Introduction
Keycloak is useful when you want to develop an enterprise application or you have many clients (web-js, mobile platforms) and you want to create and manage them dynamically.
Also, Keycloak is very useful when you have a lot of integration with third-party systems (Google, Facebook, Twitter, etc) because Keycloak has them out-of-box. Or if/when you need to integrate with some SAML or LDAP provider.
You may use Keycloak if you need some Identity and User Management platform, and when you have a complicated user access flow.
In the end, you could also consider Keycloak if you need SSO (Single Sign-On) feature. Once logged in to Keycloak, users don't have to log in again to access a different application.
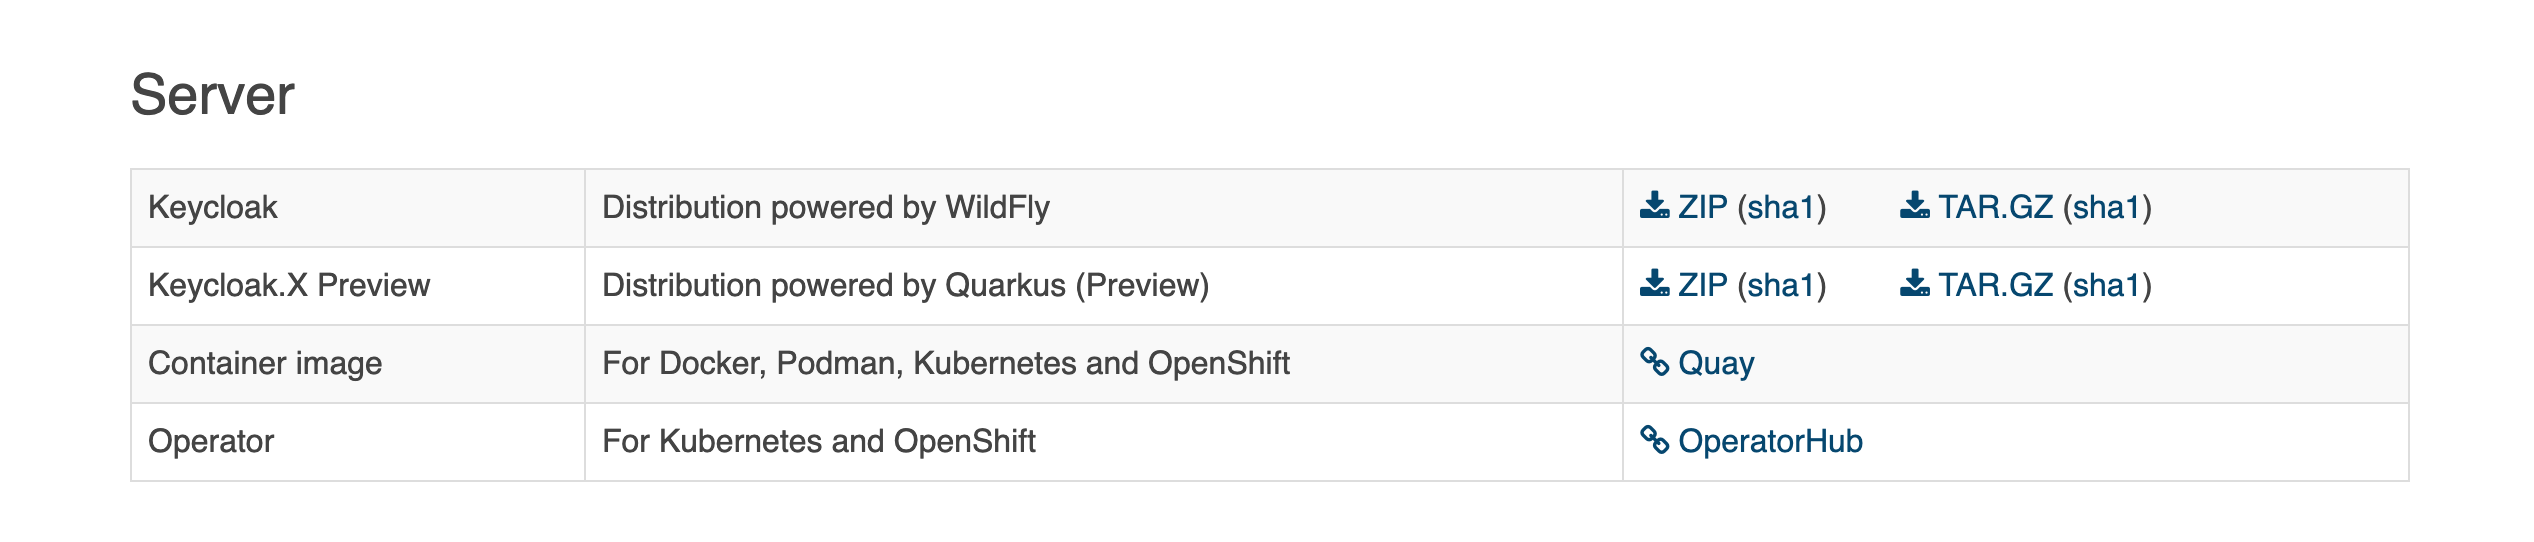
Keycloak Server Installation
Installing Keycloak is as simple as downloading it and unzipping it, You can install the server on Linux or Windows. The server download ZIP file contains the scripts and binaries to run the Keycloak server, for more details please check the getting started guide.
Integrate Keycloak in Angular Application
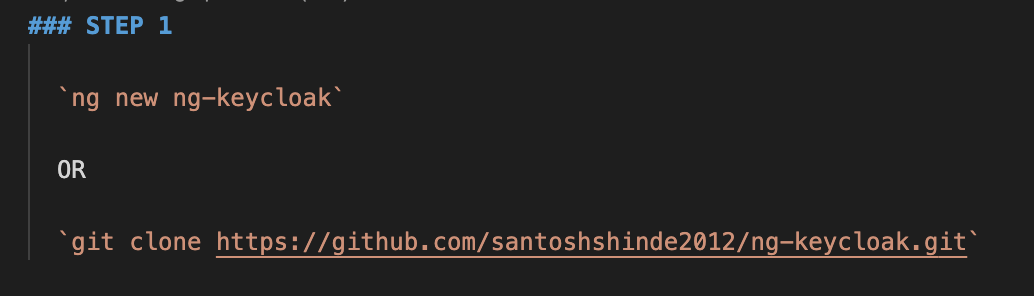
Step 1 — Create New Angular project
You can use Angular CLI to create a new project or else clone the existing ng-keycloak repository which I have created to understand the integration.
ng new ng-keycloak **OR**

git clone https://github.com/santoshshinde2012/ng-keycloak.git
Create a new Angular Application
Step 2 — Install the required dependency
Client Adapters: Keycloak client adapters are libraries that make it very easy to secure applications and services with Keycloak. We call them adapters rather than libraries as they provide tight integration to the underlying platform and framework. This makes our adapters easy to use and they require less boilerplate code than what is typically required by a library.
Keycloak comes with a client-side JavaScript library that can be used to secure HTML5/JavaScript applications. The JavaScript adapter has built-in support for Cordova applications.
npm install --save keycloak-angular keycloak-js
Install the required dependency

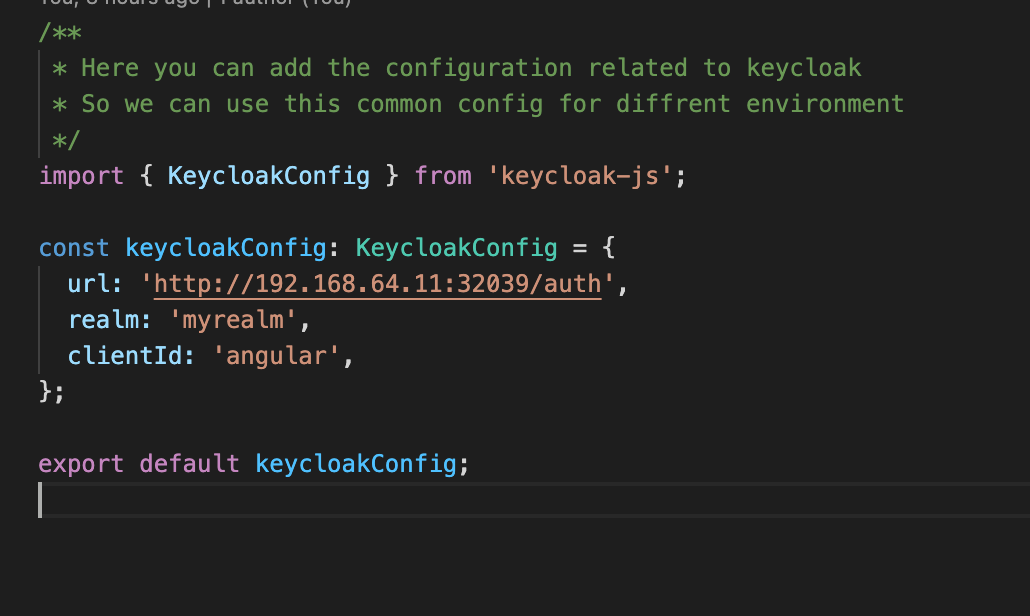
Step 3 — Create Environment based keycloak configuration
We are going to create keycloak.config.ts file inside the environments folder to get the configuration from the environment.
Create Environment based keycloak configuration
Step4 — Create Auth Module to Handle Keycloak Related Stuff
ng generate module auth
Create Auth Module to Handle Keycloak Related Stuff
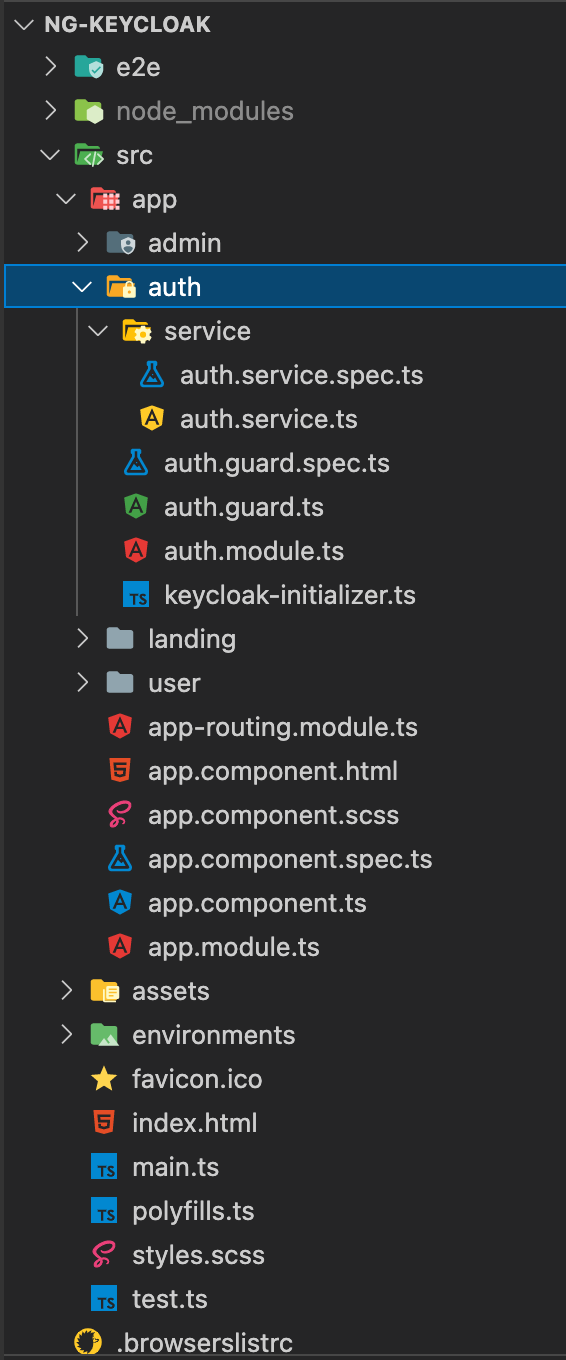
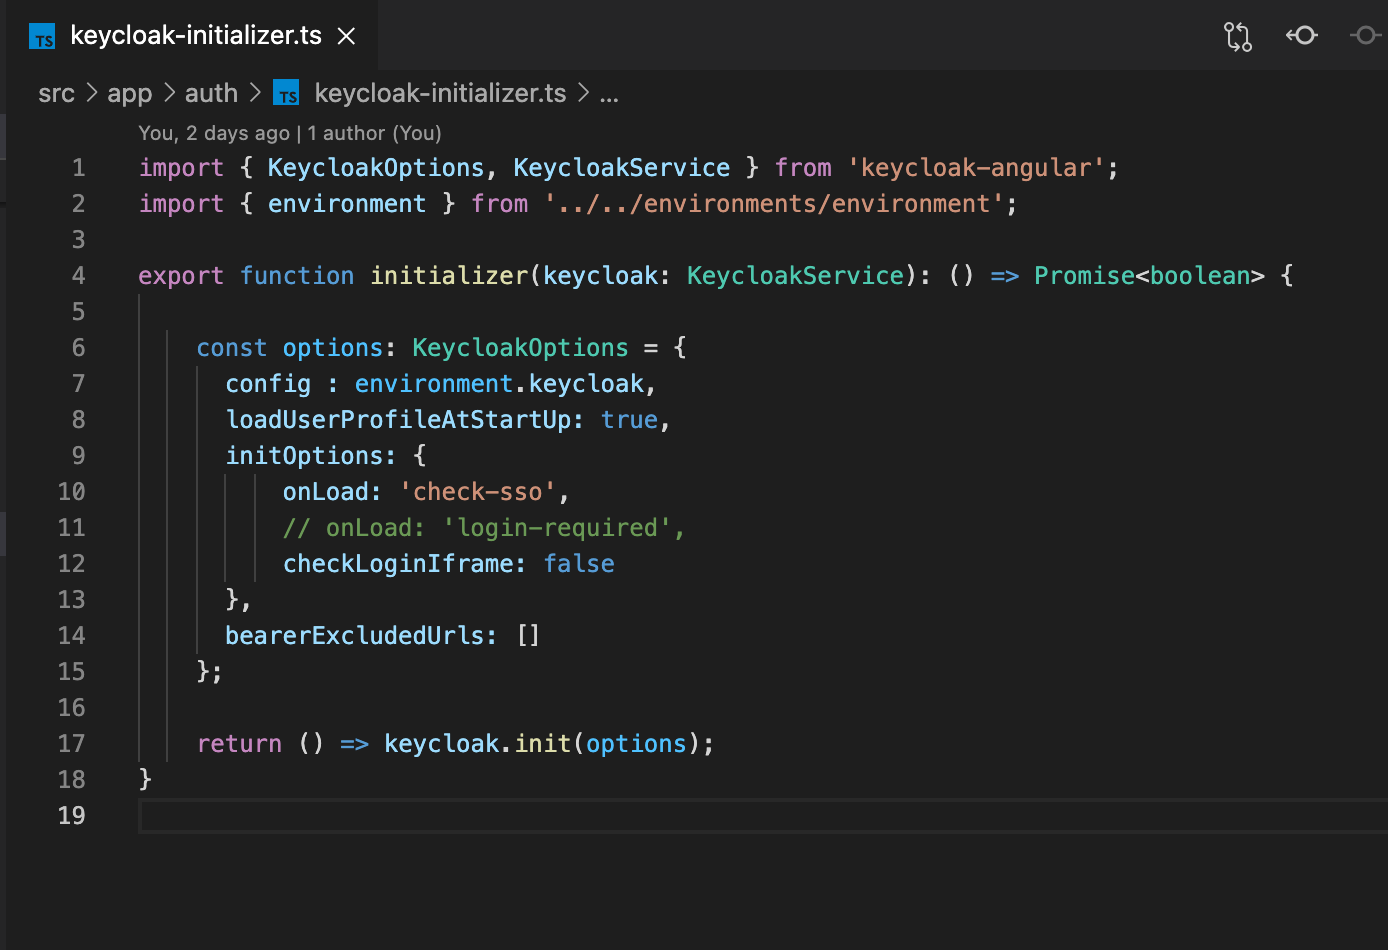
Step5 — Keycloak Initialization
Create file keycloak-initializer.ts inside the Auth, module to handle the initialization of Keycloak.
keycloak Initialization
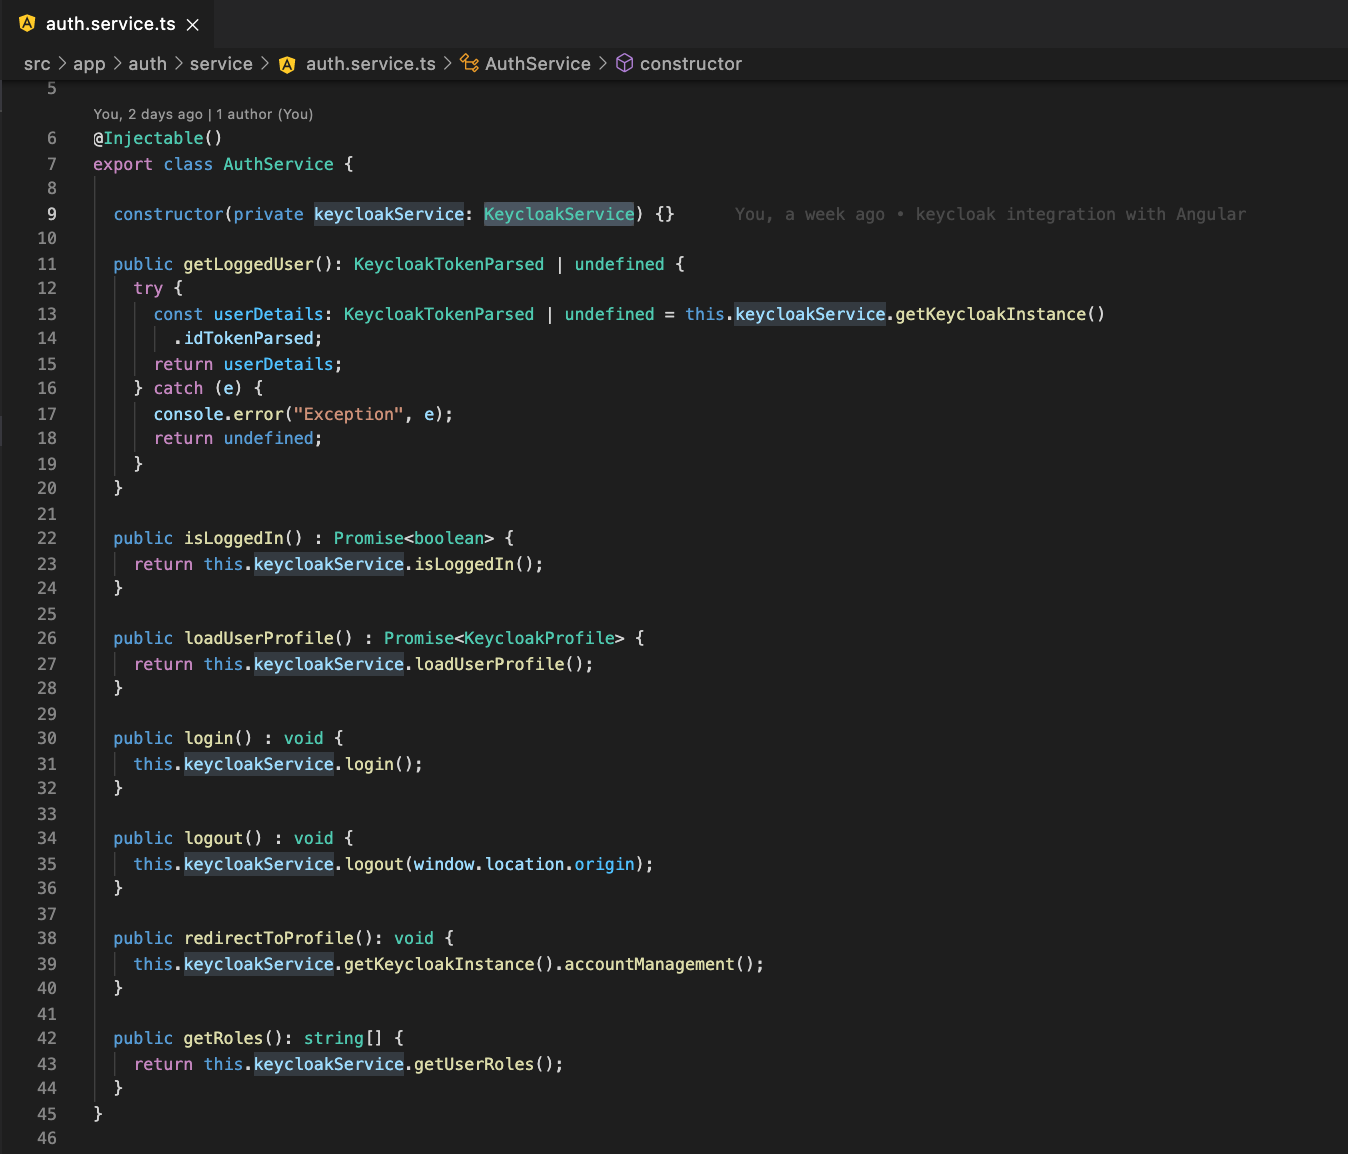
Step6 — Create Auth Service in Auth Module to handle authentication stuff
Auth Service will handle all actions related to authentication and implementation of keycloak service methods.
ng generate service auth/service/Auth
Keycloak Auth Service
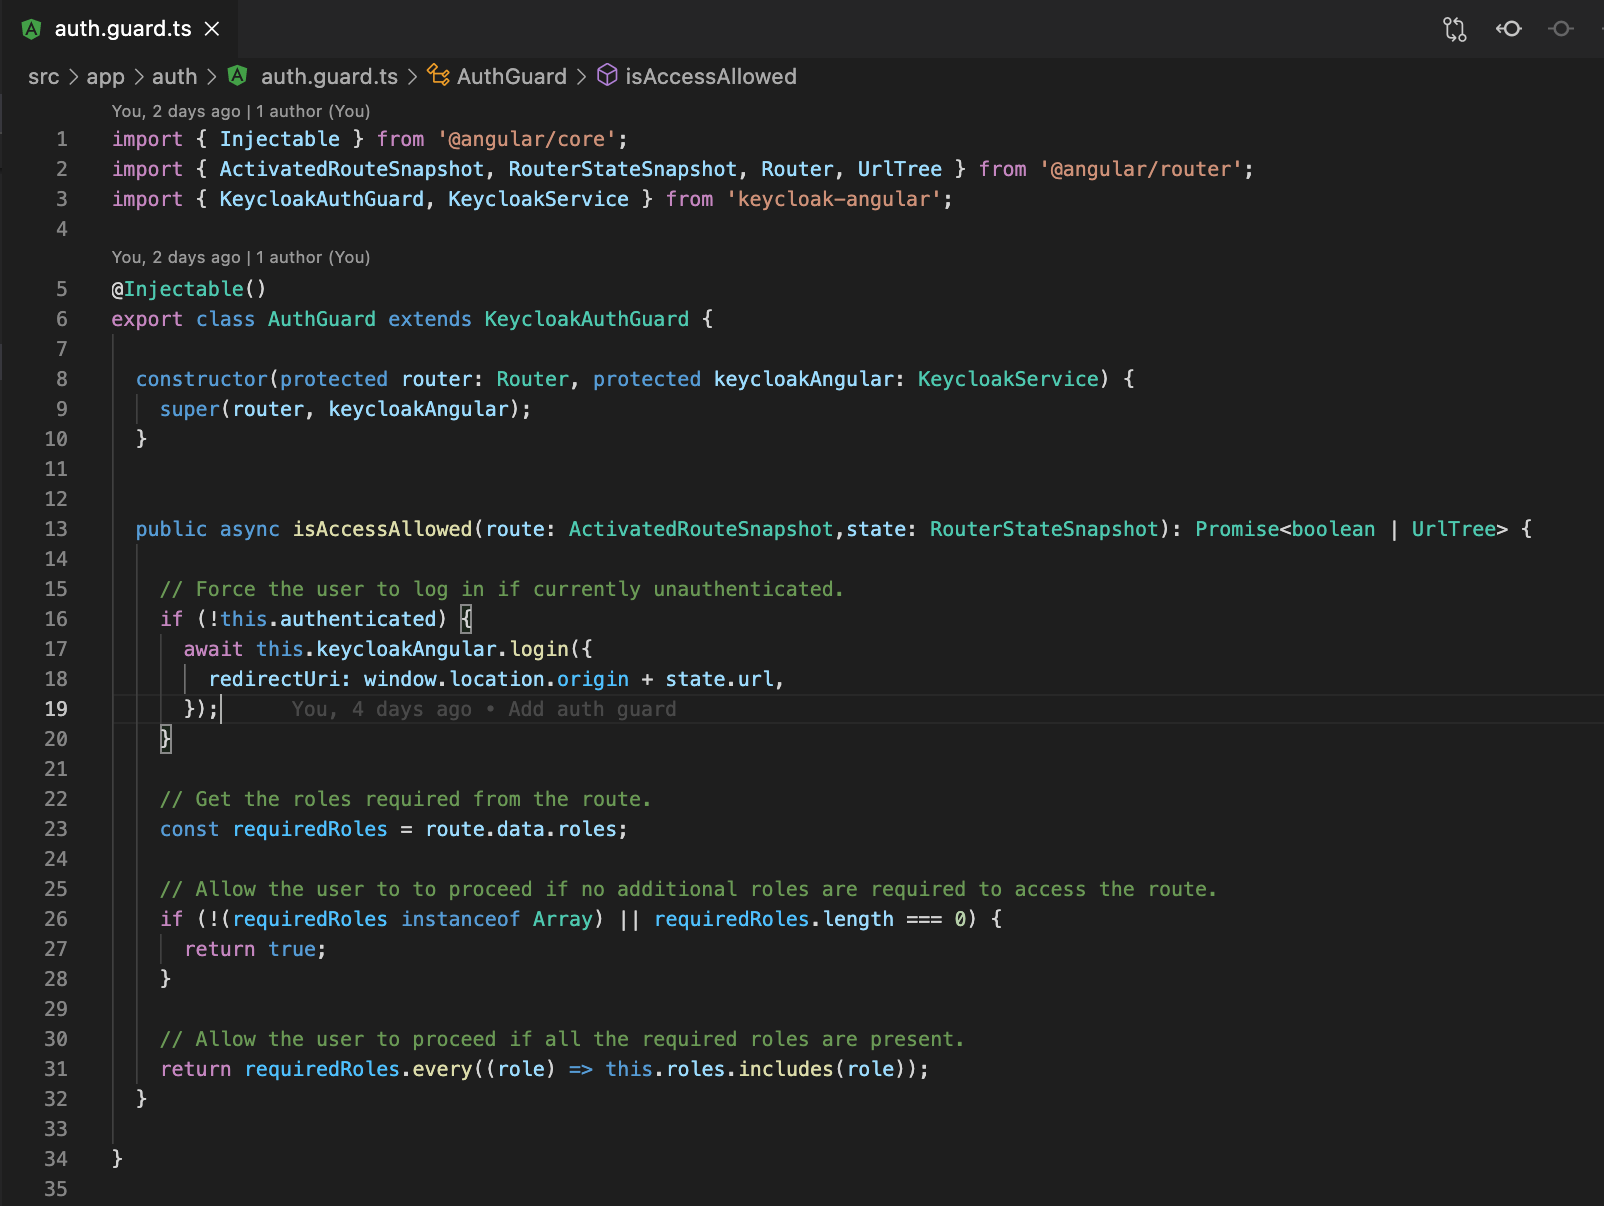
STEP 7 — Create Auth Guard
Angular's route guards are interfaces that can tell the router whether or not it should allow navigation to a requested route. They make this decision by looking for a true or false the return value from a class that implements the given guard interface.
We have to createAuthGuard in AuthModule which extends the KeycloakAuthGuard.A generic AuthGuard, KeycloakAuthGuard is provided to help you protect authenticated routes in your application. This guard provides you with information to see if the user is logged in and a list of roles that belong to the user. In your implementation, you just need to implement the desired logic to protect your routes.
Keycloak Auth Guard
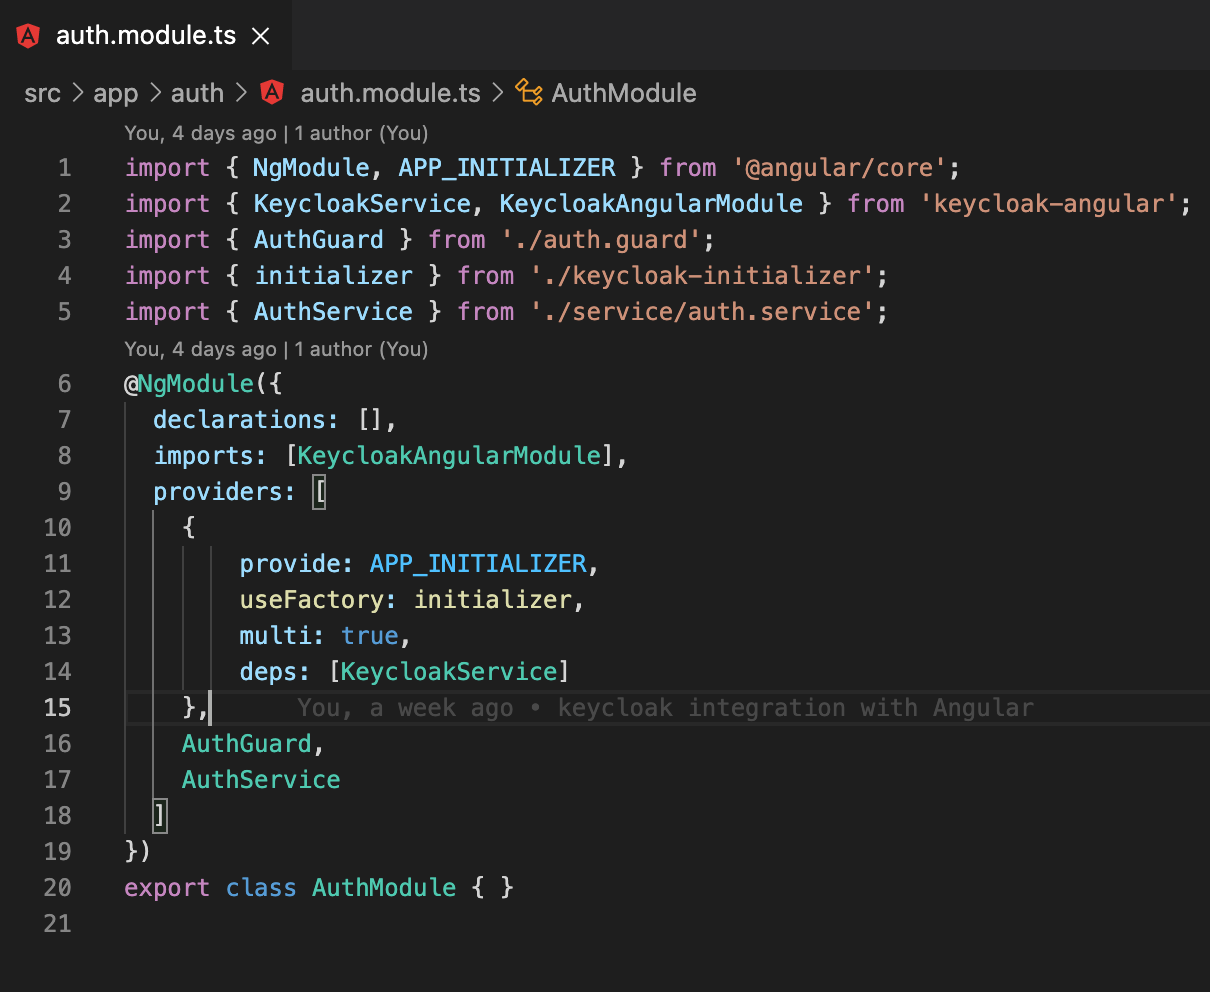
STEP 8 — Import KeycloakAngularModule and Register Provider KeyloackService in AuthModule
In order to make sure Keycloak is initialized when your application is bootstrapped you will have to add a APP_INITIALIZER provider to your AppModule. This provider will call the initializer the factory function is shown below which will set up the Keycloak service so that it can be used in your application.
Import KeycloakAngularModule and Register Provider KeyloackService in AuthModule
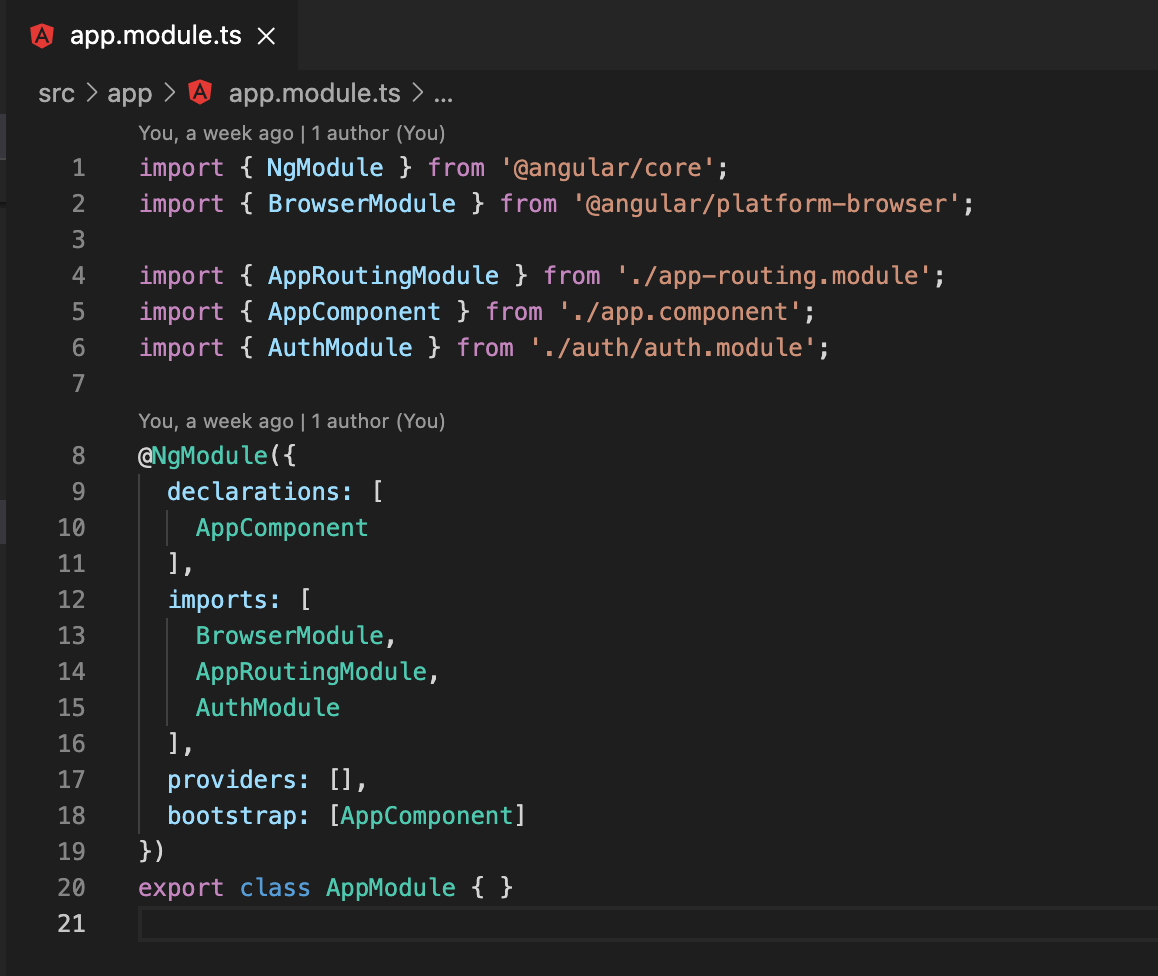
STEP 9 — Import AuthModule in main AppModule
Import AuthModule in main AppModule
STEP 10 — Routing Module Configuration
We are going to create a three-module with their own routing module.
-
Landing Module
-
Admin Module
-
User Module
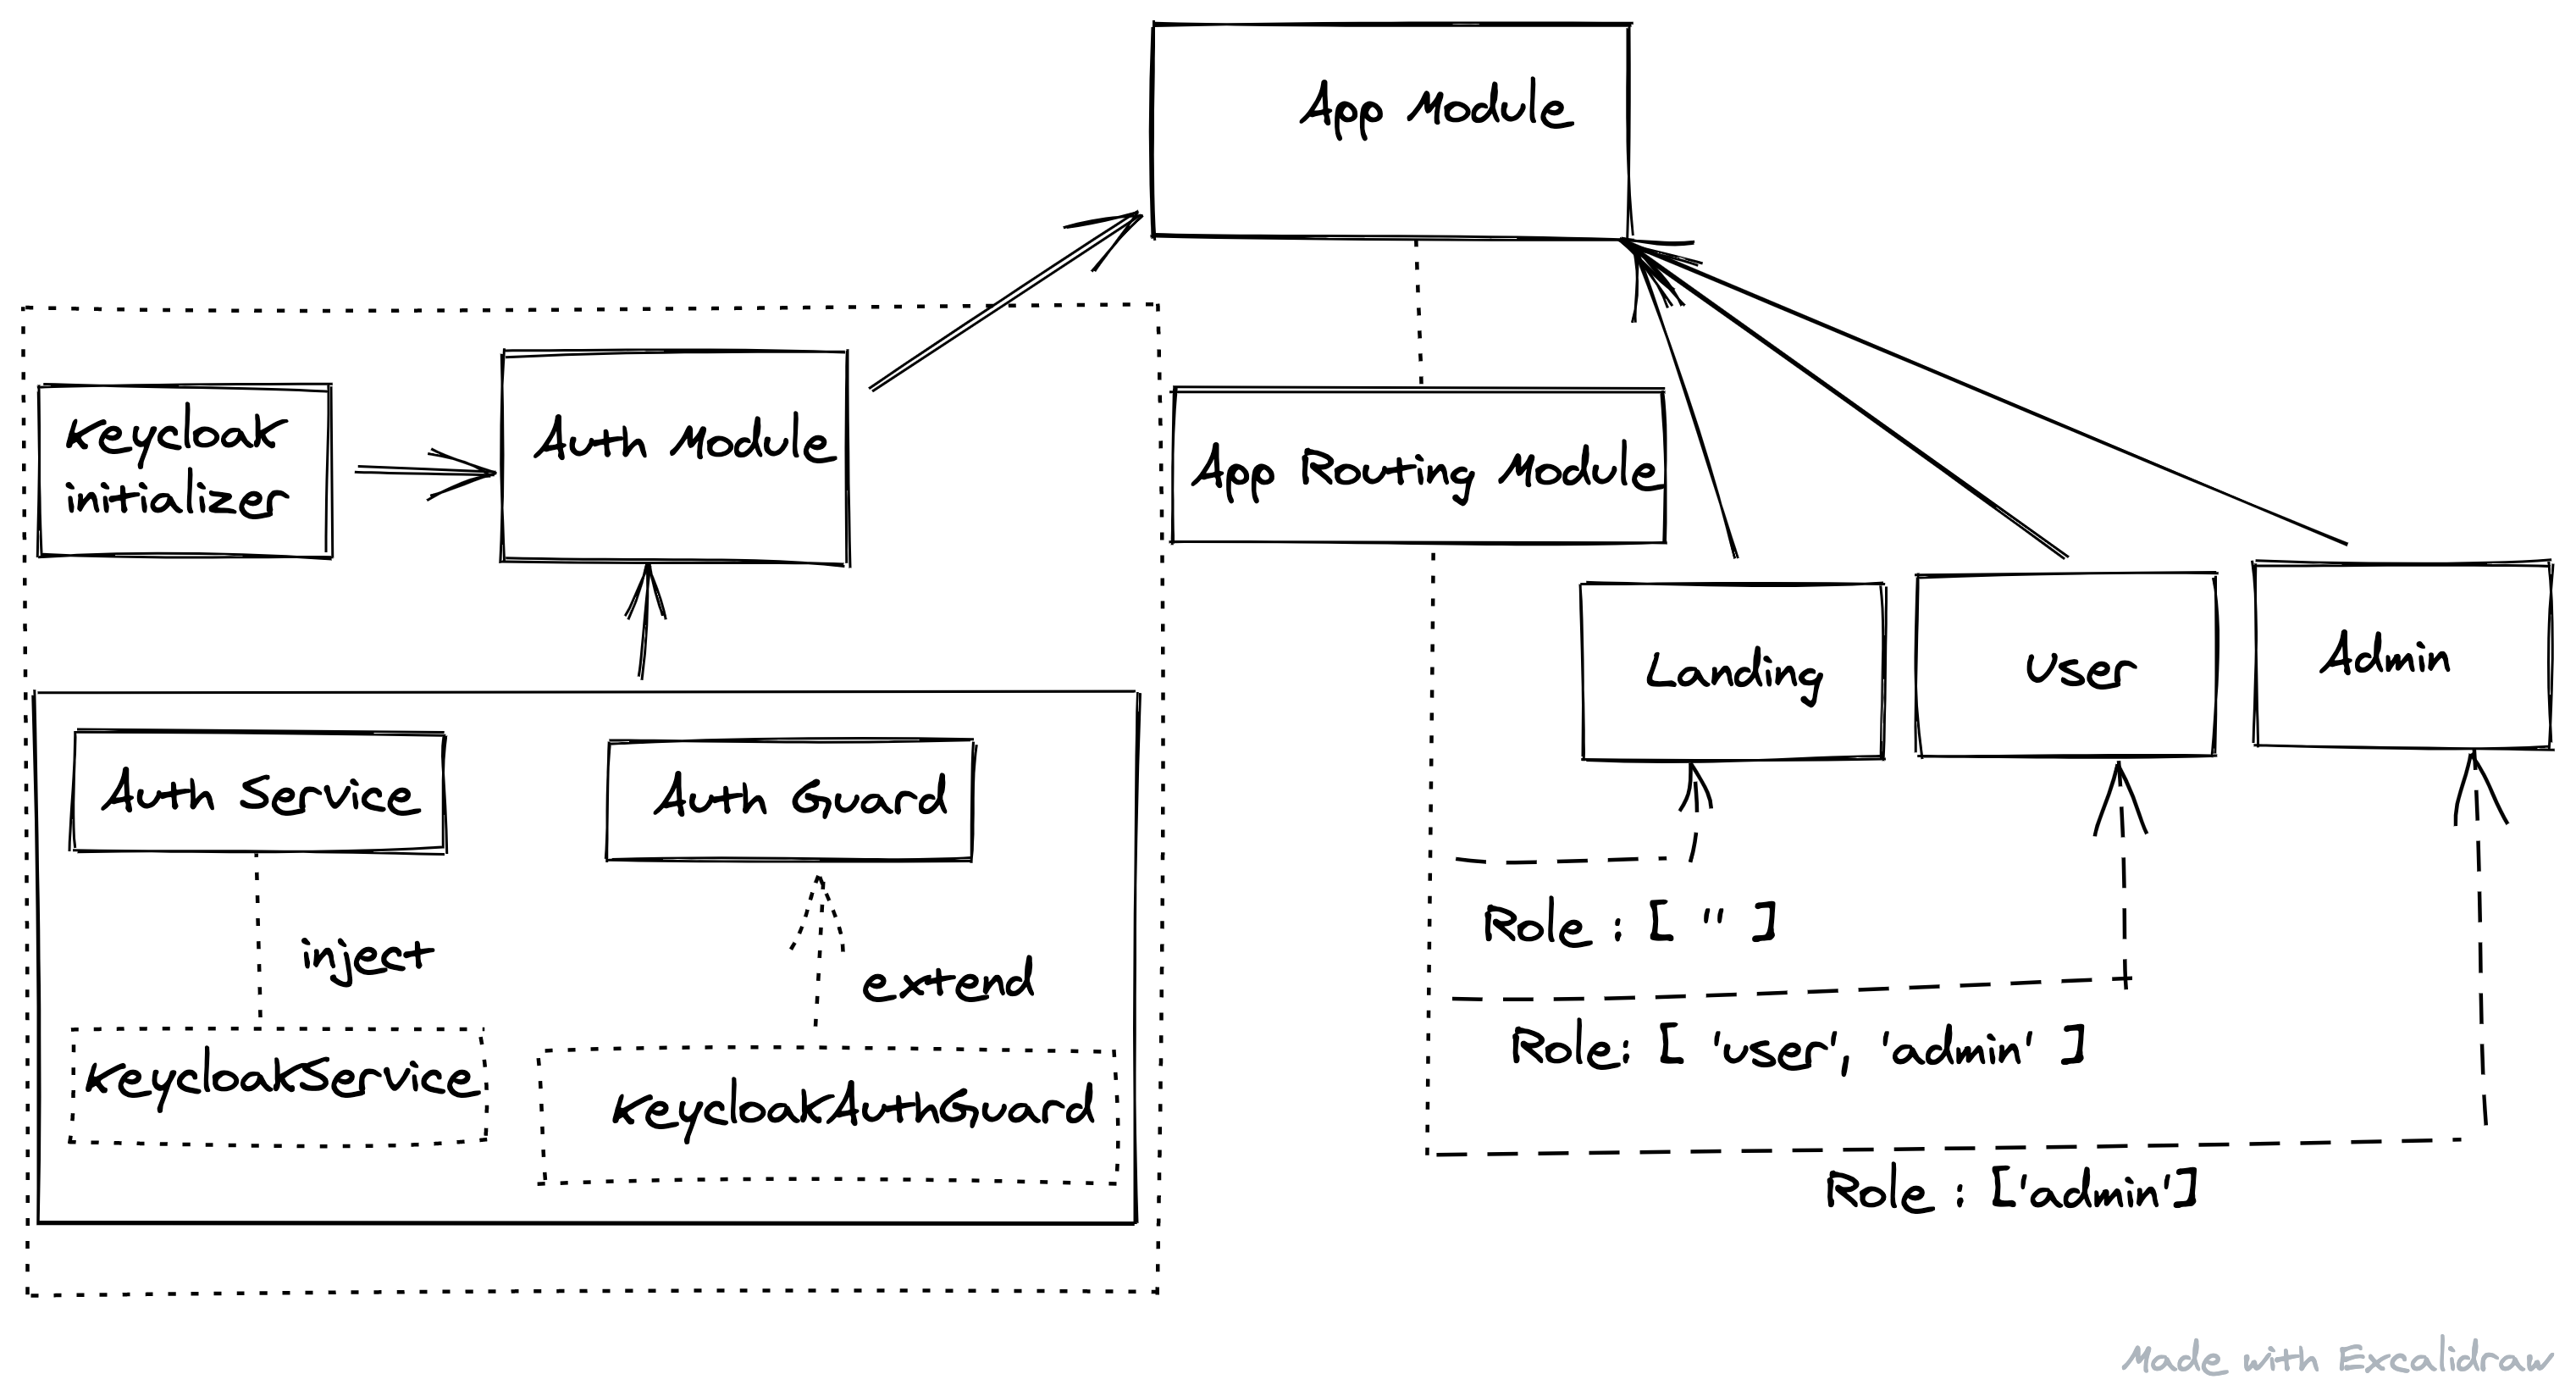
Keycloak Integration in Web(Angular) Application — Module Design
-
Create Landing module
ng generate module landing
-
Create a landing routing module with some basic routes
ng generate module landing/landing-routing --flat --module=landing
-
Create landing home component
ng generate component landing/home
Please follow the above three steps to create another module like user and admin.
We have to use AuthGuard for routes that you want to restrict access, Assign required roles for each route in data attribute, roles parameter as an array.
Routing Module Configuration

Step 11 — Run the Application
npm start / ng serve
References