

Cloning a React app's GitHub repo seems like cloning any other repo, but it's not as straightforward as it seems.
In this tutorial, we are going to effectively clone a React app from GitHub. We'll be using:
So without further ado, let's get started!
1. Cloning the React App
Now, let's take the following steps:
Creating a New Folder
So, we'll create a new folder. You can name it whatever you want. I will suggest you pick a name related to the repo to be cloned, for easy detection. But the name ultimately depends on your choice.
Getting the Code URL
To clone the said React app GitHub repo, you have to possess the specific URL to open the GitHub repo on your browser.
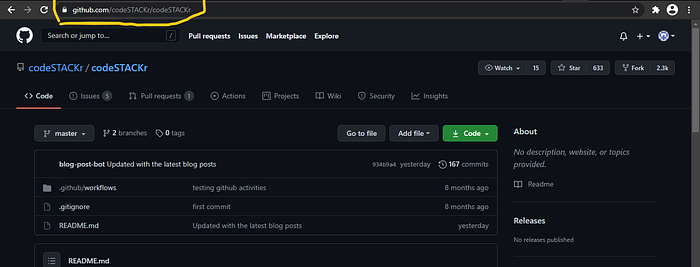
Note: You can clone a public github repo since you have access to it. You can't clone a private github repo unless you are given access to that repo.
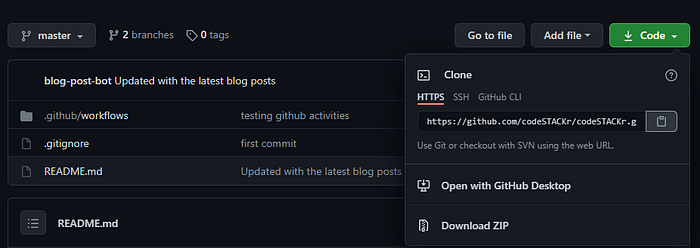
In the React app's GitHub repo, click on the button, Code. A drop down will appear where you can download the code in a Zip file or copy the code URL.
In this tutorial, we will be making use of the code URL. Hence, let's copy it.
Cloning the React app's GitHub Repo
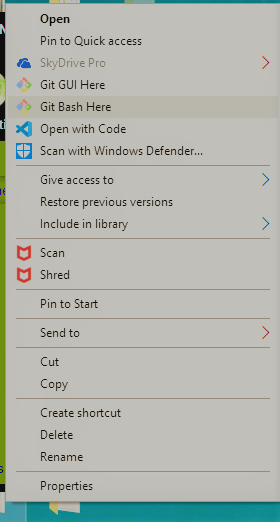
Now, open the git bash window for the new folder you just created by right clicking on the folder and clicking Git bash here.
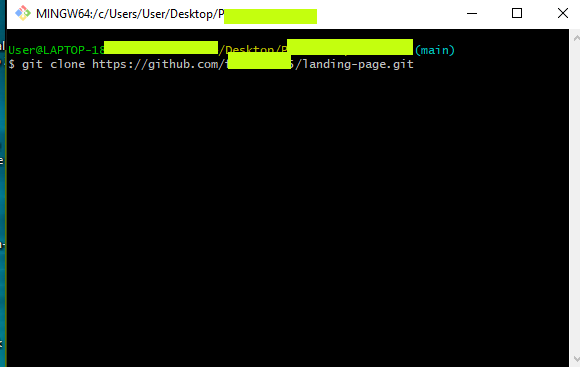
On your git bash window, type git clone, paste the code URL of the GitHub repo, then run the command by pressing enter.
git clone ‘the code URL of the github repo’
At the end of the process, if you did everything correct, you won't encounter any errors meaning the cloning process was completed successfully.
2. Configuring your Cloned App
Once you’ve completed the previous step, we need to create our own package-lock.json file and node_modules folder. We don’t need to manually create these, as the following commands we run will create them.
Press ctrl + j on windows or command + j on Mac to open your terminal on VSCode.
On your terminal, change your directory to the name of the cloned folder.
Let’s say the cloned folder name is ‘my-cloned-app’
cd my-cloned-app
Once that is done successfully, you need to run npm install . This will some time to finish running.
If you did everything correct, at the end of the process, you will see words along these lines on your terminal.
run `npm fund` for details
found ..... severity vunerablity
run `npm audit fix` to fix them or `npm audit` for details
You will also see your package-lock.json file and node_modules folder at the left side of the window.
Great, the configuration process was a success. We are making progress!
3. Starting the React app
So, run npm start on your terminal.
Make sure you are in the right directory before running this command to avoid errors.
If you are not or if you are not sure you are, cd to the right directory.
Once the command is done running, your React app will open on your local host on your default browser.
https:// local host:3000
Congratulations, you've successfully cloned and started your React app.
Conclusion
We just cloned a React app where we learnt how to clone the GitHub repo, configured the app and successfully run it on our local host on our browser.
Now you can modify the code and deploy the app online if you want.
So has this been fun? Has it been helpful? Thanks for your time!
Helpful resources
-
The articles below: