Notion is a platform that blends your workflow into an all-in-one workspace. It has many options and features adapted to all kinds of usage.
With the recent release of the beta version of the Notion API, a lot of integrations between apps are now possible, and an entire universe of possibilities is now open for data science projects.
What if you want to also add Notion API to some of your apps? This article will outline how you can do it using the Notion API and integrate it using Python.
Setting up Notion API
At the onset, you will need to create a page that contains a database in Notion. In this example, we will make one that includes three fields; name, genre, and completed.
If you need to access this page inside Python, you will need to create an integration for it. You can go to Settings, Integrations, then develop your own integrations. Then specify a name for your integration and submit it.
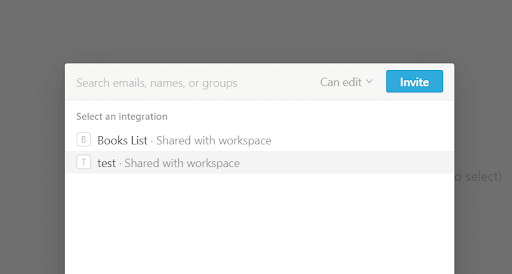
You now have a secret key. Copy the key because we will need it in the Python program. Go on the notion page, click the Share button, press Invite, and then you can select the integration that you just created from a list:

Notion API
Python Setup
First, you import the requests library that we are going to use to interact with the Notion API. Then, you store the secret and database_id from the notion setup.
import json

import requests

token = ‘secret_from_notion_integration’

database_id = ‘database_id_from_link’
How do you create functions?
You use the requests library to interact with the Notion API. For example, you can create a function called getMovies.
def getMovies():

url = f’https://api.notion.com/v1/databases/{database_id}/query'

r = requests.post(url, headers={

“Authorization”: f”Bearer {token}”,

“Notion-Version”: “2021–08–16”

})

result_dict = r.json()

movie_list_result = result_dict[‘results’]

print(movie_list_result)
How to call the function?
If you add a movie on Notion, and you want to call this function, you will see a lot of data. To make it more readable and use only the information we need, you will make a helper function:
def mapNotionResultToMovie(result):

# you can print result here and check the format of the answer.

movie_id = result[‘id’]

properties = result[‘properties’]

genre = properties[‘Genre’][‘rich_text’][0][‘text’][‘content’]

name = properties[‘Name’][‘title’][0][‘text’][‘content’]

completed = properties[‘Completed’][‘checkbox’]

return {

‘genre’: genre,

‘name’: name,

‘completed’: completed,

‘movie_id’: movie_id

}
You will need to call this helper function inside getMovies; therefore the function should contain the following code:
def getMovies():

url = f’https://api.notion.com/v1/databases/{database_id}/query'

r = requests.post(url, headers={

“Authorization”: f”Bearer {token}”,

“Notion-Version”: “2021–08–16”

})

result_dict = r.json()

movie_list_result = result_dict[‘results’]

movies = []

for movie in movie_list_result:

movie_dict = mapNotionResultToMovie(movie)

movies.append(movie_dict)

return movies
Now, you can use this function to display your movies inside Python.
How to use the requests library to interact with the Notion API
You can now import and use the requests library to interact with the Notion API as shown below:
movies = getMovies()

# json.dumps is used to pretty print a dictionary

print(‘Movie list:’, json.dumps(movies, indent=2))
See also this example:
Final thoughts
The integrations that Notion now offers with the newly released official API can take productivity to a whole new level. The app had only provided an SDK in javascript, but it is also easy to integrate with Python, as shown in this article. Of course, it is easier to interact with the Notion API from JavaScript because they provide a client, but once you learn to interact with it from Python, it becomes more interesting.
