In today's software development landscape, microservices have gained significant popularity due to their scalability, flexibility, and modularity. However, as the complexity of microservice architectures increases, so does the need for comprehensive documentation to help you and other developers contribute effectively to a project.
This article aims to provide a step-by-step guide on documenting microservices, with a special focus on leveraging the Swimm IDE Plugin to simplify the process.
At the end of the article, you should be able to build a simple microservice with React and Node.js and also document that microservice using the Swimm IDE plugin.
Understanding Microservices
Microservices are a software architecture pattern where an application is broken down into small, loosely coupled services that can be developed, deployed, and scaled independently. Each such *micro-*service focuses on a specific business capability, communicating with other microservices through well-defined APIs.
This pattern offers several benefits, including improved scalability, agility, fault isolation, and ease of technology adoption. However, effectively documenting microservices is crucial to fully harnessing these advantages.
Importance of Documenting Microservices
- Microservices often involve multiple teams working on different services, so new team members would be lost trying to understand the purpose, functionality, data flows, and interactions while trying to get on board.
- Having well-documented API contracts, expected input/output formats, parameters, etc. prevents misunderstandings.
- Logging and monitoring guidelines, error handling best practices, and troubleshooting steps help devs quickly fix issues
- Microservices are dynamic, with services evolving and being updated frequently and independently. And because of that, there is a need to document versioning strategies, backward compatibility guidelines, and upgrade procedures.
- It is crucial to preserve knowledge by capturing design decisions, architectural considerations, and implementation details. This allows new team members to understand the rationale behind existing choices and reduces the risk of knowledge loss when key personnel transition out of the project.
Challenges in Documenting Microservices
What's stopping us? Let's take a look:
1. The Inherent Architectural Complexity of Microservices
Documenting the interactions, dependencies, and data flow between services is difficult because of the increased complexity of a distributed system, the varying technologies involved, and the interdependencies between services.
2. Keeping Docs in Sync with rapidly changing code
Microservices are designed to evolve. As services undergo frequent updates, new features are added, or APIs change, keeping the documentation aligned with the current state of the code becomes a challenge. Ensuring documentation remains accurate and up-to-date is critical to fostering developers' trust in the documentation.
3. Collaboration is difficult
Services are developed and maintained by different teams, often working independently. Collaboration among these development teams, architects, and stakeholders is essential but is hindered by traditional documentation approaches, which can only offer limited visibility and fragmented or incomplete documentation with no centralized control.
4. Inconsistent documentation
Each service team may adopt a different culture or mindset about documentation. Some may think inline documentation - code comments - is enough; others might use different tools, formats, or levels of detail, leading to discovery and navigation being a pain, let alone understanding docs. Others might choose not to document at all!
5. Fragmented documentation
The microservices pattern is complex. Documentation relevant to the specific needs of a developer might not even be found in the labyrinth of documentation, and most commonly, it is scattered across different repositories, services, or teams. How do you search for the exact thing you need in this ocean of information? How do you know if it is even present, let alone if it will be helpful at all? This fragmentation makes it challenging to locate and navigate the relevant documentation, especially when multiple services are involved in a particular functionality.
This is where Swimm can help.
Introducing Swimm, and its official IDE Plugin

Overview
Swimm is a powerful tool used for creating, editing, maintaining, and discovering internal docs. It streamlines documentation - as a process - for any codebase, in any language at all, with automatic updates to make sure documentation artefacts stay in sync with the code, setup scripts, test suites, etc.
But its most useful feature might be how it seamlessly integrates into popular IDEs (VSCode and JetBrains), making it a cakewalk to both :
a) Create a rich knowledge base right from your IDE itself, with a comprehensive set of features that enhance documentation creation, collaboration, and maintenance.
b) Find relevant documentation where and when developers need it most - within their IDE, right beside their code, as they code.
Learn more:
Streamlined documentation. Right from your IDE. *Create and edit docs next to relevant code. Eliminate context switching. Instantly find the information you need, exactly when you need it.
Features and Benefits of Swimm's IDE Plugin
The Swimm IDE Plugin offers a number of features that make it possible to create effective internal documentation, efficiently:
- Create code-coupled, interactive documentation: The Swimm IDE Plugin allows developers to create interactive documentation directly within their IDE, referencing live code itself. Developers can just select code and add it to markdown documentation with one click, adding explanatory notes, images, videos, and Mermaid diagrams to document the selection.
- Auto Sync: With the Swimm IDE Plugin, documentation stays synchronised with the actual codebase. Any updates or changes made to the code are automatically reflected in the documentation, updated using Swimm's patented auto-sync technology, and every time anyone on your team performs a
git pull, the most recent version of the docs is pulled in together with the most recent code. This ensures that developers can always trust the documentation. - Documentation discovery: Swimm establishes two-way links between the code and its documentation, meaning you can quickly navigate from code to docs - and vice versa - right within your IDE. There is no need for context switching and frantic Alt+Tabbing between different windows. You can also search for documentation directly from the IDE itself. Together, these features will save you countless hours when working.
Step-by-Step Guide to Documenting Microservices with Swimm IDE Plugin
So before proceeding, let's talk about what you will be building and how many services you will need to create. Here, you will be creating a single blog application. The feature in the application will allow you to create a post and also comment on a post.
For the microservice, you will be creating a posts and comments service
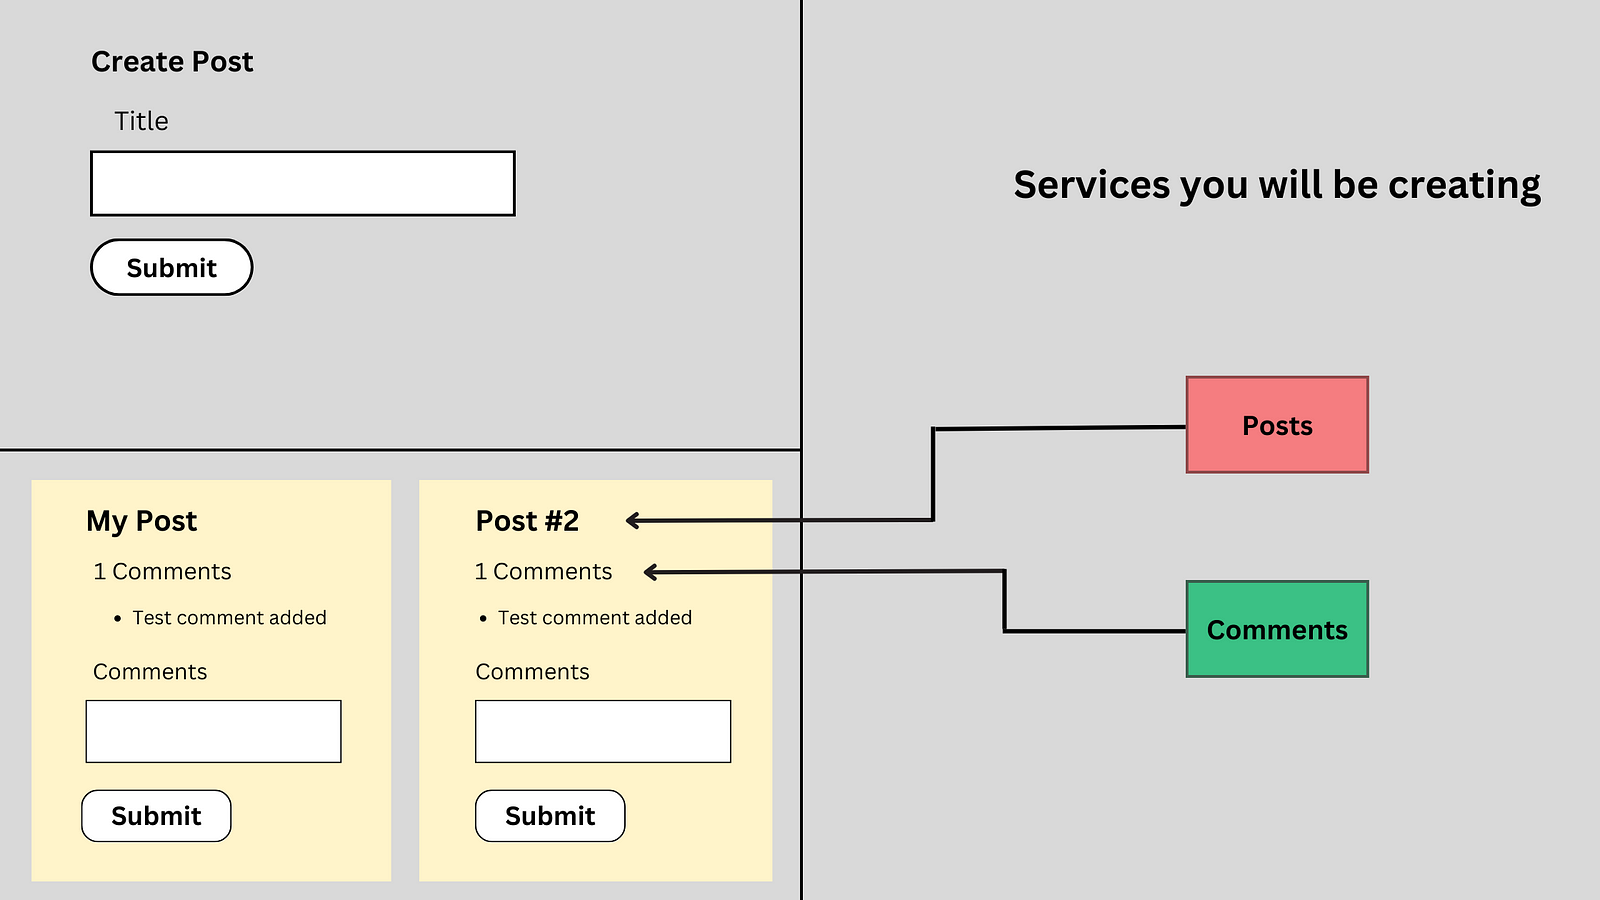
Product architecture
💡 You can find the code for this project on GitHub here.
Now let's dive into a step-by-step guide on how to effectively document microservices using the Swimm IDE Plugin.
1. Installation and Setup
To set up your project, follow these steps
👉 To begin, create a folder called blog.
👉 Inside the blog folder, create two folders, called posts and comments
👉 Open the blog folder in your terminal and create a create app.
npx create-react-app client
👉 Initialise Git in the blog folder and open the blog folder using either VSCode or JetBrains.
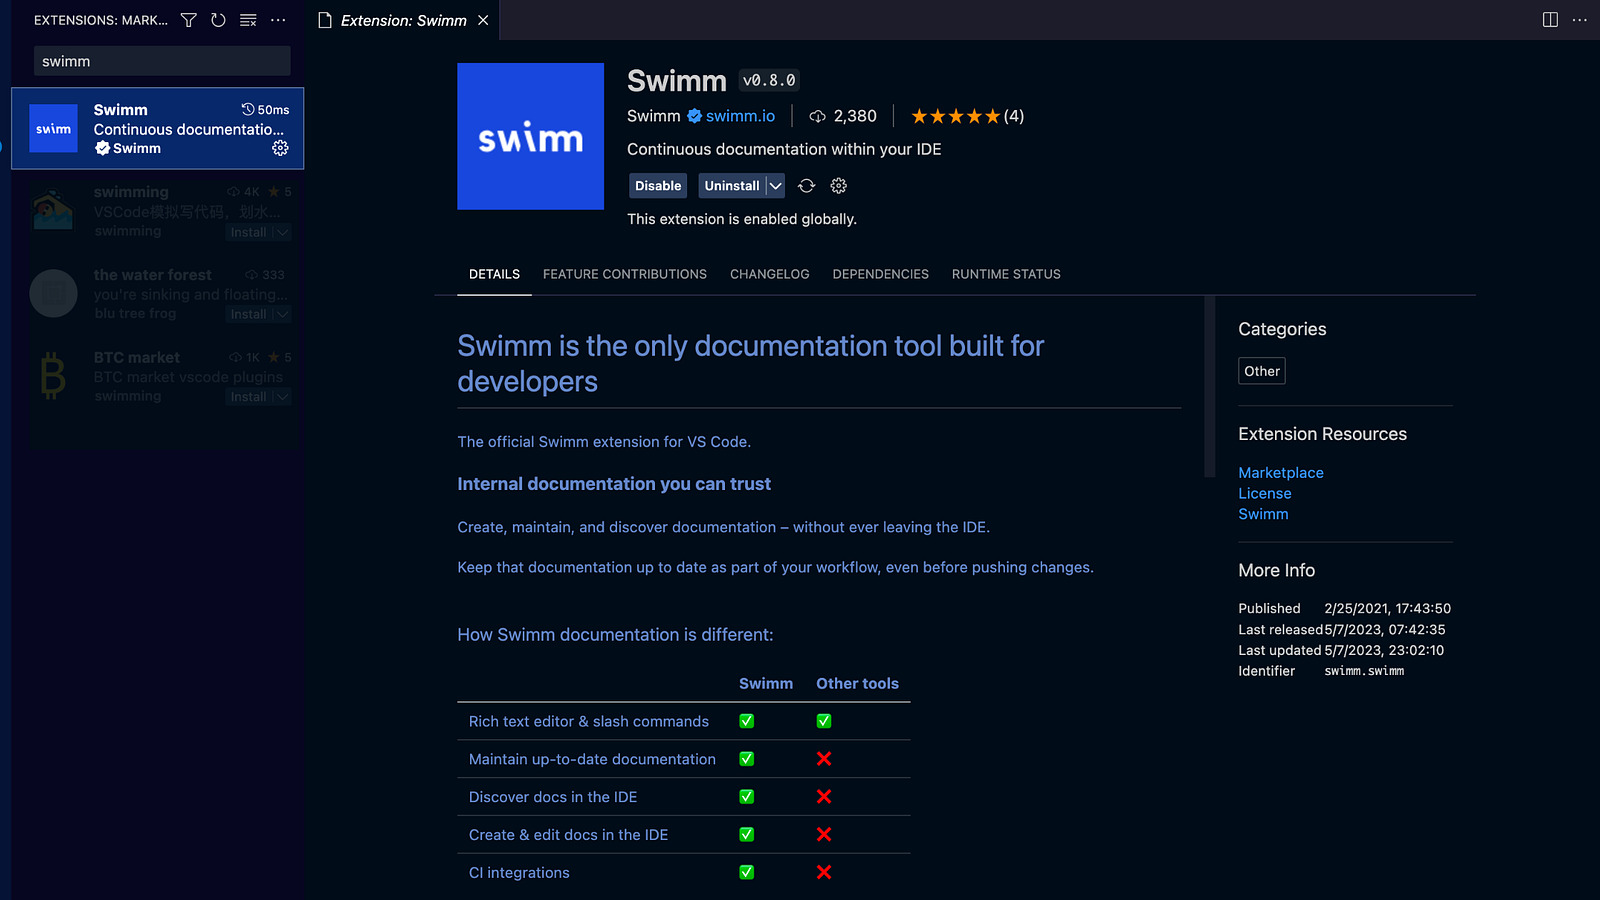
👉 Go to your IDE extension marketplace, search for, and install Swimm's IDE plugin.
Swimm - Visual Studio Marketplace
Swimm - IntelliJ IDEs Plugin | Marketplace
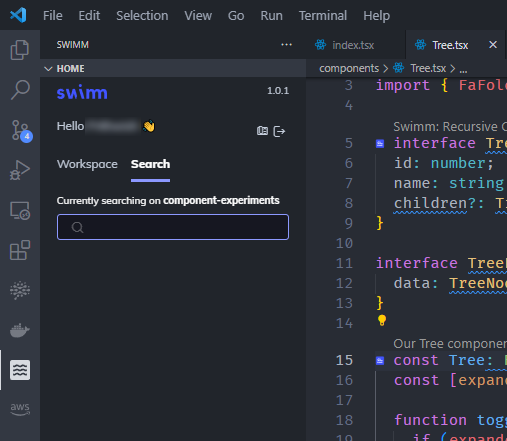
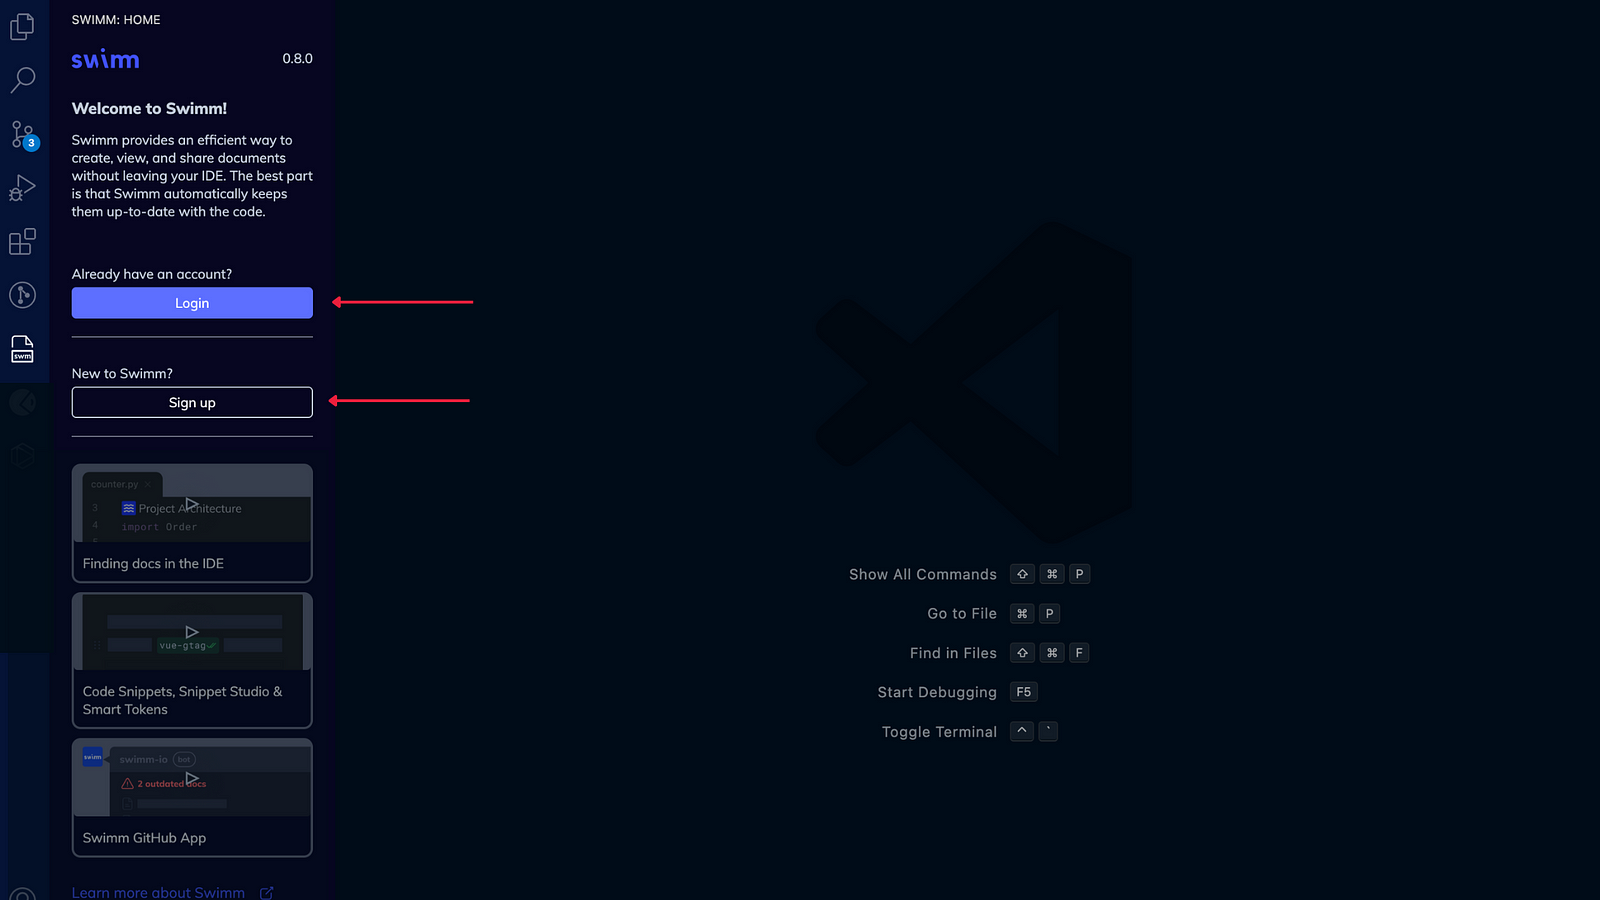
After which, you will need to Signup or Login into your Swimm account using the Swimm icon in your IDE.
Creating the Posts service
So let's go over what you should have already. In your blog folder, you should now have three folders (posts, comments, and client).
Now that that's settled, let's dive into the code. And oh, you can also install the Postman or Thunder Client IDE plugins to test your API services.
Moving forward, you will need to install some dependencies for the Posts service. To do that, first cd into the posts folder and run the following commands:
npm init -y
Next:
npm install express cors axios nodemon
After that is successfully installed, go to your package.json file and under the script, include:
"start": "nodemon index.js"
Now that all the necessary things have been set, let's go over what you will be implementing in the Posts service. For the Posts service, you will be implementing the functionality to create a post and also to get the list of posts created.

Inside your posts folder, create an index.js file to implement the code for your posts service
// @ts-nocheck
const express = require("express");
const { randomBytes } = require("crypto");
const bodyParser = require("body-parser");
const cors = require("cors");

const app = express();
app.use(bodyParser.json());
app.use(cors());

//object that will hold all the posts
const posts = {};

app.get("/posts", (req, res) => {
  res.send(posts);
});

app.post("/posts/", (req, res) => {
  const id = randomBytes(4).toString("hex");
  const { title } = req.body;

  posts[id] = {
    id,
    title,
  };

  res.status(201).send(posts[id]);
});

app.listen(4000, () => {
  console.log("Listening on 4000");
});
To confirm that everything runs well, spin up your server with the command below:
npm start
In the above code, you have implemented a GET and POST request. Using either Postman or Thunder Client, test that your Posts service API is working using this URL.
URL for the POST and GET request
http://localhost:4000/posts
For the POST request, you will need to include raw data in the body. It should take this form
{
  "title": "new post"
}
The GET request will fetch the data you sent using the POST request.
Documenting the Posts service using the Swimm IDE plugin
Now that you have the Posts service ready, you can proceed to document it.
Ideally, it is best to write your Swimm documentation as you code, when your code is still fresh in your memory.
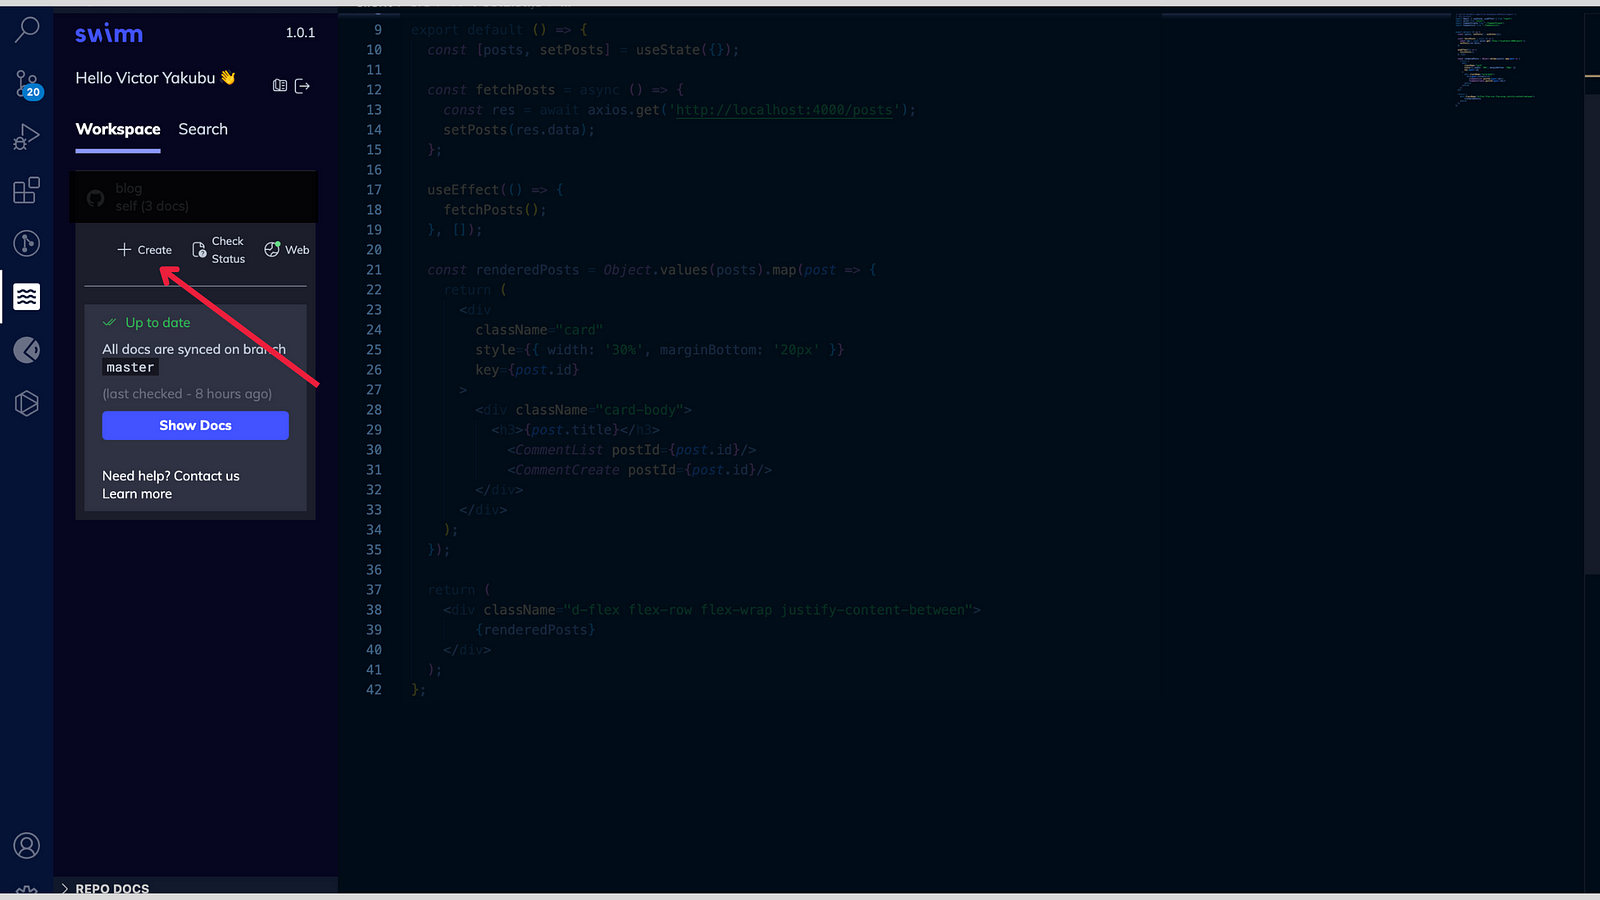
To do that, click on the Swimm icon and then click on "Create" to create a new Swimm document.
This will open a new markdown file, where you can then proceed to write your documentation. You don't need to learn any language to create or edit a Swimm doc.
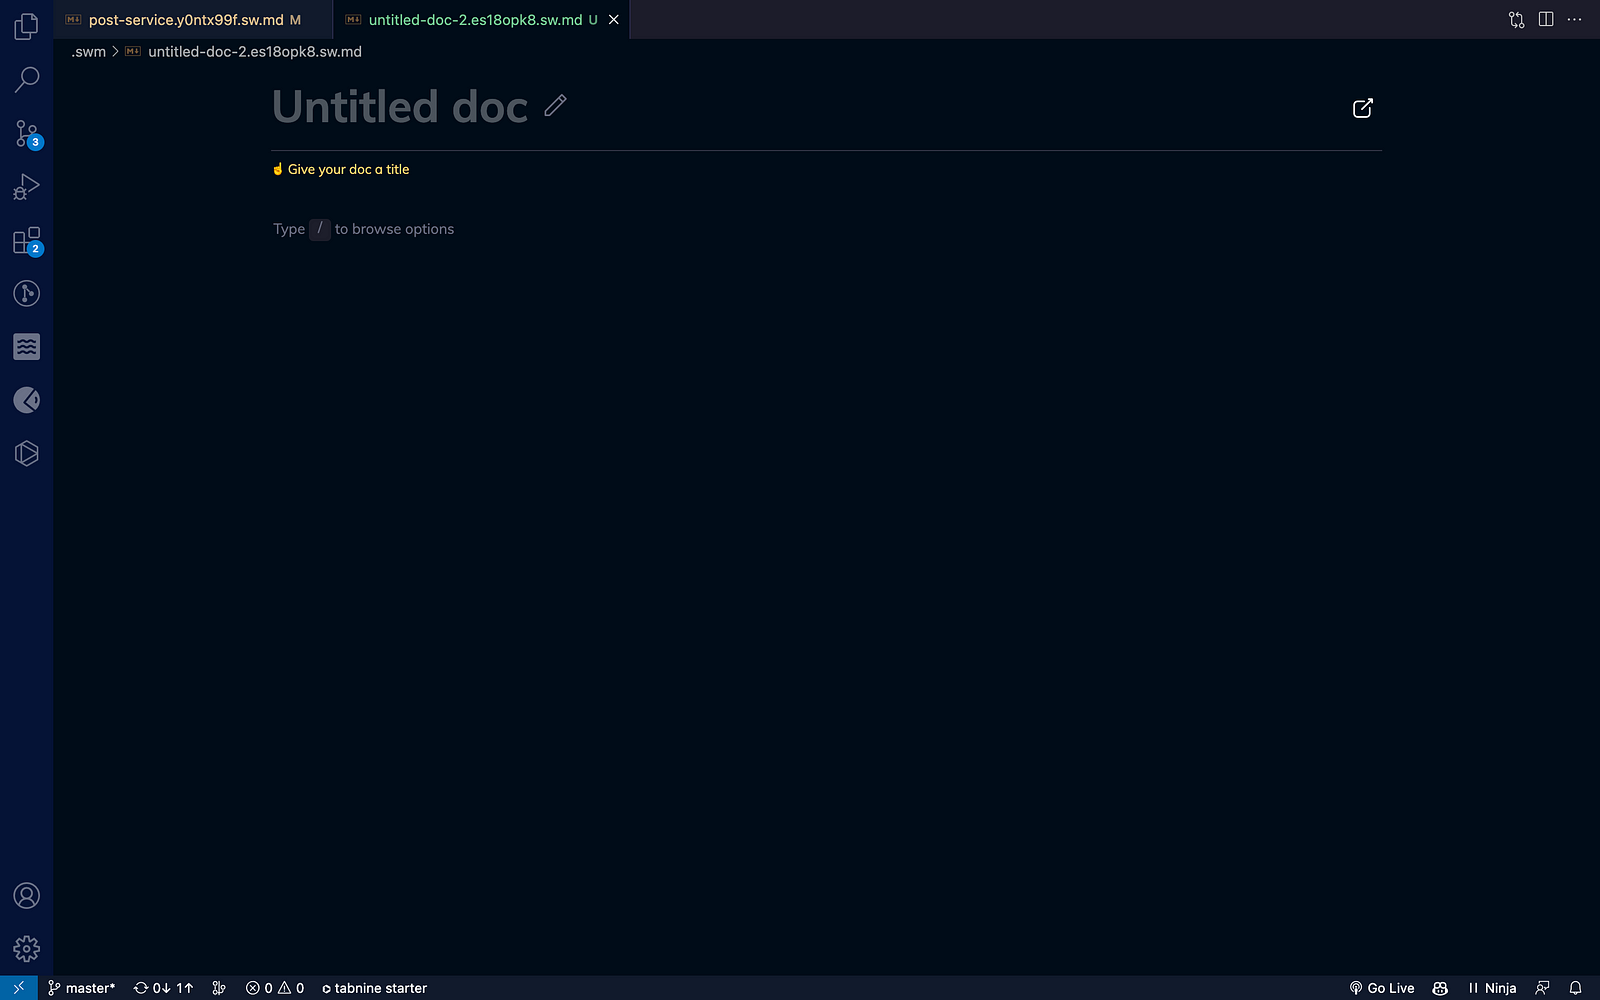
Swimm provides a number of features that you can add to your document. As shown in the markdown file, you can type/browse these options. These options include code snippets, smart tokens, diagrams, tables, and a lot more, which can be included in your documentation to make it more interactive.
In creating code-coupled documentation (i.e., adding code snippets to your docs), all you have to do is select "code snippets" from the doc options and then select or highlight the code sections/snippets and add them to the doc file, then document it with text, images, links, videos, or Mermaid diagrams.
For my Posts service documentation, I included a diagram to show the overall architecture of the Posts service. You can check out mermaid.live to see the types of diagrams you can add to your documentation.
I also included a table. Swimm makes it easy to insert tables in your documentation just by selecting tables from the options. Code snippets were also added.
In my opinion, one of the advantages of using Swimm is its ease of use; you don't need to learn a special skill or language to use it.
So here is the documentation I developed for the Posts service; the markdown file is available on GitHub here. From the example below, you can add more details to your microservice or other product that you require documentation for using the Swimm IDE plugin right inside your IDE.
Creating the Comments service
Let's proceed to create the other service for comments.
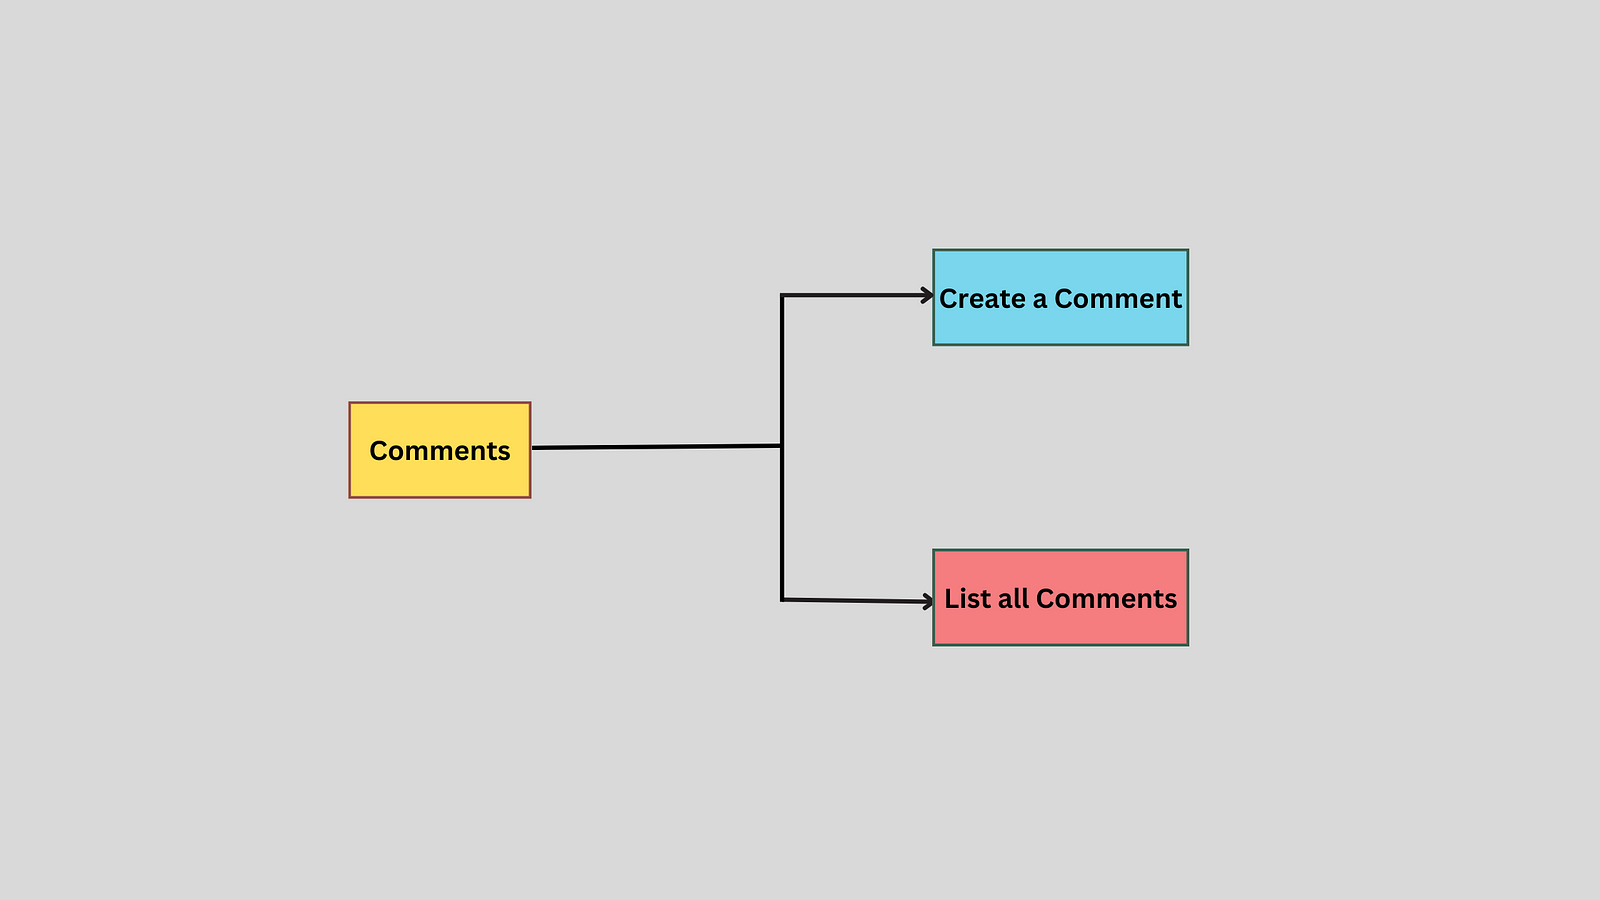
Here, you will be implementing two functionalities in the comments service. For creating comments and the other to List all comments.
Just like you did with the Posts service, open a new terminal in your IDE and cd into the comments folder. Then follow these commands to initialize git and also install the necessary dependencies.
npm init -y
npm install express axios cors nodemon
After these have been successfully installed, create an index.js file inside the Comments folder. Inside this file, you will implement the functionalities for the Comments service. Here is the code:
// @ts-nocheck
const express = require("express");
const bodyParser = require("body-parser");
const { randomBytes } = require("crypto");
const cors = require("cors");

const app = express();
app.use(bodyParser.json());
app.use(cors());

const commentsByPostId = {};

app.get("/posts/:id/comments", (req, res) => {
  res.send(commentsByPostId[req.params.id] || []);
});

app.post("/posts/:id/comments", (req, res) => {
  const commentId = randomBytes(4).toString("hex");
  const { content } = req.body;
  const comments = commentsByPostId[req.params.id] || [];
  comments.push({ id: commentId, content });

  commentsByPostId[req.params.id] = comments;

  res.status(201).send(comments);
});

app.listen(4001, () => {
  console.log("Listening on 4001");
});
Save your code, and run the command below to spin up your server on port 4001:
npm start
URL for the POST and GET request
http://localhost:4001/posts/${postId}/comments
For the POST request, you will need to include raw data in the body. It should take this form
{
  "content": "I am the first comment"
}
The GET request will fetch the data you sent using the POST request.
Documenting the Comments service using the Swimm IDE plugin
Just like you did for the Posts service, create a new Swimm document and begin documenting your service.

💡 You can learn more about using the Swimm's IDE plugin using the resources below:
Streamlined documentation. Right from your IDE.
Bonus
I implemented the frontend for these microservices (Posts and Comments). You can find the frontend code here. You can copy the code or fork the repo to see how the microservices serve on the frontend.

Conclusion
Creating internal documentation for your product, like microservices, is crucial for maintaining clarity, facilitating communication, and ensuring the scalability and maintainability of your system. By leveraging the Swimm IDE Plugin, you can easily streamline the documentation process, enhance collaboration, and keep your documentation up-to-date.
Incorporate the Swimm IDE Plugin into your development workflow and follow the step-by-step guide provided in this article to create comprehensive and effective microservices documentation. Remember to regularly update and maintain your documentation to maximize its value.
Comments
Loading comments…