In the web development field, auth (authentication + authorization) plays a vital role in securing user access and protecting sensitive data. Authentication involves verifying the user's identity, and Authorization is about granting them appropriate access to the application's resources.
That said, it's not easy. Implementing auth solely in the frontend is easy, but is usually a terrible idea. Even when done in the backend, it can have its drawbacks.
This article explores these limitations and presents a compelling third alternative: the Backends-for-Frontends (BFF) pattern.
By adopting this approach, developers can enhance security, improve performance, and achieve greater flexibility in their authentication implementation. Essentially, it's the perfect pattern for this problem.
Additionally, we'll examine how WunderGraph simplifies the process of implementing auth with a BFF.
So let's get going!
Why Frontend Auth Falls Short
Let's first clear the air and analyze why doing front-end auth is such a bad idea (because, let's face it, it might seem easy, but it's a terrible way to implement it).
Too Exposed
Frontend auth involves embedding auth logic in the client-side code, making it vulnerable to inspection by malicious actors.
With access to the JS bundle, anyone can analyze and exploit potential weaknesses, jeopardizing the security of the system.
Yes, you can obfuscate the code, minimize it and make it literally unreadable by humans. But anyone with enough free time and a Developer's Console (which is on every major browser) can break your logic and "hack" your auth.
Messy Frontend Code
Handling auth logic in the frontend increases the burden on frontend teams, leading to slower development cycles.
Moreover, frontend code becomes tightly coupled with the auth implementation, hindering scalability and adaptability.
In other words, you're adding code where you shouldn't, and that only plays against you and your team.
Multiple Clients Complexity
What if your back-end can be used by different clients (e.g., desktop, mobile app, gaming consoles)?
In that case, every different client will have to re-implement the entire auth logic. Does that sound reasonable to you?
Even worse, what if you're developing a platform that can be used by anyone? Then you'll have countless client applications having to re-invent the authentication wheel.
Madness! MADNESS I SAY!
The "Prevent Tracking" Option
Enabling privacy features that aim to prevent user tracking might unintentionally interfere with auth, causing third-party cookies or auth tokens to be dropped, and eventually disrupting the authentication process.
In a typical frontend auth setup, the authentication process involves the frontend obtaining an auth token or cookie from the backend upon successful login.
This token is then used to authenticate subsequent requests. But when the "prevent tracking" option is activated, the frontend may be prevented from storing or sending these tokens or cookies. As a result, the authentication flow is disrupted, and users may find themselves unable to access protected resources or perform authenticated actions.
The implications of the "prevent tracking" option on on the authentication flow underline the need for alternative approaches. By moving the auth logic to the backend or adopting other patterns (more on this in a second), developers can mitigate these challenges.
So, let's ditch the frontend and focus on the backend!
I mean, it only makes sense right? If implementing the auth flow on the front-end alone makes no sense (and we've seen many reasons why that is), then logic dictates we should move it to the back-end. Right?
Not exactly.
While moving the authentication flow to the backend is a step in the right direction, there is a hidden third option that literally lies in the middle of both alternatives: the Backend-for-frontend, also known as BFF (sounds funny, I know).
Let's review what the BFF pattern is, and why implementing the auth layer in the Backend for Frontend (BFF) makes even more sense!
The Power of Backends-for-Frontends (BFF) and WunderGraph
The Backends-for-Frontends (BFF) pattern acts as a dedicated mini-backend layer owned by the frontend team, created to cater specifically to the needs of that particular frontend or client. It serves as the only 'backend' that frontend app can see, hiding the actual backend from it. This BFF serves as the intermediary between the frontend and the real backend.
Think about it this way. Have you ever been part of a project where :
- The backend wants to develop the services one way and the frontend complains that's not useful for them? And then each develops and deploys their part independently, having to spend weeks re-adjusting and re-factoring later to sync up and match expectations?
- One where you have multiple, diverse clients that need to consume the same service (most commonly, when you start offering a mobile app in addition to a web app), leading to complex, chatty (either via overfetching or underfetching) frontend code that results in increased network overhead and slower response times, and becomes harder to maintain and scale?
- Or simply one where changes in one component had unintended effects on the other, because the frontend and backend were tightly coupled?
Who hasn't right? Well, with the BFF pattern, frontend developers can have more control over the data they need and their interactions with the backend, and each can develop, evolve, and deploy their services independently, without being tightly coupled and stepping on each others' toes.
Check out the following diagram to make more sense of it:
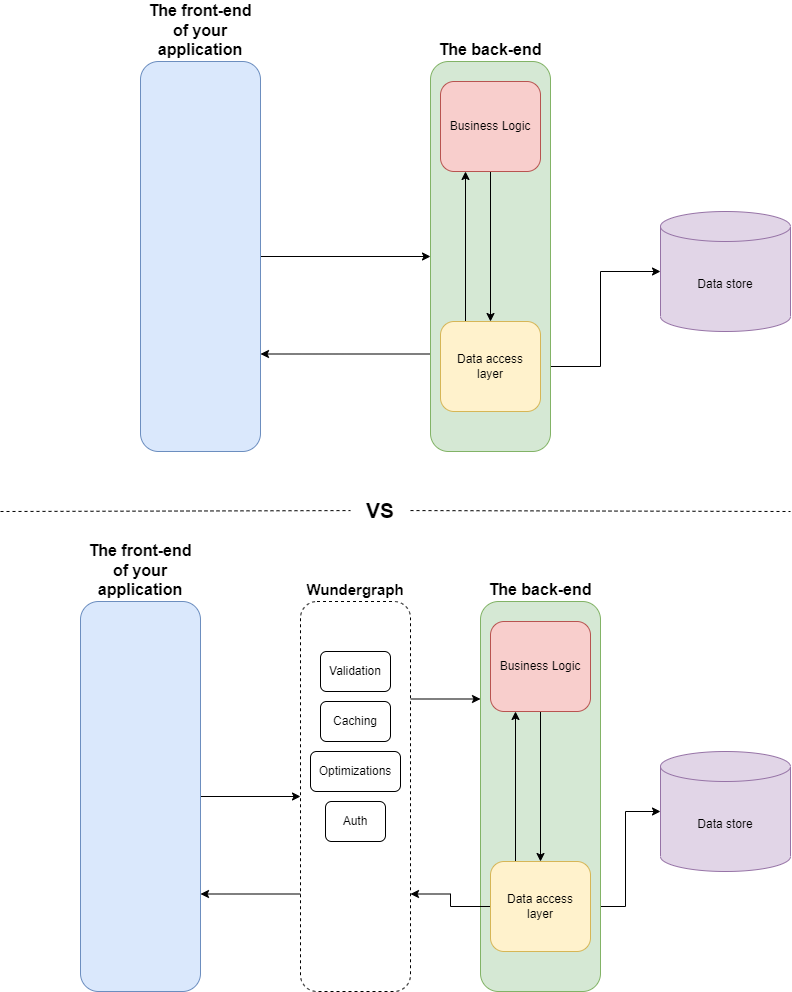
The above setup shows a classic client-server setup, while the bottom version shows the BFF pattern being implemented by WunderGraph.
Sounds like overengineering, but here's why BFF is superior to both the frontend and the backend for implementing auth:
- Middleware: Within the BFF, developers can implement various security measures like IP whitelisting/blacklisting, rate limiting, request validation and more. They can use any middleware they want for it and these robust options safeguard backend services from problems like DDoS attacks, ensuring that incoming requests undergo the necessary security checks before reaching your backend.
- Potential Performance Gains: The BFF pattern allows developers to add a cache for auth tokens, manage session states efficiently, and aggregate data from multiple downstream backend services. Think about it, you can do anything you want in this layer to save time and avoid unnecessary requests to the actual backend of the application. That of course, translates into a more efficient service and potentially a better user experience.
- Scalability: Auth logic can be iterated upon and scaled independently of the backend, since you're literally not touching it. This agility helps accelerates development cycles, and ensures resilience as traffic increases through horizontal scaling (adding more servers to the auth-backend).
- Separation of Concerns for the team: With the frontend team also owning the BFF, they can iterate on the user interface and authentication flows independently. Through techniques such as request-mocking, they can move forward with the entire development process while the backend team focuses on developing the core business logic. Granted, eventually both teams will have to "talk to each other", but this process allows for a safer and more flexible way to work independently from each other.
- Security by obfuscation: Remember what I said earlier about how a developer with a Dev Console could be a potential problem to a full-frontend implementation? Well, this is one way to solve those problems. With the BFF pattern, developers can't really see the actual log-in logic, they can only see how the frontend reacts to certain responses and that's IT. In the end, more than "security by obfuscation", this is more like "security by hiding the logic away from the developer", but that was too long to use as a bullet point.
Alright, by now you should be thinking something like "Right, OK, I'm sold, how do I implement my first BFF?" right?
Well, that's not a trivial task, which is why we'll use other tools to assist us and help with the process. That's where WunderGraph comes into play.
What is WunderGraph?
WunderGraph, the Backend for Frontend (BFF) Framework, streamlines API composition with its intuitive approach.
By combining APIs seamlessly and treating them as dependencies, WunderGraph enables developers to build applications that rely on data from multiple sources. With native support for GraphQL Subscriptions and a virtual graph layer for cross-source joins, WunderGraph empowers real-time functionality and simplified data integration.
With its open-source nature, WunderGraph aims to make utilizing APIs quick and effortless.
GitHub - wundergraph/wundergraph: WunderGraph is a Backend for Frontend Framework to optimize...
Let's Explore Clerk Authentication with WunderGraph in our BFF
I always like to say: show me a practical example!
So enough with the crazy theory and the list of benefits and let's get this show on the road. Let's build something using Wundergraph and the BFF pattern.
Actually, we'll use that AND NextJS as the framework and we'll also throw in a little bit of Clerk to handle the auth process.
STEP 1: Set up WunderGraph + NextJS
To get started, let's set up WunderGraph with NextJS. Open your terminal and run the following commands:
npx create-wundergraph-app my-project -E nextjs
cd my-project && npm i && npm start
If you see something like this after the first line, it means everything was installed correctly:

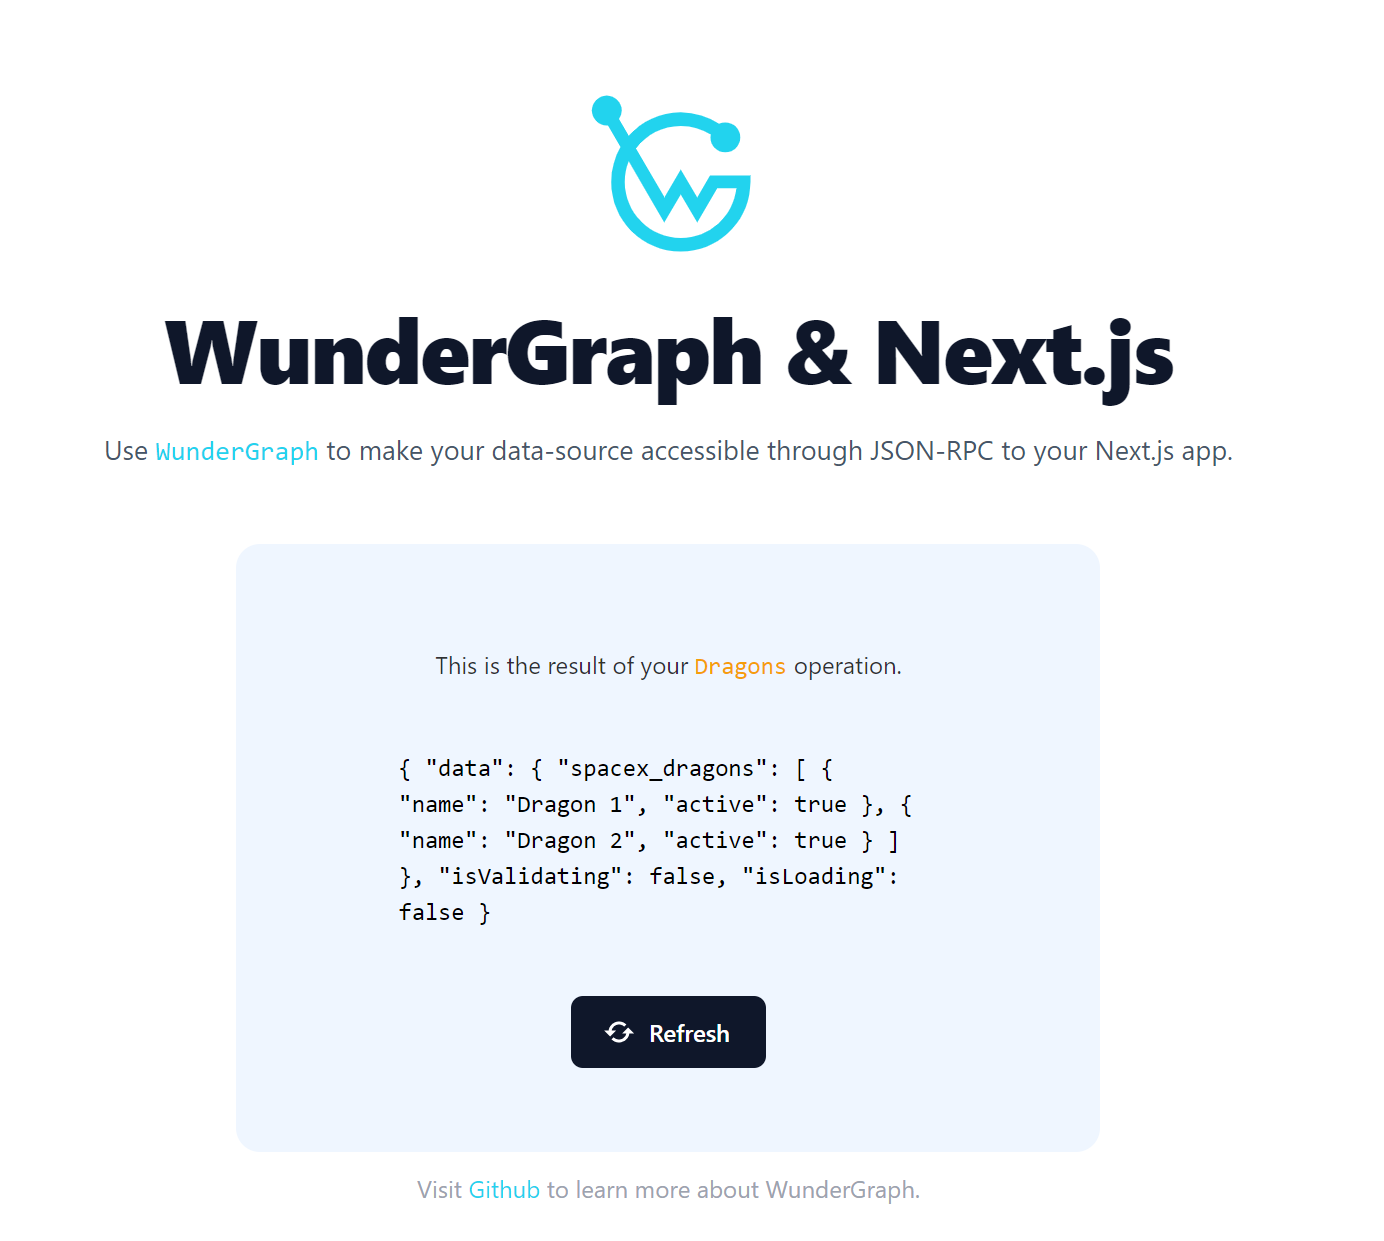
Verify that everything is working by navigating to localhost:3000 in your browser. If you see this (it takes a while, so give it time), then you're good:
STEP 2: Sign up for a Clerk.com Account
To proceed with Clerk, you'll need to sign up for a Clerk.com account. This will provide the necessary authentication infrastructure for our implementation.
Once you've signed up, click on "Add Application" and start configuring your authentication strategy. As you can see below, you get a nice preview of your log-in screen (right half of the screen) while at the same time, you can configure which auth methods you'll allow (left half of the screen):
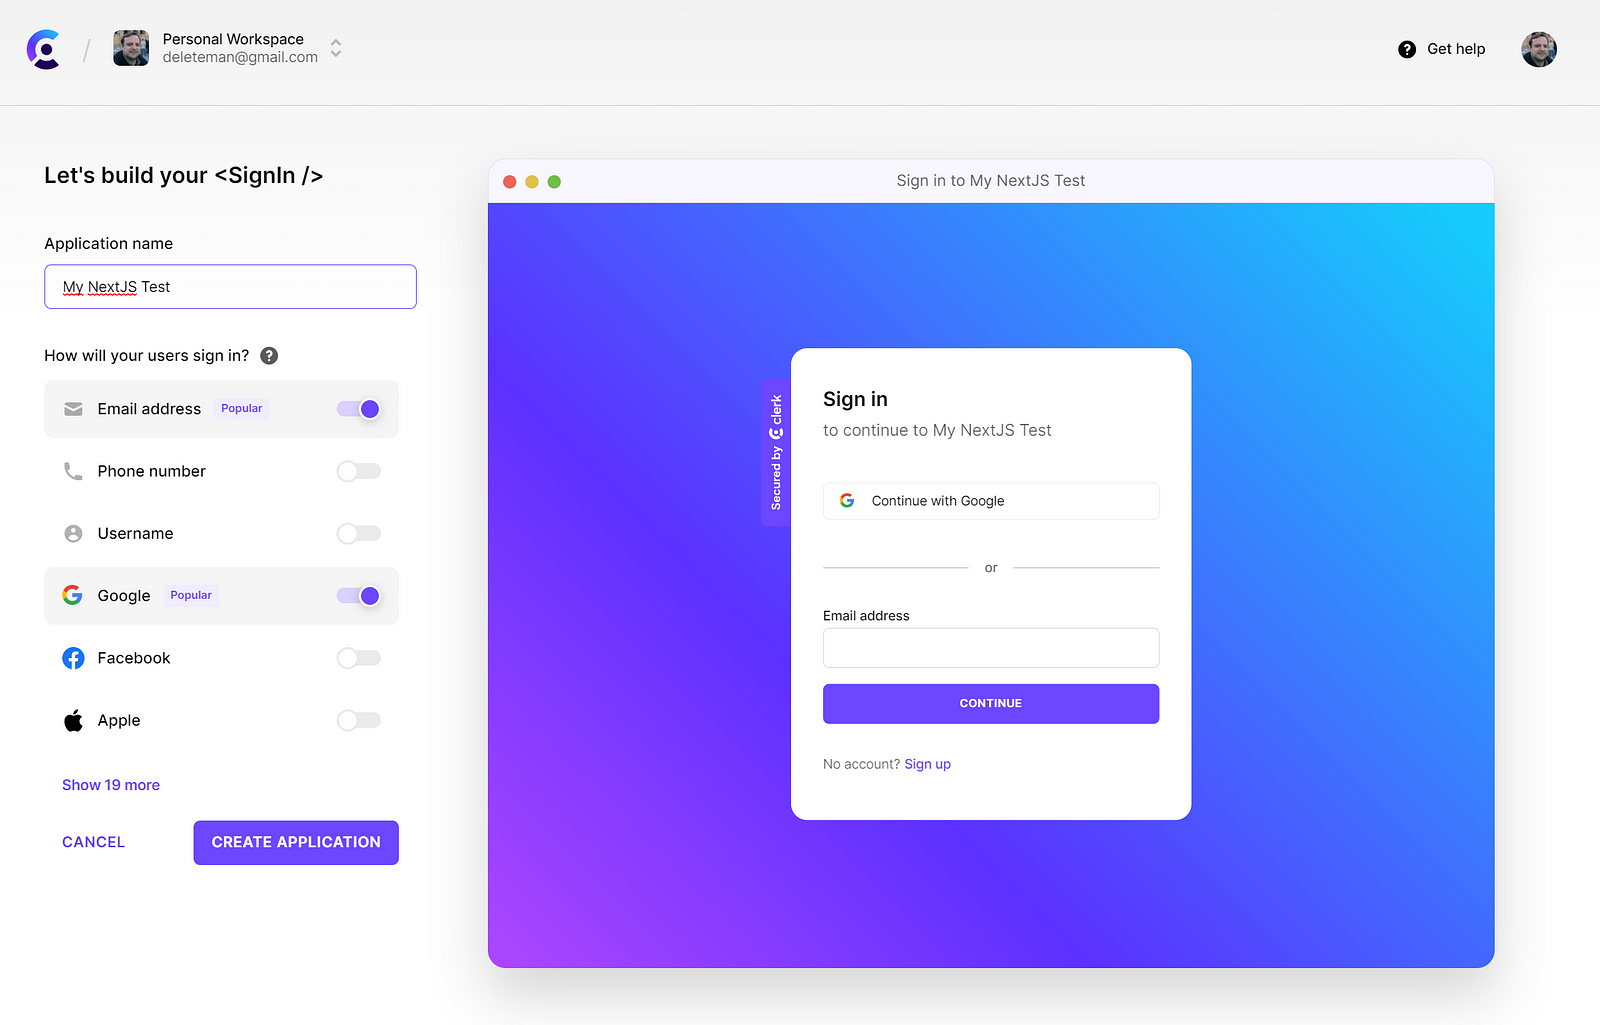
For this example, we'll just go with e-mail and Google. Now hit "Create Application" and let the SaaS do the rest!
You'll be redirected to a page showing you your new keys and how to configure them on multiple frameworks. The first one is going to be Next and since that's what we're using (coincidence?!), just don't touch anything.
Just click on the "copy" button on the top right corner of the keys section (see image below):
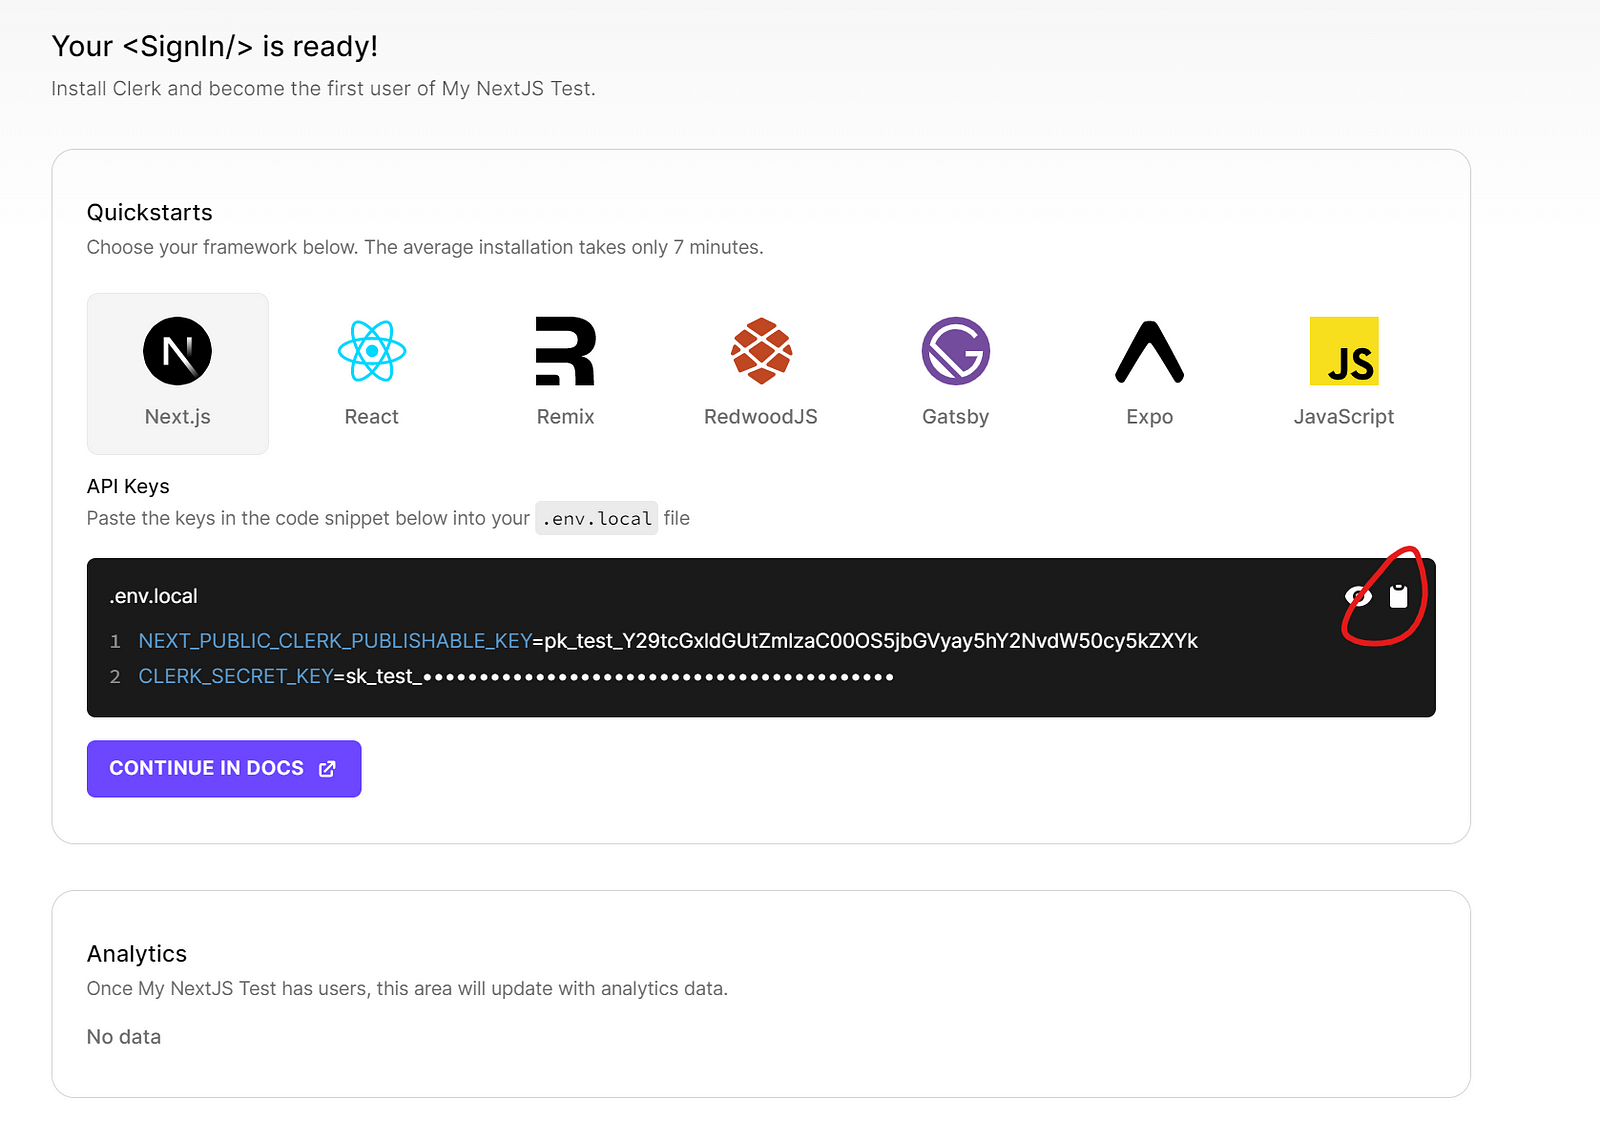
And save that on your .env file (if you don't have one at the root of your project, create one and save the data there).
You'll also have to install the @clerk/nextjs package:
npm install @clerk/nextjs
STEP 3: Implementing Clerk Auth in WunderGraph
Now, let's dive into the code and integrate Clerk authentication into our WunderGraph BFF.
For the example, we'll use the default page that was already created by the generator. We'll add our auth code, and suddenly we'll have to sign in to actually see it.
First, go to Clerk.com and on the left side menu, select the "JWT Templates" section:

Add a new one, and fill in a name, let's call it "wundergraph" (original, I know), and on the "claims" box, add something like this:
{
  "id": "{{user.id}}",
  "email": "{{user.primary_email_address}}",
  "company": "{{user.company}}",
  "lastName": "{{user.last_name}}",
  "username": "{{user.username}}",
  "firstName": "{{user.first_name}}"
}
The important bit is you'll also copy the "JWKS Endpoint":
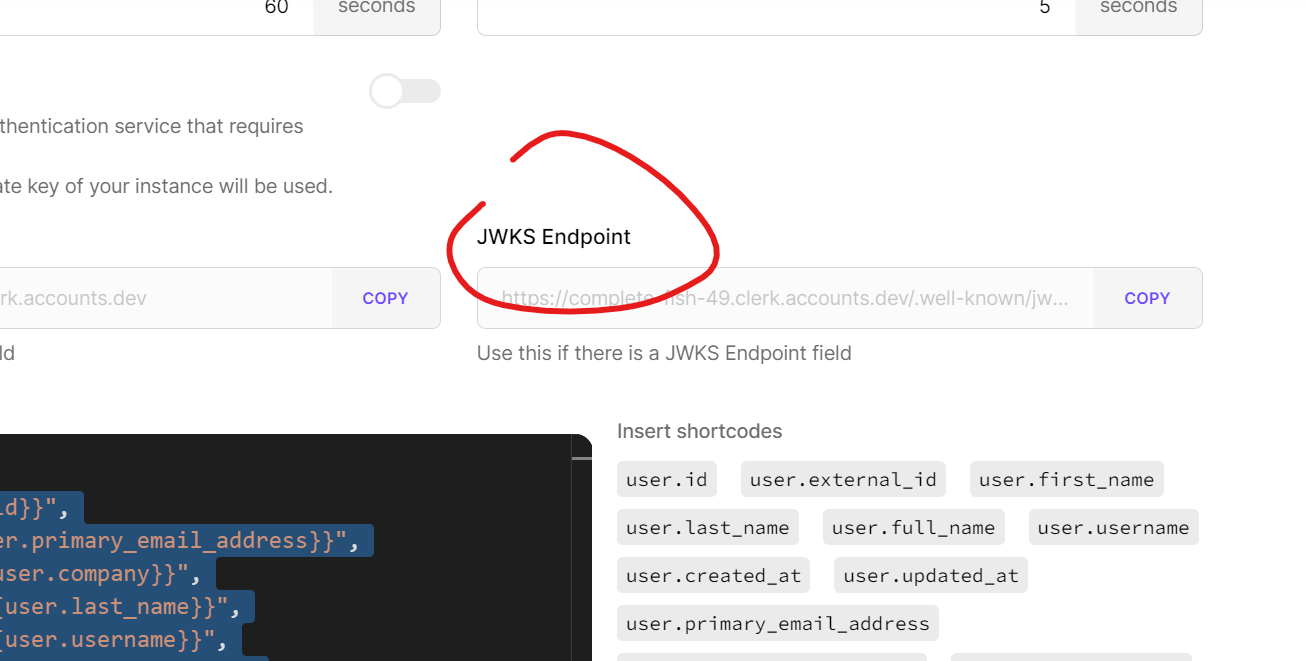
Then go to .wundergraph/wundergraph.config.ts and edit the authentication section to look like this:
authentication: {
  tokenBased: {
    providers: [
      {
        jwksURL: "<the url you just got>",
      },
    ];
  }
}
Now go to the pages/_app.tsx file and change it to look like this:
import Head from "next/head";
import { AppProps } from "next/app";
import { useAuthMiddleware } from "@wundergraph/nextjs";
import { withWunderGraph } from "../components/generated/nextjs";
import {
  ClerkProvider,
  RedirectToSignIn,
  SignedIn,
  SignedOut,
  useAuth,
} from "@clerk/nextjs";
import { Middleware } from "swr";

export const useWunderGraphClerk: Middleware = (useSWRNext) => {
  const auth = useAuth();

  return useAuthMiddleware(useSWRNext, async () => {
    return auth.getToken({ template: "wundergraph" });
  });
};

function MyApp({ Component, pageProps }: AppProps) {
  return (
    <ClerkProvider {...pageProps}>
      <Head>
        <meta charSet="UTF-8" />
        <meta name="viewport" content="width=device-width, initial-scale=1.0" />
        <script src="https://cdn.tailwindcss.com"></script>
      </Head>
      <main className="flex dark:bg-slate-800 min-h-screen justify-center">
        <SignedIn>
          <Component {...pageProps} />
        </SignedIn>
        <SignedOut>
          <RedirectToSignIn />
        </SignedOut>
      </main>
    </ClerkProvider>
  );
}

export default withWunderGraph(MyApp, {
  use: [useWunderGraphClerk],
});
There are several things to note here:
- We created the
useWunderGraphClerkmiddleware. - We applied the middleware to the exported component.
- Inside the middleware, we're referencing the name of the JWT template we created on Clerk (I called it "wundergraph" you might need to change this value if you used another name).
- I added the
<ClerkProvider>component around everything. If you don't do this, you'll see an error saying something likeAuth context not found. - I also added the
SignedInandSignedOutcomponents, which take care of adding logic inside the JSX code to understand what to do if the user is signed in or not.
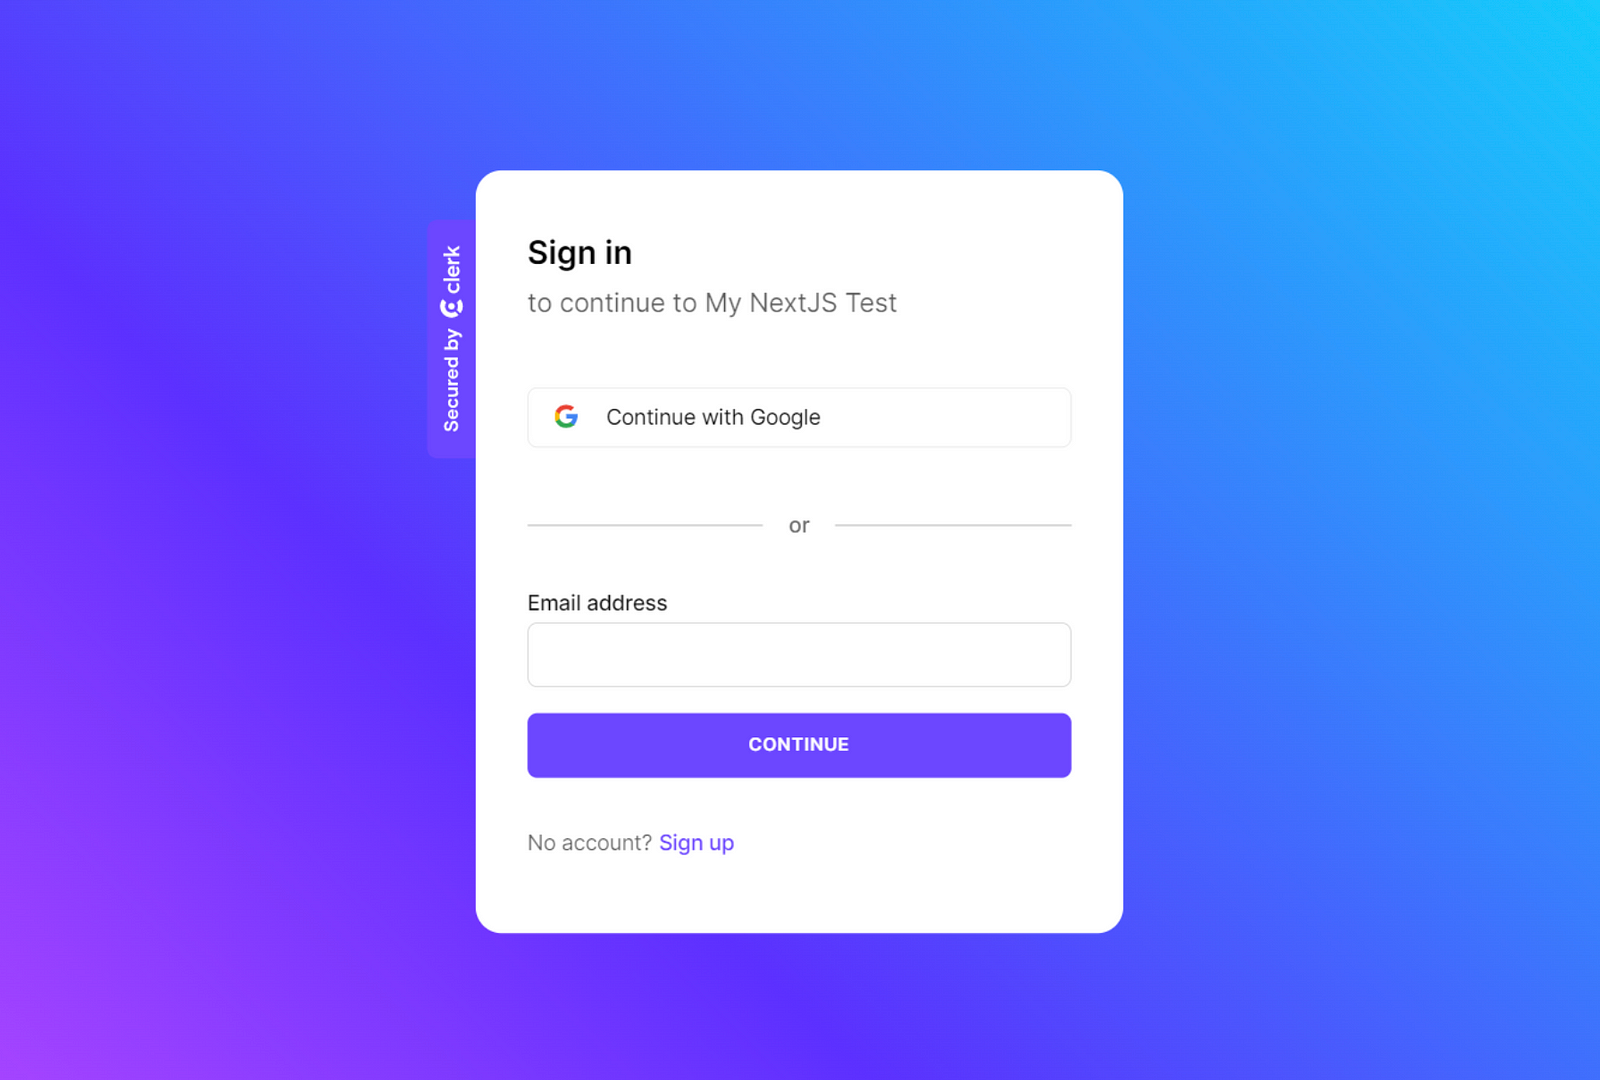
At this point, when visiting http://localhost:3000 you should see a login screen like this:
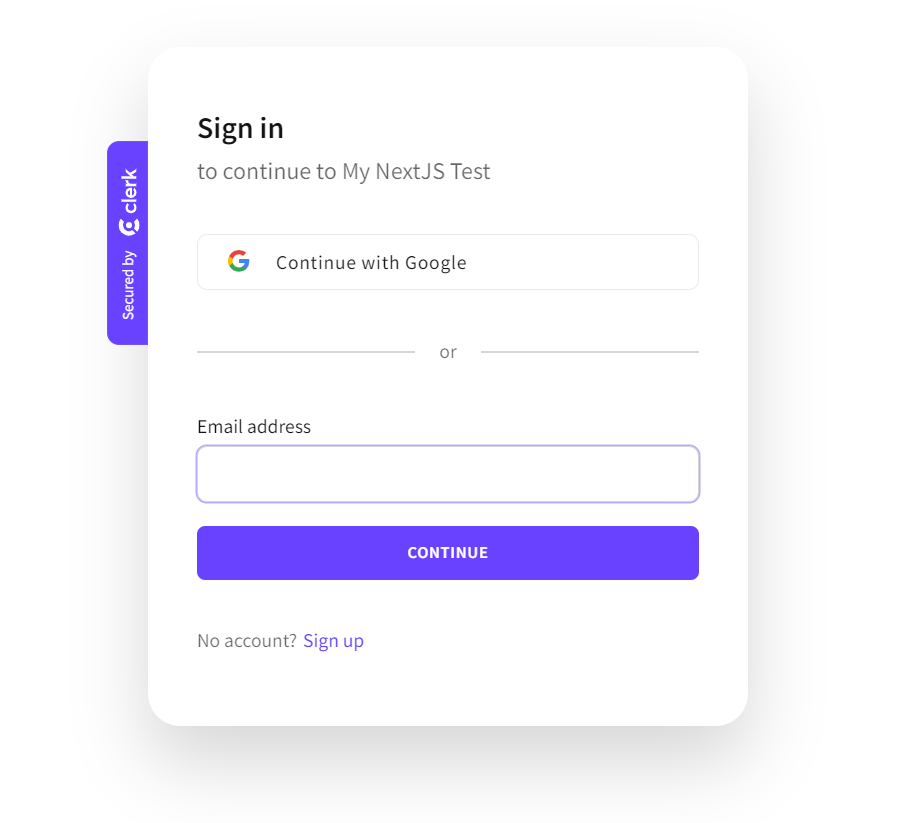
And after logging in, you'll be redirected automatically to your homepage.
STEP 4: But wait, there is more!
Yes, you're done, you can stop reading now, but I wanted to take this a little bit further and show you how cool Clerk is.
Inside your logged-in pages, you can add a user menu icon that by default already shows your avatar. And all of that with a single component.
Simply add the <UserButton /> component inside the pages/index.tsx file wherever you want and be amazed by the simplicity and power of this component.
Here is mine:
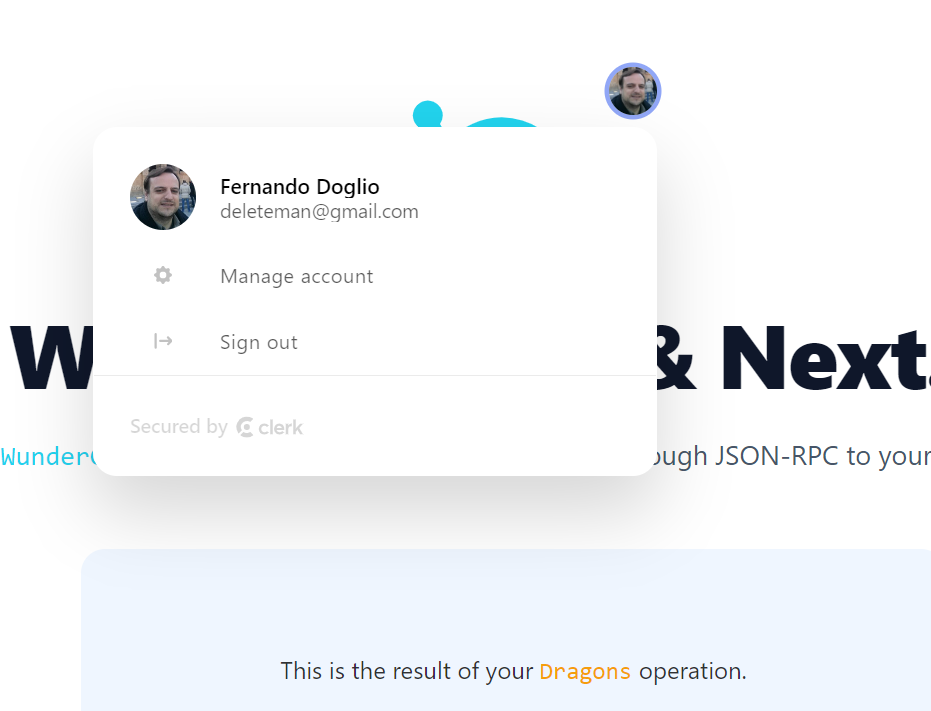
There you have the "Sign-out" link, which is also a common question users ask after setting everything up!
By integrating Clerk authentication into our WunderGraph BFF, we were able to leverage the powerful features and security provided by Clerk.com while benefiting from the simplicity and flexibility of WunderGraph.
This is truly a match made in heaven!
Conclusion
If you'd like to check out the full source code of this example, you have it here, simply clone the repo and go nuts!
That said, I hope you found this step-by-step tutorial interesting! I personally loved the simplicity of integration and how both options simplify different aspects of the development process.
In the end, we're looking at a flexible and powerful frontend capable of being easily integrated into different backends without affecting the UI. Not only that, but we also saw a very simple way of integrating authentication into an existing application with minimum effort!
Have you used the BFF pattern before? What about Wundergraph or Clerk? Share your experience in the comments, I'd love to know what you think about this topic!
Comments
Loading comments…