
If you are familiar with JavaScript or Web Development then you must have heard about npm. NPM helps us to manage packages and dependencies in our projects. So, while learning a JavaScript framework the knowledge of npm would be really useful to learn it in an easier manner.
In this series of articles, we aimed to cover the following topics:
-
NPM and import/export modules in JavaScript (this article)
Let's first start with NPM:
NPM
What is NPM?
NPM is the default package manager for node. It is used to install, share, and manage javascript packages in a project.
NPM has three components:
-
The website (Using the website we can find, share, and view packages)
-
The Command Line Interface (CLI) (The CLI is the component that helps us in managing our packages)
-
The registry (The npm registry is the database where all the packages exist, we can download packages published by other developers and can also publish our own packages to the registry)
Note:
-
NPM can also be used to publish and manage private packages.
-
A package is simply a program that performs one or more operations.
How to Install npm?
NPM comes pre-installed with node.js. So, you don't need to worry about installing it manually, you just have to install node.js on your system.
To install node.js, visit https://nodejs.org/en/download, and install its LTS (Long Term Support) version.
After installation, use the commands shown below to check if they are installed:
// to check nodejs's version
node -v or node --version

// to check npm's version
npm -v or npm --version
This will result in something like this:
 Checking for node's and npm's version
package.json
The package.json file is like the manifest of your project. It makes it easier to install and manage packages. It consists of all the metadata of the project that will be useful while sharing the project with other developers.
According to the official docs:
A package.json file:
-
lists the packages your project depends on
-
specifies versions of a package that your project can use using semantic versioning rules
-
makes your build reproducible, and therefore easier to share with other developers
How to create a package.json file?
To create a package.json file, run npm init in the root folder of your project. After running this command, it asks you for some data about your project, you can choose to answer them or just press enter to set the data values to default.
Here is an example of the same:
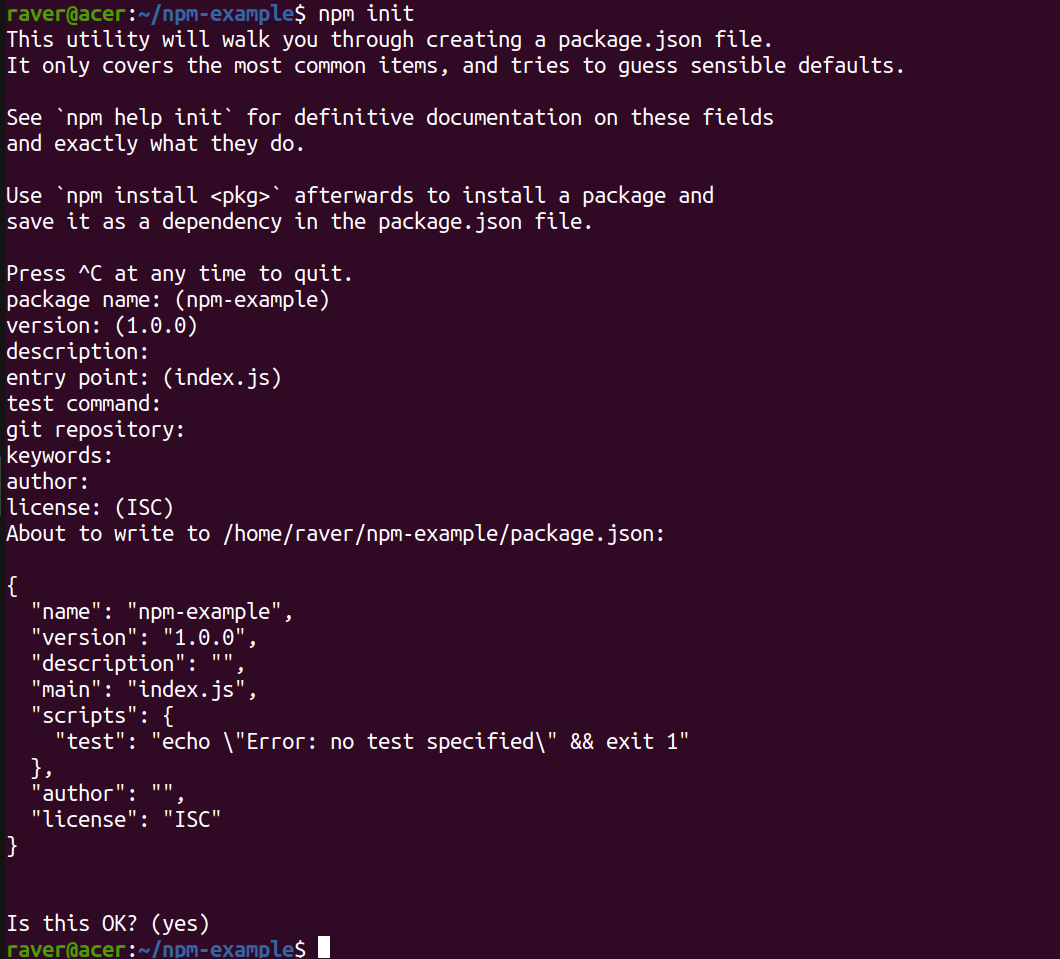 Create package.json file
You can also execute the command npm init -y to create the package.json and it will create the file by itself by setting all the data to default.
Here is the example for the execution of this command:
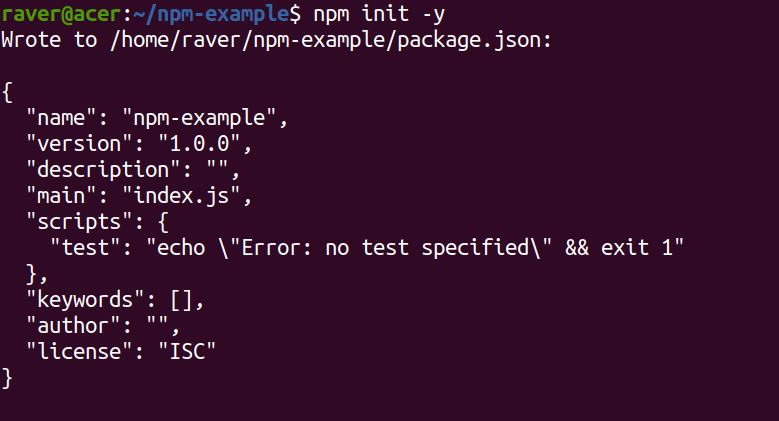 Create package.json using ‘npm init -y'
So, you can notice that this file contains some important data like name, description, versions, and author, etc about our project.
Important npm commands
Here we will learn about some of the useful npm commands. Let's first learn about installing packages from npm.
Installing an NPM package
To install an npm package simply run the command:
npm install
For example, let's install lodash:
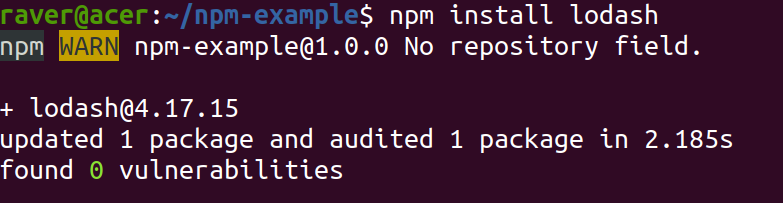 Install an npm package
After the installation, the project folder structure should look like this:
 Project's folder structure
So, we can notice that we have a new folder named node_modules and file named package-lock.json.
The node_modules folder contains the package and all its dependencies (i.e the programs and files on which our package depends for its working) while the package-lock.json file holds the exact versioned dependency tree.
So, with that being installed in your project, you can now use lodash and its functions in your project.
**Note: **To install a package globally, simply append -g or --global to the command. To understand this, let's install nodemon globally:
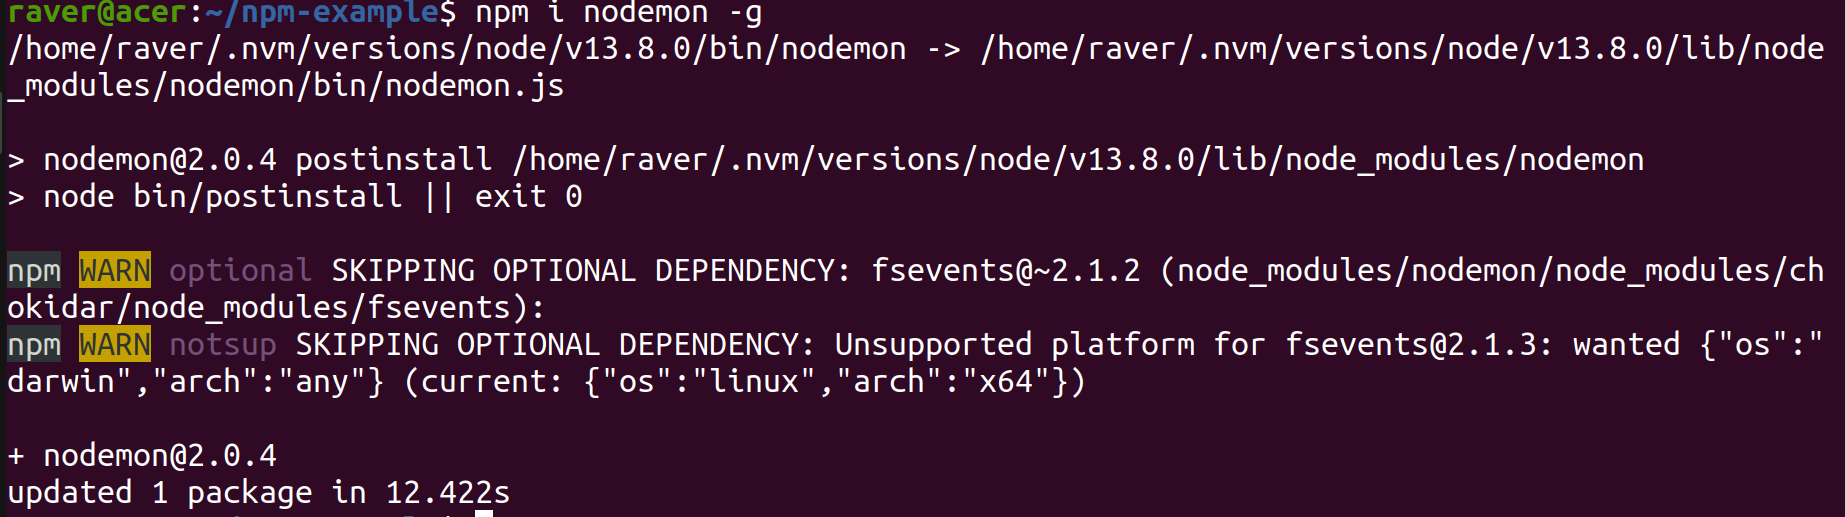 Installing npm modules globally
As you can see, I already had it on my system, so the package was only updated.
Note:
-
Any package that you want to use in your project should be installed locally.
-
Any package that you want to use from the command line or CLI should be installed globally.
 package.json file
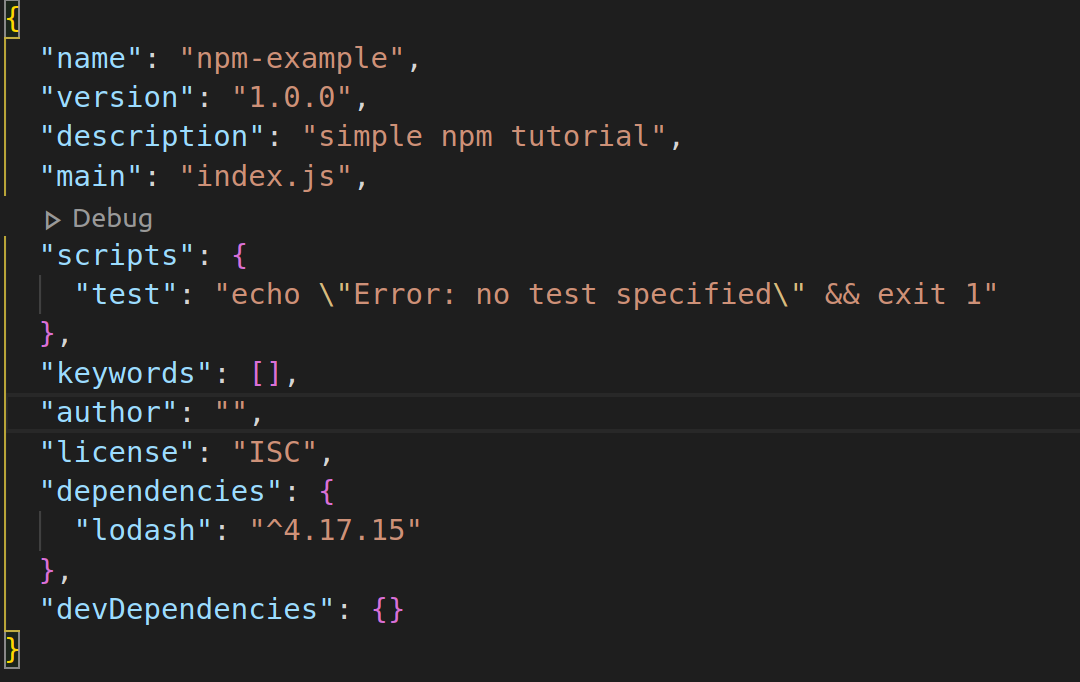
So, you can notice that lodash is added to the dependencies list in the package.json file but nodemon wasn't added as it was installed globally. Now, if you notice, there is another key named devDependencies which is empty.
Let's understand what it is.
We can also install packages that are only intended to be used in the development phase of our project and not in the production phase. These packages are known as devDependencies.
To install a devDependency append --save-dev to the command. Let's install eslint as a dev dependency:
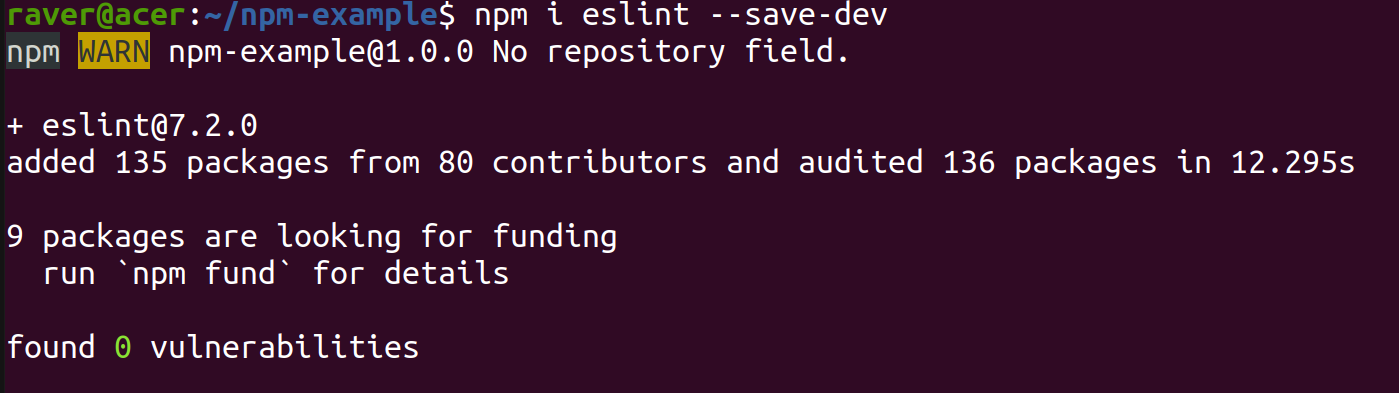 Installing a devDependency
If you now notice the package.json file then it should look like this:
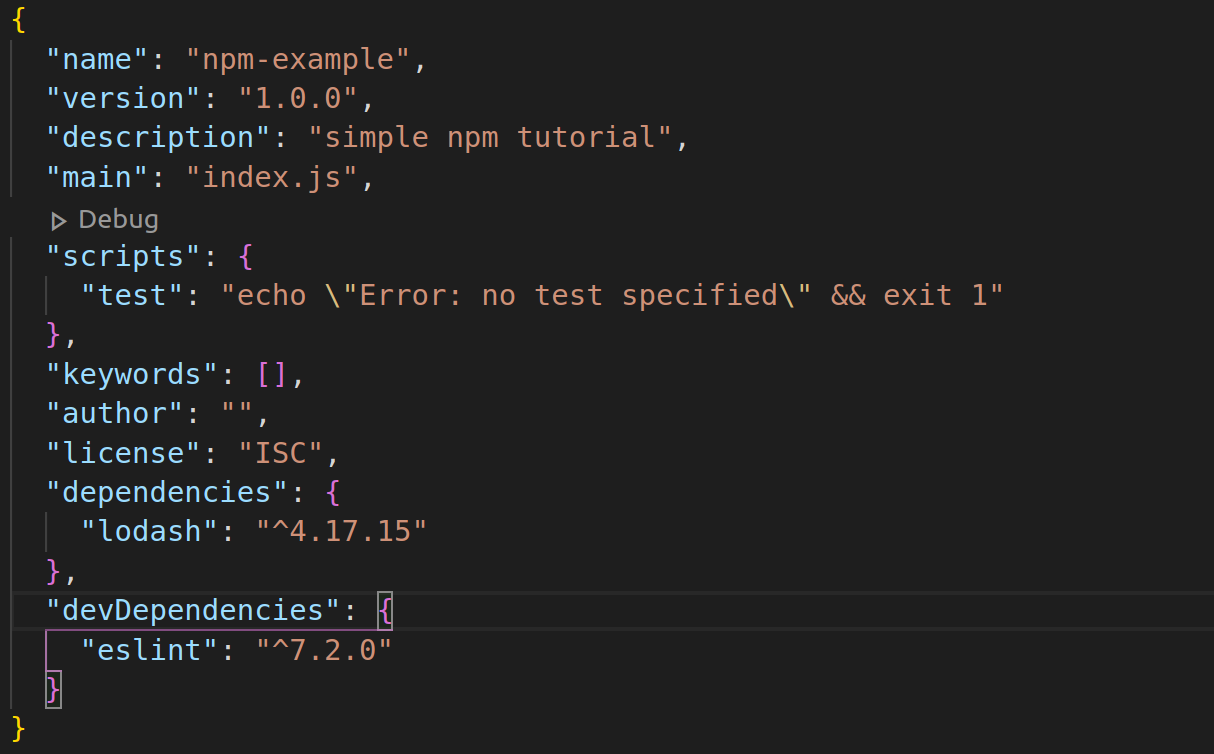 package.json file
So, eslint got added to the devDependencies list.
Install a specific version of the package
To install a specific version of the package add the version to the package like:
npm i
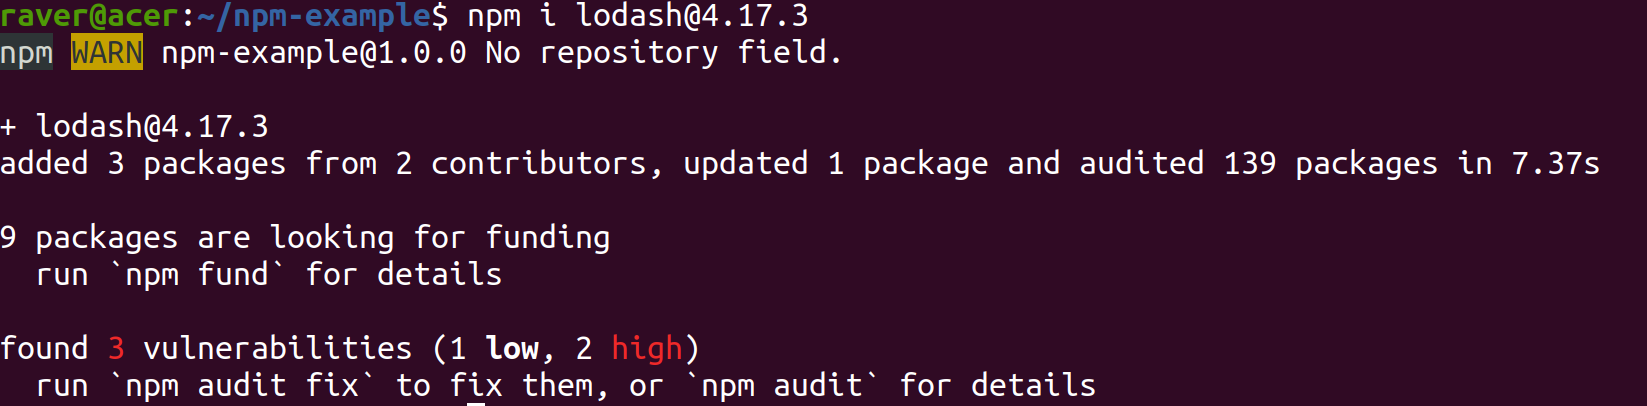 Installing a specific version of the package
So, if you now notice the version of lodash in your package.json then it should be:
 snippet from package.json file
Updating an npm package
To update a specfic npm package simply run npm update
 Updating an npm package
So, now lodash will be updated to the latest version:
 snippet from package.json file
Note: To update a global package run npm update
Uninstalling an npm package
To uninstall an npm package use the following command:
npm uninstall <package-name>
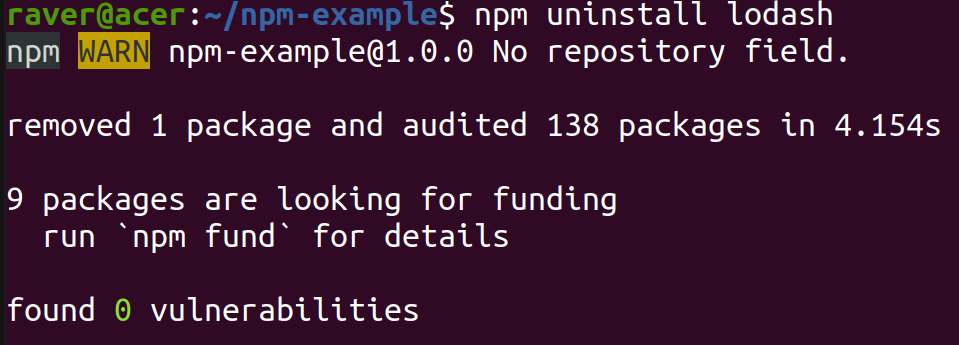 Uninstalling an npm package
This will remove the package and its dependencies (if they are not being used by any existing project).
Installing packages from package.json
When you are working in a team and want to share your project with your peers then you should not share the complete node_modules folder as sharing only the package.json and package-lock.json will do the job, as it consists of all the data related to your project and its packages along with their versions.
To install packages from the package.json file run:
// Install packages from package.json
npm install or npm i
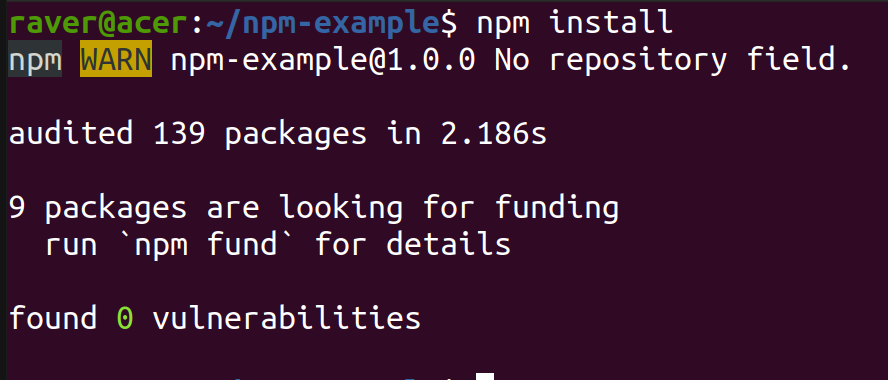 Installing packages from package.json
This will automatically install all the packages and dependencies required for the working of your project.
Note:
-
npm was originally made for node but the frontend community has also adapted it.
-
We can't directly use an npm package in the script tag, for that we need to use tools like webpack, and parcel. But these tools are not necessary to learn before getting started with any framework as nowadays most of the frameworks provide tools to get started without troubling yourself with webpack or parcel. Examples of such tools are react-cra and vue-cli.
If you wish to learn more about package-lock.json then this video is a great watch.
With that, we have covered the first topic of our article, let's now move on to the next topic which is import/export modules in JavaScript.
Import/Export modules in JavaScript
What are JavaScript modules and why do we need to use them?
JavaScript modules are files that are used to perform some specific operations that can be added/removed into the main program without disrupting it.
We use modules as it makes our code more re-usable, helps to split functionalities into smaller files, and also to eradicate naming conflicts while writing code.
We can export some code from one module and import the same in another module. This way we will be able to separate code which is meant for a specific purpose in their own files and can use them in the main program.
Here we will talk about ES6 modules and ways to import/export them.
Remember: If you do not export some specific code from a file then it can't be imported or used in the other file.
To understand the concept of importing and exporting modules, let's consider the example of an appliance without a plug.
Now, obviously, in this state, the appliance doesn't work. To make it work we will have to add a plug to it and connect it to the socket.
In the case of modules, the appliance is the module itself, now, when you add an export statement in a module then you are basically adding a plug to the appliance and when you import the value of the module from another module then you are connecting the plug into the socket.
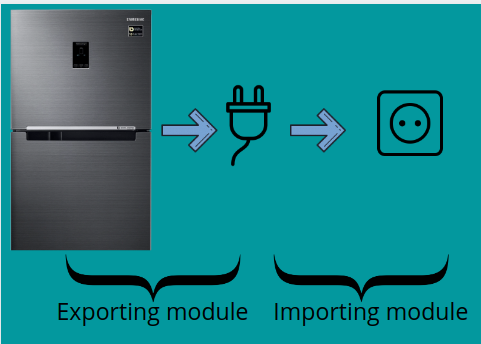 Importing and exporting a module
Exporting
To export anything from the module we use the export keyword.
We can export our code using the following ways:
-
Named export (zero or more exports per module)
-
Default export (only one per module)
Let's see how they work:
// 1. Named export

// a) Exporting one by one
const ids = [1, 2, 3, 4]; // Not availiable outside this file
export const users = ['Ajay', 'Akash', 'Raman'];
export const tasks = ['write article', 'practice', 'read docs'];

/* Here, we are exporting the variables one by one in their declaration
but, we can also export them in a single line as: */

// b) Exporting in a single line
const users = ['Ajay', 'Akash', 'Raman'];
const tasks = ['write article', 'practice', 'read docs'];

export { users, tasks };

// 2. Default export

// a) exporting with the defination
export default function logUser(user) {
    console.log(user);
}

/* OR */

// b) Exporting at the end of the file
function logUser(user) {
    console.log(user);
}

export default logUser;
So, we can notice that the named export is useful to export multiple values but using the default export can be used to export only one value.
Importing
To import the exported content of one module into another module we use the import keyword. Also, we need to mention the relative or absolute (if the project has the configuration) path to that module.
Based on the different types of exports we can have the following types of imports:
-
Importing single or multiple named exports from the module
-
Importing defaults
Let's see how they work:
// 1. Import one or more named exports from the module

// Syntax
import { <named_export_value> } from '<path_of_module_from_current_module>';
// path can be relative or absolute depending upon the configuration of the project

// For Example:
import { users, tasks } from './export.js';
// This will import the users and tasks arrays into the current module

// 2. Import default

// Syntax
import <default_export_value> from '<path_of_module_from_current_module>';
// path can be relative or absolute depending upomn the configuration of the project

// For Example:
import logUser from './export.js';
// This will import the function logUser into this module
So, we can notice that the named import is useful to import multiple values but using the default import can be used to import only one value.
Importing from an npm package
We can import functions and code from an npm package using the following syntax:
// To import a default export
import <default_value> from '<package-name>';
/* OR */
// To import a named export
import { <named_export_value> } from '<package-name>';
view raw
Now, as you can notice that we didn't use the relative path here due to which webpack decides that it has to import the function/value from the node_modules folder.
Let's understand how to import the npm packages using the lodash example:
import lodash from "lodash";

// We can also import specific functions using the format:
import { isArray } from "lodash";

// We can also import other files or JS entry points from a package:
import map from "lodash/map";
So, you can observe that we didn't use the file's extension in the last import statement, we can import without the file extension if it is a .js file. For all other file formats, we will have to specify the file extension.
Note: By default webpack only allows to import javascript files but we can configure it to import CSS and other files.
Here is a simple example to understand the concept in a better way. Feel free to play and experiment with the sandbox.
With that, we have covered all the topics of this article as well as this series. I hope this series helped you in some manner to learn the useful concepts in JavaScript that one should know before learning any JavaScript framework.
As always, to end this one I will leave you guys with a simple React Component that uses the above concepts:
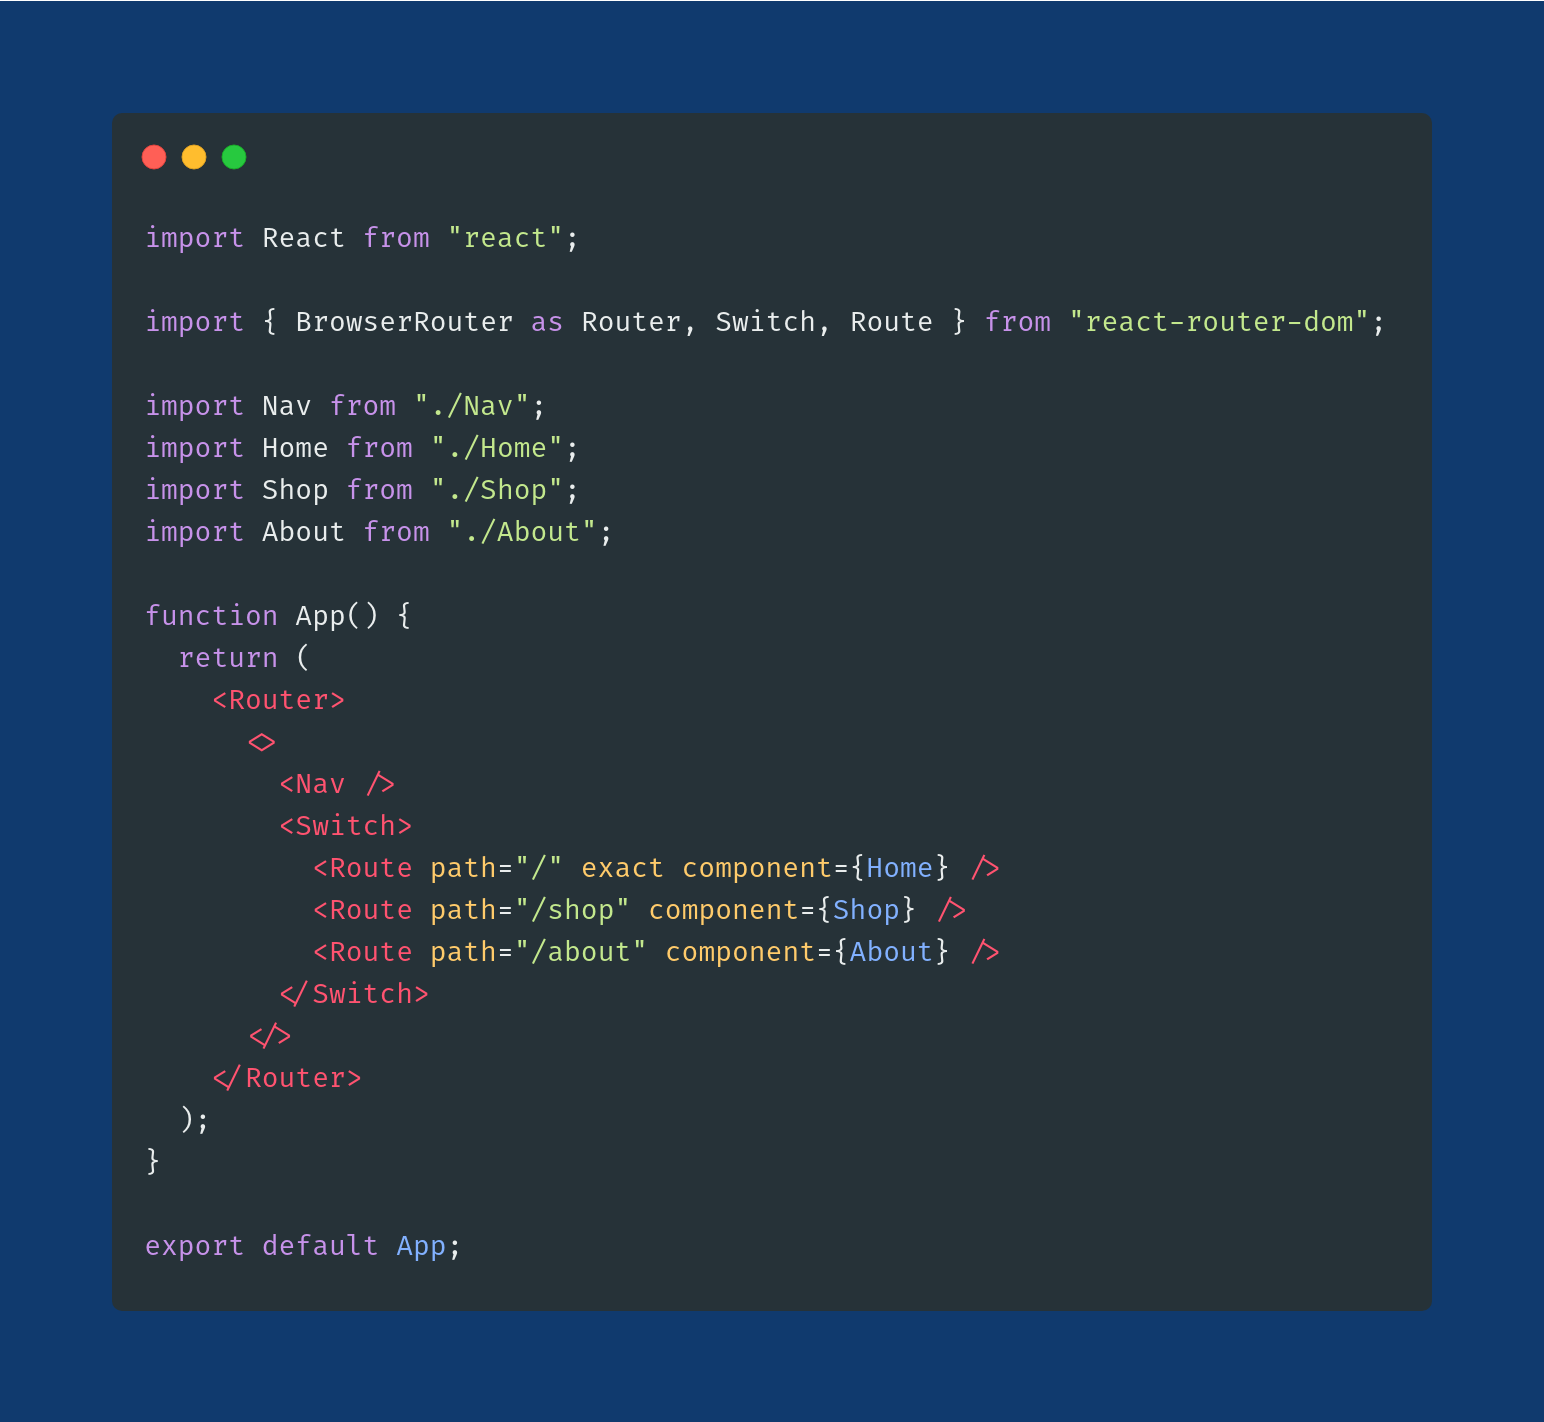 A simple React Component
Also, check out the previous parts (in case you haven't): Things to learn before learning a JavaScript framework (part 1) *So, In this series of articles, I will try to explain some of those features and concepts which I feel are really…*medium.com Object and Array methods to learn before JavaScript frameworks (part 2) The different types of methods that can be applied to Objects and Arrays in JavaScriptmedium.com Asynchronous JavaScript to learn before JavaScript Frameworks (part 3) An insight to asynchronous javascriptmedium.com
In case you want to connect with me, follow the links below:
Comments
Loading comments…