Over the past few months, I’ve been learning Svelte in order to create a tool that generates websites from Notion databases. Recently, I’ve been working on another project — a Chrome Extension that improves the efficiency of local development projects by allowing users to change website icons when in different environments. Using Svelte for the Chrome Extension was a great choice! In this post, I’ll share some tips on how to get started on building Chrome Extensions with SvelteKit. While the steps may seem simple at first, I ran into a few issues that I had to troubleshoot:
- Creating a Svelte project with SvelteKit
- Setting up the repo for the Chrome Extension output
- Testing the extension in Chrome Overall, Svelte has been an excellent choice for building this Chrome Extension. It’s recommend to clone the project from the GitHub repo that can be tested directly in Chrome.
Creating a Svelte project with SvelteKit
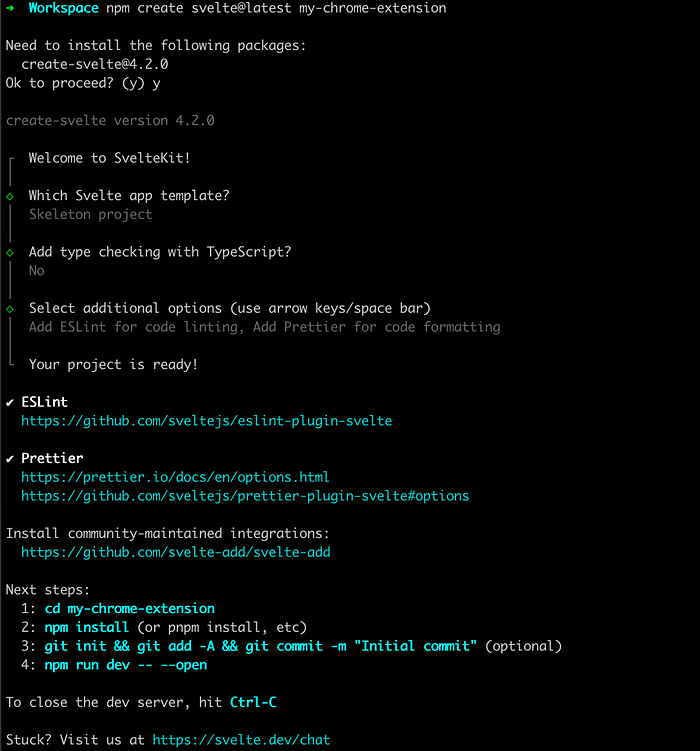
The most straightforward method for building a Svelte application is using the SvelteKit by executing the command npm create
npm create svelte@latest my-chrome-extension
When executing this command, various templates are available for selection, and I personally prefer the following option:
 Next, proceed to install all the necessary dependencies required for the project, using
 npm run dev to start a development server and we can view page from localhost:5173.
Setting up the repo for the Chrome Extension output
We need to configure the project for building the Chrome Extension specific output files. First, we need to create an manifest.json in the /static directory, We will be using manifest V3 here:
{
  "name": "My Chrome Extension",
  "description": "A browser extension made with Svelte Kit",
  "version": "1.0.0",
  "manifest_version": 3,
  "action": {
    "default_title": "Svelte Extension",
    "default_icon": "favicon.png",
    "default_popup": "index.html"
  }
}
Then change our adapter to the @sveltejs/adapter-static to generate static files:
npm i -D @sveltejs/adapter-static
Alter the adapter in the svelte.config.js
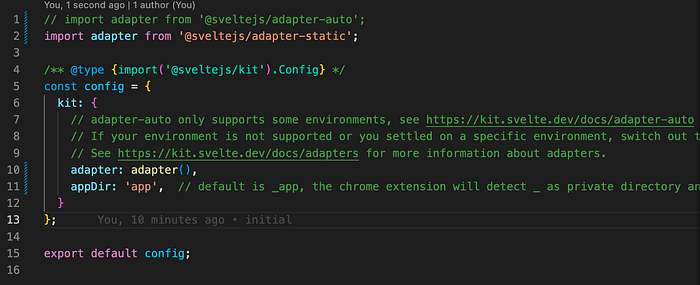 We changed
 appDir to “app” since the default _app starting with an underscore would not work in a Chrome extension. Additionally, we added a layout.js file in the src/routes folder to enable prerendering.
// src/routes/+layout.js
export const prerender = true;
We need to eliminate the inline script from the output HTML files, as the Chrome Extension v3 does not allow inline script. To accomplish this, we can develop a Node.js script removeInlineScript.cjs:
// removeInlineScript.cjs
const glob = require("tiny-glob");
const path = require("path");
const fs = require("fs");

function hash(value) {
  let hash = 5381;
  let i = value.length;
  if (typeof value === "string") {
    while (i) hash = (hash * 33) ^ value.charCodeAt(--i);
  } else {
    while (i) hash = (hash * 33) ^ value[--i];
  }
  return (hash >>> 0).toString(36);
}

async function removeInlineScript(directory) {
  console.log("Removing Inline Scripts");
  const scriptRegx = /<script>([\s\S]+)<\/script>/;
  const files = await glob("**/*.{html}", {
    cwd: directory,
    dot: true,
    aboslute: true,
    filesOnly: true,
  });
  files
    .map((f) => path.join(directory, f))
    .forEach((file) => {
      console.log(`edit file: ${file}`);
      const f = fs.readFileSync(file, { encoding: "utf-8" });

      const script = f.match(scriptRegx);
      if (script && script[1]) {
        const inlineContent = script[1]
          .replace("__sveltekit", "const __sveltekit")
          .replace(
            "document.currentScript.parentElement",
            "document.body.firstElementChild"
          );
        const fn = `/script-${hash(inlineContent)}.js`;
        const newHtml = f.replace(
          scriptRegx,
          `<script type="module" src="${fn}"></script>`
        );
        fs.writeFileSync(file, newHtml);
        fs.writeFileSync(`${directory}${fn}`, inlineContent);
        console.log(`Inline script extracted and saved at: ${directory}${fn}`);
      }
    });
}

removeInlineScript(path.resolve(__dirname, "build"));
After the build is completed, execute this script. We can modify the build command in the package.json file.
{
  // ...
  "scripts": {
    // ...
    "build": "vite build && node removeInlineScript.cjs"
  }
  // ...
}
Everything is finished, here we go to test it in Chrome.
Testing the extension in Chrome
Go to chrome://extensions/ and ensure that you have enabled the development mode located in the top right corner of the page.
Next, load the Chrome browser from our output folder(generally is build). Once this step is complete, the extension will be visible on the page.
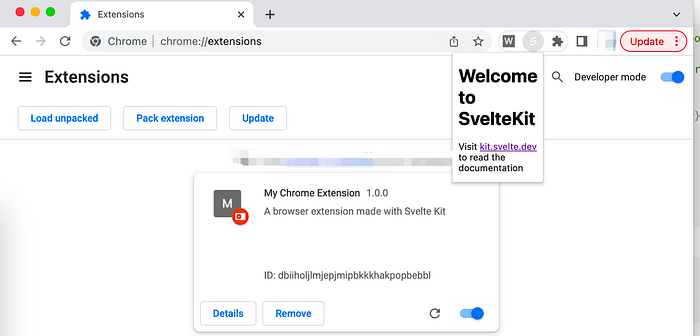 Awesome! We’ve just created a Chrome extension like a pro using Svelte Kit and Manifest v3!
Comments
Loading comments…