1. Setup the MySQL database
At first, I’ll prepare MySQL database to connect.
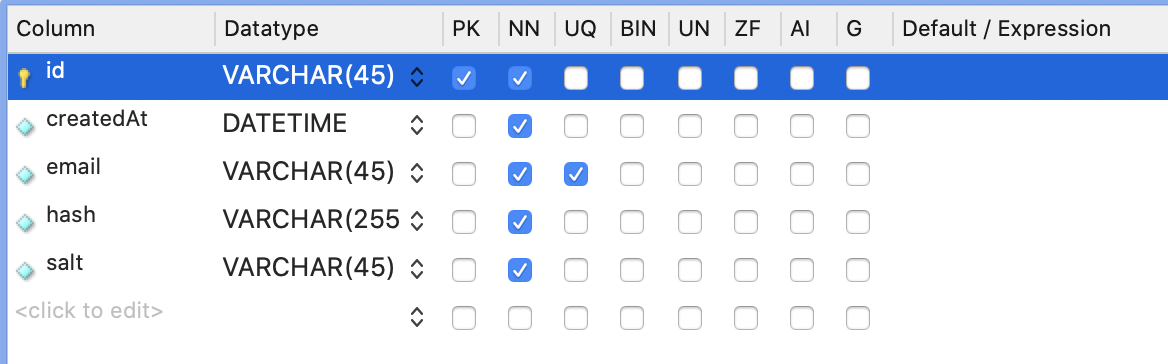
If you already installed that, you can skip this step. Just create a database and table named ‘users’ in MySQL.
Let’s install the ‘mysql’. I used ‘homebrew’ package manager.
$ brew install mysql
It is not necessary to use this method. Depending on the OS or your preference, you can use different styles.
After installation, create a database and ‘users’ table. I used ‘MySQLWorkbench’.
2. Clone the next.js authentication example
If the database is ready, We need a next.js app to connect to the database.
It also has to have some features about authentication. But Developing authentication features from zero bases takes too much effort. It is not this posting’s main purpose.
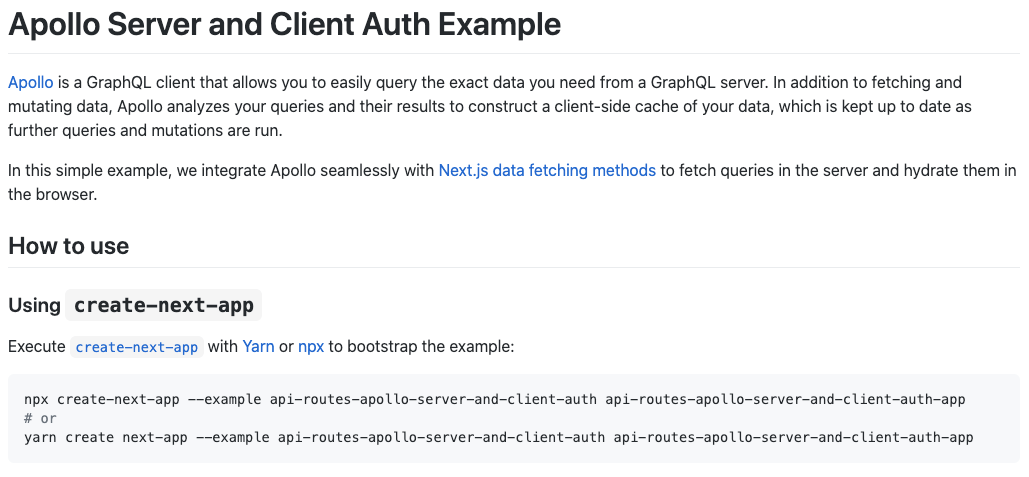
So we’ll use next.js’s official example named ‘api-routes-apollo-server-and-client-auth’. We can clone that project by ‘npx’ command or ‘yarn’.
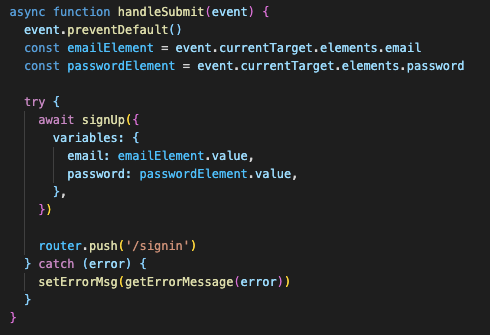
Let’s see the SignUp function component in ‘signup.js’ file. It receives email and password from the user and calls ‘handleSubmit’ function when submit.
When the submit event has occurred, the ‘handleSubmit’ function requests ‘signUp’ mutation.
 signup.js
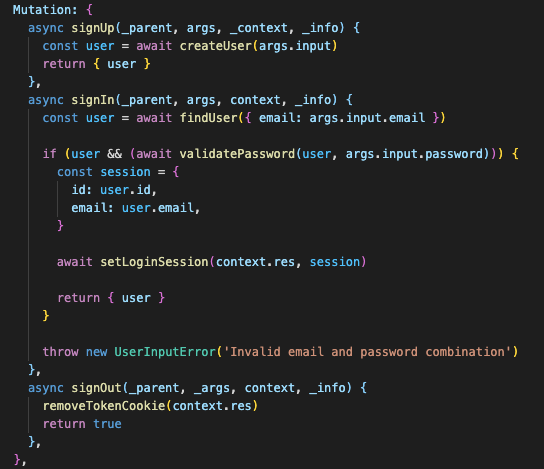
If signUp mutation comes, the resolver creates a new user as the user’s password is encrypted in ‘apollo/resolvers’ and ‘lib/user.js’.
Same as this feature, ‘signIn’ and ‘signOut’ features are already made. It also supports session management.
 resolvers.js
3. Connect next server to DB
And now to connect to MySQL, we need to install a connection manager. we used the ‘serverless-mysql’. It’s a wrapper for the ‘mysql’ module. It supports ‘async/await’ and monitoring connections.
$ yarn add serverless-mysql
And create a ‘lib/db.js’ file.
// db.js

import mysql from 'serverless-mysql';

const db = mysql({

  config: {

    host: process.env.MYSQL_HOST,

    port: process.env.MYSQL_PORT,

    database: process.env.MYSQL_DATABASE,

    user: process.env.MYSQL_USER,

    password: process.env.MYSQL_PASSWORD

  }

});

export default async function excuteQuery({ query, values }) {

  try {

    const results = await db.query(query, values);

    await db.end();

    return results;

  } catch (error) {

    return { error };

  }

}
To run this code, we have to set env variables. If you’ve ever used webpack, It will be familiar.
we can these variables by making ‘next.config.js’ file.
// next.config.js


module.exports = {

  env: {

    'MYSQL_HOST': '127.0.0.1',

    'MYSQL_PORT': '3306',

    'MYSQL_DATABASE': {database_name},

    'MYSQL_USER': {user_name},

    'MYSQL_PASSWORD': {user_password},

  }

}
Then, check the app is connected to the database. import the ‘excuteQuery’ from db.js and call it in ‘createUser’ function.
import crypto from "crypto";
import { v4 as uuidv4 } from "uuid";
import excuteQuery from "./db";
import moment from "moment";

export async function createUser({ email, password }) {
  const salt = crypto.randomBytes(16).toString("hex");
  const hash = crypto
    .pbkdf2Sync(password, salt, 1000, 64, "sha512")
    .toString("hex");
  const user = {
    id: uuidv4(),
    createdAt: moment().format("YYYY-MM-DD HH:mm:ss"),
    email,
    hash,
    salt,
  };

  try {
    const result = await excuteQuery({
      query:
        "INSERT INTO users (id, createdAt, email, hash, salt) VALUES(?, ?, ?, ?, ?)",
      values: [
        user.id,
        user.createdAt.toString(),
        user.email,
        user.hash,
        user.salt,
      ],
    });
    console.log(result);
  } catch (error) {
    console.log(error);
  }

  return user;
}

export async function findUser({ email }) {
  try {
    const result = await excuteQuery({
      query: "SELECT * FROM users WHERE email = ?",
      values: [email],
    });
    return result[0];
  } catch (error) {
    console.log(error);
  }
}

export async function validatePassword(user, inputPassword) {
  const inputHash = crypto
    .pbkdf2Sync(inputPassword, user.salt, 1000, 64, "sha512")
    .toString("hex");
  const passwordsMatch = user.hash === inputHash;
  return passwordsMatch;
}
Then enter the ‘http://localhost:3000/signup’. If you write down new user’s email and password and submit, You can see the new user is created in MySQL database.
mysql> SELECT * FROM users;
The ‘signIn’ feature is also not too difficult. we just use ‘SELECT’ query instead of ‘users’ const variable.

Now we can use authentication features successfully.
References:
Create a Next.js App with a MySQL Database That Builds and Deploys with Vercel - Vercel Guides
Comments
Loading comments…