
For this walkthrough, I will be demonstrating how to incorporate Python and a variety of AWS services into a simple, serverless workflow. The idea is to create an SQS queue using Python, then using an HTTP API to trigger a Lambda function that sends messages to the queue.

Below are the steps I will be taking to create this workflow:
-
Create a Standard SQS Queue using Python.
-
Create a Lambda function in the console with a Python 3.7 or higher runtime
-
Modify the Lambda to send a message to the SQS queue. The message should contain the current time. Use the built-in test function for testing.
-
Create an API Gateway HTTP API type trigger.
-
Test the trigger to verify the message was sent.
Prerequisites:
-
AWS IAM user with administrative access
-
an IDE (interactive development environment) of choice configured with AWS CLI, Python, and boto3 installed — For this exercise, I am using AWS Cloud9 which already utilizes the AWS CLI and comes with Python pre-installed. I have already installed boto3 prior to this exercise.
- Create a Standard SQS Queue using Python
Using your IDE, create your SQS queue — refer to the boto3 documentation for additional clarification.
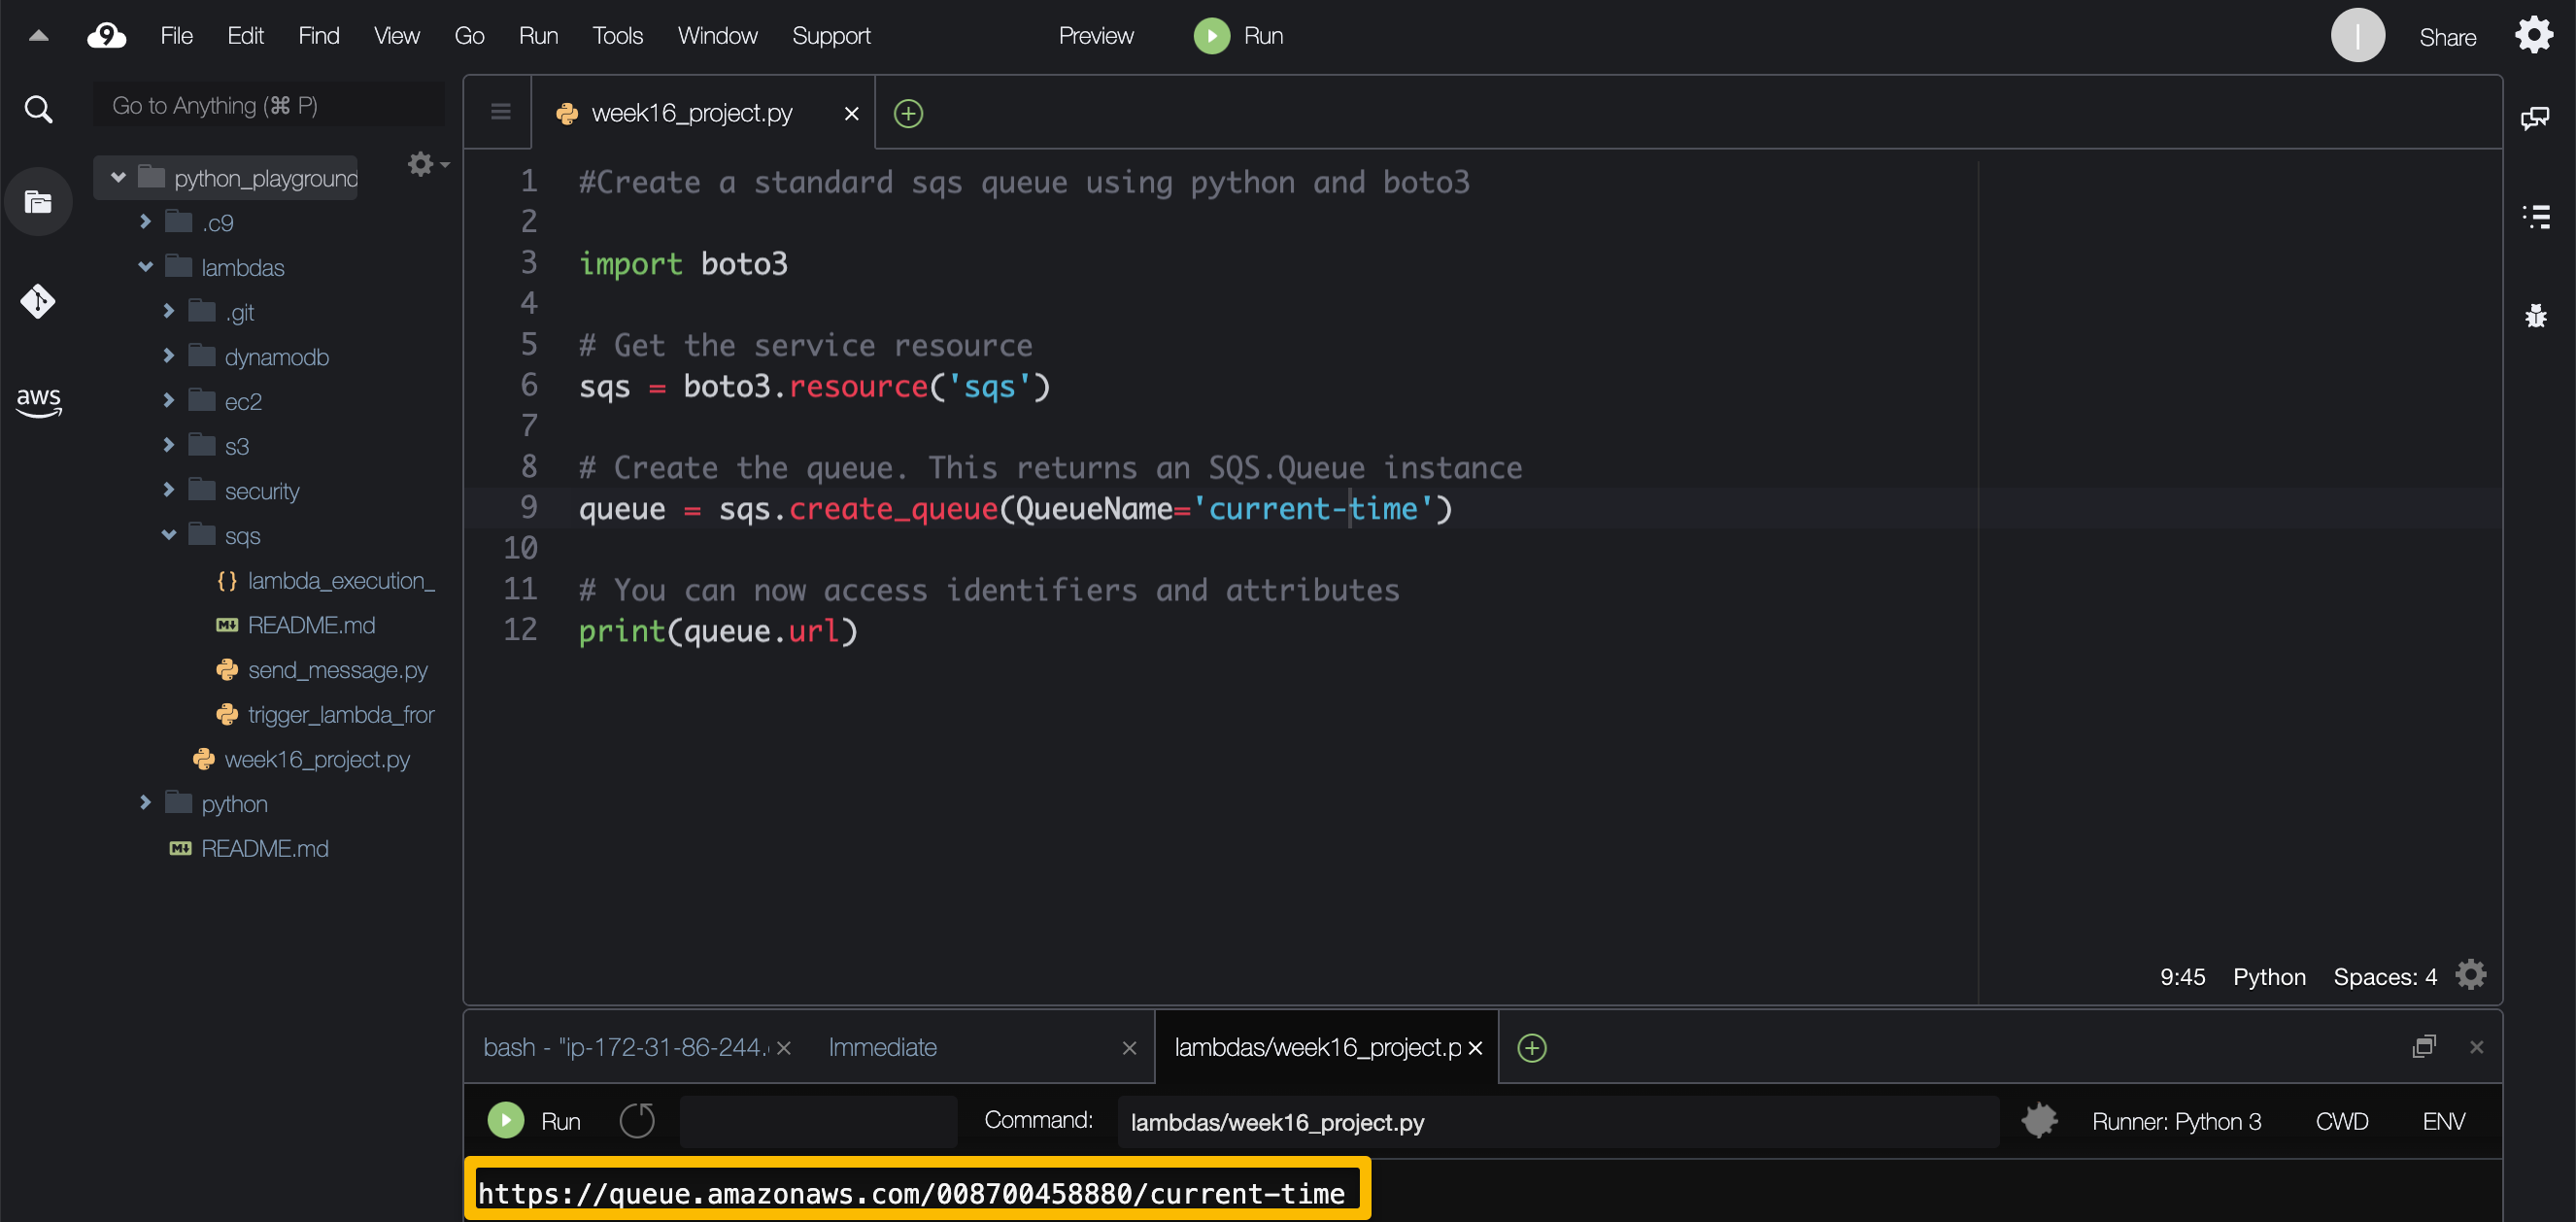
After entering the script for creating the SQS queue, click “Run” to generation the URL of your queue. Verify the queue is created by pasting the url in your browser.
# Get the service resource
sqs = boto3.resource('sqs')

# Create the queue. This returns an SQS.Queue instance
queue = sqs.create_queue(QueueName='queue-name')

# You can now access identifiers and attributes
print(queue.url)
To verify the queue was created, either copy the URL created in your IDE or navigate to SQS from the AWS Management Console and select "Queues" from the dashboard.
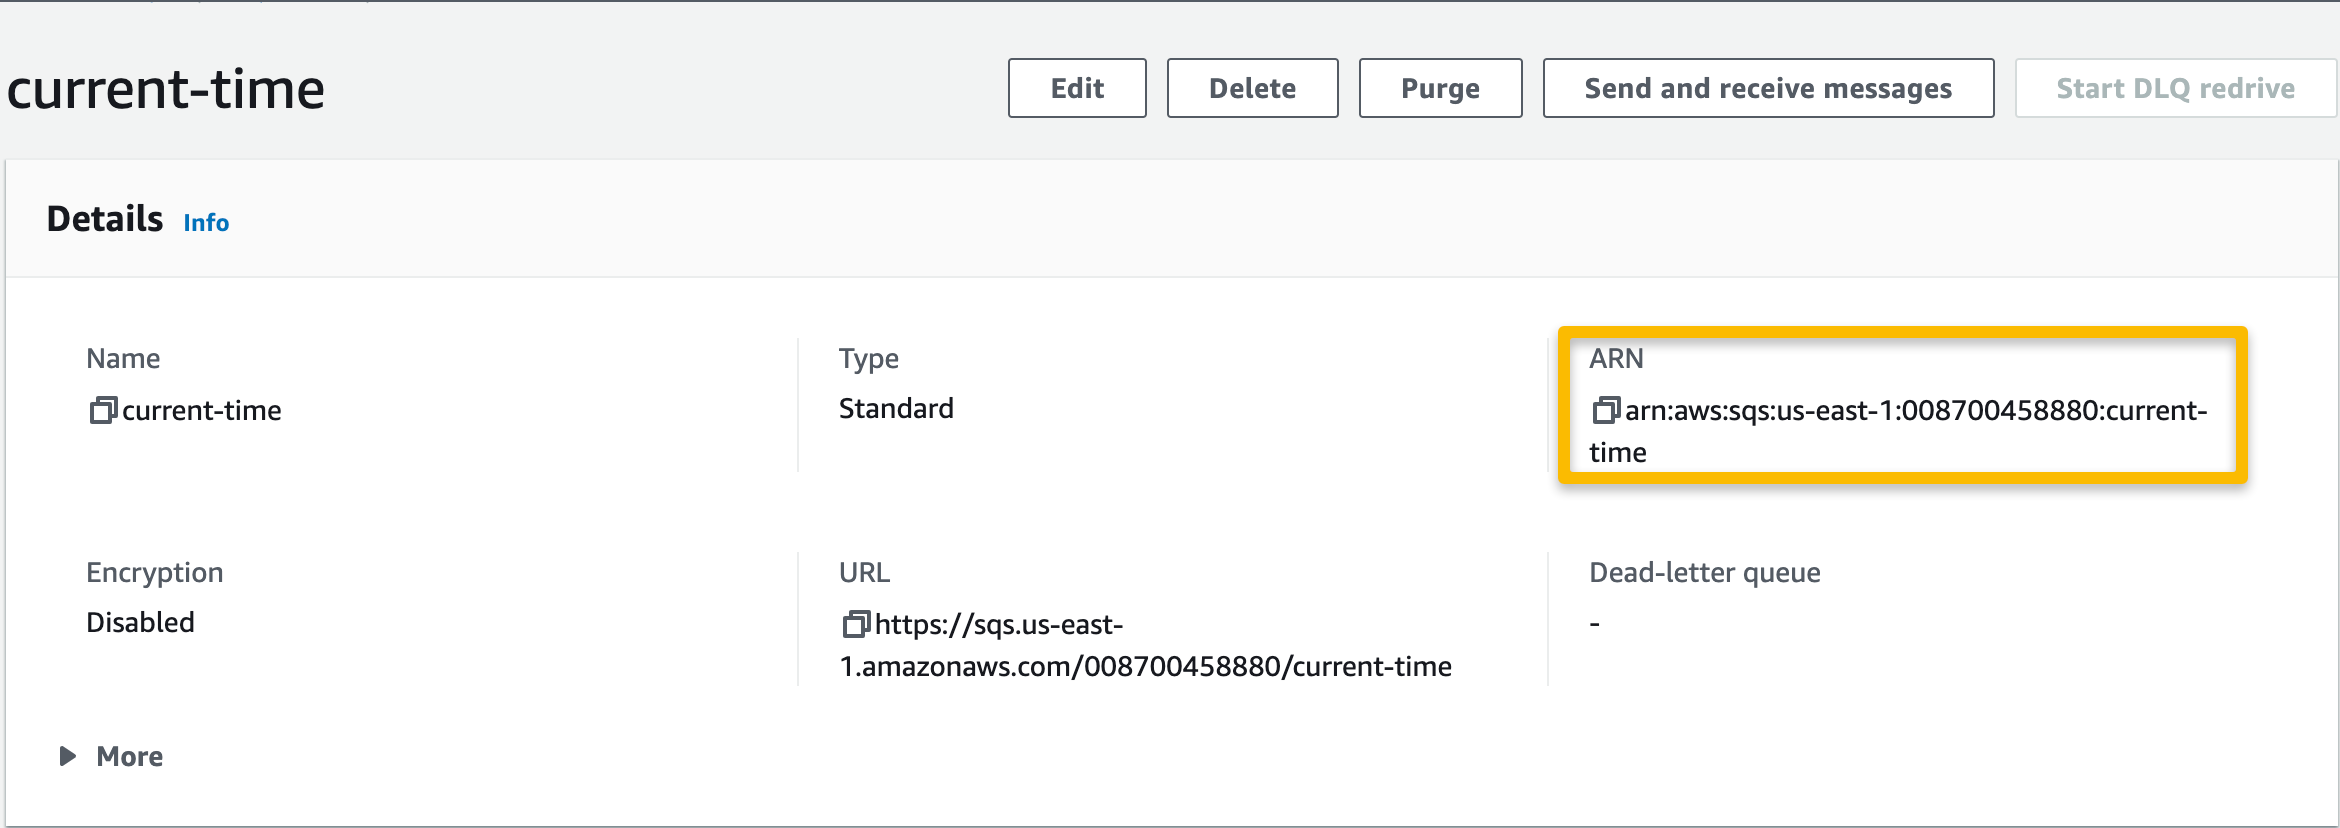
SQQ → Queues → select the newly-created queue and copy the ARN for later — it will be needed when editing the permissions policy of the lambda execution role.
2. Create a Lambda function in the console with a Python 3.7 or higher runtime
From the AWS Management Console, navigate to Lambda and click “Create function”. Provide your function a name and select the appropriate runtime — I selected Python3.7.
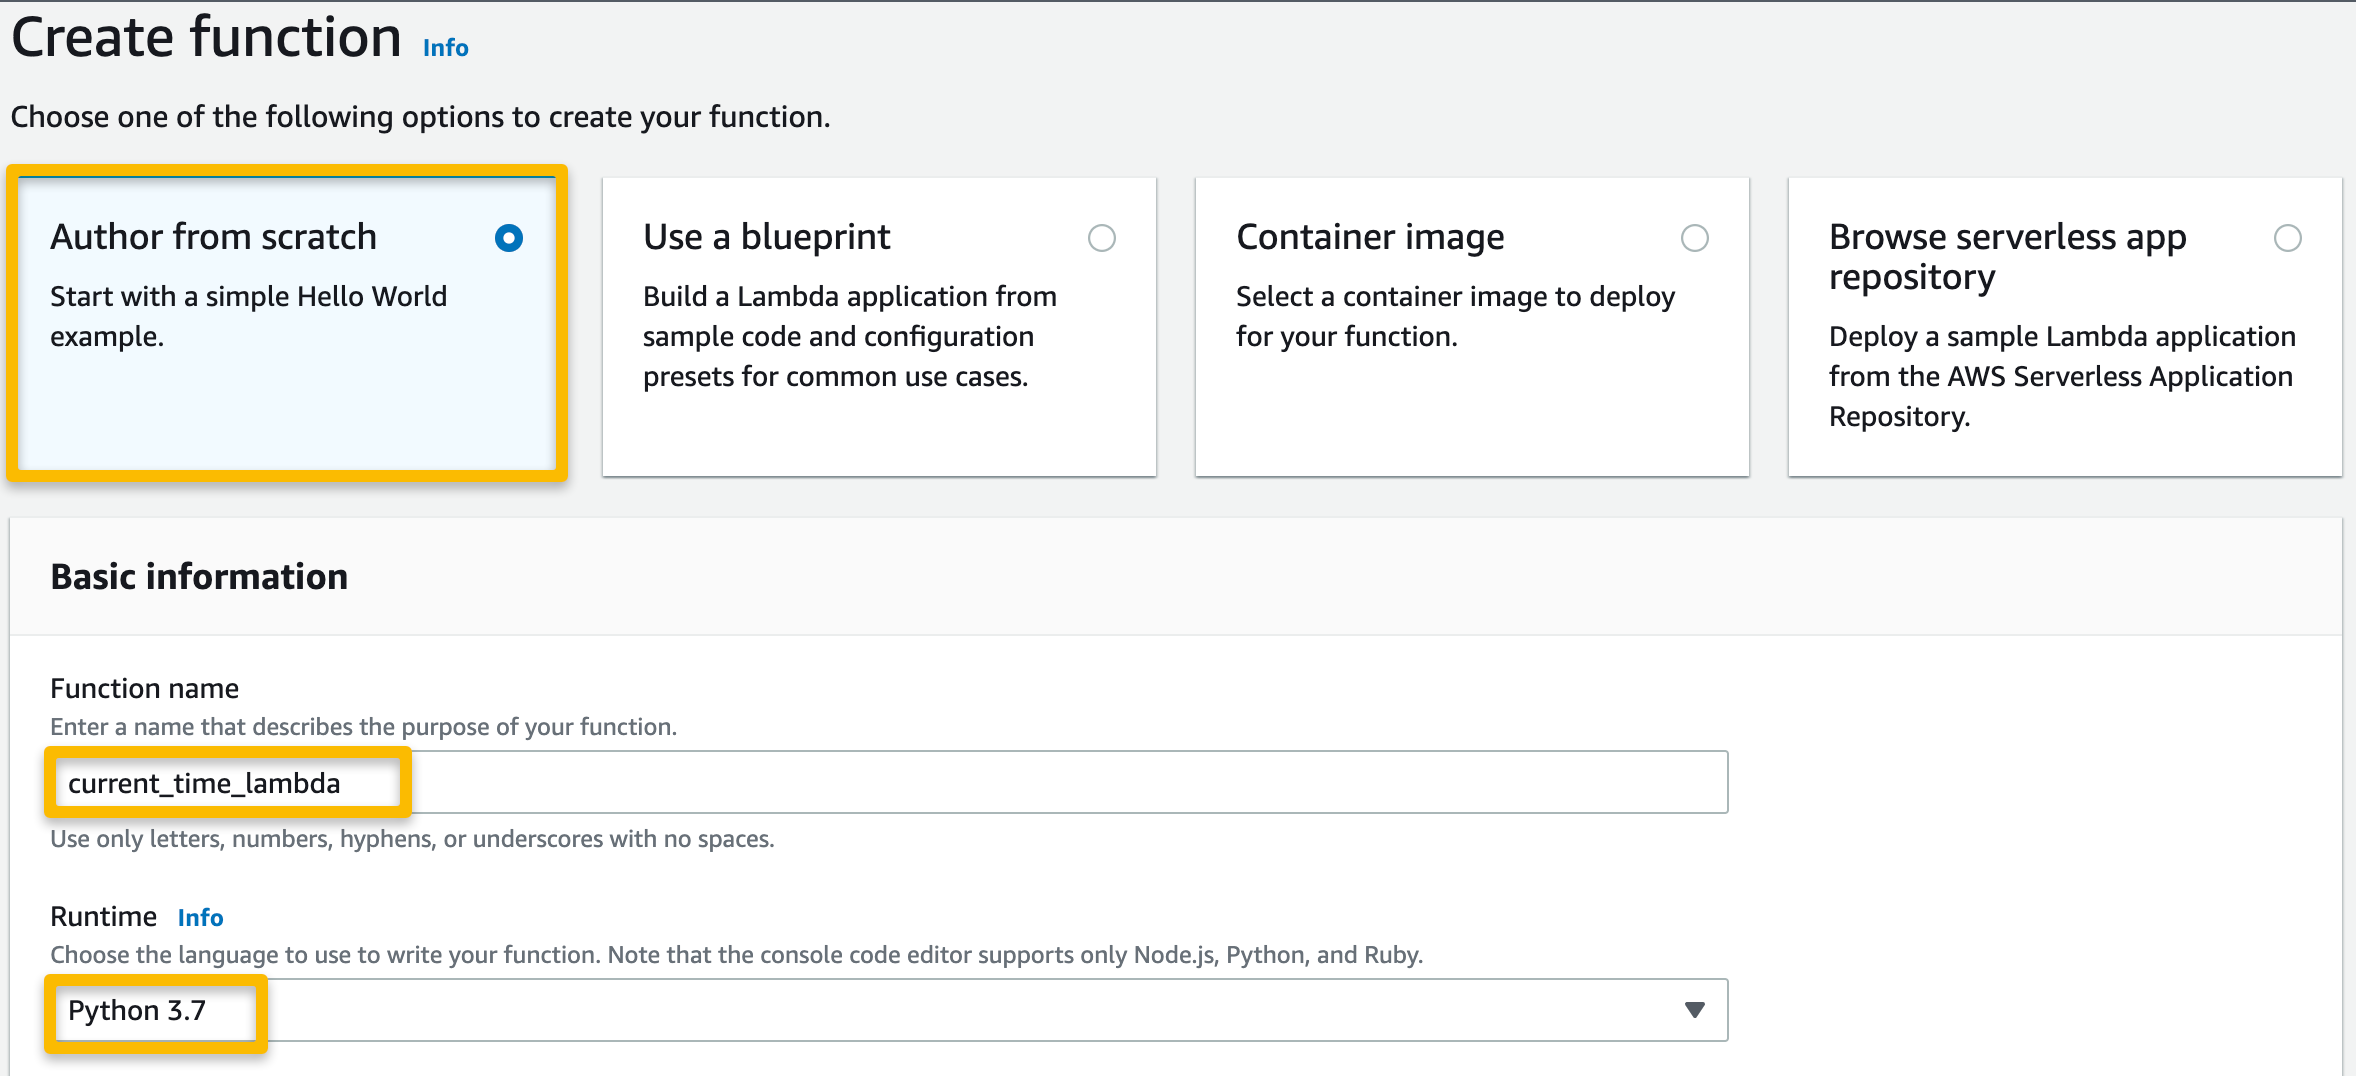
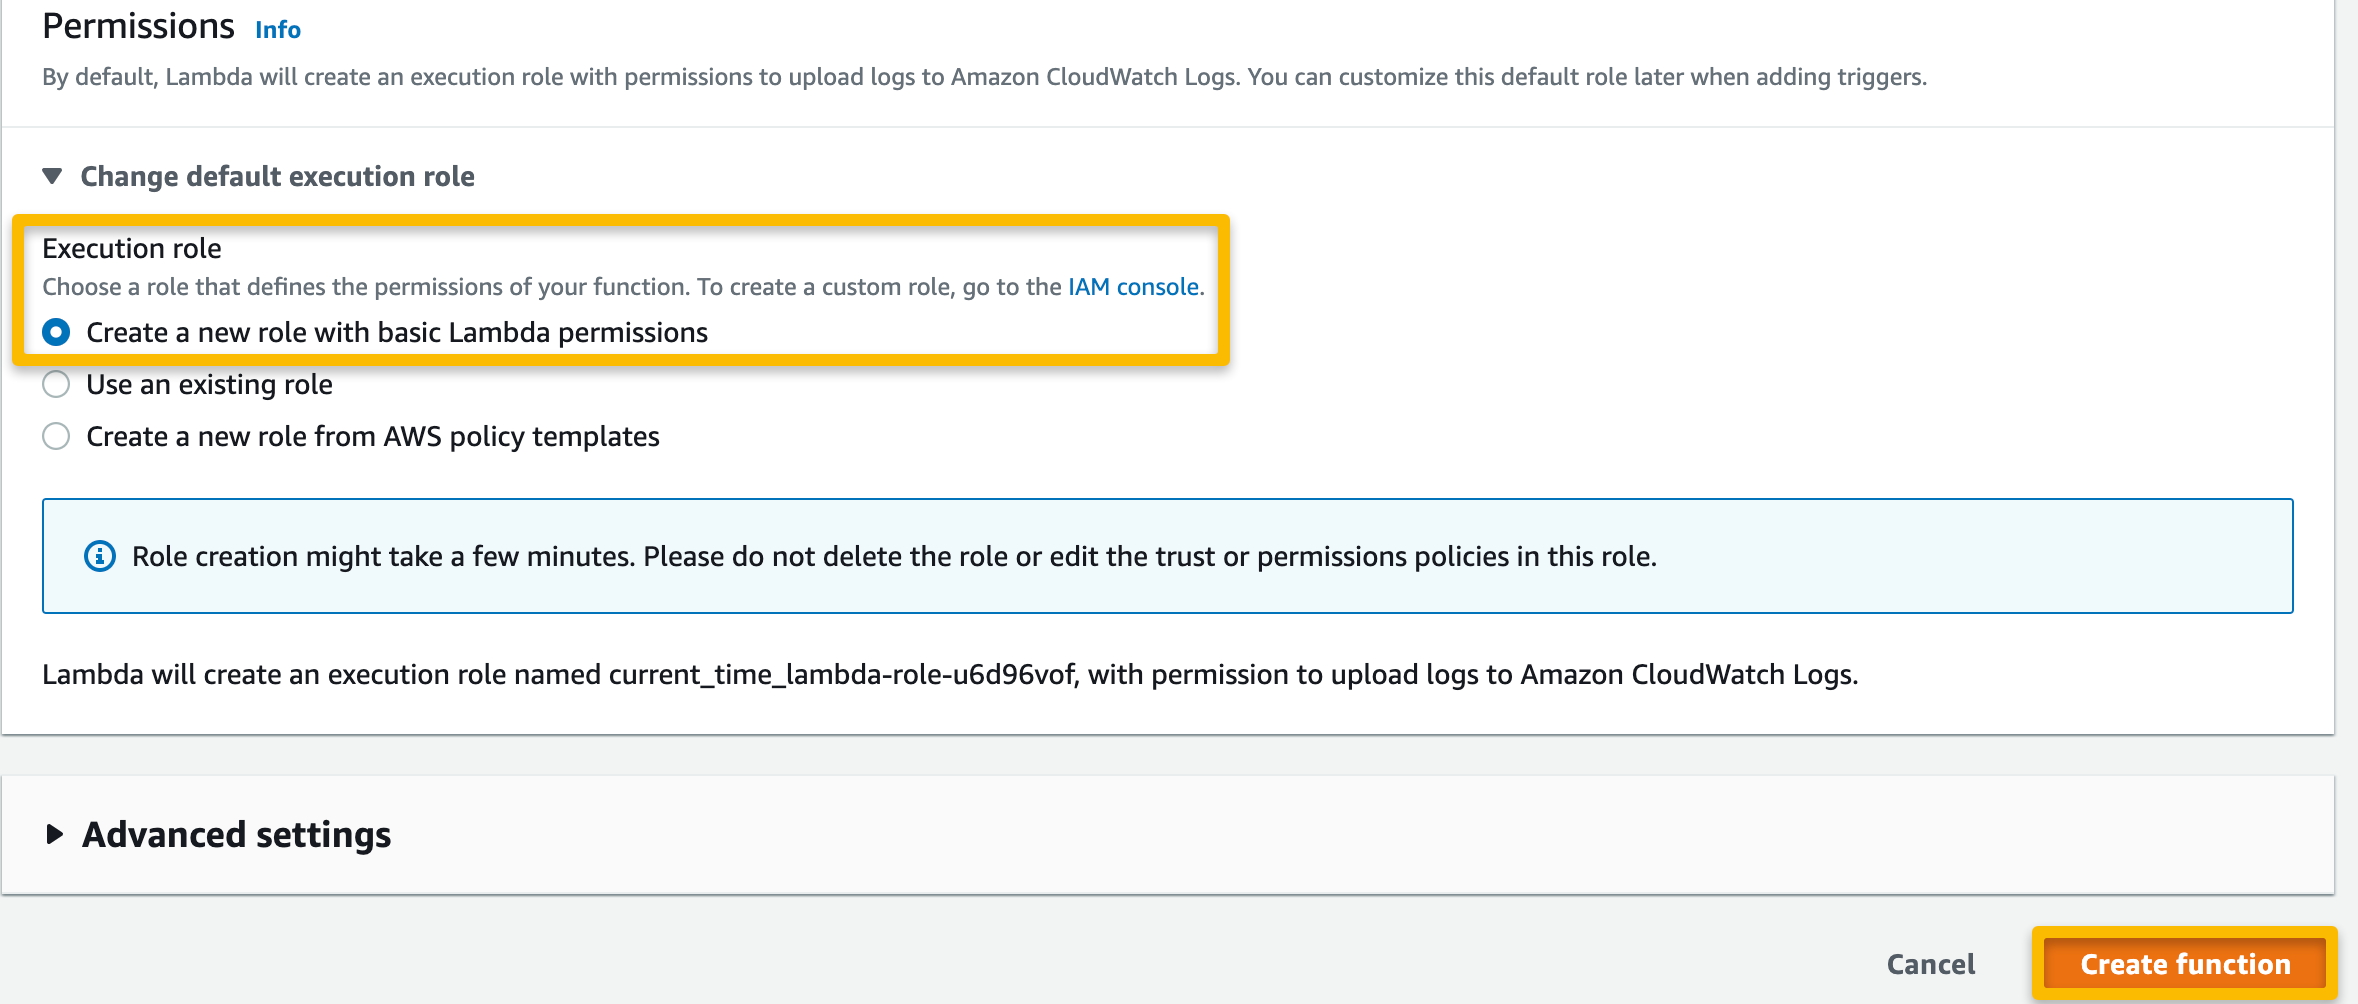
Select “Author from scratch” and provide a name for the function, select the runtime (Python3.7 or higher), and select the option to make a new execution role. Select “Create function”.
Once the function has been created, the new execution role must be modified to allow access to SQS so that when triggered. From the AWS Management Console, navigate to IAM, select “Roles” from the dashboard, and search for the newly created execution role by typing in the function name — it should populate automatically.
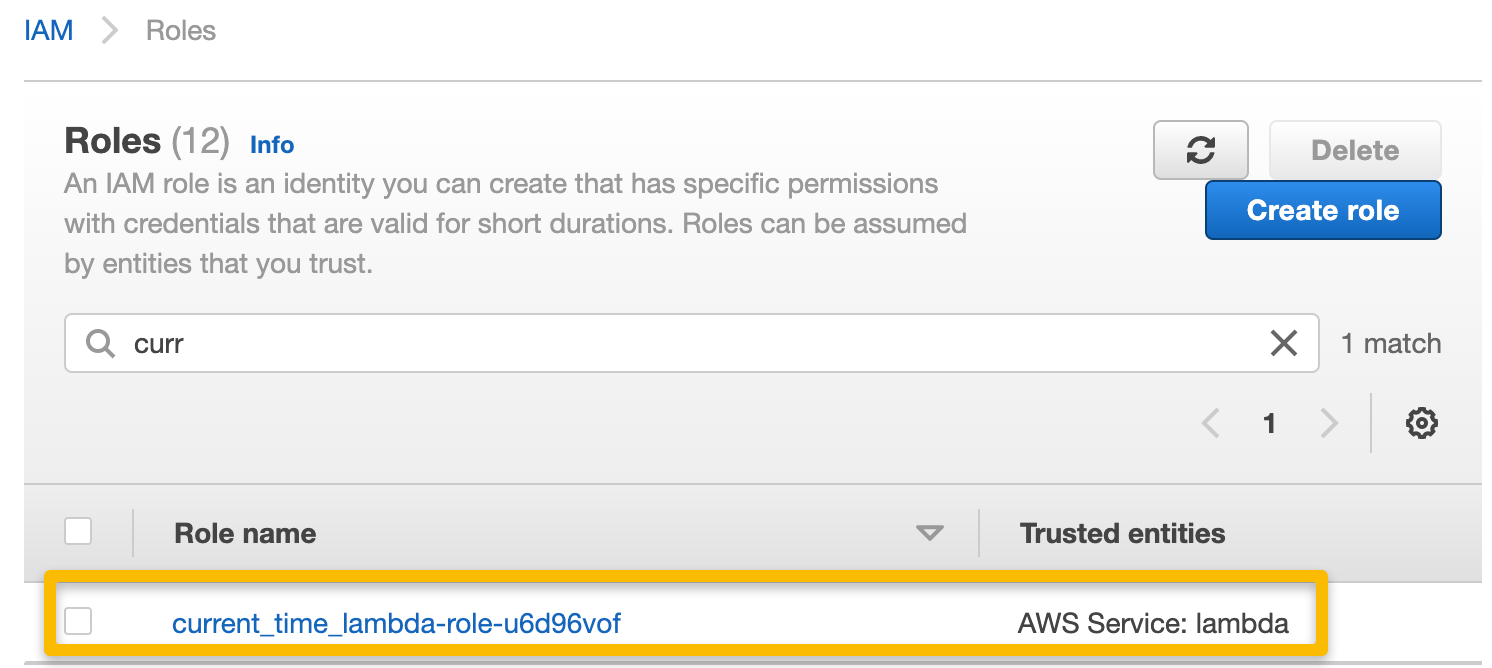
Search for the execution role that was created with the function and select it.
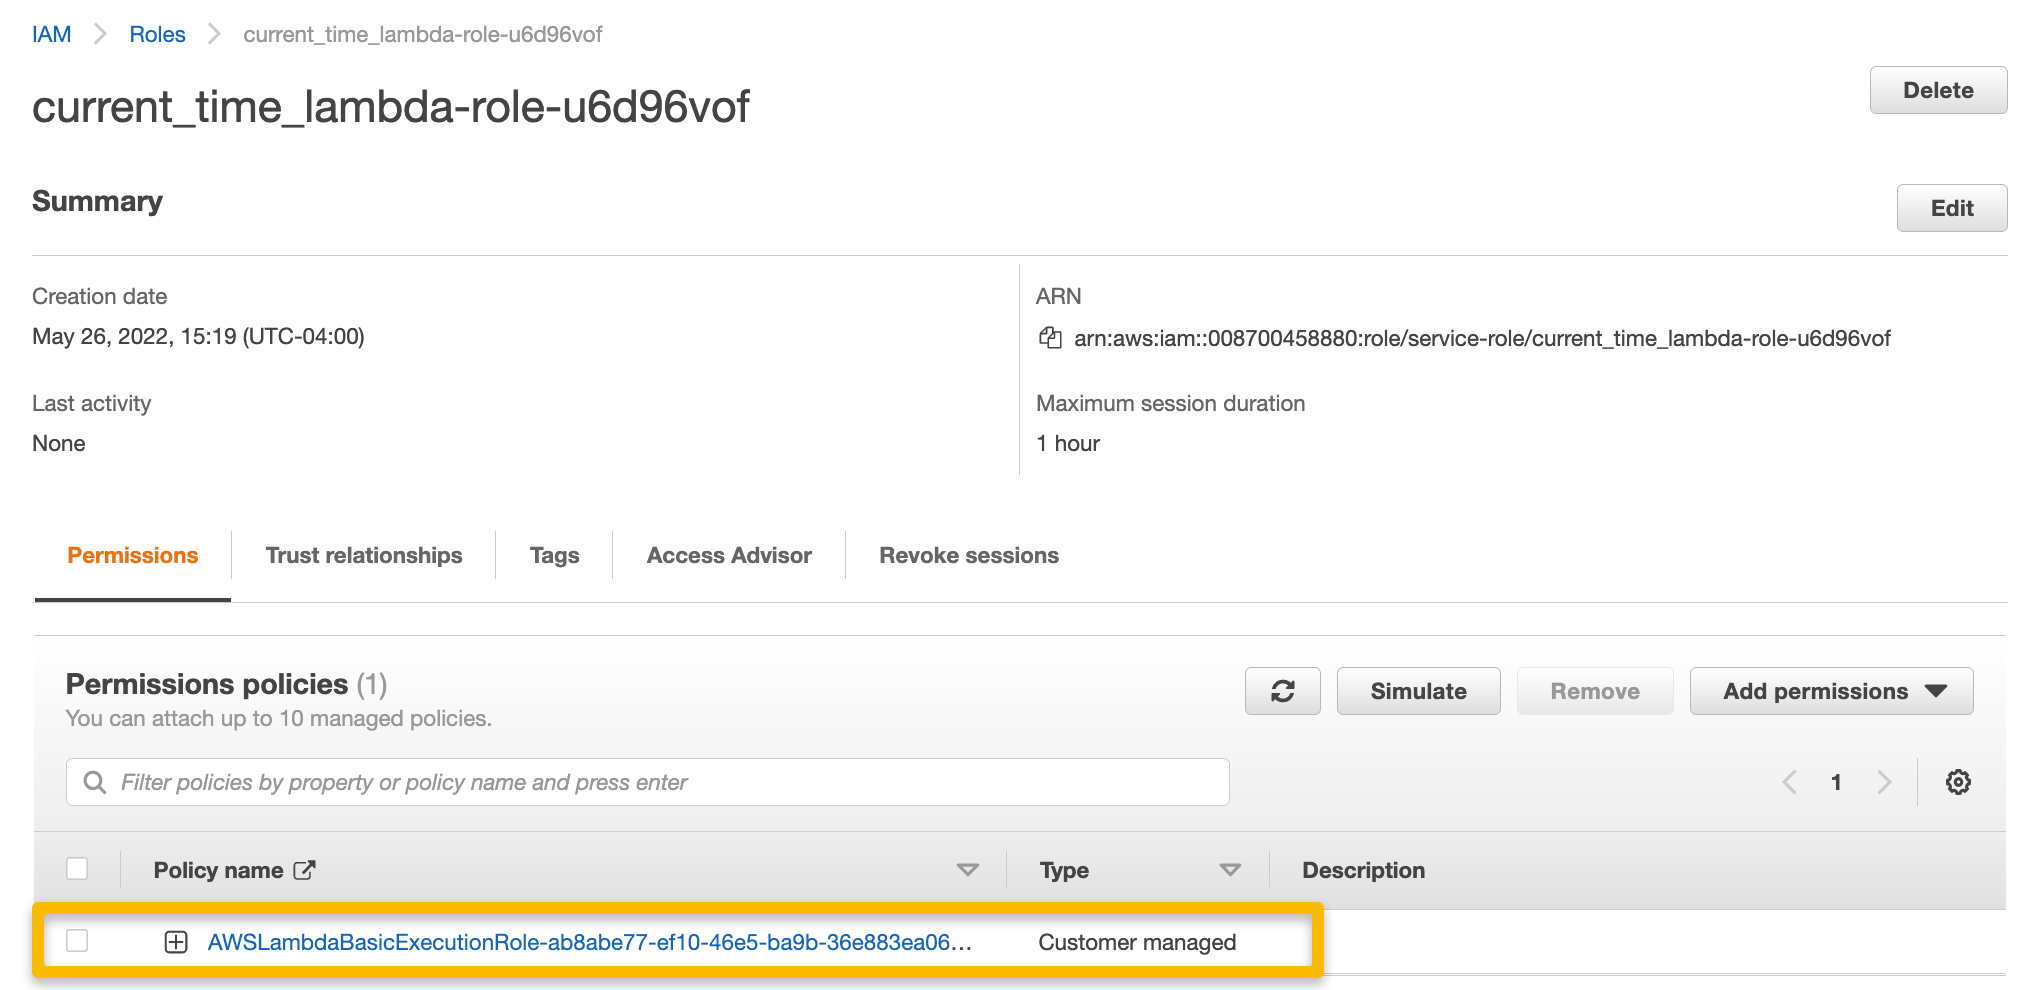
Click on the policy name to edit the policy directly.
The execution policy that was created with the function does not include permissions in the policy that would allow Lambda access to SQS, so we need to add that portion with the SQS queue ARN to the existing policy.
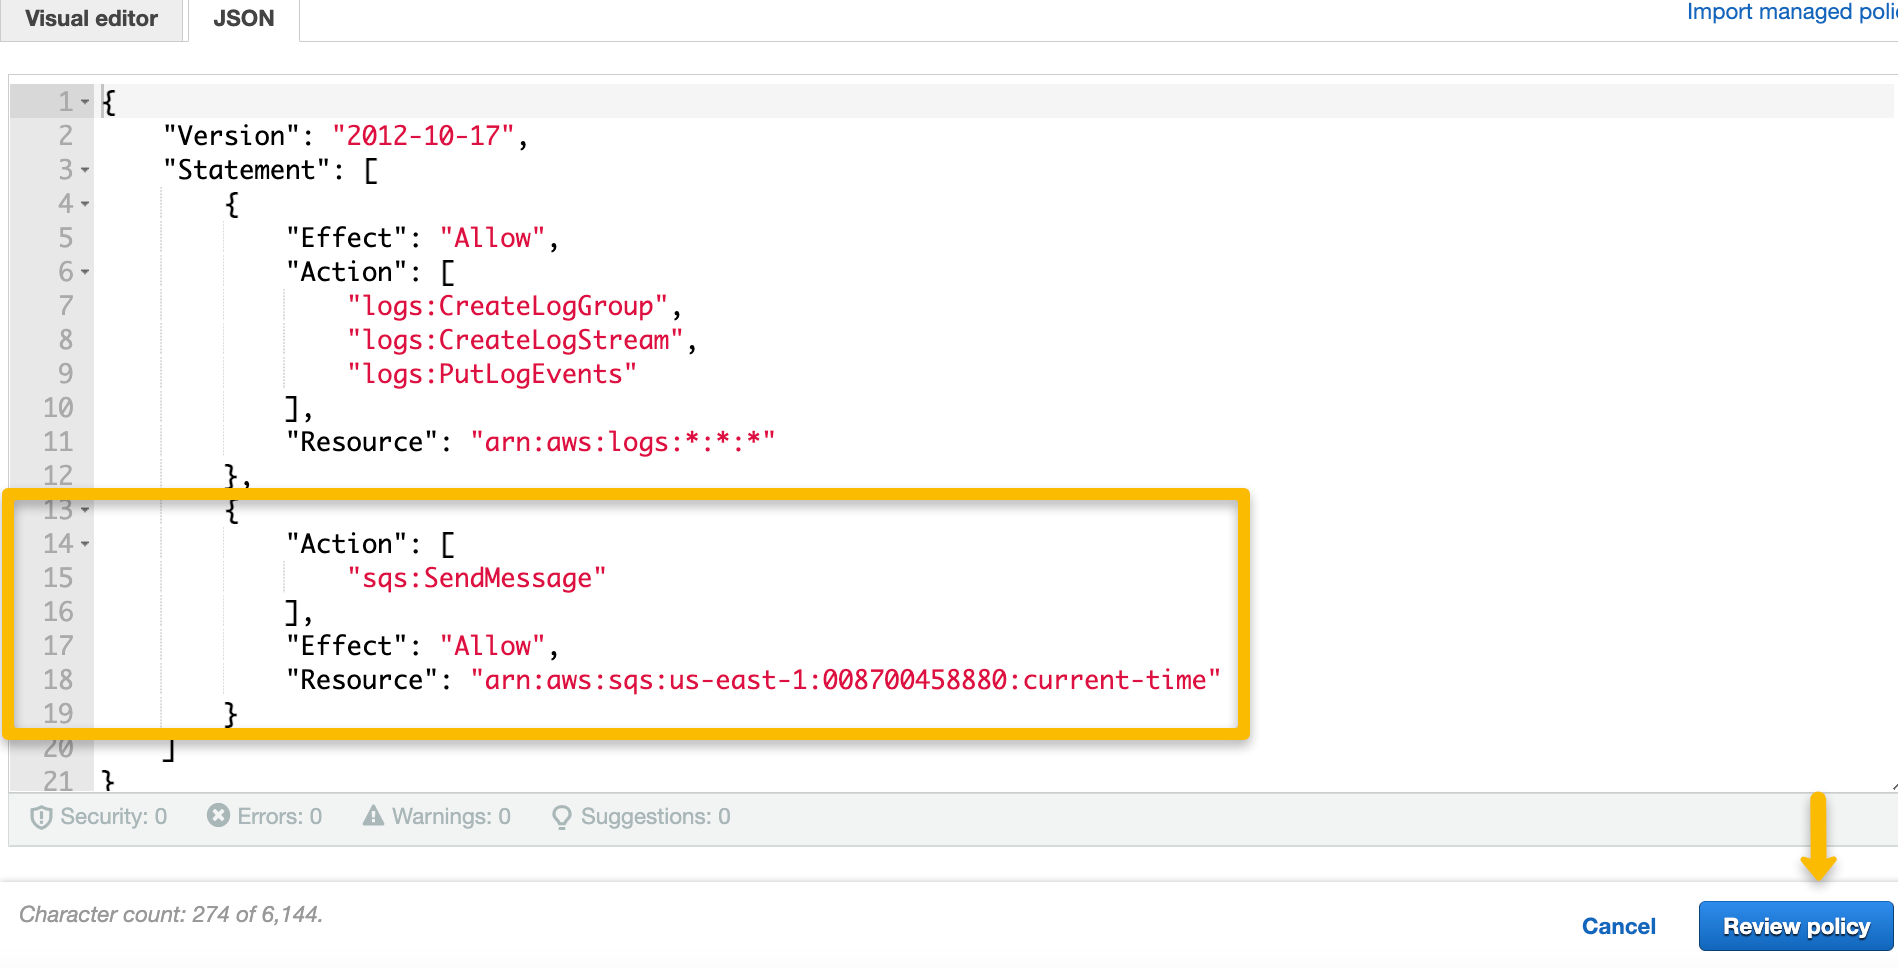
Click on the “Edit policy” and click on the JSON tab to view and edit the policy. Add the SQS permissions — to send messages to SQS — and include the ARN of the SQS queue in the Resource element.
Click "Review policy" and "Save changes" before navigating back to Lambda.
3. Modify the Lambda to send a message to the SQS queue. The message should contain the current time. Use the built-in test function for testing.
While in Lambda, open the function you recently created to view the Code source. Using the gist below, modify the existing Lambda function to send a message to SQS that contains the current time.
Note: The code to generate the current time produces a result in UTC, or Coordinated Universal Time. Working from the state of Virginia, I am composing this walkthrough during the month of May, which falls during Eastern Daylight Time. For me, UTC is currently 4 hours ahead, or noted as UTC -4. When Daylight Savings Time ends in my timezone, I will be on Eastern Standard Time, or UTC -5.
import json
import boto3

from datetime import datetime


def lambda_handler(event, context):

    now = datetime.now()
    current_time = now.strftime("%H:%M:%S %p")

    sqs = boto3.client('sqs')
    sqs.send_message(
        QueueUrl="https://sqs.us-east-1.amazonaws.com/xxxxxxxxxxxx/current-time",
        MessageBody=current_time
    )
    return {
        'statusCode': 200,
        'body': json.dumps(current_time)
    }
view rawgistfile1.txt hosted with ❤ by GitHub
Be sure to include the URL of the SQS queue created in the first step of this walkthrough.


Be sure to click “Deploy” to save any changes made in order to apply them to the test. Test the function code by configuring a “test event”.
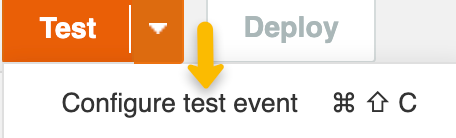
After clicking “Test”, there will be a prompt to “Configure Test Event”.
I named and configured a test event using the template called API Gateway — AWS Proxy as I will be using an HTTP API trigger for this function.
(The template for SQS only tests the Lambda receiving a message from a queue rather than sending a message. I can easily check my queue from the SQS dashboard to ensure a message was sent from the Lambda function after testing it.)
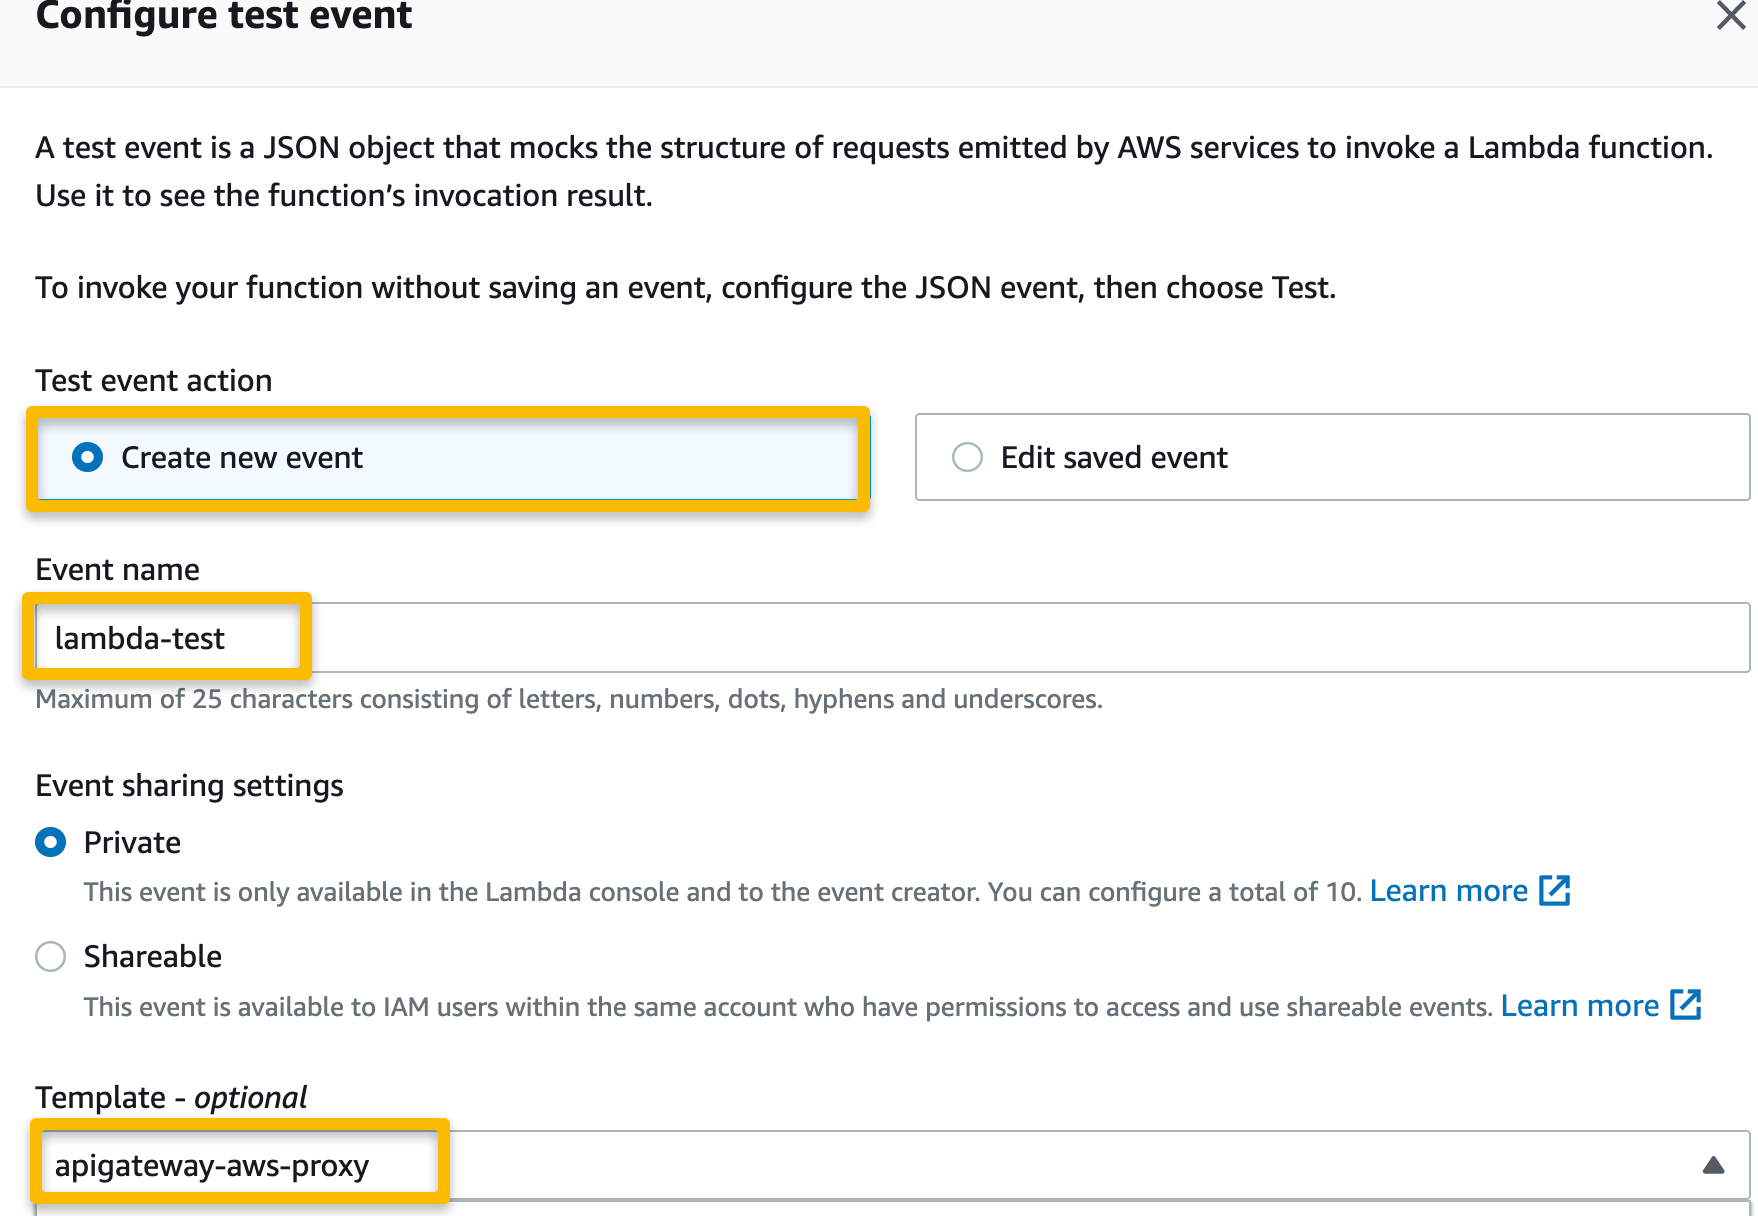
After naming and configuring the test event, click “Save” and proceed to test the function.
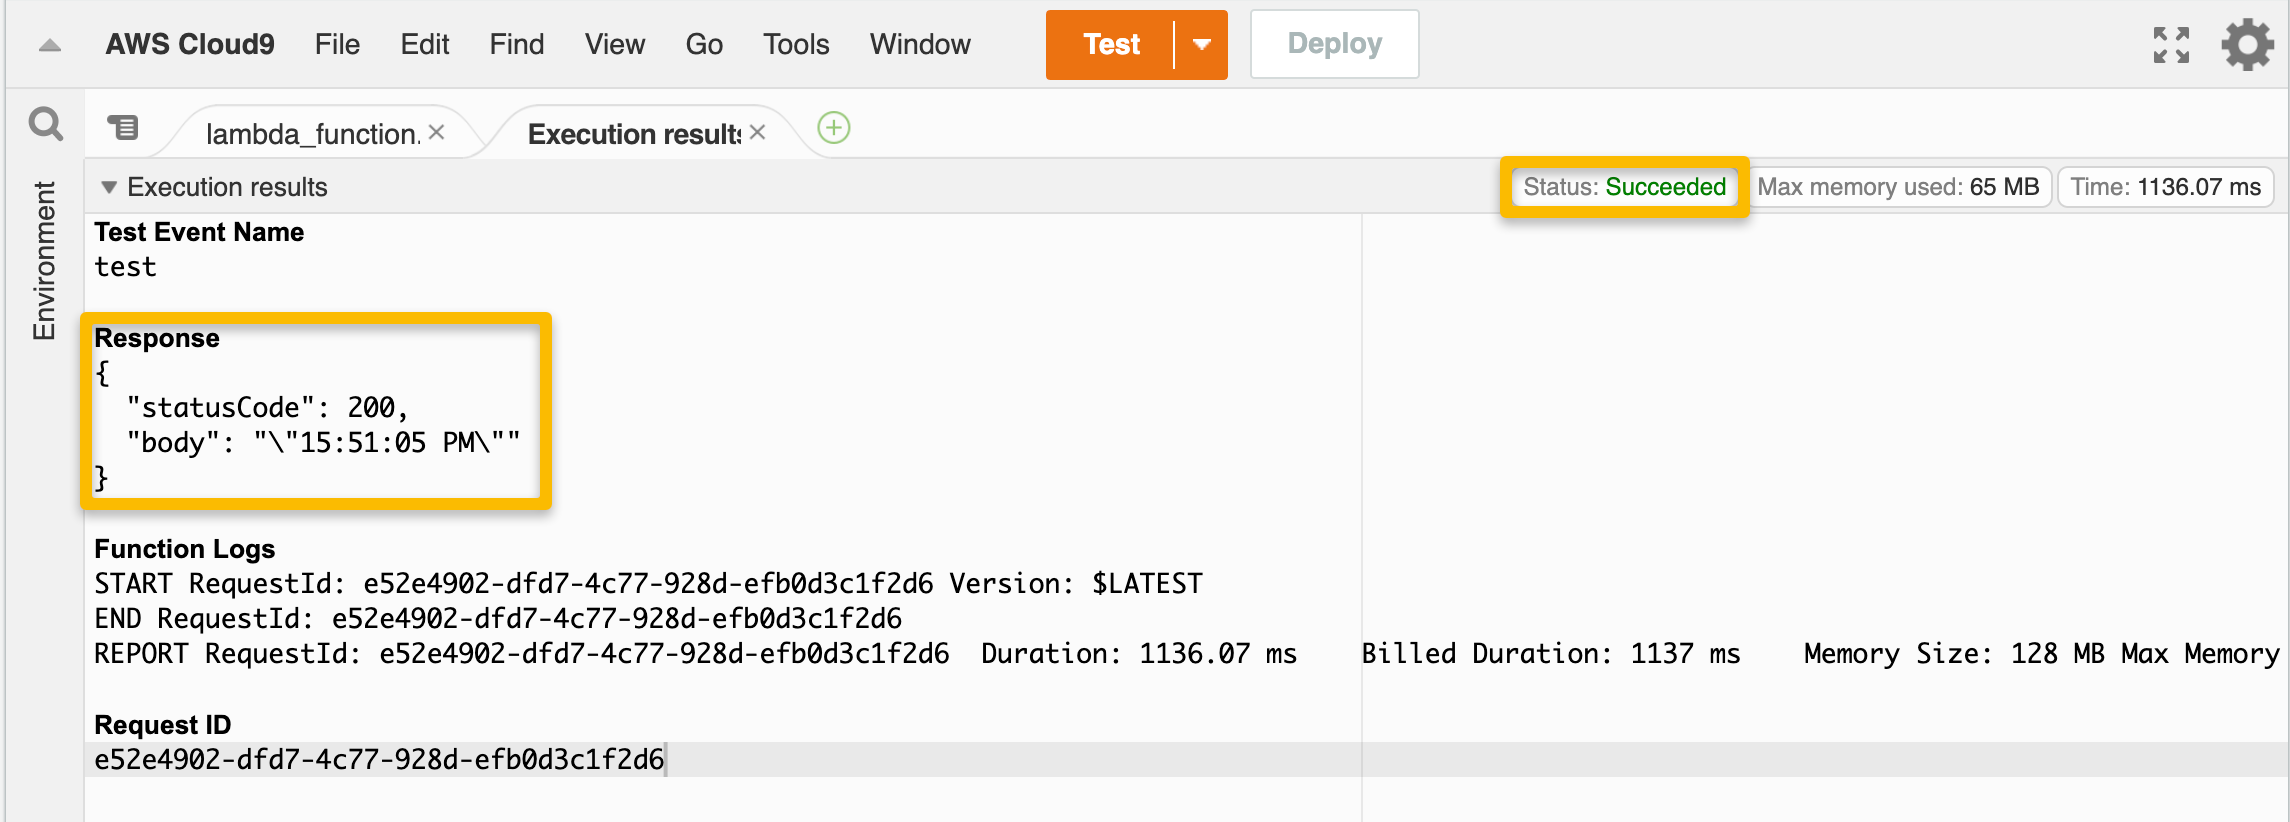
The “Status” and “Response” portions of the execution results should show that the test was successful and that the current time was returned from the function.
4. Create an API Gateway HTTP API type trigger.
While still on the Lambda function page, click "Add trigger" under the Function overview heading to create and configure the API Gateway trigger.
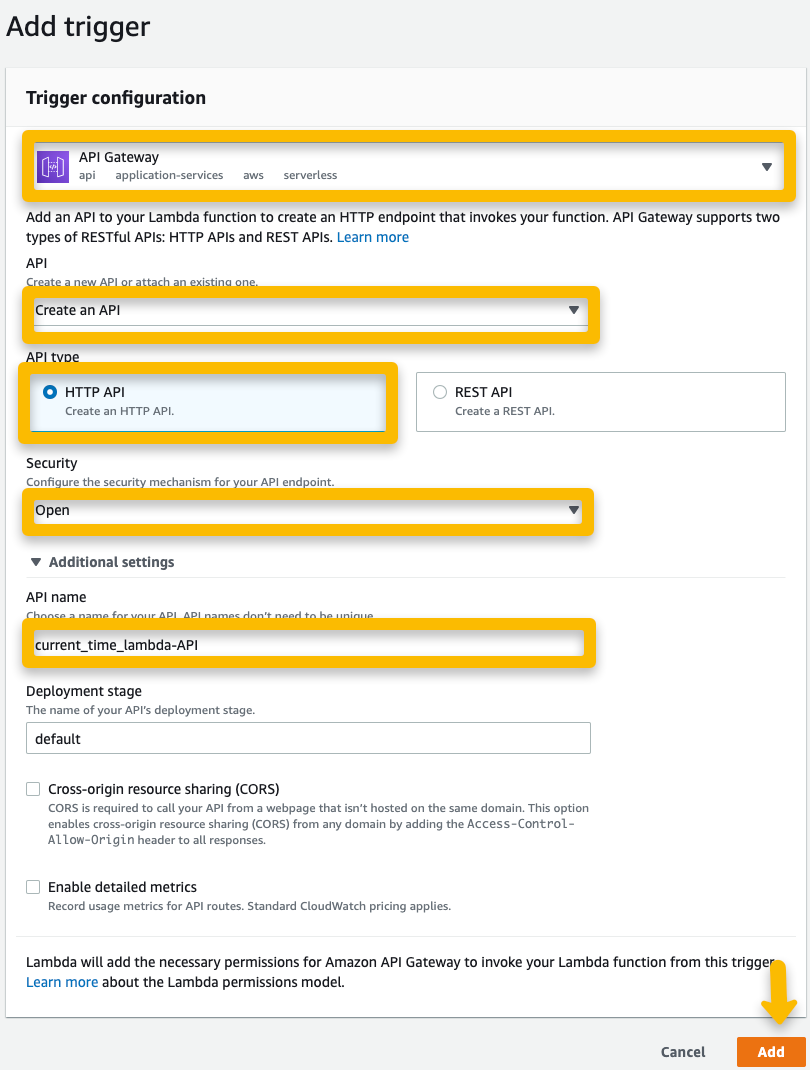
Add the trigger to the function.
5. Test the trigger to verify the message was sent.

On the Lambda function page, select the “Configuration” tab and then “Triggers” from the side dashboard. Copy and paste the API endpoint URL into the browser to invoke the function.
Once the API endpoint URL has been accessed, two thing should happen: the user should be able to view the current time in the browser, and the message should appear in the SQS queue created at the beginning of the walkthrough.
 The endpoint URL should return the UTC time.
 The queue gains a message with each function invocation. (Yes, I tested this 26 times…)
In closing, this exercise was to help demonstrate how a simple serverless workflow can be configured with AWS services and Python.
Comments
Loading comments…