
Hello readers, we'll be performing some nice operations together but for us to do that, there are some things that I'll love you to have/set in place of which are:
-
An AWS account with root privileges.
-
Root privilege permissions for a terminal tool.
If you're ready, let's get started. In this article, you'll learn how to:
-
Create an IAM user from a user group with a customer managed policy.
-
Add IAM user credentials to Jenkins.
-
Build a Jenkins Pipeline using Source Control Manager (SCM) technique with declarative syntax.
AWS
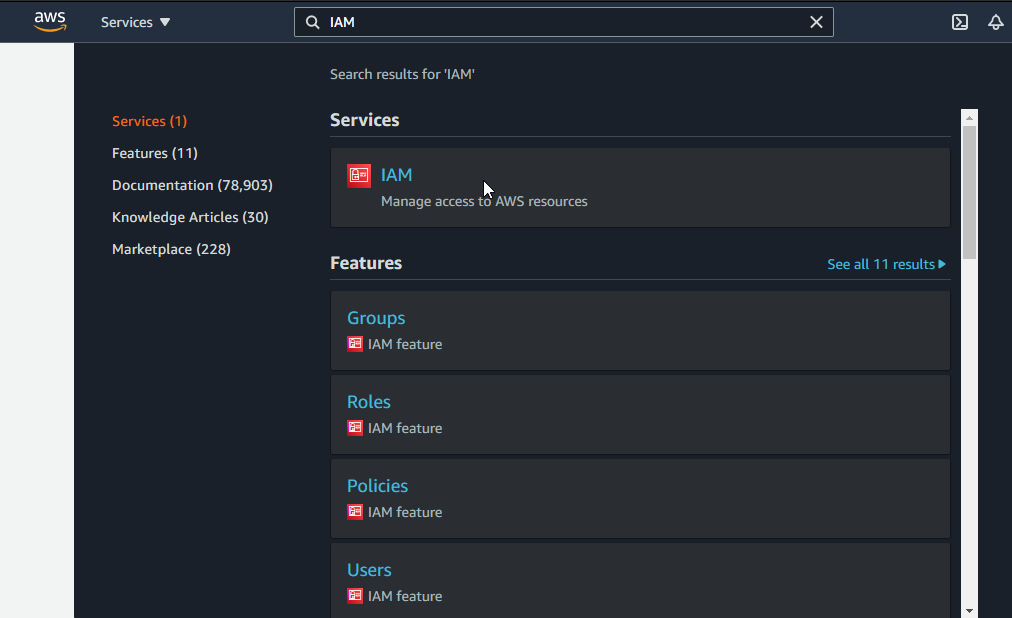
We'll start by logging in to AWS Management console as a root user and search for the IAM Service.
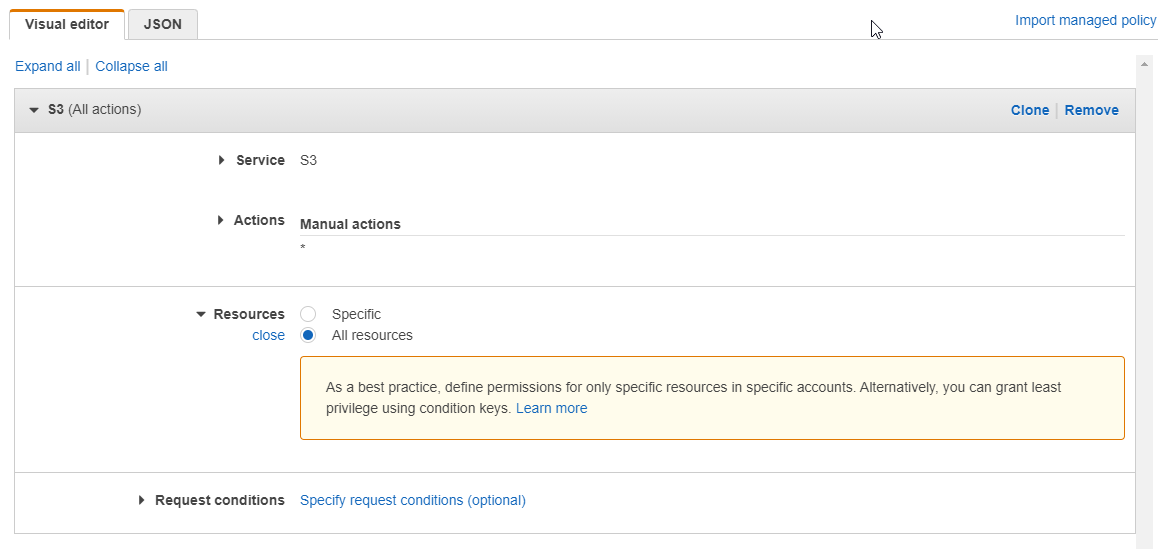
On the left hand navigation pane, select Policies. A policy is set of permissions for various services connected together as a single entity. To create a policy, click Create Policy, for the service, search and select S3. For the actions and for simplicity purpose, check the All S3 actions (s3:) and for resources, select All resources.
For the purpose of this article, Jenkins will be installed locally. If you desire to harness AWS EC2 you can use the same technique above to configure permission for EC2 service. Jenkins uses port 8080 so, do well to configure your security group to allow TCP connection on port 8080.
It's a good practice to tag resources for easy identification and hence, adding a key-value pair tag to the policy would be nice.
After selecting the service for the policy, click Review and name the policy with its description. Click Create Policy to create your customer managed policy.

As an organization, there are times new people would be joining the team as well as others leaving. To avoid the repeated tasks of setting up user permissions, user groups are used. On the left navigation pane, select User groups. Click Create group and enter a User group name. In the attach permissions policy, select the policy created in the previous step and click Create group.
Let's create a user having the same permissions of the group. On the left hand navigation plane, select Users. Click Add users and enter a User name for the user. Give Programmatic and AWS Management Console Access to the user. Add the user to the group created in the previous step and after review, Create user.
The Access ID, Secret access key and password are very important and appear once. It will be necessary to copy them and keep in a safe place. Follow the AWS link to login to the created IAM user account.
On the IAM user management console, navigate to S3 service and create bucket accessible to the public.
Jenkins
Install Jenkins on your local machine by following the installation from here.
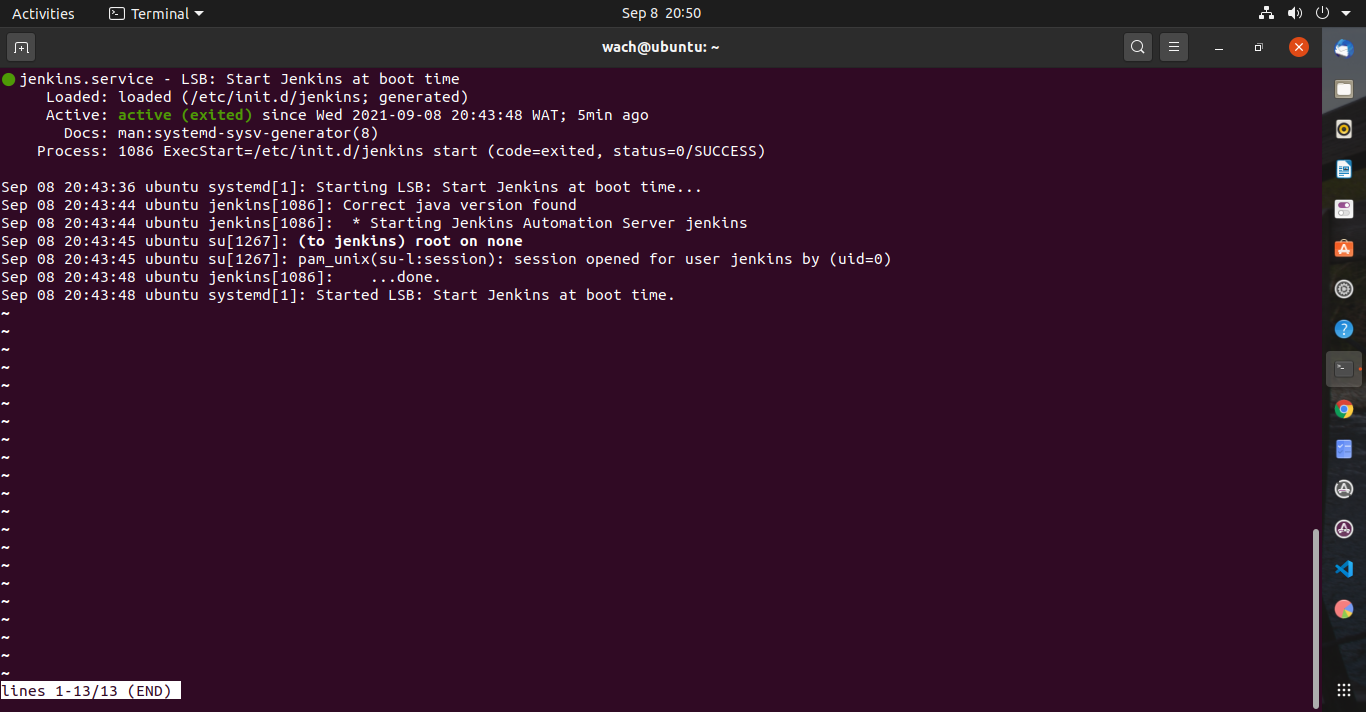
I am using Ubuntu terminal and to start Jenkins, run _systemctl start jenkins_
To confirm Jenkins started, its status is checked using: _systemctl status jenkins_
Let's access the Jenkins platform. On your browser, open the Jenkins classic UI with localhost:8080 (if you're using an EC2 instance, public_ip:8080). Follow the instructions to set up a user and password for the Jenkins console. After the user has been created, login to Jenkins using the created credentials.
Jenkins allows for the usage of plugins for some of its functionality and we will be using the Pipeline AWS Steps and S3 Publisher plugins. Click Manage Jenkins > Manage Plugins > Available Tab. Search and install Pipeline: AWS Steps and S3 publisher plugins. After the plugin installation, restart Jenkins.
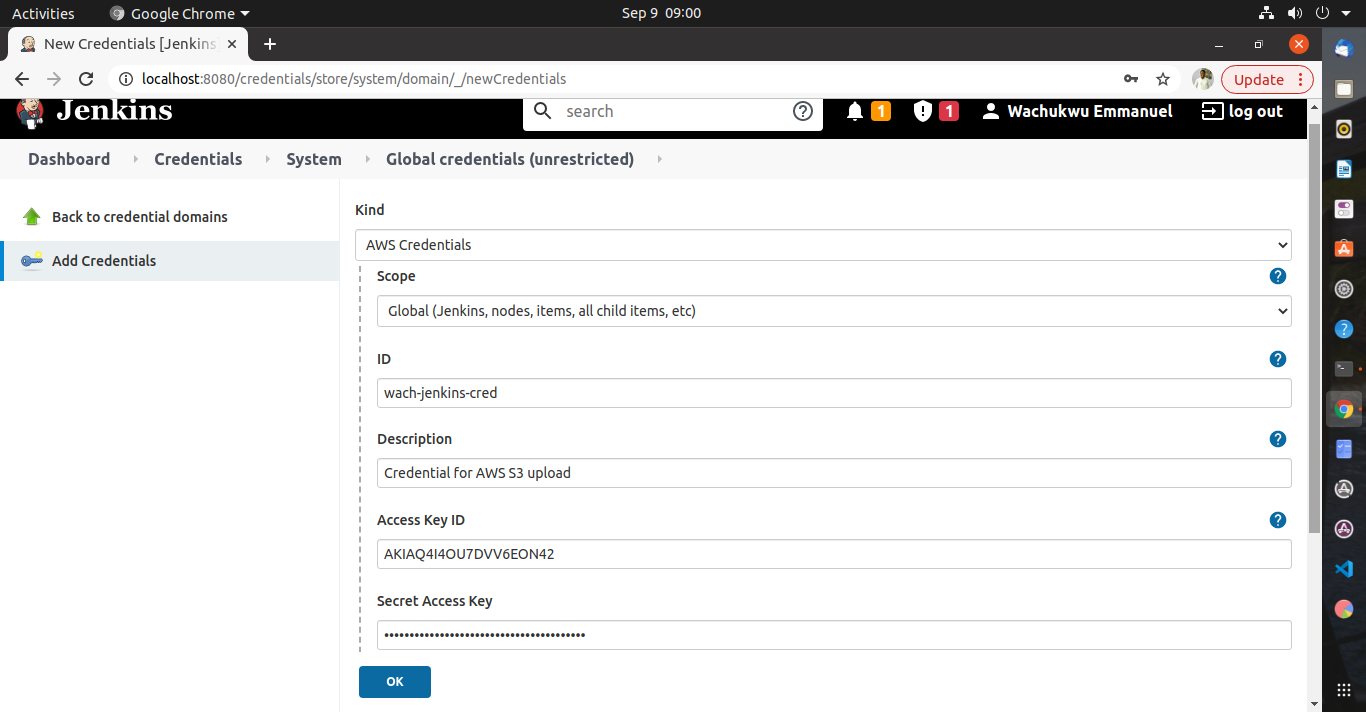
Credentials serve as keys in which a guest (Jenkins) can have access to a particular host (AWS). To add the IAM user credential to Jenkins, click Manage Jenkins > Manage Credentials > Click Jenkins store > Global credentials. From the left pane, click Add Credentials. Specify the following in their respective fields:
Kind: AWS Credentials

Scope: Global (Jenkins, nodes, items, …, etc)

ID: # Specify an ID of your choice

Description: #Specify its description

Access ID: #IAM user Access ID

Secret Access Key: #IAM user Secret Access ID
The repository containing the Jenkinsfile can be found here. Fork, clone and modify the contents to suite your credentials and resource specifications.
Do not be tempted to use mine, it won't work 😄 unless obviously, you created your resources with exactly what I used.
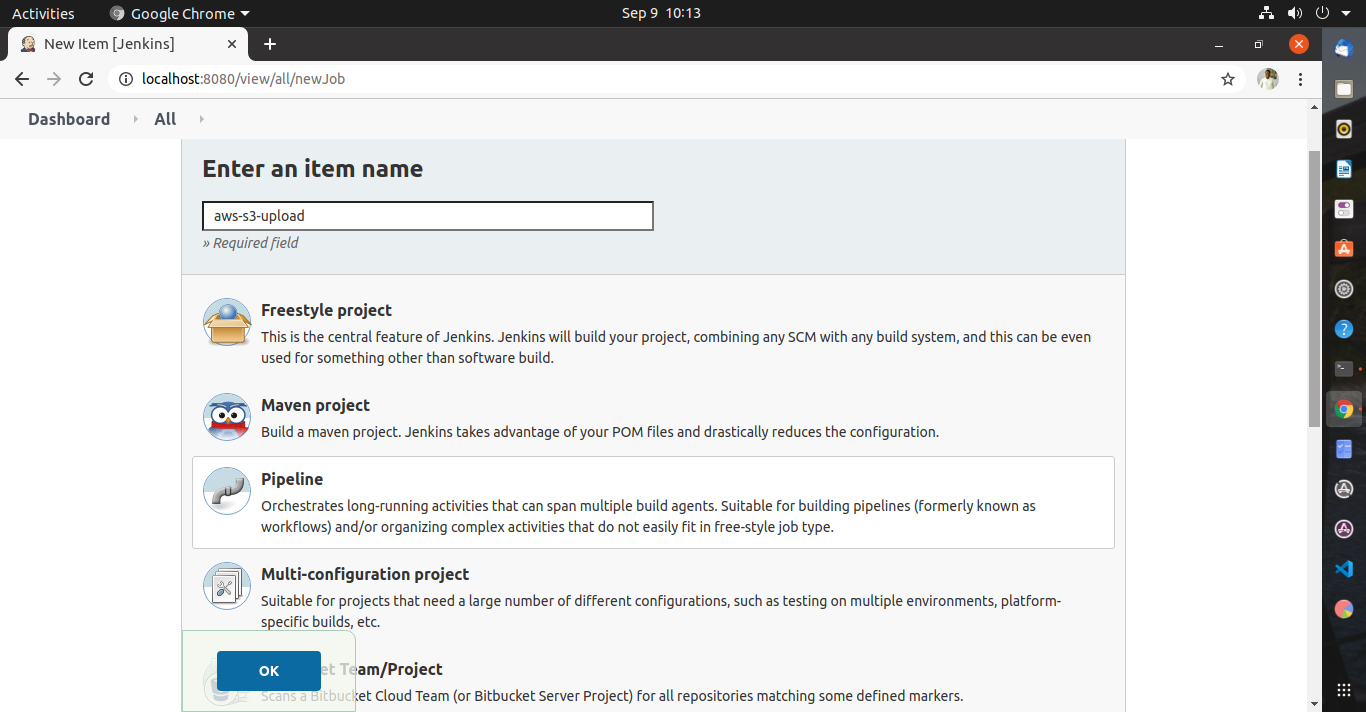
Let's set up our first Jenkins project. From the left pane, select New Item. Enter a new item name and select Pipeline as the item type.
Since we will be using a Jenkinsfile that was committed to a repository, we'll use the Source Control Manager as the source of our pipeline script. Click Pipeline tab and change the Definition to Pipeline script from SCM. Specify the following in their respective fields:
SCM: Git

Repository URL: [https://github.com/Wach-E/jenkins-aws-upload](https://github.com/Wach-E/jenkins-aws-upload)

Branch Specifier: */main

Script Path: Jenkinsfile
Click Apply and Save.
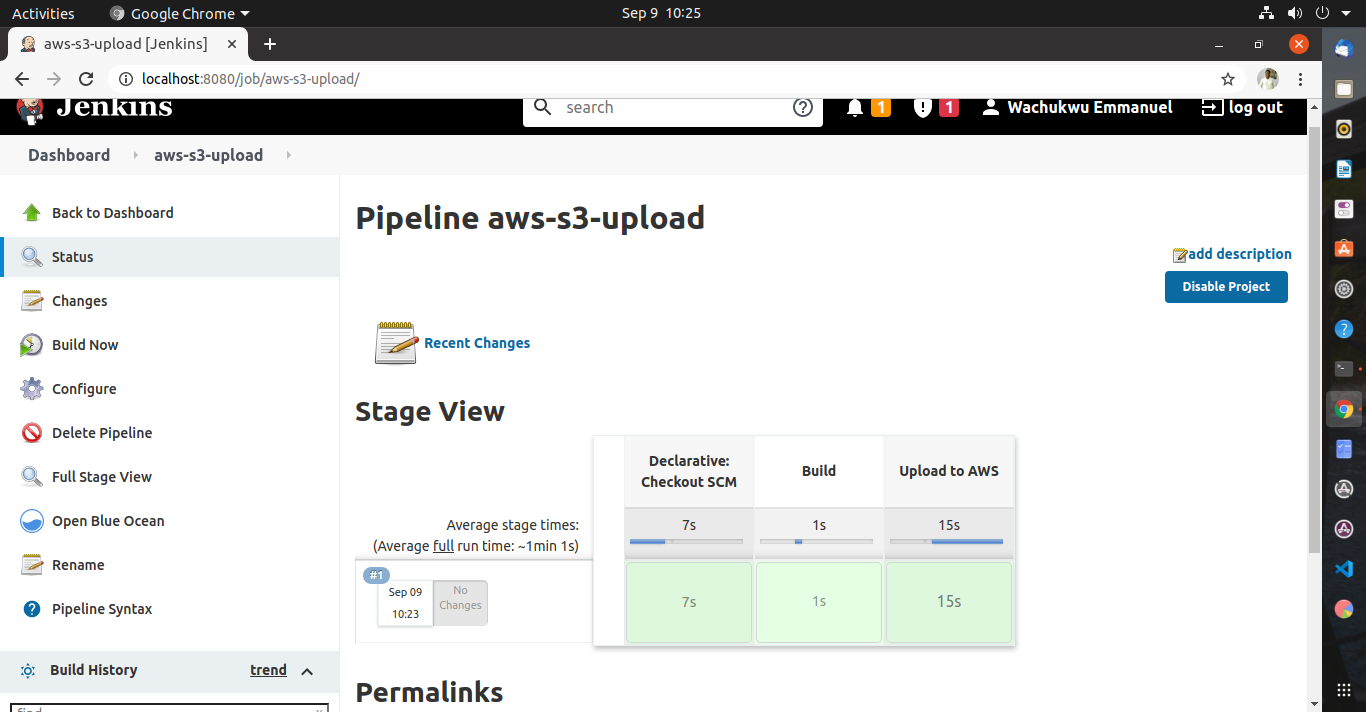
From the left pane, click Build Now. After the build of each stage, the time spent per stage is displayed on the project dashboard. Check the content of the S3 bucket to confirm the file upload was successful.
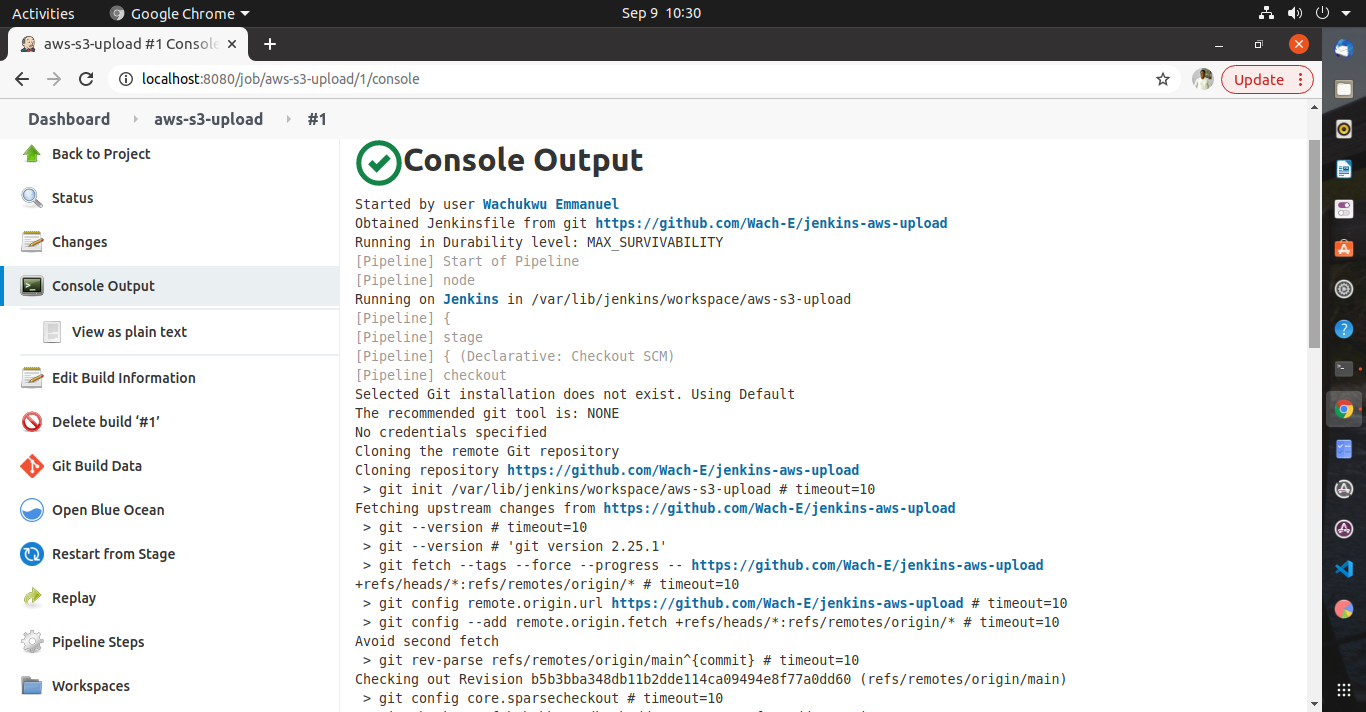
From the left pane, scroll down to Build History, select the build number and select Console Output to see the step wise build output.
Congratulations! You have successfully implemented AWS best practice in creating an IAM user and created a Jenkins Pipeline for file upload to an S3 bucket. 👏
Jenkins is a very powerful CI/CD tool and can be used to perform various operations with different techniques that suites the product design. You can take this learning further by configuring Build Triggers 💥 for this project.
If you found this article helpful, leave some claps 👏 and share to help others see it 🙂
Comments
Loading comments…