Introduction
Amazon Elastic Compute Cloud (EC2) instances are the backbone of many cloud-based applications. To ensure the data and configurations of your EC2 instances are safe, AWS provides a powerful tool called “Snapshots.” In this blog post, we will walk you through the process of restoring an EC2 instance from a snapshot.
What is an EC2 Snapshot?
An EC2 snapshot is a point-in-time copy of an EBS (Elastic Block Store) volume. It captures the data, configurations, and metadata of the volume, providing a backup mechanism to recover instances in case of failure, data corruption, or other issues.
Prerequisites
Before we dive into the restoration process, make sure you have the following in place:
- An AWS account.
- An existing EC2 instance.
- A snapshot of the EBS volume associated with that instance.
If you don’t know how to create an EC2 Instance you can read the below blog and create an EC2 Instance.
If you don’t know how to create a snapshot from EBS volume you can follow the below link.
Restoring an EC2 Instance from a Snapshot
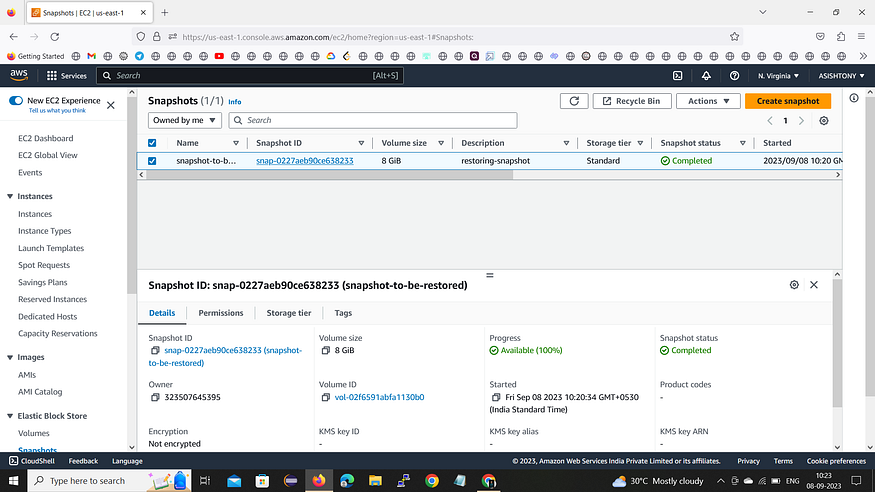
- Find and select the snapshot you want to use to restore your EC2 instance.
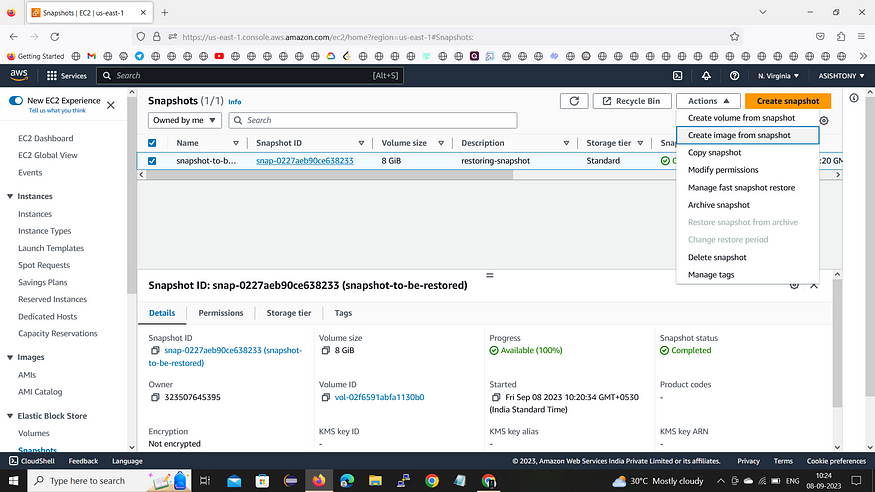
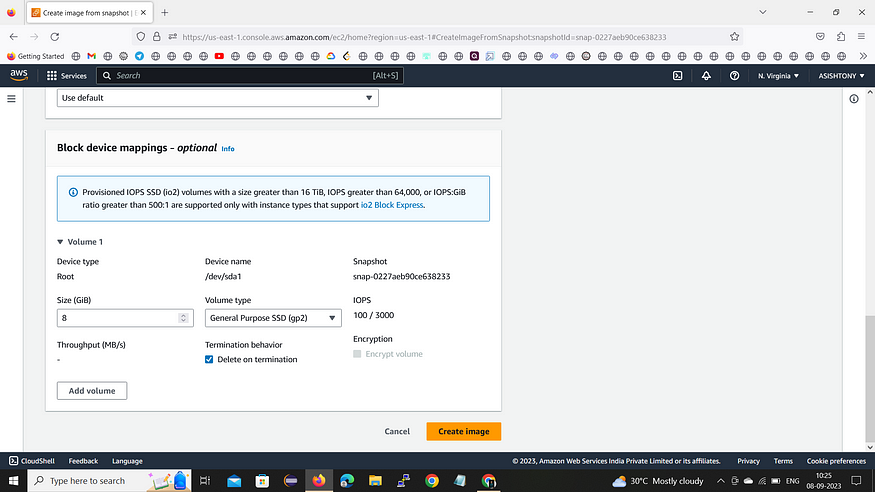
- In the “Actions” dropdown menu, select “Create Image from snapshot”.
- Fill in the required details like Name, Description, and any additional settings you want to configure.
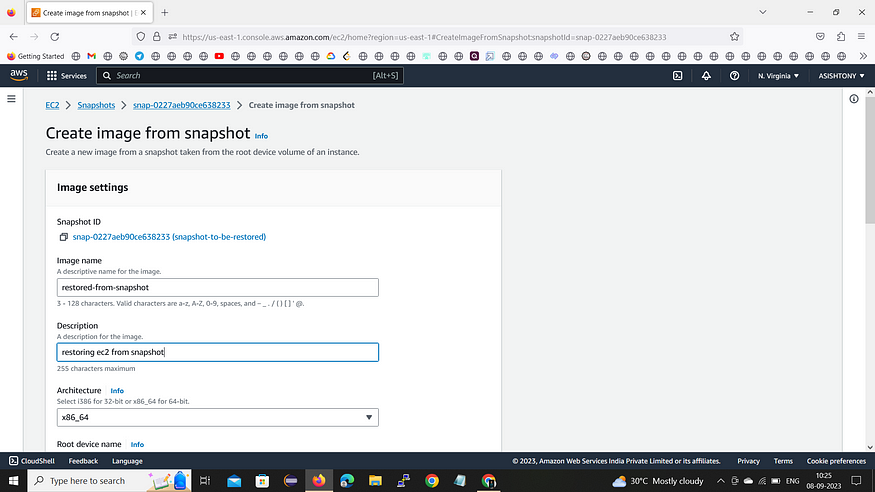
- Click “Create Image”.
- Still in the EC2 dashboard, select “Launch Instance”.
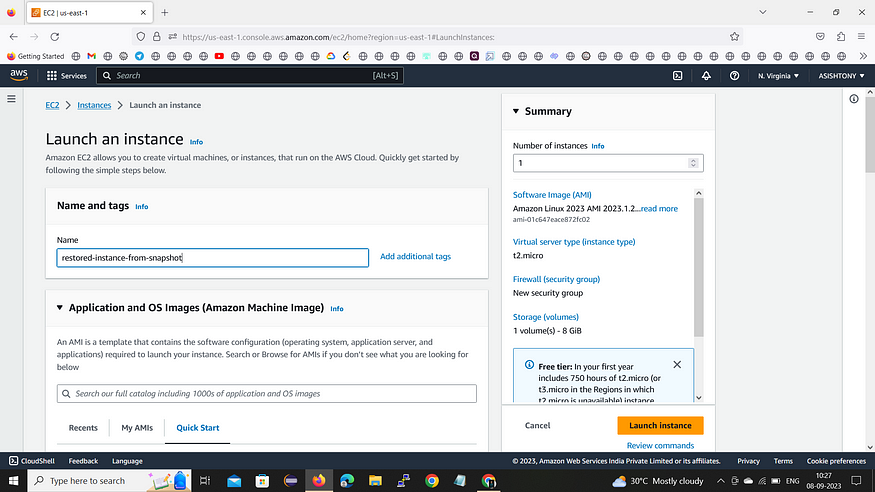
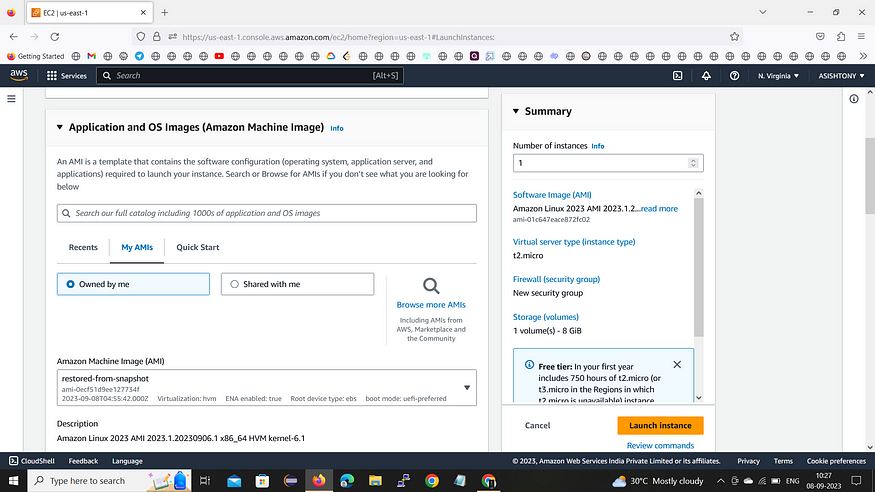
- Under “My AMIs” in the left sidebar, you should see the newly created AMI. Select it.
-
Choose the instance type and other configuration details.
-
Continue through the steps, configuring instance details, storage, security groups, and tags as needed.
-
Review your settings and click “Launch instance”.
Accessing Your Restored Instance
- Once the new instance is running, note down its public DNS or IP address.
- Use an SSH client or RDP (Remote Desktop Protocol) to connect to your instance depending on your operating system.
- For Linux instances: Use an SSH client with the key pair associated with the original instance.
- For Windows instances: Connect using RDP and the appropriate username and password.
Important Considerations:
- Make sure to choose an AMI that matches the original operating system and software configuration of your original instance.
- If the original instance was associated with an Elastic IP address, you may need to reassign it to the new instance.
- Double-check security group rules and network settings to ensure the new instance has the necessary access.
Conclusion
You have successfully restored an EC2 instance from a snapshot using an Amazon Machine Image (AMI). This method allows you to recreate an instance with the same configuration as the original, making it useful for backup and recovery scenarios. Always ensure you have backups in place and regularly test your restoration process to maintain data integrity and availability.
Comments
Loading comments…