CI/CD is an approach that increases the frequency of application distribution by introducing automation at the application development stage.
The main concepts related to the CI/CD approach are continuous integration, continuous distribution, and continuous deployment. The CI/CD represents a solution to the problems posed by the integration of new code segments for development and operations teams (the so-called “integration hell”).
Specifically, the CI/CD ensures continuous automation and monitoring throughout the application lifecycle, from the integration and testing phases to distribution and deployment. Together, these practices are often referred to as the CI/CD pipeline, and they rely on agile collaboration between development and operations teams.
In this tutorial, we will create a small SpringBoot application then will create a full CI/CD pipeline using GitHub Actions and AWS BeanStalk 🔥.
Let’s start the application building 🏗️
Our application will have the following scenarios :
- Get random nations
- Get random currencies
- Get application version
- health check
We will generate our project using the Spring Initializr.
In our case, we need the Spring web dependency only.
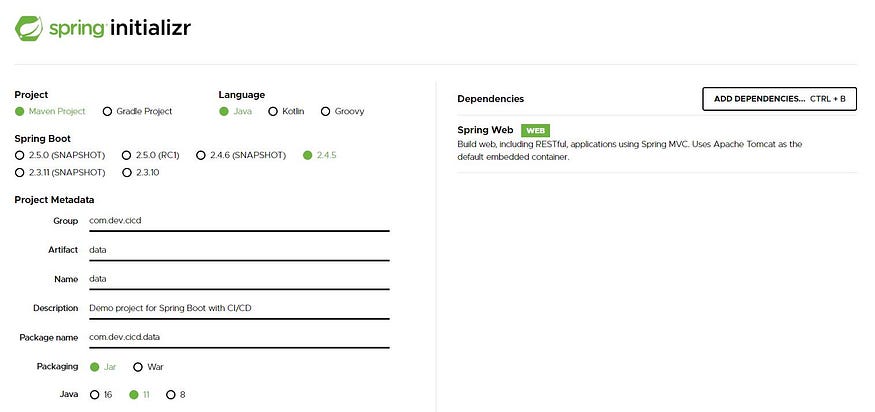
Generating the application on Spring Initializr
After generating the project, add it to your favorite IDE 😎.
I will use the Java Faker library to get random data, so we need to add the following dependency to our pom file.
<dependency>

<groupId>com.github.javafaker</groupId>

<artifactId>javafaker</artifactId>

<version>1.0.2</version>

</dependency>
Now let’s create our DataController class:
@RestController

public class DataController {

@GetMapping("/")

public String healthCheck() {

return "HEALTH CHECK OK!";

}

@GetMapping("/version")

public String version() {

return "The actual version is 1.0.0";

}

@GetMapping("/nations")

public JsonNode getRandomNations() {

var objectMapper = new ObjectMapper();

var faker = new Faker(new Locale("en-US"));

var nations = objectMapper.createArrayNode();

for (var i = 0; i < 10; i++) {

var nation = faker.nation();

nations.add(objectMapper.createObjectNode()

.put("nationality", nation.nationality())

.put("capitalCity", nation.capitalCity())

.put("flag", nation.flag())

.put("language", nation.language()));

}

return nations;

}

@GetMapping("/currencies")

public JsonNode getRandomCurrencies() {

var objectMapper = new ObjectMapper();

var faker = new Faker(new Locale("en-US"));

var currencies = objectMapper.createArrayNode();

for (var i = 0; i < 20; i++) {

var currency = faker.currency();

currencies.add(objectMapper.createObjectNode()

.put("name", currency.name())

.put("code", currency.code()));

}

return currencies;

}

}
Now, we have finished building the application, we can start it and check if everything is ok 👌.

Booting logs
Our application is ready to use 😁. I’m going to use Postman to test it🔥.
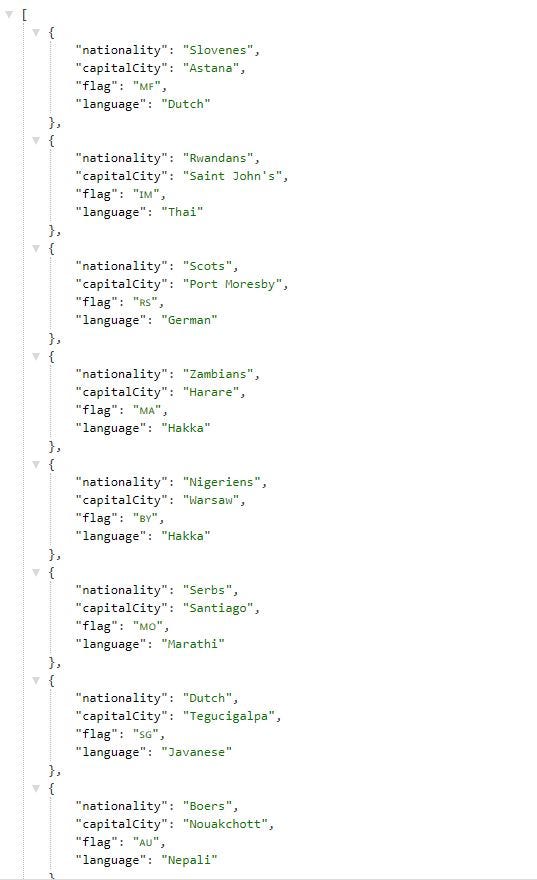
Get random nations :
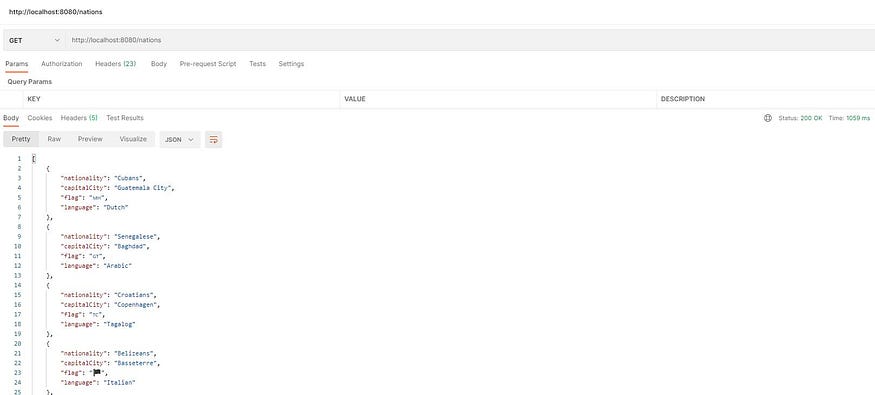
Postman UI: get random nations
Get random currencies :
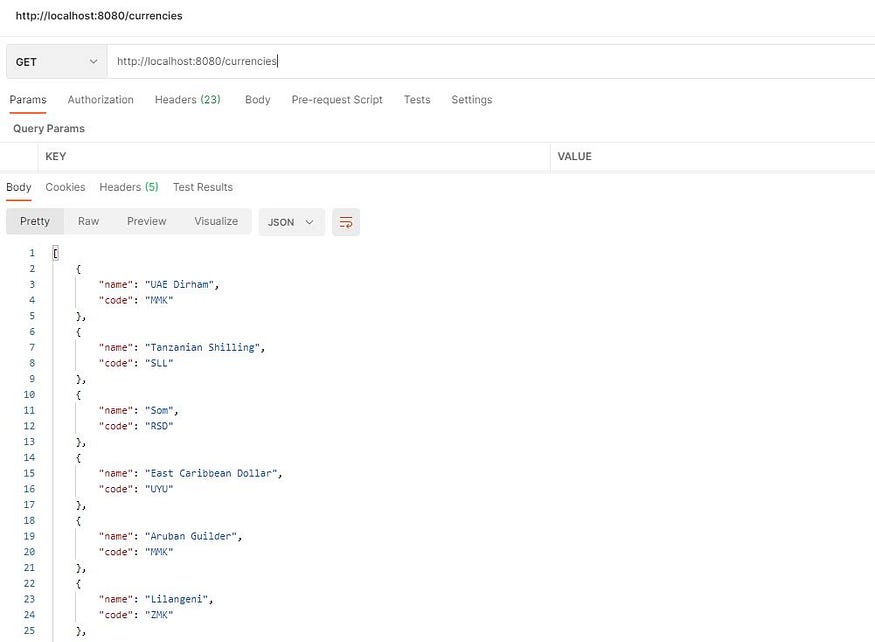
Postman UI: get random currencies
Get application version :

Postman UI: get application version
health check :
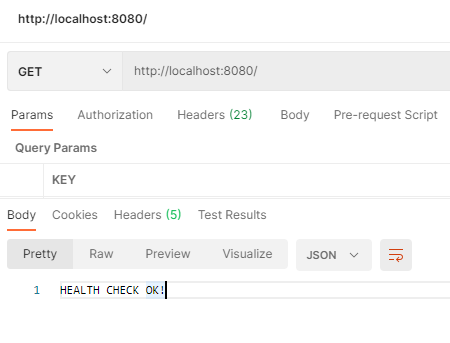
Postman UI: Health check
Now let’s add unit tests to our RestController:
@SpringBootTest

class DataControllerTest {

@Autowired

DataController dataController;

@Test

void health() {

assertEquals( "HEALTH CHECK OK!", dataController.healthCheck());

}

@Test

void version() {

assertEquals( "The actual version is 1.0.0", dataController.version());

}

@Test

void nationsLength() {

Integer nationsLength = dataController.getRandomNations().size();

assertEquals(10, nationsLength);

}

@Test

void currenciesLength() {

Integer currenciesLength = dataController.getRandomCurrencies().size();

assertEquals(20, currenciesLength);

}

}
Cool, now we have a well-tested SpringBoot application, ready to deploy 👌. So let’s start creating the CI/CD pipeline.
In this tutorial, we are going to use GitHub actions to create our pipeline 🔥.
GitHub actions is a tool to automate your workflow from code to production.
GitHub Actions makes it easy to automate all your software workflows, now with world-class CI/CD. Build, test, and deploy your code right from GitHub. Make code reviews, branch management, and issue triaging work the way you want.
First, we need to create the .github/workflows/build.yml file.
#Workflow name

name: CI/CD Pipeline

on:

#Manually trigger workflow runs

workflow_dispatch:

#Trigger the workflow on push from the main branch

push:

branches:

- main

jobs:

#Test's job

tests:

name: Unit tests

#Run on Ubuntu using the latest version

runs-on: ubuntu-latest

#Job's steps

steps:

#Check-out your repository under $GITHUB_WORKSPACE, so your workflow can access it

- uses: actions/checkout@v1

#Set up JDK 11

- name: Set up JDK

uses: actions/setup-java@v1

with:

java-version: '11'

#Set up Maven cache

- name: Cache Maven packages

#This action allows caching dependencies and build outputs to improve workflow execution time.

uses: actions/cache@v1

with:

path: ~/.m2

key: ${{ runner.os }}-m2-${{ hashFiles('**/pom.xml') }}

restore-keys: ${{ runner.os }}-m2

#Run Tests

- name: Run Tests

run: mvn -B test
In the above file, we have a pipeline called CI/CD Pipeline, it will be triggered manually or when it detects a push on the main branch.
This pipeline contains a single job called testswith a name label Unit tests, this job contains several steps. First, it will set up the JDK 11 then it will set up the maven cache and finally it will run the application tests.
Now let’s test our pipeline and see what will happen.
I’ll push the build.yml file and the workflow will be executed automatically.
Now go to your Github repository and click on Actions. You will find the pipeline’s status and the steps logs.
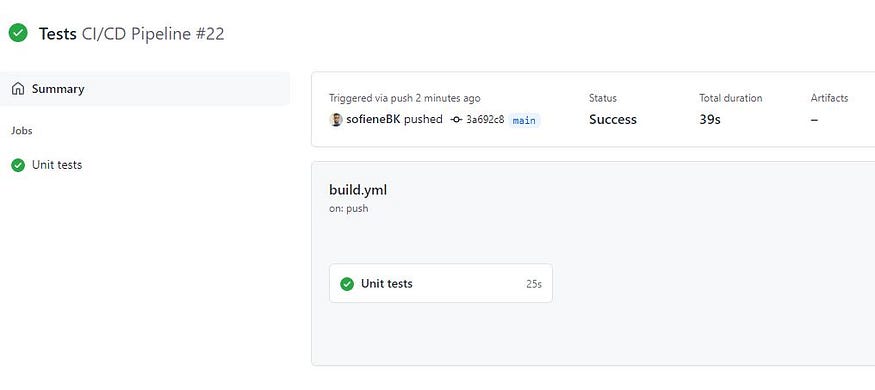
Github Actions UI: Pipeline job
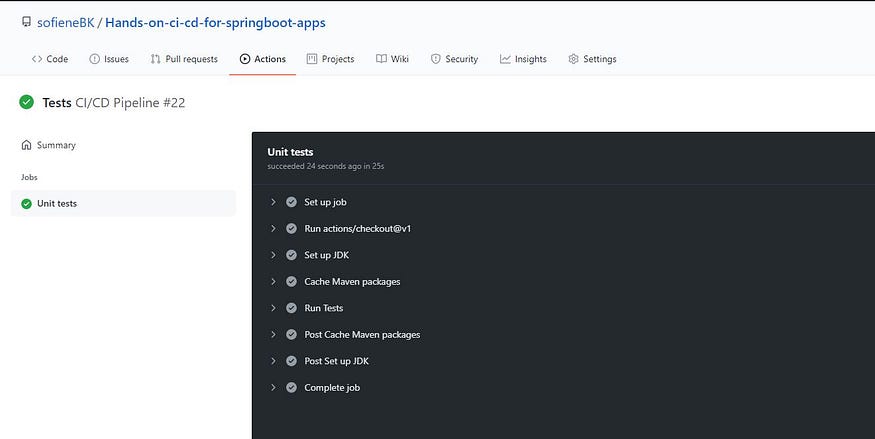
Github Actions UI: Job details
Cool, everything works fine 💪.
You can also run the pipeline manually at any time 😉.
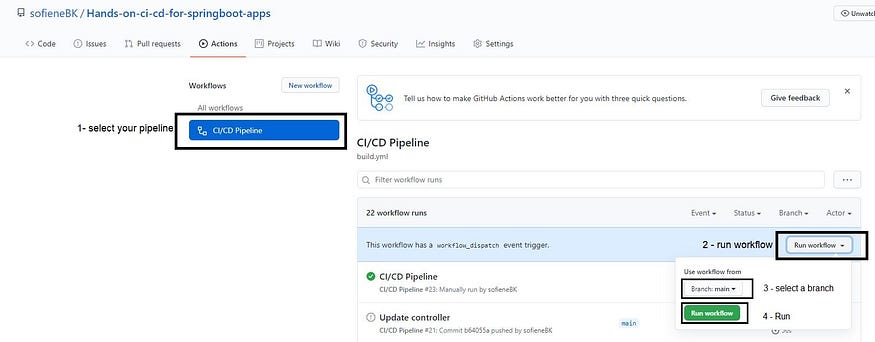
Manually running workflow steps
Now let’s move on to the next step in which we add sonar analysis to our pipeline 😎.
In this tutorial, we will use SonarCloud.
SonarCloud is the leading online service to catch Bugs and Security Vulnerabilities in your code repositories.
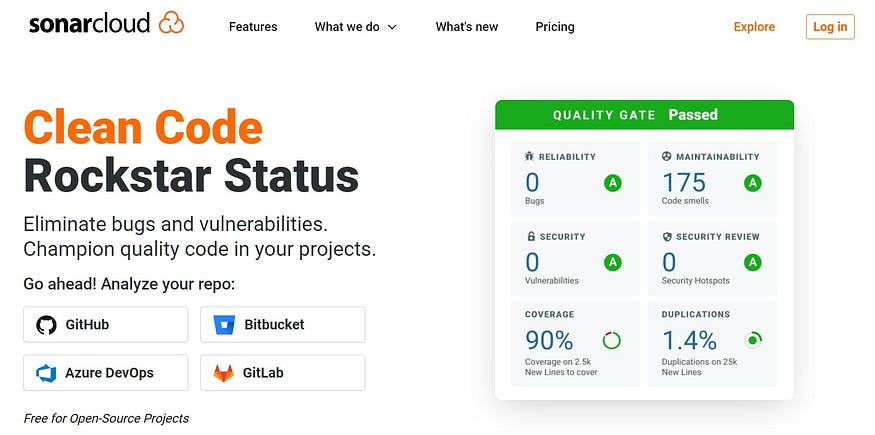
SonarCloud home page
Click the login button, then use Github.
Log in or Sign up to SonarCloud
At the first time, Github will ask you to grant permission to SonarCloud, then will ask you to create an organization
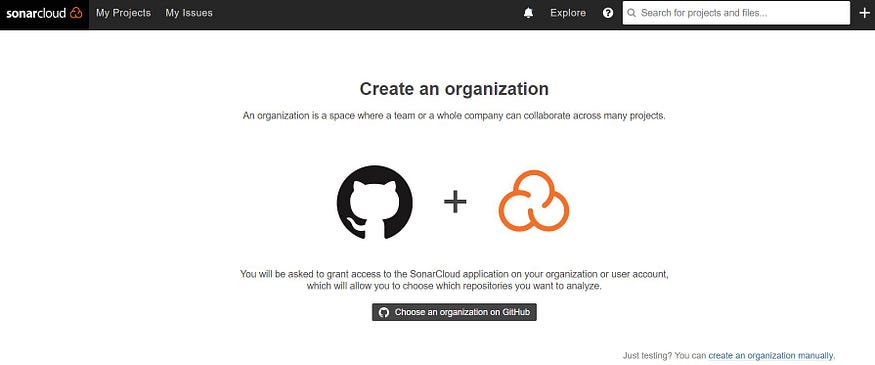
SonarCloud UI
Next, you will be asked to choose the repository access, either you give access to all repositories or you select a specific repository.
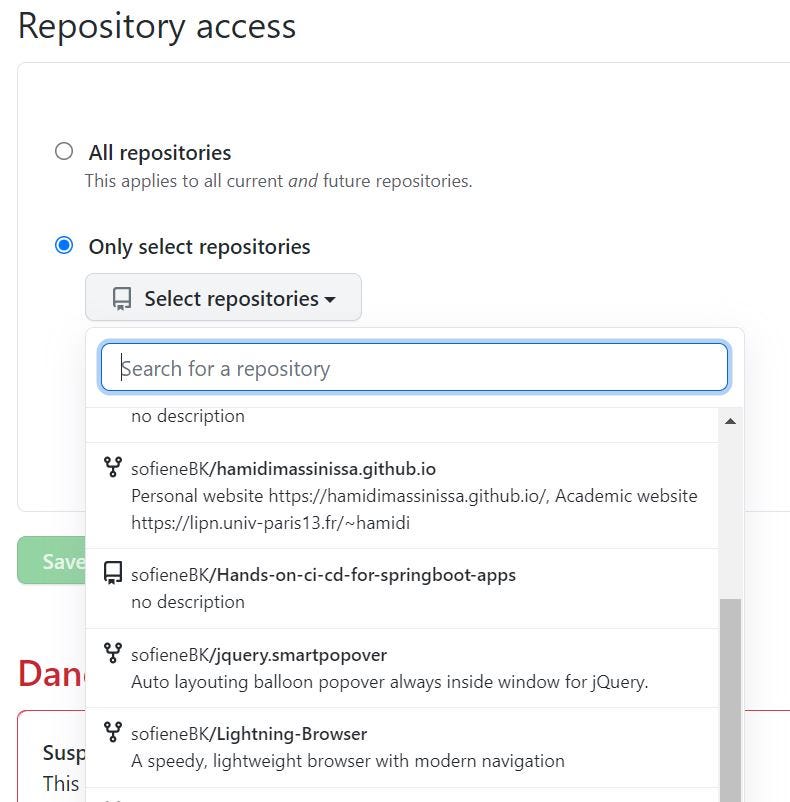
GitHub repository access
Then the repository will be imported to SonarCloud.
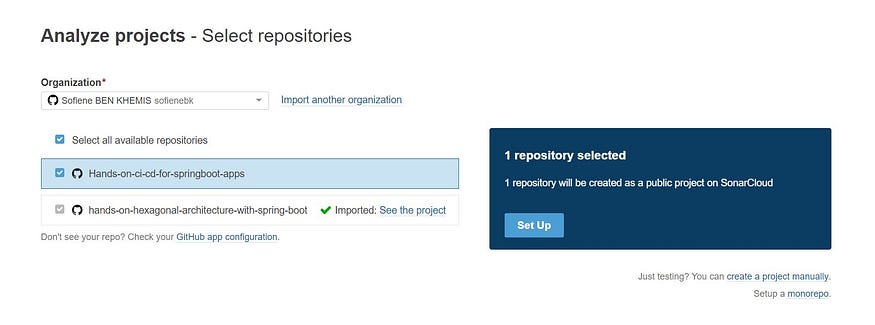
SonarCloud analyze projects
We choose our repository then start the setup 😄.
SonarCloud project configuration
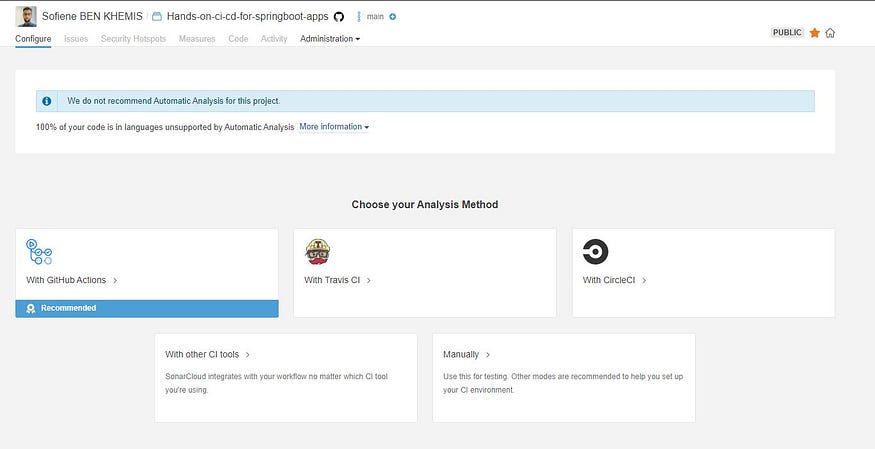
Now, we select the Analysis Method, in our case, it will be using Github Actions 😎.
Now SonarCloud gives us a SONAR_TOKEN that must be added to our repository secrets.
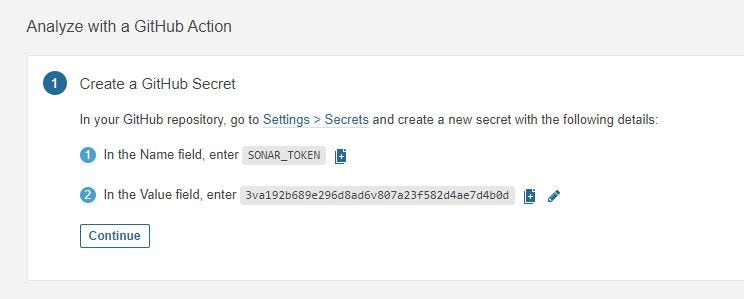
SonarCloud Token
Once done, we move to the next step. SonarCloud will give us properties and configurations for the pipeline.
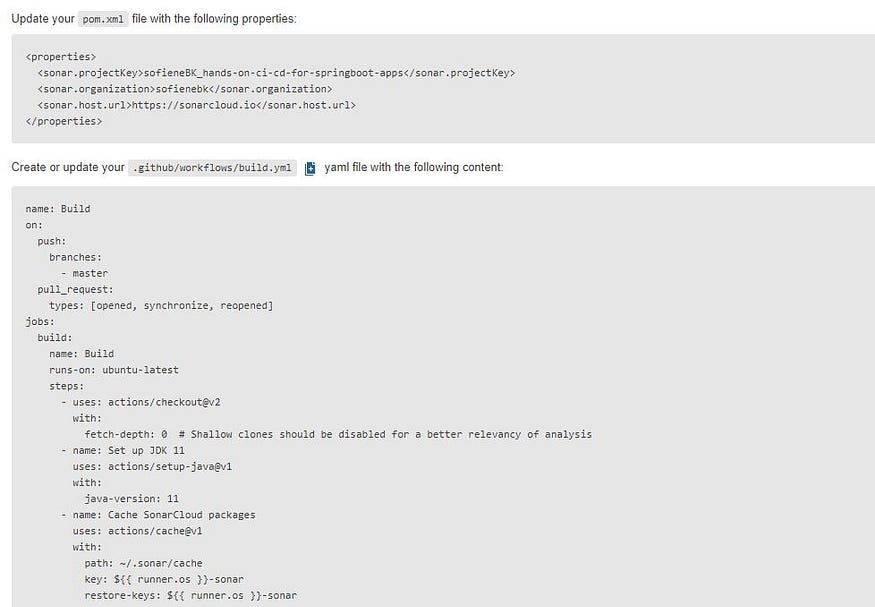
Suggested configuration for the GitHub workflow
I will adapt this configuration according to our needs 😎.
in the build.yml file we will add a new job called sonar .
#Sonar's Job

sonar:

#Depends on test's job

needs: tests

name: SonarCloud analysis

#Run on Ubuntu using the latest version

runs-on: ubuntu-latest

#Job's steps

steps:

#Check-out your repository under $GITHUB_WORKSPACE, so your workflow can access it

- uses: actions/checkout@v1

#Set up JDK 11

- name: Set up JDK

uses: actions/setup-java@v1

with:

java-version: '11'

#Set up SonarCloud cache

- name: Cache SonarCloud packages

#This action allows caching dependencies and build outputs to improve workflow execution time.

uses: actions/cache@v1

with:

path: ~/.sonar/cache

key: ${{ runner.os }}-sonar

restore-keys: ${{ runner.os }}-sonar

#Set up Maven cache

- name: Cache Maven packages

#This action allows caching dependencies and build outputs to improve workflow execution time.

uses: actions/cache@v1

with:

path: ~/.m2

key: ${{ runner.os }}-m2-${{ hashFiles('**/pom.xml') }}

restore-keys: ${{ runner.os }}-m2

#Analyze project with SonarCloud

- name: Analyze with SonarCloud

run: mvn -B verify sonar:sonar -Dsonar.projectKey=sofieneBK_Hands-on-ci-cd-for-springboot-apps -Dsonar.organization=sofienebk -Dsonar.host.url=https://sonarcloud.io -Dsonar.login=$SONAR_TOKEN

env:

GITHUB_TOKEN: ${{ secrets.GITHUB_TOKEN }}

SONAR_TOKEN: ${{ secrets.SONAR_TOKEN }}
As you can see thesonarjob depend on the testsjob, which means once the testsjob fail thesonarjob will not be executed.
For the sonar properties, I decided to pass them as parameters in themvn -B verify command.
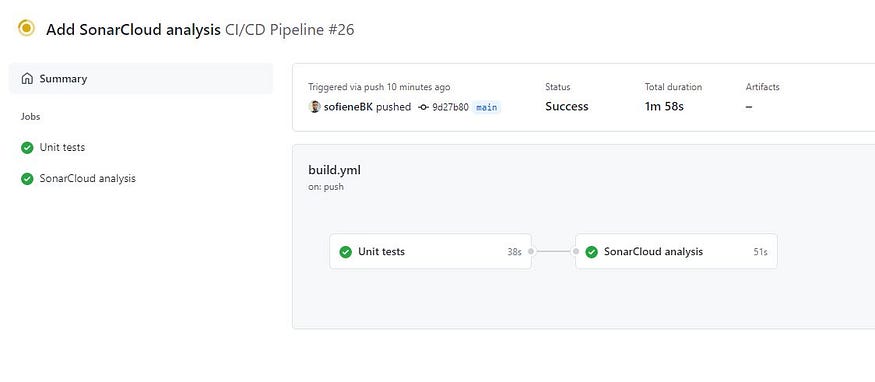
Github Actions UI: Pipeline jobs
Now that everything looks good, let’s take a look at SonarCloud to see what happened.
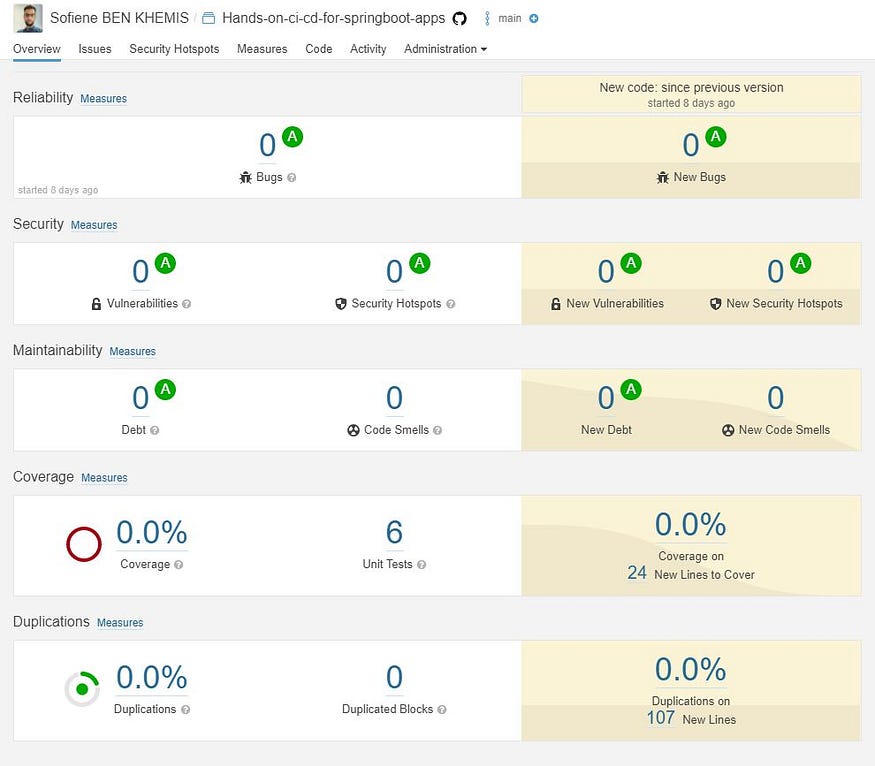
SonarCloud Analysis
Everything looks good, except the coverage, why it’s 0% even though we added unit tests 🤔 🤔
Don’t worry that's because we need to add the Jacoco plugin to our pom file.
<plugin>

<groupId>org.jacoco</groupId>

<artifactId>jacoco-maven-plugin</artifactId>

<version>0.8.7</version>

<executions>

<execution>

<goals>

<goal>prepare-agent</goal>

</goals>

</execution>

<!-- attached to Maven test phase -->

<execution>

<id>report</id>

<phase>test</phase>

<goals>

<goal>report</goal>

</goals>

</execution>

</executions>

</plugin>
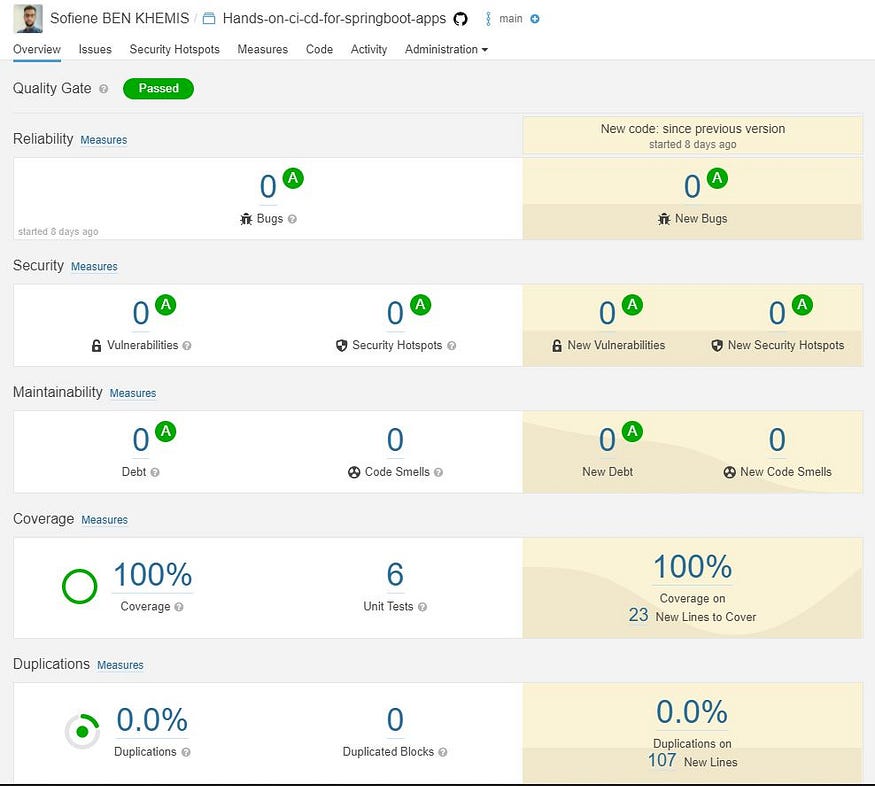
SonarCloud Analysis
Cool, now it’s all in green 💪.
After the unit test job and the sonar job, we will add another job to build our application and generate the jar file 😀.
#Build's job

build:

#Depends on sonar's job

needs: sonar

name: Build

#Run on Ubuntu using the latest version

runs-on: ubuntu-latest

steps:

#Check-out your repository under $GITHUB_WORKSPACE, so your workflow can access it

- uses: actions/checkout@v1

#Set up JDK 11

- name: Set up JDK

uses: actions/setup-java@v1

with:

java-version: '11'

#Set up Maven cache

- name: Cache Maven packages

#This action allows caching dependencies and build outputs to improve workflow execution time.

uses: actions/cache@v1

with:

path: ~/.m2

key: ${{ runner.os }}-m2-${{ hashFiles('**/pom.xml') }}

restore-keys: ${{ runner.os }}-m2

#Build the application using Maven

- name: Build with Maven

run: mvn -B package -DskipTests --file pom.xml

#Build the application using Maven

- name: Upload JAR

#This uploads artifacts from your workflow allowing you to share data between jobs and store data once a workflow is complete.

uses: actions/upload-artifact@v2

with:

#Set artifact name

name: artifact

#From this path

path: target/data-0.0.1-SNAPSHOT.jar
This job will build the application using maven and will upload the jar file.
The upload artifact step allows us to share data between jobs and store data once a workflow is complete. In our case, we will use the uploaded jar file in the deploy job.
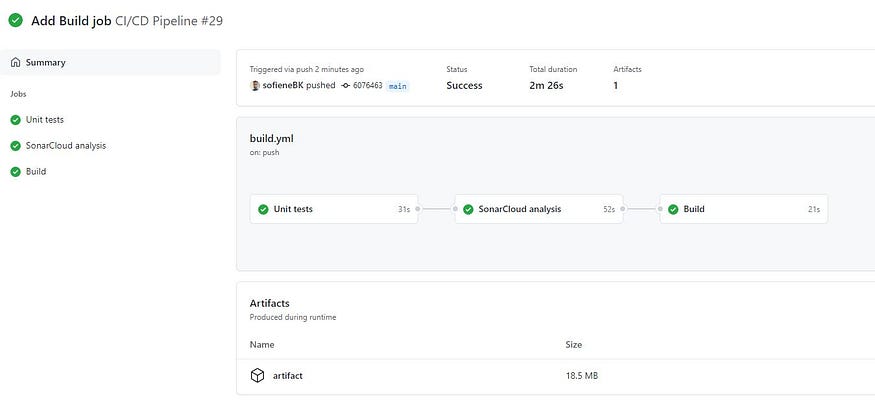
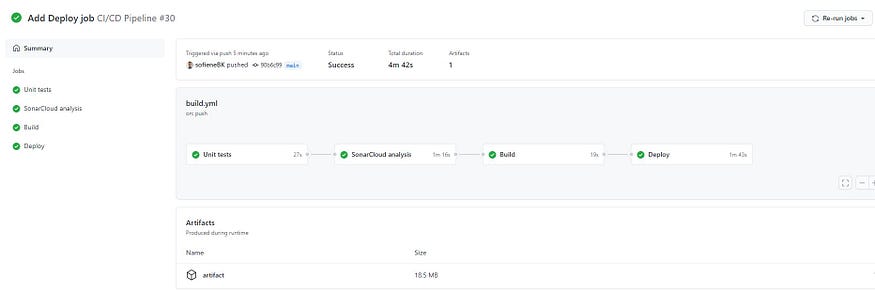
Github Actions UI: Pipeline jobs
The job has been completed 😎 😎.
You can even see the generated file in the artifacts part, you can also download it and run it on your local machine.
Now, let’s move to the last step, which is the application deployment.
For the deployment, we are going to use AWS Elastic Beanstalk.

AWS Elastic Beanstalk
AWS Elastic Beanstalk is an easy-to-use service for deploying and scaling web applications and services.
With Elastic Beanstalk, you can quickly deploy and manage applications in the AWS Cloud without having to learn about the infrastructure that runs those applications. Elastic Beanstalk reduces management complexity without restricting choice or control. You simply upload your application, and Elastic Beanstalk automatically handles the details of capacity provisioning, load balancing, scaling, and application health monitoring.
Now let’s create our deploy environment 😊
First, we need to connect to the AWS account then we select the Elastic Beanstalk service.
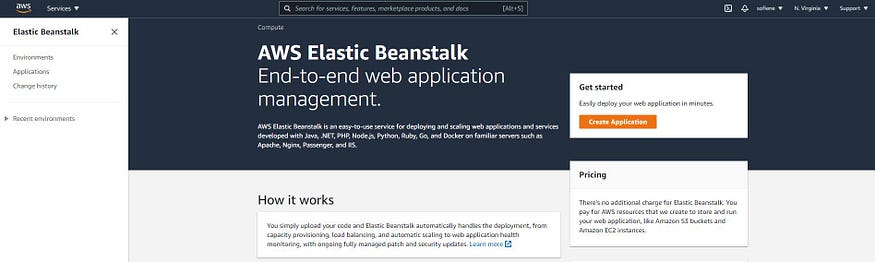
AWS Elastic Beanstalk home page
then click on Create Application
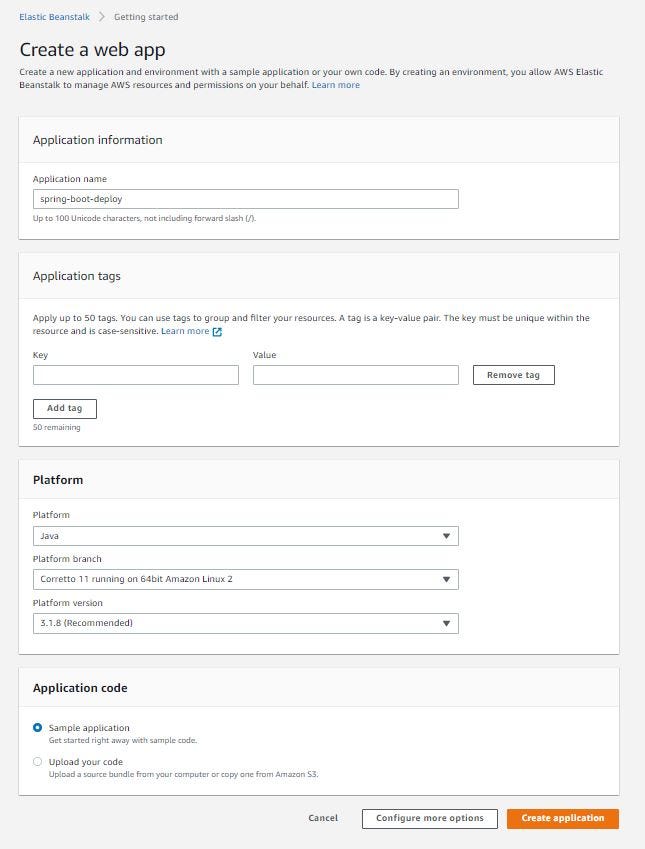
AWS Elastic Beanstalk: Create a web app
Then we put the application information, like the application name and the platform type, and how we are going to deal with the code.
In our case we are going to put:
✅ Application name: spring-boot-deploy
✅ Platform: Java Corretto 11 V3.1.8
✅ Application code: sample application
Then click Create application.
The environment creation will take a few minutes ⏳ ⏳

AWS Elastic Beanstalk environment creation logs
Once the environment is ready it will look like this
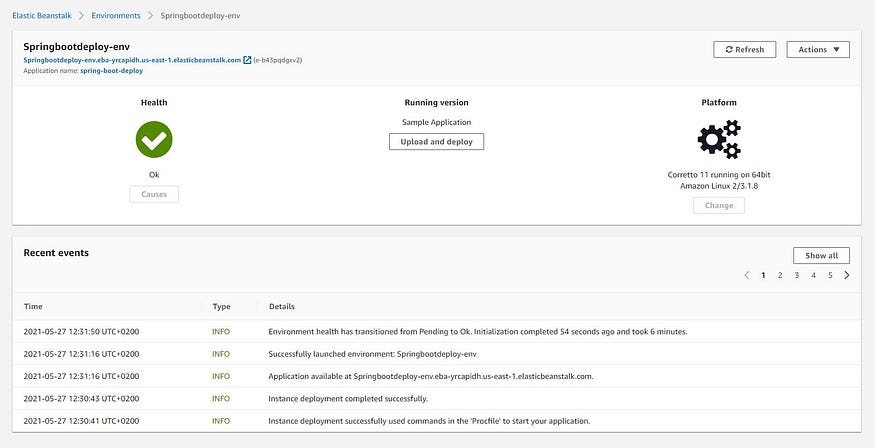
AWS Elastic Beanstalk environment page
Great, now we have an environment that is ready to use.
As mentioned above, AWS gives us a public address to access our application from the internet.
🌍 http://springbootdeploy-env.eba-yrcapidh.us-east-1.elasticbeanstalk.com
By default, the website will show you this.
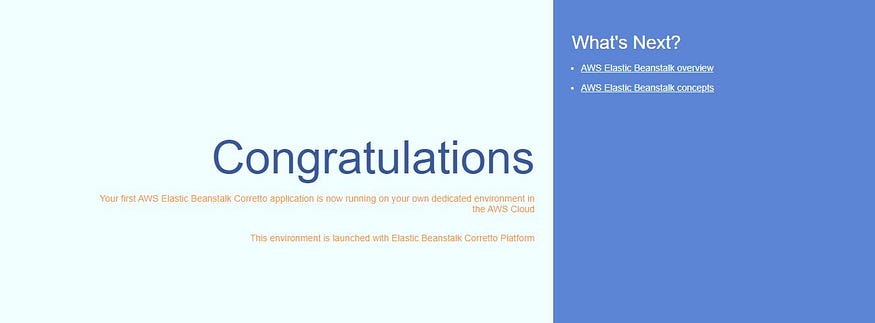
Now let’s create the deploy job.
#Deploy's job

deploy:

#Depends on build's job

needs: build

name: Deploy

#Run on Ubuntu using the latest version

runs-on: ubuntu-latest

steps:

- name: Download JAR

#Download the artifact which was uploaded in the build's job

uses: actions/download-artifact@v2

with:

name: artifact

#Deploy the artifact (JAR) into AWS Beanstalk

- name: Deploy to EB

uses: einaregilsson/beanstalk-deploy@v13

with:

aws_access_key: ${{ secrets.AWS_ACCESS_KEY_ID }}

aws_secret_key: ${{ secrets.AWS_SECRET_ACCESS_KEY }}

aws_session_token: ${{ secrets.AWS_SESSION_TOKEN }}

use_existing_version_if_available: false

application_name: spring-boot-deploy

environment_name: Springbootdeploy-env

version_label: ${{github.SHA}}

region: us-east-1

deployment_package: data-0.0.1-SNAPSHOT.jar
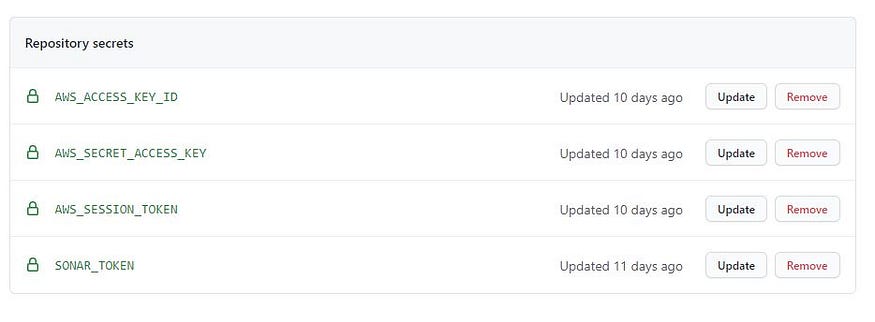
First, you need to add AWS_ACCESS_KEY_ID , AWS_SECRET_ACCESS_KEY , AWS_SESSION_TOKEN to the GitHub secrets.
use_existing_version_if_available: This can be set totrueand then the program will deploy a version already in Elastic Beanstalk if it exists, but if it doesn't exist it will create it from the deployment package you specify.
So, here, the job will download the jar file that was uploaded in the build job and deploy it to AWS EB.
Now our pipeline is ready let’s test it.
Cool, it looks ok, let’s visit our application.

Oops, it doesn’t work, there is something wrong 😱😱.
Don’t worry, this happens because the application load balancer by default points to the Port 80 of the Nginx server in the EC2 instance. The Nginx is configured to forward requests to Port 5000 by default, whereas our application server runs on Port 8080.
So to fix this issue, we will edit the server port in the application.properties
server.port=5000
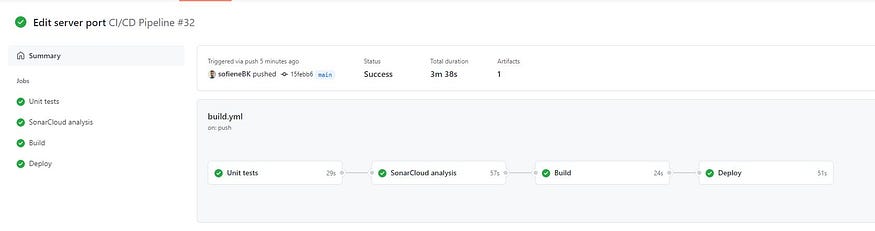
Now let’s check the application again.
🌍 http://springbootdeploy-env.eba-yrcapidh.us-east-1.elasticbeanstalk.com

🌍 http://springbootdeploy-env.eba-yrcapidh.us-east-1.elasticbeanstalk.com/nations
Everything works correctly 🥳
In this tutorial, we learned how to create a full CI/CD pipeline, from the application creation to the application deployment 💪
All the project sources are available on my GitHub page.
Thank you for reading! 🙏
Comments
Loading comments…