What is Karpenter?
Designed as an open-source Kubernetes cluster autoscaler, Karpenter seamlessly integrates with AWS (Amazon Web Services) to enhance application availability and cluster efficiency. By swiftly provisioning compute resources of the right size, it effectively responds to fluctuations in application load, ensuring optimal performance.

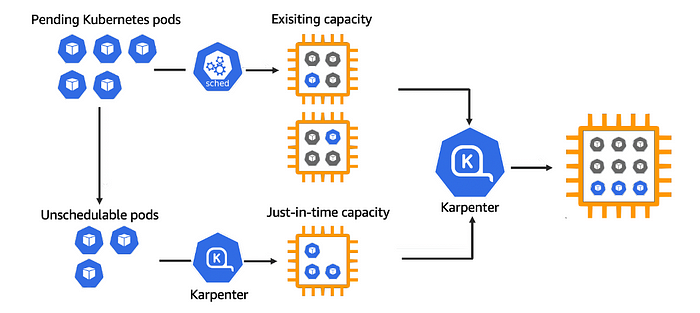
How Karpenter works?
Once installed in your cluster, Karpenter actively monitors the combined resource requests of unscheduled pods and takes actions to minimize scheduling delays and reduce infrastructure expenses by launching or terminating nodes. This is accomplished by observing Kubernetes cluster events and issuing commands to the underlying compute service of the cloud provider, such as Amazon EC2.
Let’s Deploy…
Prerequisites
- AWS IAM access with admin privileges
- AWS CLI
- Kubectl
- Eksctl
- Helm
Step 1: Setup ENV variables
1.1 Declare variables for the stack
## Set karpenter version
export KARPENTER_VERSION=v0.29.0
## if you are not using standard partitions, you may need to configure to aws-cn / aws-us-gov
export AWS_PARTITION="aws"
## Set your desired cluster name
export CLUSTER_NAME="karpenter-demo"
## Set AWS region
export AWS_DEFAULT_REGION="us-east-1"
## Set AWS Account ID
export AWS_ACCOUNT_ID="$(aws sts get-caller-identity --query Account --output text)"
1.2 Verify the variables
echo $KARPENTER_VERSION $CLUSTER_NAME $AWS_DEFAULT_REGION $AWS_ACCOUNT_ID
Step 2: Setup Infra
2.1 Setup infrastructure needed by the EKS cluster
- Here we will use the getting started CloudFormation templates provided by the Karpenter to set up the infrastructure needed by the EKS cluster.
- This template will set up required roles, policies, etc...
- Fetch the CloudFormation yaml to your local
curl -fsSL https://raw.githubusercontent.com/aws/karpenter/"${KARPENTER_VERSION}"/website/content/en/preview/getting-started/getting-started-with-karpenter/cloudformation.yaml > cloudformation.yaml
- Now we can deploy the CloudFormation stack
aws cloudformation deploy \
  --stack-name "${CLUSTER_NAME}" \
  --template-file cloudformation.yaml \
  --capabilities CAPABILITY_NAMED_IAM \
  --parameter-overrides "ClusterName=${CLUSTER_NAME}"
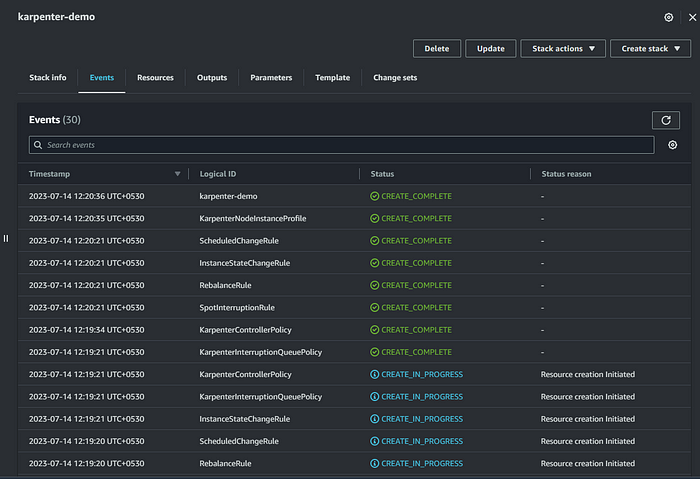
Screenshot of the CloudFormation stack:
- Successfully deployed, Now Let’s create the EKS cluster
2.2 Provision of EKS cluster
- Here, We will create the EKS cluster using the Eksctl template
- It will establish a Kubernetes service account and an AWS IAM Role, then utilize IRSA to associate them, allowing Karpenter to initiate instance launches.
- VPC, Subnets, and Security Groups will be created
- Mapping of Karpenter node role to the aws-auth configmap to allow nodes to connect.
- Uses AWS EKS-managed node groups for the kube-system and karpenter namespaces
eksctl create cluster -f - <<EOF
---
apiVersion: eksctl.io/v1alpha5
kind: ClusterConfig
metadata:
  name: ${CLUSTER_NAME}
  region: ${AWS_DEFAULT_REGION}
  version: "1.27"
  tags:
    karpenter.sh/discovery: ${CLUSTER_NAME}

iam:
  withOIDC: true
  serviceAccounts:
  - metadata:
      name: karpenter
      namespace: karpenter
    roleName: ${CLUSTER_NAME}-karpenter
    attachPolicyARNs:
    - arn:${AWS_PARTITION}:iam::${AWS_ACCOUNT_ID}:policy/KarpenterControllerPolicy-${CLUSTER_NAME}
    roleOnly: true

iamIdentityMappings:
- arn: "arn:${AWS_PARTITION}:iam::${AWS_ACCOUNT_ID}:role/KarpenterNodeRole-${CLUSTER_NAME}"
  username: system:node:{{EC2PrivateDNSName}}
  groups:
  - system:bootstrappers
  - system:nodes

managedNodeGroups:
- instanceType: t3a.large
  amiFamily: AmazonLinux2
  name: ${CLUSTER_NAME}-ng
  desiredCapacity: 2
  minSize: 1
  maxSize: 10
EOF
CloudFormation created by Eksctl:
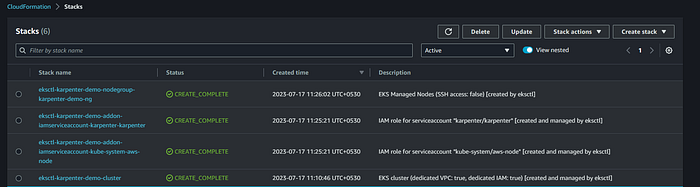
EKS Cluster:

- Successfully created the EKS cluster
- Set KARPENTER_IAM_ROLE_ARN variables. Which will be used during the Karpenter installation
export CLUSTER_ENDPOINT="$(aws eks describe-cluster --name ${CLUSTER_NAME} --query "cluster.endpoint" --output text)"
export KARPENTER_IAM_ROLE_ARN="arn:${AWS_PARTITION}:iam::${AWS_ACCOUNT_ID}:role/${CLUSTER_NAME}-karpenter"

echo $CLUSTER_ENDPOINT $KARPENTER_IAM_ROLE_ARN
- Create a role to allow spot instances.
aws iam create-service-linked-role --aws-service-name spot.amazonaws.com || true
# If the role has already been successfully created, you will see:
# An error occurred (InvalidInput) when calling the CreateServiceLinkedRole operation: Service role name AWSServiceRoleForEC2Spot has been taken in this account, please try a different suffix.
Step 3: Install Karpenter
3.1 Installation of Karpenter using HELM
helm upgrade --install karpenter oci://public.ecr.aws/karpenter/karpenter --version ${KARPENTER_VERSION} --namespace karpenter --create-namespace \
  --set serviceAccount.annotations."eks\.amazonaws\.com/role-arn"=${KARPENTER_IAM_ROLE_ARN} \
  --set settings.aws.clusterName=${CLUSTER_NAME} \
  --set settings.aws.defaultInstanceProfile=KarpenterNodeInstanceProfile-${CLUSTER_NAME} \
  --set settings.aws.interruptionQueueName=${CLUSTER_NAME} \
  --set controller.resources.requests.cpu=1 \
  --set controller.resources.requests.memory=1Gi \
  --set controller.resources.limits.cpu=1 \
  --set controller.resources.limits.memory=1Gi \
  --wait
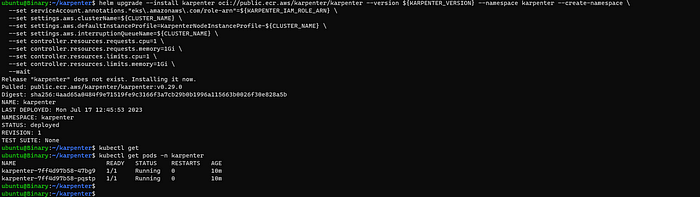
Helm Output:
3.2 Configuration of Provisioner
- Karpenter provisioners can efficiently manage numerous pod shapes by utilizing pod attributes like labels and affinity, thus streamlining scheduling and provisioning decisions and eliminating the necessity to handle multiple node groups.
- More about Provisioners, Node Templates
cat <<EOF | kubectl apply -f -
apiVersion: karpenter.sh/v1alpha5
kind: Provisioner
metadata:
  name: default
spec:
  requirements:
    - key: karpenter.sh/capacity-type
      operator: In
      values: ["spot"]
    - key: "node.kubernetes.io/instance-type"
      operator: In
      values: ["t3a.large"]
  limits:
    resources:
      cpu: 1000
  providerRef:
    name: default
  consolidation:
    enabled: true
---
apiVersion: karpenter.k8s.aws/v1alpha1
kind: AWSNodeTemplate
metadata:
  name: default
spec:
  subnetSelector:
    karpenter.sh/discovery: ${CLUSTER_NAME}
  securityGroupSelector:
    karpenter.sh/discovery: ${CLUSTER_NAME}
EOF
Provisioner output:
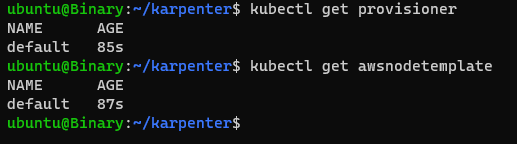
- Karpenter has been activated and is fully prepared to initiate node provisioning.
Step 4: Deploy the Application
4.1 Upscale deployment
- Now, Let’s create a deployment and watch Karpenter provision nodes in response
cat <<EOF | kubectl apply -f -
apiVersion: apps/v1
kind: Deployment
metadata:
  name: nginx
spec:
  replicas: 0
  selector:
    matchLabels:
      app: nginx
  template:
    metadata:
      labels:
        app: nginx
    spec:
      terminationGracePeriodSeconds: 0
      containers:
        - name: nginx
          image: nginx
          resources:
            requests:
              cpu: 1
EOF
Before Scaling:

- Deployed nginx with zero replicas, Now Let’s scale the deployment and watch the Karpenter logs
## Scale deployment
kubectl scale deployment nginx --replicas 5
## To monitor the karpenter logs
kubectl logs -f -n karpenter -l app.kubernetes.io/name=karpenter -c controller
After Scaling:
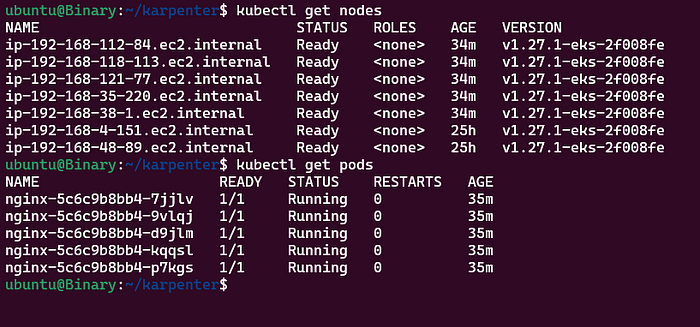
- Based on your Requirements and Configuration, You can modify the provisioner and node templates
4.1 Downscale deployment
- Next, proceed to downscale the deployment. In a brief duration, Karpenter will automatically terminate the empty nodes as part of the consolidation process.
## DownScale deployment
kubectl scale deployment nginx --replicas 0
## To monitor the karpenter logs
kubectl logs -f -n karpenter -l app.kubernetes.io/name=karpenter -c controller
After Downscaling:
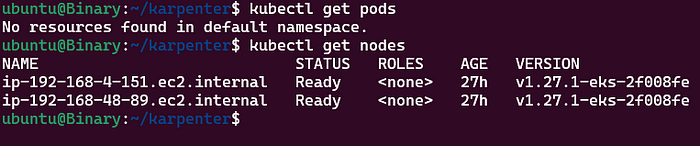
- We have completed the demo of Karpenter in EKS
Conclusion
- Karpenter provides enhanced scaling capabilities, enabling it to detect precise workload requirements and allocate the resources accordingly intelligently. This results in dynamic scaling that adapts to actual usage, allowing it to scale up as needed efficiently.
Comments
Loading comments…