
The importance of data in our daily activities cannot be overemphasized. Data helps us in many ways, such as wise decision-making, problem-solving, improving processes, and so on. Data helps us set out new goals and achieve those goals.
The list is endless on the importance of data. What, then, is data?
What is data?
Data can simply be referred to as pieces of values, facts, statistics, and contents collected to be processed as information for personal or collective use. This could be for analysis or reference purposes.
While data is in raw format, information is the finished and processed data that makes meaning to users.
We all use data in one way or another. From our businesses, jobs, studies, research, and even online activities, we collect and make use of data. It could be formal or informal.
In formal settings, tech companies, banks, security, media and entertainment, the health sector, the education sector, the manufacturing sector, the transportation sector, and others are the biggest users of data.
What is data structure?
Data structure is the organized way in which data is collected, processed, and stored for personal or collective use. Data structure deals with the collection and management of data.
Many tools can be used to collect and manage your data. These tools vary based on the purpose for which you intend to collect and use your data.
Web developers manage their data using tools such as Django. Data analysts manage their data using tools such as NumPy. The list goes on.
The focus of this article is on data structure in web development. Thus, Django will be our case study.
What is Django?
Django is a Python framework used for creating web applications. The Django framework enables the creation of full-stack web applications, i.e., the backend, which is the server side, and the front end of web applications.
Django uses the MVT architecture in creating web applications.
MVT stands for Model View Template. The MVT is a development pattern in Django where the M (Model) handles the data and database of the web app. The V (View) handles the logic of the web app, such as sending requests and return statements. The T (Template) handles the static contents of the web app, such as HTML files.
The M (Model) of Django’s MVT will be the focus of this article.
Before diving into Django models, let’s examine the various programming data types.
Programming data type: Django’s case study
In this section, you will learn the data type in Python programming language, with Django as a case study.
- String: Strings are datatype in programming that hold a sequence of characters. Although these characters could be numbers or alphabet, they are written in single (‘’) or double quote (“”) marks. The string datatype is represented in the Django framework as a CharField or TextField. The CharField is used for shorter string values while the TextField is used for longer string values. See the code example below.class Product(models.Model): featured = models.BooleanField(db_index=True)
class Items(models.Model):
title=models.CharField(max_length=50)
description=models.TextField()
- Numbers: Numbers are data type in programming that holds numeric values. These values could include int, float, decimal, and so on. Int holds whole numbers while float and decimal store numbers with a decimal point. In the Django framework, the number data type is represented as an IntegerField for int, DecimalField for decimal data type, and FloatField for float data type. See the code examples below.
class User(models.Model):
    number = models.IntegerField()
class Products(models.Model):
    price = models.DecimalField(max_digits=6, decimal_place=2)
- Boolean: The boolean data type holds the value of ‘True’ or ‘False’. The boolean data type is represented with the BooleanField in Django. See the code example below.
class Product(models.Model):
    featured = models.BooleanField(db_index=True)
Other prominent data types in the Django programming framework include the following:
- DateField — store the value of the date,
- EmailField — a CharField that validates email addresses,
- ImageField — stores and validates image files,
- amongst others.
For more context on Django data types, visit https://geeksforgeeks.org
Django models relationship
Models are database tables written in the Django models.py file.
In this section, you will learn about model relationships in Django.
Primary Key
Primary keys are unique values in Django models. Every table created in your database must have a field or column that contains a unique value. The unique value is known as a primary key.
A primary key aims to identify each table with a unique value and ensure the integrity of data.
Foreign key
A foreign is the primary key of a separate table used in another table while also having its primary key.
Examine the Django codes below.
class Products(models.Model):
    productID = models.IntegerField(primary_key = True)
    name = models.CharField(max_length=50)
class Customers(models.Model):
    customerID = models.IntegerField(primary_key=True)
    productID = models.ForeignKey(Products, on_delete=models.CASCADE)
    Email = models.EmailField(max_length=50)
The above code is an example of database models created in the models.py file. There are two tables–Products and Customers. Each table has a primary key that will contain its unique value. For the Products table, productID is the primary key. For the Customer table, customerID is the primary key.
Also, note that the primary key of the Products table appeared as a foreign key in the Customer table. This creates a relationship between customers and their purchased products.
Types of relationship
There are three types of relationships in Django models namely:
- One-to-One,
- One-to-Many, and
- Many-to-Many.
One-to-One relationship: A one-to-one relationship signifies that a model record is related to only one other model record. For instance, in the academic field, a student has only one unique ID and a unique ID can only be assigned to a student. Thus, this is a one-to-one relationship model. See the code example below.
class StudentID(models.Model):
    Reg_no = models.IntegerField()
    Date = models.DataeField(db_index = True)
class Student(models.Model):
    studentID = models.OneToOneField(StudentID, on_delete = models.CASCADE, primary_key = True)
    Name = models.CharField(max_length = 50)
One-to-Many: The one-to-many relationship signifies that a model record is related to many records in another model. For instance, in an academic field, a student is assigned to a department while the department contains multiple students. Thus, this is a one-to-many relationship. This relationship in Django is defined by the keyword–ForeignKey. See the code example below.
class Student(models.Model):
    studentID = models.IntegerField(primary_key = True)
    name = models.CharField(max_length = 50)
class Department(models.Model):
    departmentID = models.IntegerField(primary_key = True)
    studentID = models.ForeignKey(Student, on_delete = models.CASCADE)
Many-to-Many: The many-to-many relationship signifies that many records of a model are related to many records of another model. For instance, in an academic field, a lecturer can lecture many courses while a course can be lectured by many lecturers. See the code example below.
class Teacher(models.Model):
    teacherID = models.IntegerField(primary_key = True)
    name = models.CharField(max_length = 50)
    email = models.EmailField(max_length = 50)
class Course(models.Model):
    courseID = models.IntegerField(primary_key = True)
    name = models.CharField(max_length = 50)
    teacher = models.ManyToManyField(Teacher)
Data integrity
You must have noticed the on_delete argument passed to related data. The on_delete argument indicates the behavior of the related model when the record in the primary model gets deleted. The on_delete argument accepts the following value:
- CASCADE — this deletes the record containing the related model
- PROTECT — this prevents the deletion of related models
- RESTRICT — this prevents the deletion of related models while raising a RestrictedError.
A step-by-step guide to creating a database with Django
In this section, you will create a Django project for an article app.
This section is divided into three parts. They include:
- Django project setup
- App configuration and database setup
- User admin.
Prerequisite
You are expected to know and install the below before moving ahead with this section.
- The basics of Python programming language. Django is a framework of Python and Django is the case study. Thus, it is important you know the basics of Python programming language.
- Install Python on your PC. You are expected to install Python on your PC. Visit www.python.org and follow the instructions to install Python if you don’t have Python installed on your PC.
- Install PIP on your PC. PIP is a Python utility that manages Python installations on the terminal. The latest version of Python comes with the installation of PIP.
- A code editor. Although you can use any code editor of your choice this tutorial will make use of VS code editor.
Let’s get started.
Part one: Django project setup
In this first part, you shall be creating a Django project. The Django project will be created in a virtual environment.
Step one: Create a project folder
Open your terminal and create a new folder for your Django project. Next, navigate to your new folder. See the code example below.
C:\Users\Username\Desktop>mkdir django_project
C:\Users\Username\Desktop>cd django_project
Step two: Create a virtual environment
Create a virtual environment by typing the following command line on your terminal. Make sure you are in your project folder directory.
C:\Users\Username\Desktop\django_project>python -m venv venv
Step three: Activate the virtual environment
Next, activate the virtual environment. Note that whenever you want to access your virtual environment, you need to activate it first. Type the following command on your terminal to activate your project virtual environment.
C:\Users\Username\Desktop\django_project>venv\Scripts\activate
Step four: Install Django
After you have activated your virtual environment, the next step is to install Django. Type the below commands to install Django.
C:\Users\Username\Desktop\django_project>pip install django
Note: Make sure you have a strong internet connection when installing Django. Without a strong internet connection will throw an error.
Step five: Create a Django project
After you have installed Django in your virtual environment, the next step is to create a Django project. Use the below command to create a Django project.
C:\Users\Username\Desktop\django_project>django-admin startproject my_project
The above command creates a series of file and folder structures as seen below.
C:\Users\Username\Desktop\django_project>
    manage.py
    my_project
    __init.py__
    asgi.py
    settings.py
    urls.py
    wsgi.py
Step six: Create a Django app
Next, you will navigate to your Django project directory–i.e. my_project–and create your Django app.
Use the below command to navigate to your Django project directory and create your Django app.
C:\Users\Username\Desktop\django_project>cd my_project
C:\Users\Username\Desktop\django_project\my_project>python manage.py startapp my_app
Step seven: Test installation
In your terminal, type the below commands to test your app installations.
C:\Users\Username\Desktop\django_project\my_project>python manage.py runserver
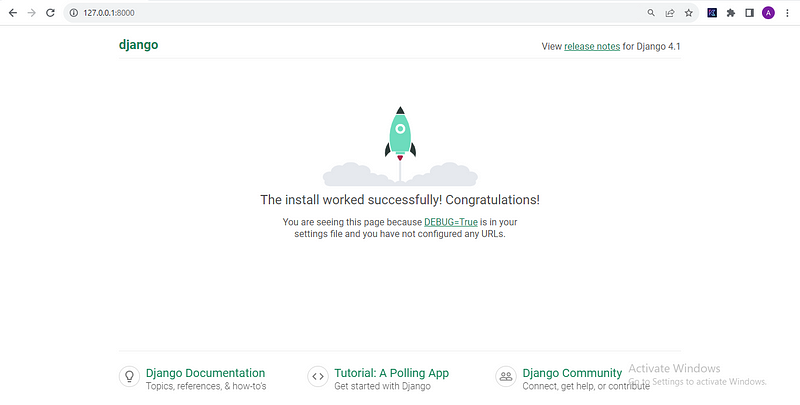
The Django server runs on port 8000, with an IP address 127.0.0.1. Open your browser and enter http://127.0.0.1:8000. If the image below is displayed on your screen, congratulations! you have successfully created your Django app.
Part two: App configuration and database setup
In this section, you will be creating a database that will enable users to store and retrieve data.
The model.py file in the app directory is where you will create the database tables. But first, configure your app.
Let’s get started.
Step one: App configurations
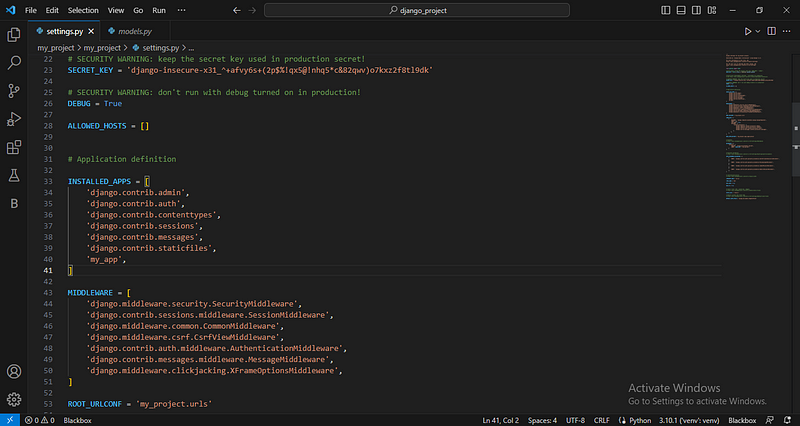
Open your Django project with any code editor of your choice. Next, open the settings.py file in the my_project directory. Scroll down to the INSTALLED APPS section, and add your app name–my_app, as seen in the image below.
Step two: Create a database table
Navigate to your app directory in your code editor, open the models.py file and insert the below codes.
    from django.db import models
    From django.contrib.auth.models import User
    class Article(models.Model):
    title = models.CharField(max_length=50)
    description = models.TextField()
    author = models.ForeignKey(User, on_delete=models.CASCADE)
    date = models.DateField(db_index=True)
    def __str__(self):
    Return self.title
The above code is a Django database model for Article. It also contains related data for the User.
Note that Django has a default User authentication. It was first imported from django.contrib.auth.models, and then applied as a foreign key to the Article model.
There is also a function below the Article model that returns self.title. This is to ensure that when articles are created, the title of each article will be displayed instead of Django’s default settings that return object.
Step three: Run migrations
In the Django framework, you need to run the migrations script any time you create or update the models.py file. The migration script helps to construct the model class into a database table.
To run the migrations scripts, open your terminal and stop the server by pressing Ctrl + C, if your server is still running. Next type the below command in your Django project directory to run the migration scripts.
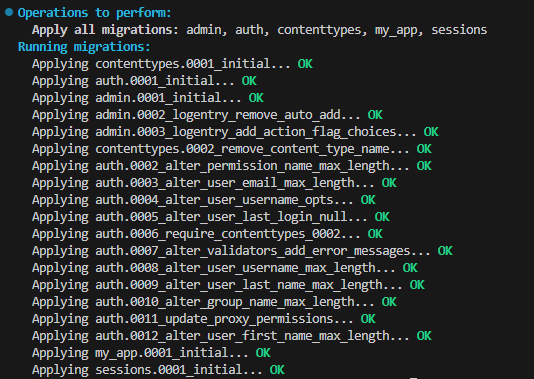
C:\Users\Username\Desktop\django_project\my_project>python manage.py makemigrations my_app
C:\Users\Username\Desktop\django_project\my_project>python manage.py migrate
If the above commands run successfully, it will show the below image on your terminal.
Congratulations! You have successfully created a database table with Django. The next part examines how to input your data into the database using Django Graphical User Interface (GUI), with a super user account.
Part three: User admin
In this section, you will create a super user account with Django. A super user account served as the app administrator. The app admin has the most authorization in the app. As the app admin, you can perform CRUD (Create, Read, Update, Delete) operations, assign other users to groups, and so on.
Let’s dive in.
Step one: Create a super user
In your terminal, type the below code to create a super user.
C:\Users\Username\Desktop\django_project\my_project>python manage.py createsuperuser
This will demand you to type in a username, email address, and password. Note that when typing the password, it will be invisible.
After that, you will be notified in your terminal ‘Superuser created successfully.’
Step two: Register article model
Open the Admin.py file with your code editor, and register the Article models you earlier created in the models.py file. See the code example below.
    from django.contrib import admin
    from .models import Article
    admin.site.register(Article)
Step three: Run the server
Next, run the Django server in your terminal.
C:\Users\Username\Desktop\django_project\my_project>python manage.py runserver
Step four: Admin login
Navigate to the admin page in your browser i.e. http://127.0.0.1:8000/admin
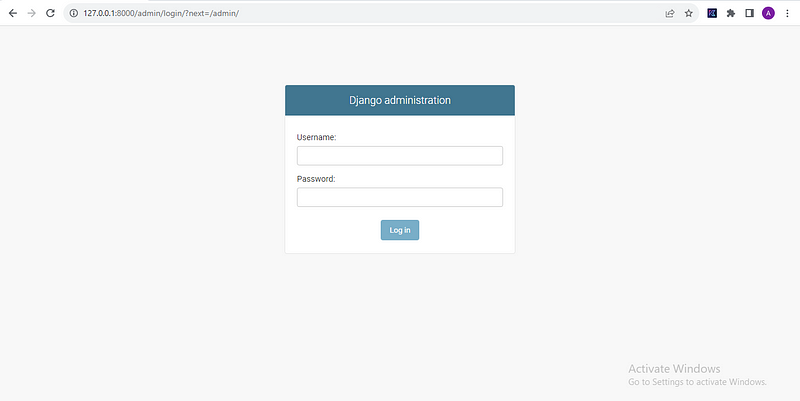
Enter the username and password you created earlier and click on Log in.
The below image is displayed on your browser.
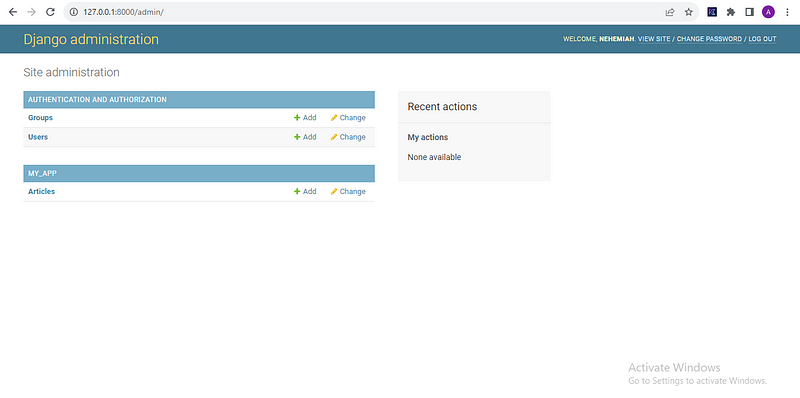
Let’s create an article.
Click on the Add button for Articles to create a new article, which takes us to the page displayed below.
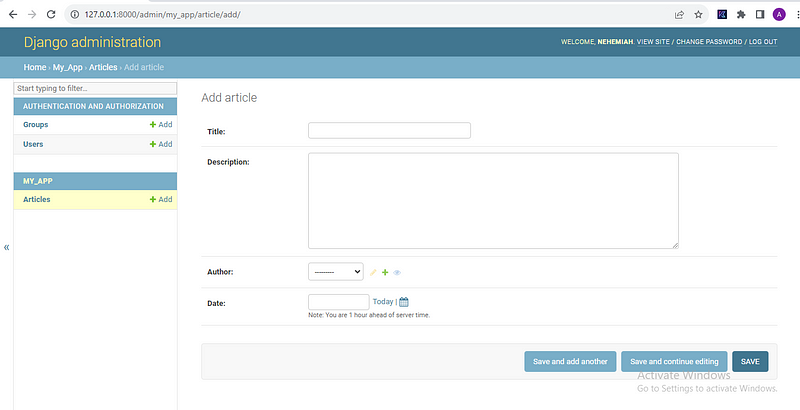
Next, fill in the details and click save. For now, select your super user as the author.
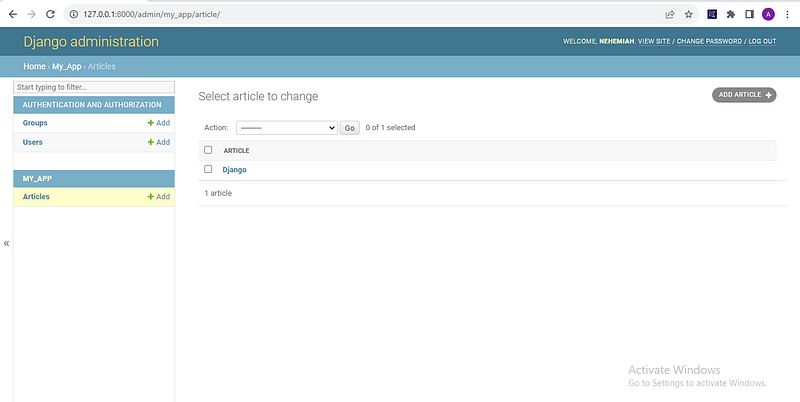
Congratulations! You have successfully created an article with the Django framework.
When you click on your article title, you can perform CRUD operations.
Conclusion
In this article, you learn about data and data structure in web development. Django was used as a case study. You learn the different data types as well as related data in Django. Finally, you created an article app with Django and you were able to write your first article. Great work!
Next is to further your knowledge of how to perform logic and algorithms with Django.
Comments
Loading comments…