Photo by Denis Cherkashin on Unsplash
Nowadays, it is impossible to escape emojis. We are surrounded by smilies that express our feelings or have the sole purpose of shortening our sentences. Whether you are laughing 😂 or whether the message that you received leaves you scandalized 😱, you have been able to express these emotions by adding what we call emoticons. For this reason then, in this article, we will see how to add these nice emoticons to our Angular project.
Preparing our environment
Creating projects, generating application and library code, performing tasks such as testing, building, and deployment depends on the Angular CLI. To install the Angular CLI, open the terminal and run the following command:
npm install -g @angular/cli
At this point, we create our workspace by running the following commands:
cd ~
ng new emoji-app
With the ng new command, you will be asked a series of questions depending on the version you have installed of the Angular CLI, which you can accept with the default values. Typical questions you should answer:
- Would you like to add Angular routing? Yes
- Which stylesheet format would you like to use? SCSS This can take a few minutes.
Hello World
The first thing we are going to do after creating the project is to certainly start it and see by default what is present in our workspace.
cd emoji-app
ng serve
At this point, open your browser and navigate to: <http://localhost:4200/>
As you can see, Angular’s CLI was kind enough to create a default page for us immediately displayed on the browser.
Necessary dependencies
To achieve our goal we will use the module: “ngx-emoji-mart”. As a first step we are going to install the following dependency:
npm install @ctrl/ngx-emoji-mart --save
At this point under the “dependencies” property in package.json you should be able to see something very similar to this: @ctrl/ngx-emoji-mart: ^4.1.0 .
At this point, we add the reference to the new module inside our app.module.ts and FormsModule in order to correctly use all the angular directives.
import { BrowserModule } from "@angular/platform-browser";
import { NgModule } from "@angular/core";
import { AppRoutingModule } from "./app-routing.module";
import { AppComponent } from "./app.component";
import { FormsModule } from "@angular/forms";
import { PickerModule } from "@ctrl/ngx-emoji-mart";
@NgModule({
  declarations: [AppComponent],
  imports: [PickerModule, FormsModule, BrowserModule, AppRoutingModule],
  providers: [],
  bootstrap: [AppComponent],
})
export class AppModule {}
and we import the CSS in the configuration file of our project angular.json under the field projects.emoji-app.architect.build.styles.
// ...
"styles": [
   "src/styles.scss",
   "node_modules/@ctrl/ngx-emoji-mart/picker.css"
]
// ...
Alternatively, you could also import the CSS in the src/styles.scss file as follows:
@import "~@ctrl/ngx-emoji-mart/picker";
Let’s code the template
Although during the generation a default template was created in the app.component.html, we clean the code from the automatically generated one and proceed to create a text-area with a button to add the icons.
We will display the compiled text immediately below our input.
Let’s create a title for our **app.component.html** page and a small paragraph below.
<h1>Angular Emoji</h1>
<p>This is where the magic happens</p>
At this point, we add our text-area.
<textarea
  placeholder="Type a message"
  type="text"
  name="textarea"
  [(ngModel)]="textArea"
></textarea>
And in app.component.ts the variable “textArea”.
public textArea: string = '';
At this point, all that remains is to take advantage of our installed module.
We then add a button after the textarea to activate the emojiPicker and the emoji-mart directive
<button (click)="isEmojiPickerVisible = !isEmojiPickerVisible;">😀</button>
<br /><emoji-mart
  class="emoji-mart"
  *ngIf="isEmojiPickerVisible"
  (emojiSelect)="addEmoji($event)"
  title="Choose your emoji"
></emoji-mart>
Clearly, as it is possible to observe, some variables have been used that are not yet present within our typescript component.
For this reason, let’s go to the app.component.ts and complete our component with the boolean isEmojiPickerVisible and the addEmoji method
export class AppComponent {
  public textArea: string = "";
  public isEmojiPickerVisible: boolean;
  public addEmoji(event) {
    this.textArea = `${this.textArea}${event.emoji.native}`;
    this.isEmojiPickerVisible = false;
  }
}
What the addEmoji method basically does, is nothing more than to input the value of the selected emoji and close the Picker again (depending on the behaviour you want the Picker to have, you can comment or not the line of code).
Let’s style
As in everything, making a layout a little more pleasing to the eye is always an aspect that should not be underestimated, even if it is a simple tutorial.
Specifically, we go to our app.component.scss and add the following code.
.container {
  display: grid;
  grid-template-columns: 100% 0%;
  width: 36%;

  button {
    background: transparent;
    border: 0;
    transform: translateX(-40px);
    cursor: pointer;
    &:focus {
      outline: 0;
    }
  }
}
Make sure you have enclosed the textarea and the button inside a div with class “container” as below.
<div class="container">
  <textarea
    placeholder="Type a message"
    type="text"
    name="textarea"
    [(ngModel)]="textArea"
  ></textarea>
  <button (click)="isEmojiPickerVisible = !isEmojiPickerVisible;">😀</button>
</div>
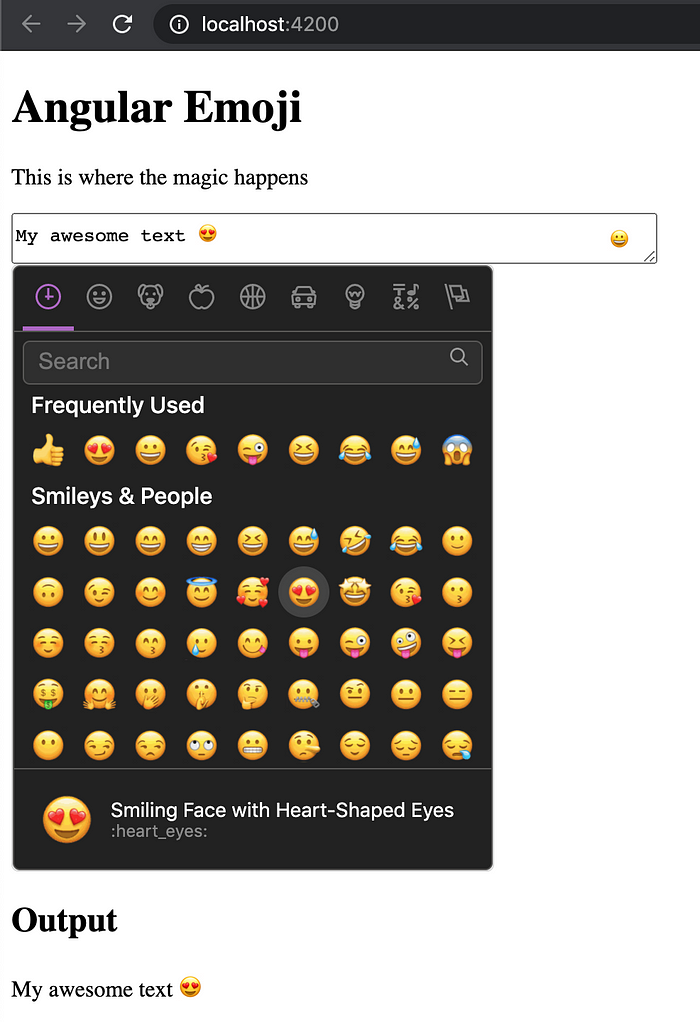
Final output
Comments
Loading comments…