HTML5 videos can be a blocker for having an A+ performance website. Web performance is the speed of when a web application/website is downloaded and is displayed to the user (people who are currently viewing your website).
Jeremy Wagner explained a lot about why performance of a website matters in a post from Google Developers. Long story short, he mentioned that performance affects the number of people that will stay on your website which eventually converts into money through purchases or ad revenues.
How to check your website performance?
There are a lot of ways to check your website performance but one way I did was using Google's Lighthouse. This technology not only allows you to check websites that is already on the Internet but also allows you to check your local web app. Like the one you are currently developing.
In my opinion, checking your web app's performance during its development is crucial because it will guide you along the way in terms of what you should or should not use. This tech also suggests you what you should do to acquire a very good performance.
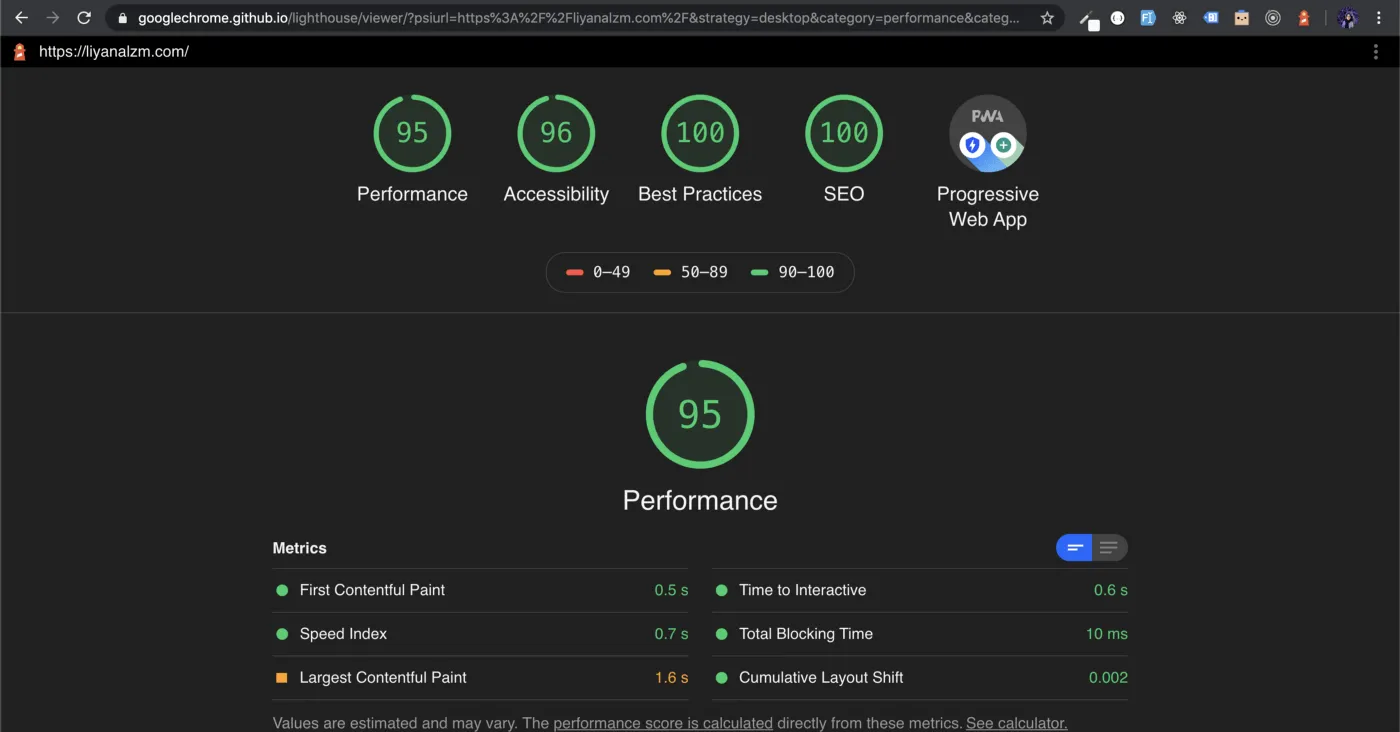
Image below is an example of my portfolio website performance that has HTML5 video tag.

Example of website with HTML5 Video tag
According to the image above, I still need to improve on the Largest Contentful Paint metric. If you click on the two tabs on your right hand side, more description with a Lean More link will appear that will eventually redirect you to a page with a lot of ways to fix it.
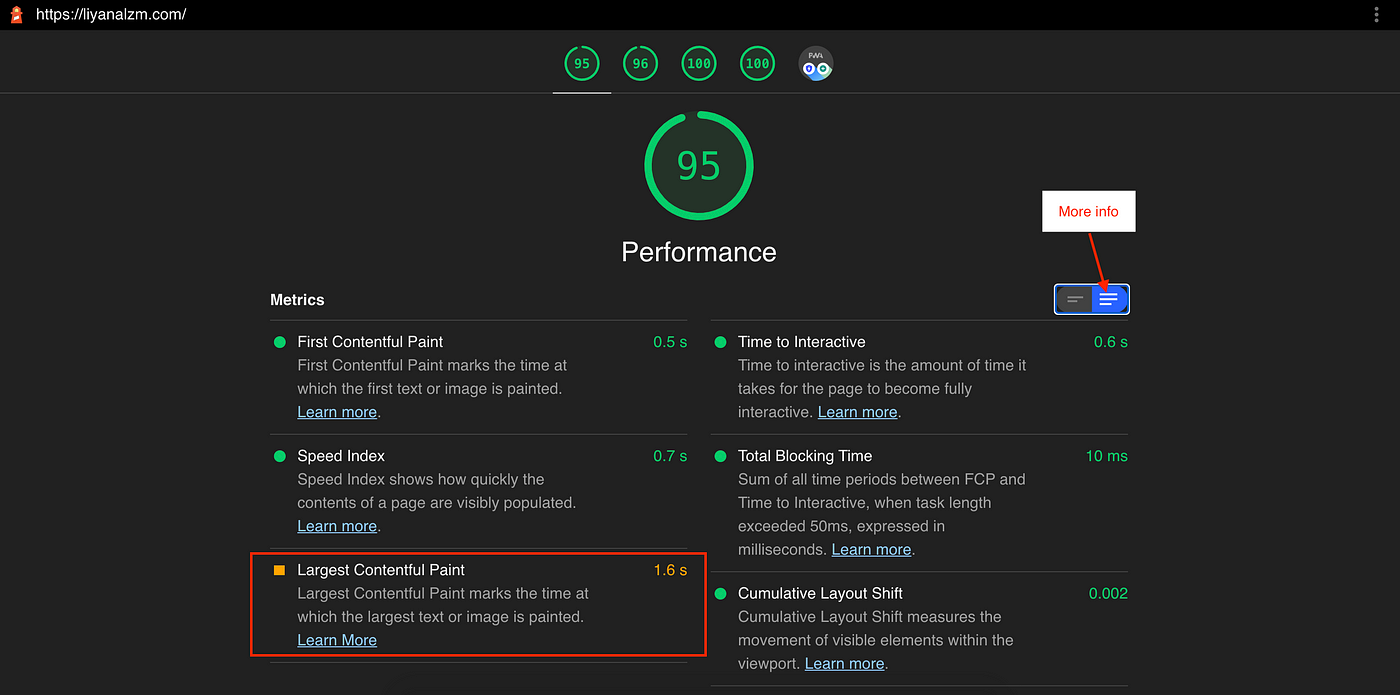
More elaborations on the metrics
Hence, this is the reasons why it is important to always check your site performance whilst in developing the website. Other than getting a website that has a good performance, you'll eventually improve the way you're writing your codes.
How do I achieve it?
What I'm going to tell you here is based on my experience developing with React JS. However, the logic can be applied with whatever technology you are using.
Only load the video after all the elements of the page is rendered correctly
  const Video = () -> {
    const [allowVideo, setAllowVideo] = useState(false);

    useEffect(() => {
      setAllowVideo(true);
    }, []);

    return (
      {allowVideo && (
        <video
          muted
          loop
          autoPlay
          playsInline
        >
          <source
            src="https://www.liyanalzm.com/static/wind-24aec1ed6c350d2efc9227d74cecbc8c.mp4"
            type="video/mp4"
          />
        </video>
      )}
    );
}
Display the first frame image of the video while the video is loading
The reason is to avoid white screen displaying to user for too long while the video is downloading. If so, user might think that the website is broken. It is better to put the first frame of the video to avoid any glitch that happens at the moment the video starts to play. Smooth transition is indeed the best user experience.
Based on the above snippet, I prefer displaying the first frame image as a background image as it does not download at first load and won't block the first page paint.
<div
  style={{
    backgroundImage:
      'url("https://www.liyanalzm.com/static/726d39074835b9d137d0e8963e2612c3/1920d/wind.jpg")',
  }}
/>
Once video is loaded overlap the video on top of the image
Talking about basic HTML5 concept, if one tag is below the other tag, the HTML tag that is at the below will be on top of the other one. Hence, even if the video has already loaded and being displayed, user won't see the video as the image is on top of it. Hence, we should adjust the style by adding z-index: -1 to hide and z-index: 1 to show.
What we can do to ensure the video has fully downloaded is to use the attribute *onCanPlayThrough. *The attribute will call videoLoaded function which will set isVideoLoaded to true. isVideoLoaded acts as a flag to hide or show the respective HTML tag as shown in snippet below.
const Video = () => {
  const [allowVideo, setAllowVideo] = useState(false);
  const [isVideoLoaded, setIsVideoLoaded] = useState(false);
  useEffect(() => {
    setAllowVideo(true);
  }, []);

  const videoLoaded = () => {
    setIsVideoLoaded(true);
  };
  return (
    <div>
      {allowVideo && (
        <video
          muted
          loop
          autoPlay
          playsInline
          onCanPlayThrough={videoLoaded}
          className={`${isVideoLoaded ? "show" : "hide"}`}
        >
          <source
            src="https://www.liyanalzm.com/static/wind-24aec1ed6c350d2efc9227d74cecbc8c.mp4"
            type="video/mp4"
          />
        </video>
      )}
      <div
        style={{
          backgroundImage:
            'url("https://www.liyanalzm.com/static/726d39074835b9d137d0e8963e2612c3/1920d/wind.jpg")',
        }}
        className={`fallback ${isVideoLoaded ? "hide" : "show"}`}
      />
    </div>
  );
};
Combined code
Below is the product of all the snippets given above. Fork and play around with it.
What will happen if I didn't care about the performance?
Snippet below is an example where I removed the code that could improve the performance.
When you run Lighthouse test, the performance of the website decreases. As you can see in the image below, the Speed Index matrix scored at 7.1 seconds which is 7 times slower. This is because the web takes a lot of time to download and display the video.
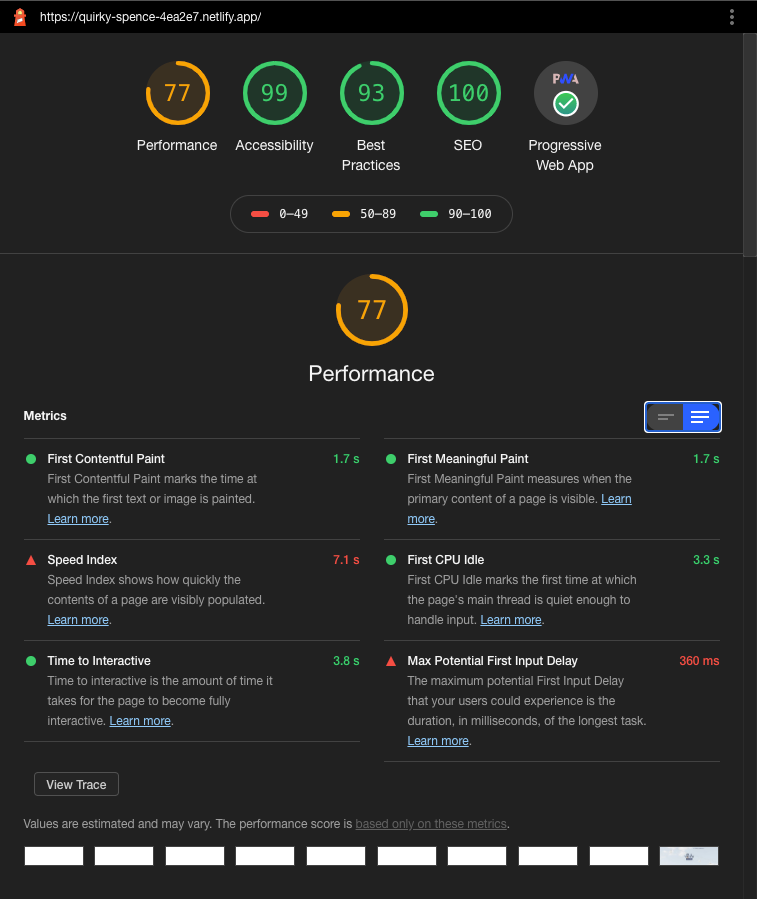
B-scored performance
To recap:
- Google's Lighthouse is a good tool for checking web app's performance during development and production.
- Only load the video after all the elements of the page is rendered correctly.
- Display the first frame image of the video while the video is loading.
- Once video is loaded overlap the video on top of the image.
Comments
Loading comments…