Introduction
If you want to create a Chrome extension with complex functionalities, chances are you need your background, content, and popup scripts to work together and react to each other.
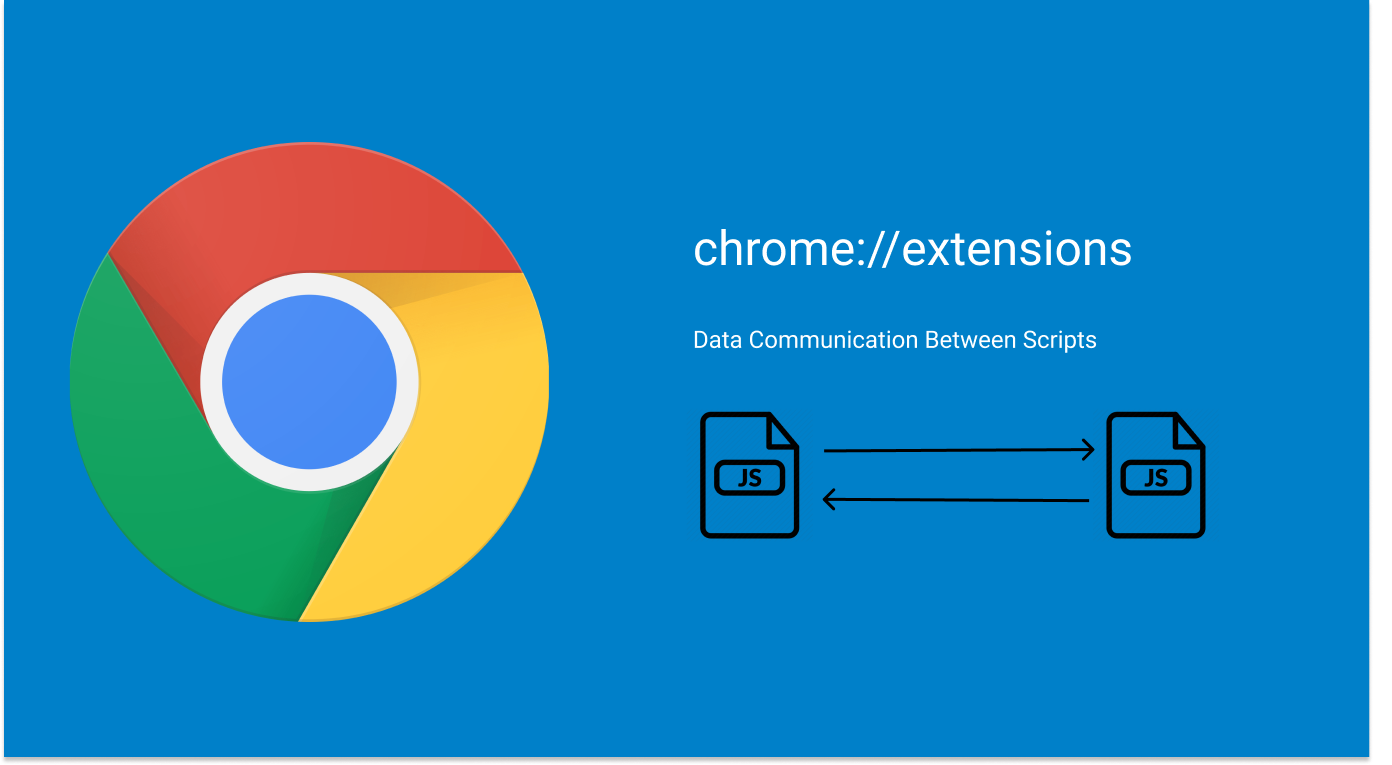
In this tutorial, I want to explain how we can send data between different components of a Chrome extension with one-time messages and long-lived connections.
Before reading on, since this post only talks about message passing, you should already have good knowledge on how to create a chrome extension and upload it on the Chrome extension page for testing.
This tutorial will be written using Manifest v3. One big difference from v2 is the ability to use async/await. But If you are using v2, you can just use callbacks instead of async/await.
A brief overview of the architecture
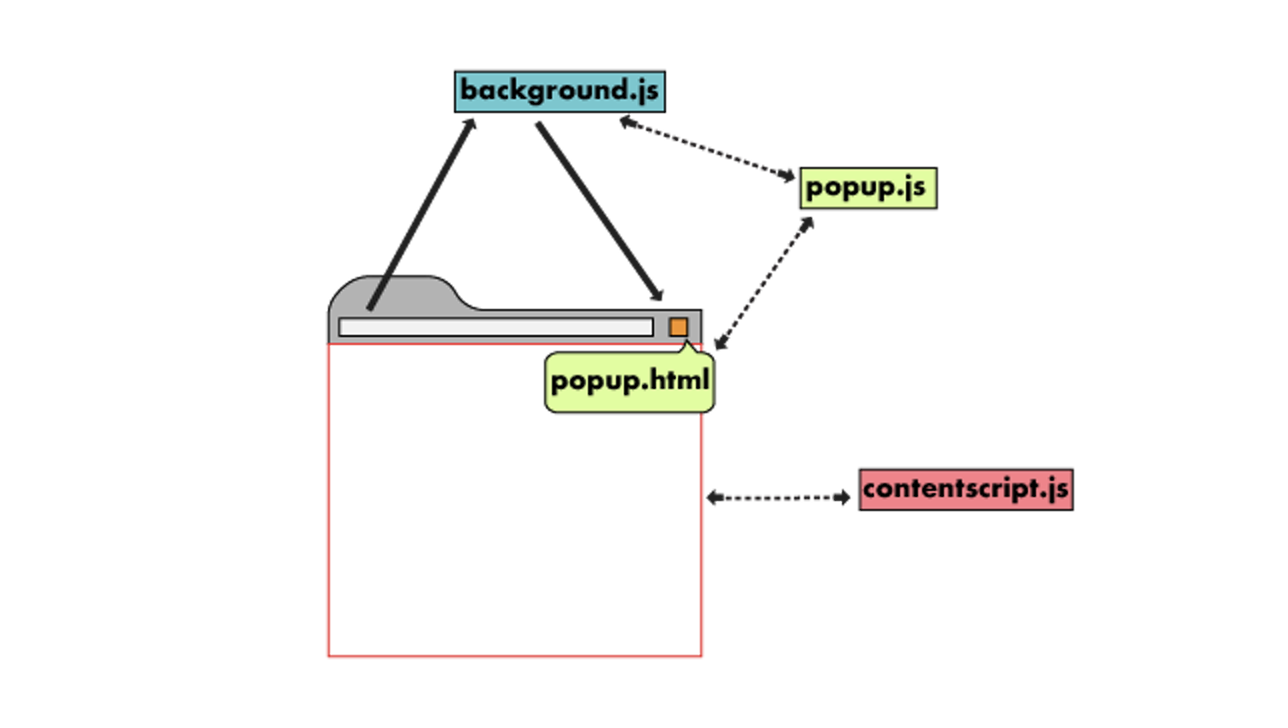
To really understand how message passing works between different components, it’s important to understand the architecture of an extension and know what each part is responsible for.
There are 3 main components we care about for an extension:
-
UI Element
-
Background Script
-
Content Script
 https://developer.chrome.com/docs/extensions/mv3/architecture-overview/
The UI element is what is being displayed when the extension icon is clicked, and it can contain a JavaScript file (popup.js) which makes it user-interactable. However, since the JavaScript logic is only used for the popup, it can’t be applied to the actual web page a user is currently viewing.
In order to manipulate and read the webpage, we need to use a content script. The content script will execute in the context of the page that is being loaded into the browser, so it’s very useful if we want to change certain information or the aesthetics of the site.
Finally, the background script (or service worker in v3) is mainly used for event handling. It is loaded once and stays idle if no interesting event is fired. It can’t access the DOM directly, but it can be very helpful for purposes such as intercepting outgoing and incoming requests for a site.
As you can see, all 3 components have different purposes, and they have access to different things in a browser. Therefore, we need to make them talk to each other and react to different messages to achieve complex functionalities.
One key thing to remember is that the content script lives in the context of the currently active tab. Therefore, any time we want to communicate with the content script from popup or background script, we need to specify which tab to send the message to, and this is true for both one-time messages and long-lived connections.
One time messages
One-time messages are useful if you want to send a single message to other parts of the extension. You can send a one-time request from the content script to popup or vice versa, and react to a reply message.
On a high level, the idea is that one of the scripts will be the message sender, and the receiver will set up a message listener to listen for any incoming messages. When a message is received, the listener runs, and can optionally send back a response to the message sender. The listener is added using chrome.runtime.onMessage.addListener .
Depending on the receiver, Chrome exposes 2 types of methods for us: chrome.runtime.sendMessage and chrome.tabs.sendMessage . It’s important to know when to use which method.
When sending a message to the content script, we need to specify which tab to send it to. Therefore, we need to retrieve the active tab information first, and then use tabs.sendMessage . To use the tabs API and to have access to the active tab, you need to add tabs and activeTab under permissions in your manifest.json .
If we are sending the message from the content script, then we should use runtime.sendMessage because we want to send it to the application or the extension page.
// popup.js
const sendMessageButton = document.getElementById("sendMessage");
sendMessageButton.onclick = async function (e) {
  let queryOptions = { active: true, currentWindow: true };
  let tab = await chrome.tabs.query(queryOptions);

  chrome.tabs.sendMessage(
    tabs[0].id,
    { color: "#00FF00" },
    function (response) {
      console.log(response.status);
    }
  );
};

// content.js
chrome.runtime.onMessage.addListener(function (request, sender, sendResponse) {
  if (request.color === "green") {
    document.body.style.backgroundColor = "green";
    sendResponse({ status: "done" });
  }
});
The above code shows how an extension’s popup actions can trigger a change in how the site looks. When sendMessageButton is clicked by the user, the handler will query the currently active tab, and send a message to the content script for that tab using sendMessage .
The method takes in 3 parameters:
-
**tab Id: **the active tab ID
-
message: can be a JSON object that contains data
-
response callback: a function that runs after the receiver replies
On the content.js side, which is the receiver, it needs to listen to incoming messages. This is done by setting up a listener using chrome.runtime.onMessage.addListener . The listener function is a function that looks like this:
(message: any, sender: [MessageSender](https://developer.chrome.com/docs/extensions/reference/runtime/#type-MessageSender), sendResponse: function) => {...}
The message parameter is the message sender sent using sendMessage , sender is an object that contains information about the script context that sent the message, and sendResponse is a function that takes in a JSON-fiable object for replying to the sender.
If you are sending messages from content script to popup, then you just need to use chrome.runtime.sendMessage instead of tabs.sendMessage . runtime.sendMessagedoesn’t take tab ID as the first parameter, but the rest of the function signature is the same as tabs.sendMessage . The receiver side code remains the same: chrome.runtime.onMessage.addListener .
You can have multiple elements in popup.js sending different messages to the receiver, to perform different actions on the currently active site the user is viewing.
Long-lived Connections
Long-lived connections allow you to open a connection that lasts longer than a single request. You can do so by using runtime.connect and tabs.connect respectively.
Let’s dive straight into the code for opening a connection from popup to content script:
const sendIdButton = document.getElementById("sendIdButton");
sendIdButton.onclick = async function (e) {
  // Query tab
  let queryOptions = { active: true, currentWindow: true };
  let tabs = await chrome.tabs.query(queryOptions);

  // Open up connection
  const port = chrome.tabs.connect(tabs[0].id, {
    name: "uiOps",
  });

  // Get input value
  const idInput = document.getElementById("idInput");
  port.postMessage({
    id: idInput.value,
  });

  port.onMessage.addListener(function (msg) {
    if (msg.exists) {
      sendIdButton.style.backgroundColor = "green";
    } else {
      sendIdButton.style.backgroundColor = "yellow";
    }
  });
};
On line 8, we are opening a connection to the content script of the active tab, and we are passing in a JSON object with a name field. This name field allows us to distinguish between multiple open connections (if your extension has them). connect method returns back a port object, and we can use this object to send messages with port.postMessage , or optionally add a onMessage listener to listen to any replies.
On line 14, we are sending a message to the receiving end (content script). The message is a JSON object with any data you want. In our case, we are passing along the value of the idInput input box.
On line 18, we are setting up the onMessage listener, which will be triggered when the receiver replies. We are expecting the reply message to have a exists field, and we will set the button background color to either green or yellow depending on the value.
chrome.runtime.onConnect.addListener(function (port) {
  port.onMessage.addListener(function (msg) {
    if (port.name === "uiOps") {
      const idToQuery = msg.id;
      if (document.getElementById(idToQuery)) {
        port.postMessage({
          exists: true,
        });
      } else {
        port.postMessage({
          exists: false,
        });
      }
    }
  });
});
To listen to incoming messages, we need to implement the listener function inside runtime.onConnect event listener, and it’s the same for bothpopup.js andcontent.js .
When the popup script called .connect , onConnect event is fired and a port object is included in the listener. We can use this object to add message listeners using .onMessage.addListener , or to reply back with port.postMessage .
On line 3, we are checking the name of the port object. As you can imagine, you may have other connections with different names, and this is where you can customize the behavior of your content script. The listener then tries to find an element on the active page with the ID from the msg object. This msg object is the parameter passed intopostMessage from the popup.
On lines 6 and 10, we are posting a message back to the sender. This will kick off the onMessage listener defined in popup.js , completing the communication cycle.
Conclusion
Hopefully, this tutorial can be helpful to you if you are trying to create an extension with complex functionalities. For more in-depth information on message passing, the Chrome documentation is always the source of truth.
Thank you for reading!
Comments
Loading comments…