
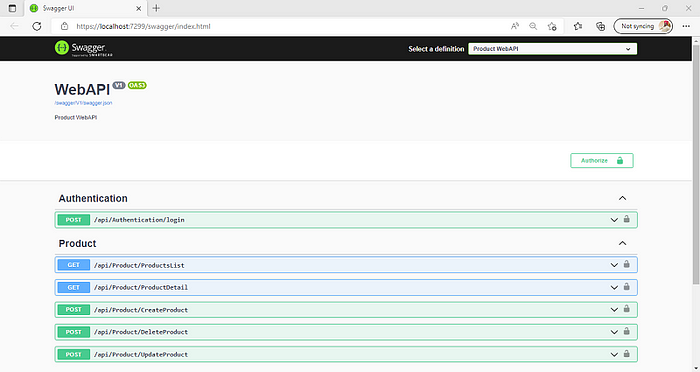
We are going to discuss JWT Token Authentication and Implementation using .NET Core API 6
Before looking into this blog, visit my following blogs to understand the basics and details of JWT Token Authentication and Authorization and how things work using JWT.
Introduction and Detail about JWT Token Authentication and Authorization
Let's start the implementation of the .NET Core 6 Web API,
Step 1:
Create the .NET Core 6 Web API Application
Step 2:
Install the following NuGet Packages which we are going to use throughout the application.
Microsoft.AspNetCore.Authentication.JwtBearer
Microsoft.EntityFrameworkCore
Microsoft.EntityFrameworkCore.Design
Microsoft.EntityFrameworkCore.SqlServer
Microsoft.EntityFrameworkCore.Tools
Newtonsoft.Json
StackExchange.Redis
Swashbuckle.AspNetCore
Step 3:
Next, create new folder Models inside the solution and create a Product class inside that.
Step 4:
Create one DbContextClass inside the Data folder used for Database operation.
Step 5:
Later on, create ProductController inside the Controllers folder.
Step 6:
Now, we are going to use the Redis cache inside this application. If you understand how distributed Redis Cache work for that check my following blog
Implementation of Redis Cache in .NET Core Web API
Step 7:
Create the Cache folder inside the solution and create a few classes for Redis and Connection Helper. So, First, create ICacheService and CacheService for Redis Cache.
Next, create CacheService class for Redis Cache-related functionality.
Step 8:
Create ConfigurationManager class which we use to configure the appsetting.json file.
Step 9:
Next, Create ConnectionHelper class inside the cache folder to get the RedisURL and configure that into the application.
Step 10:
Now, we are going to create Login and JWTTokenResponse class for the JWT Authentication part
Also, Create JWTTokenResponse class for token.
Step 11:
Later, Create AuthenticationController inside the Controllers for Authentication of User.
- As you see above class we take the Username and Password from the User, then take the secret key which we put inside the appsettings.json file
- Next, create signing credentials using a secret key using HMAC SHA256 Crypto Algorithm for encoded string.
- Later on, we put a few attributes while creating tokens like signing credentials, expiration time, issuer, audience, and different types of claims as per our needs and requirement.
- Finally, using Token Handler create the Token and which is in the encoded form and sent to the end-user.
Step 12:
Add a few Environmental Variables inside the appsetting.json file.
Step 13:
Next, register all servers related to JWT Authentication, Swagger UI for Authentication, CORS Policy, and Cache Services inside the Program class as shown below:
Step 14:
Finally, execute the following command in the Package Manager Console for the entity framework for data migration and database update.
add-migration “First”
update-database
Step 15:
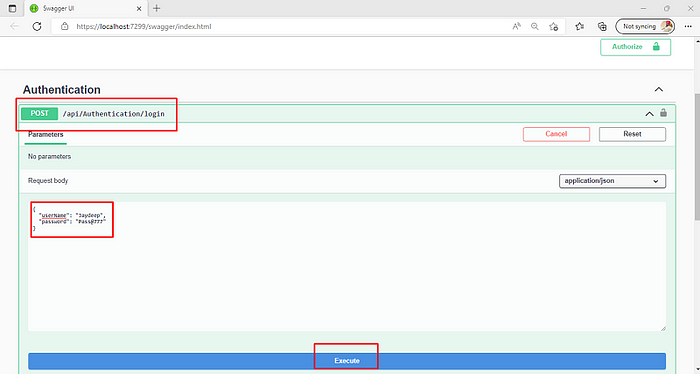
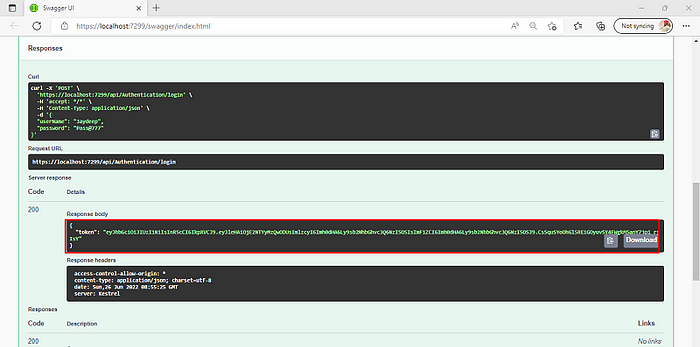
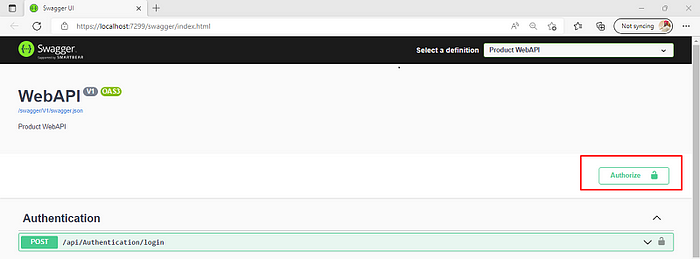
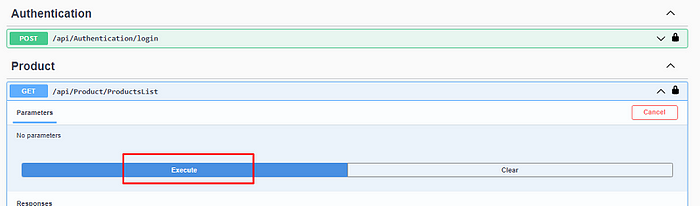
Run the application and create the token after providing credentials and put it into the Authorize tab inside swagger UI as shown in the below image:


So, this is all about JWT Authentication in .NET Core 6 Web API.
I hope you understood these things and now have an idea of how things work.
Happy coding!
Comments
Loading comments…