In today's digital world, our lives are filled with photographs. Whether they are memorable moments, important documents, or work-related images, we prefer saving these photos on multiple devices. However, sometimes due to accidental deletion, device formatting, virus attacks, or any other reasons, these important photos get deleted from your Windows or Mac device.
Luckily, there are several photo recovery methods available online that you can try to retrieve deleted photos on your device. This guide will walk you through the step-by-step process of recover deleted photos from Windows or Mac computer.
Understanding Where Deleted Photos Go
Before you proceed with methods for photo recovery from Mac or Windows PC, it's essential to understand what happens when you delete photos. On both Windows and Mac, when you delete a file including your photos, it isn't immediately wiped from your hard drive. Instead, your device OS marks the space occupied by the file as available for reuse. Until new data overwrites that space, the deleted file can still be recovered. This is why it's crucial to act quickly once you find that any important photos are deleted from your device.
Quick Methods to Retrieve Deleted Photos on Windows/Mac
In this part of the blog, we'll discuss some quick photo recovery methods, including manual approaches and third-party photo recovery software, which you can try to retrieve deleted photos. Let's get started!
Method 01: Check the Recycle Bin (Windows) or Trash (Mac)
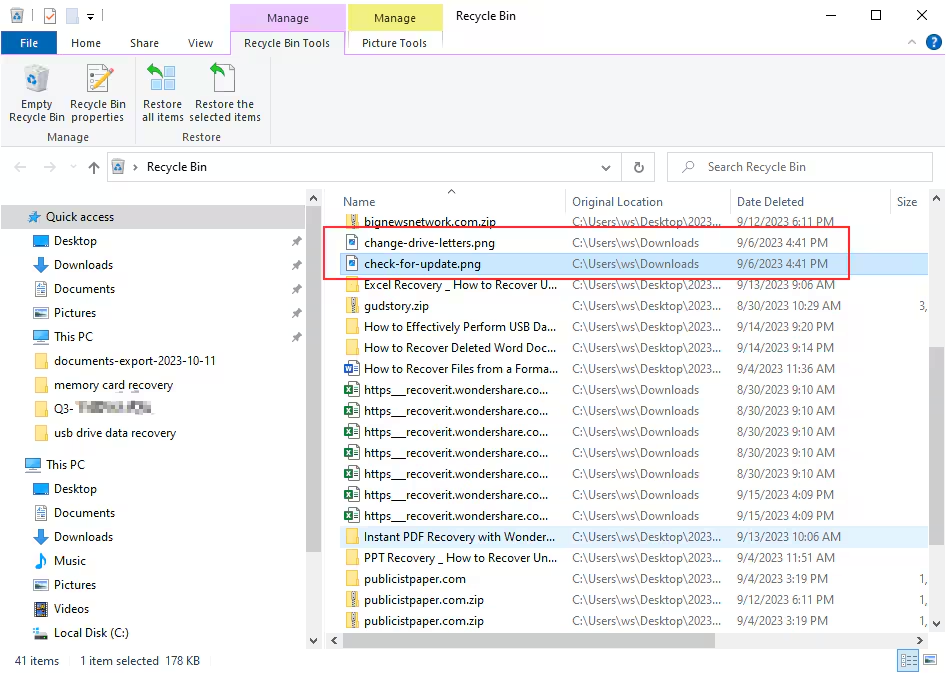
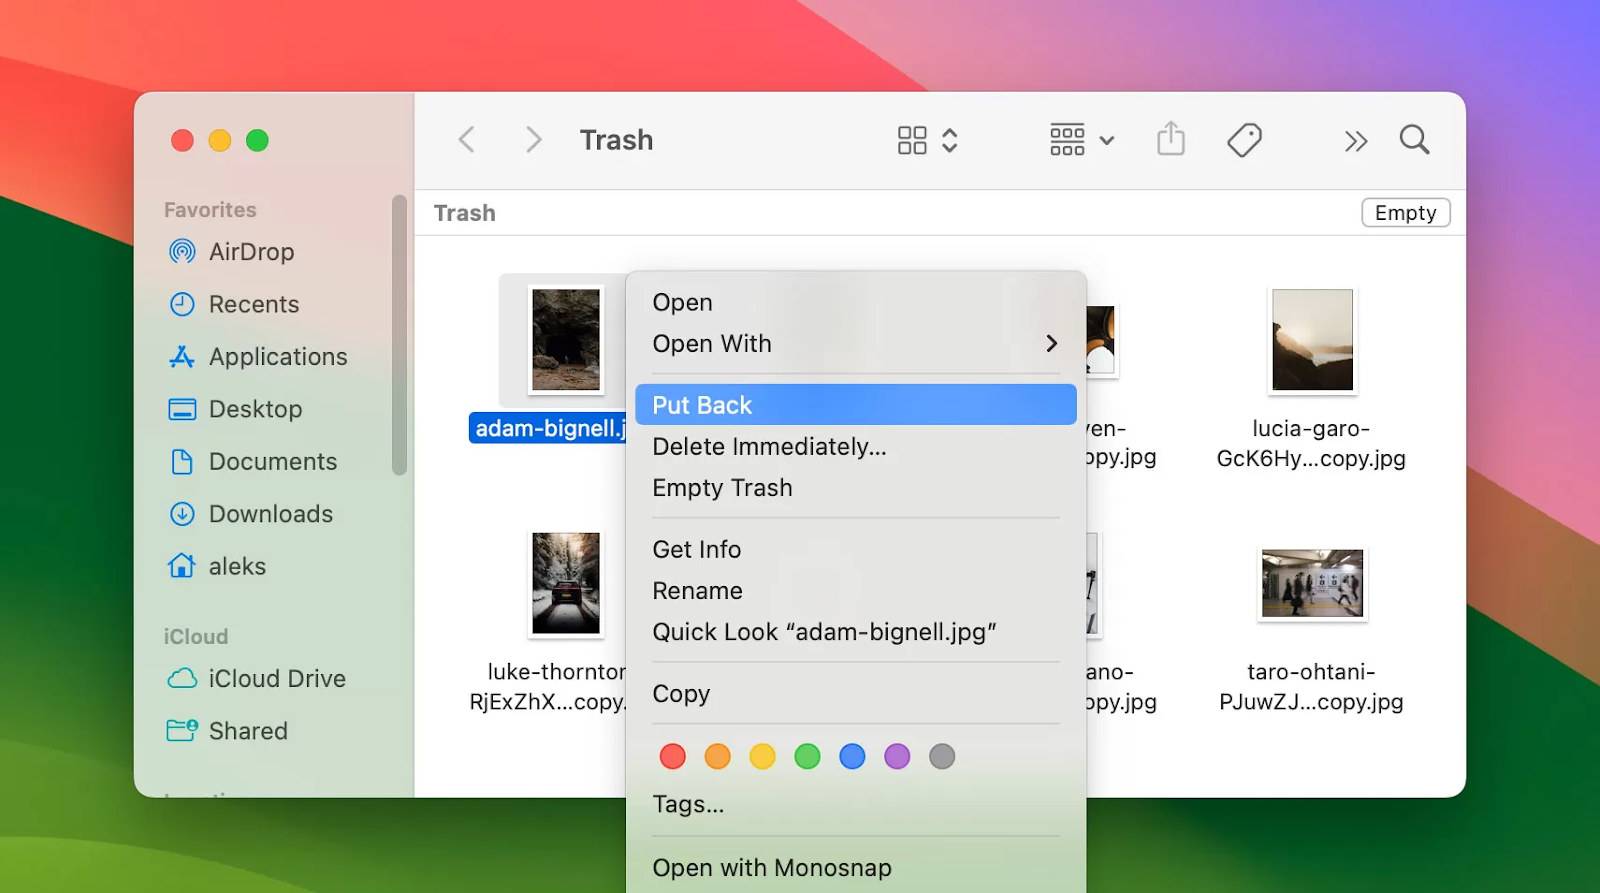
Every deleted file, including photos, on your Windows or Mac device goes to the Recycle Bin or Trash folder, respectively. These deleted photos remain there for some days, say 30 days, or until you permanently delete them from there as well. Follow the below steps for photo recovery from Mac or Windows using these in-built tools:
For Windows:
- Launch Recycle Bin by double-clicking its icon located on your desktop.
- Go through the deleted files and locate the photo that you need to restore.
- Once you find the deleted photo, right-click it and select "Restore". This will return the file to its original location.
For Mac:
- Click the Trash icon located at the right-hand corner of your dock.
- Scroll through the list to find the deleted photos that you are looking for.
- Select and right-click on the photo you need to restore. Select the "Put Back" option to return the photo to its original folder.
Method 02: Use File History (Windows) or Time Machine (Mac)
If you have emptied the Recycle Bin or Trash, you'll need to check previously created backups to restore your lost photos. Windows offers a built-in File History backup utility, and Mac users have Time Machine --- both tools are designed to back up your files automatically. All you need is to enable these backup options on your device. After that:
For Windows (File History):
- Right-click on the folder where your photos were stored before deletion, and then select "Restore previous versions".
- Navigate to the Previous Versions tab and go through the list of available backups.
- Choose the version that contains your deleted photos and click "Restore".
For Mac (Time Machine):
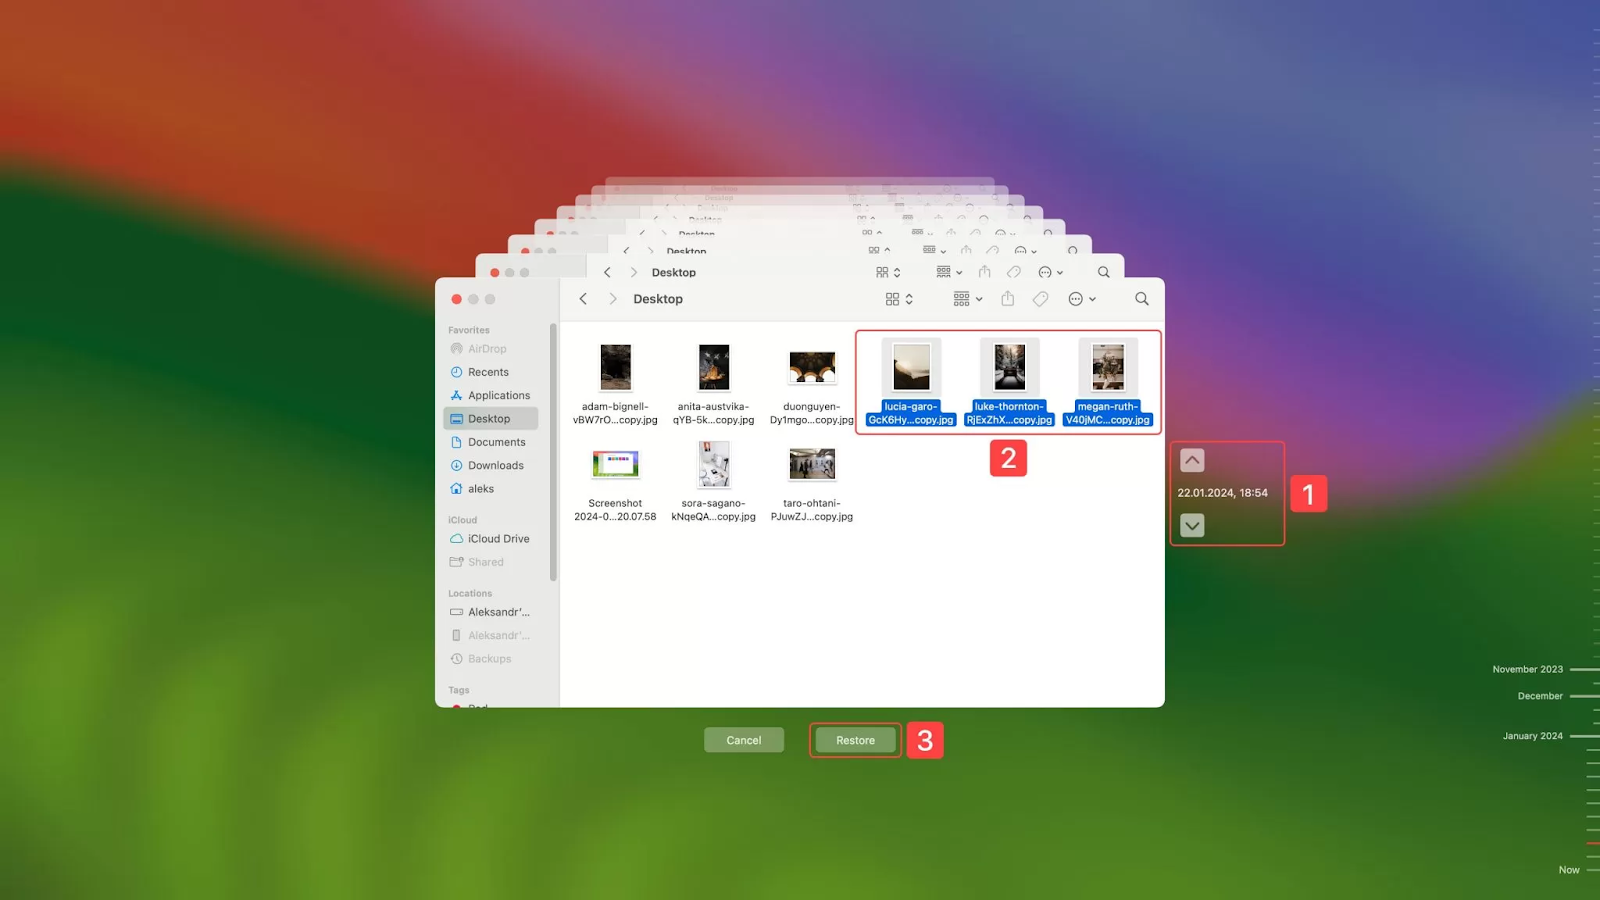
- Firstly, connect the Time Machine backup drive to your Mac, if it isn't already connected.
- Open the folder where the deleted photos were originally saved.
- Now, click the Time Machine icon from the menu bar and select "Enter Time Machine".
- Use the timeline on the right-hand side of the screen to locate the backup from before the photos were deleted.
- Once you find the deleted photos, select them and click "Restore".
Method 03: Use Professional Photo Recovery Software
If your photos aren't in the Recycle Bin/Trash or backed up by File History/Time Machine, don't lose hope. There are several photo recovery software such as Stellar Photo Recovery, which can help you in easy and quick photo recovery from Mac or Windows devices. This all-in-one photo recovery software is powerful enough to restore your lost photos even from damaged or reformatted drives.
- Not only photos, you can use the Stellar Photo Recovery software to recover deleted videos and audio files of multiple file formats.
- Supports recovery of multimedia files deleted due to accidental deletion, formatting, virus attacks, human error, etc.
- Compatible with both Windows and Mac devices.
- It can recover deleted photos from hard drives, SSDs, SD cards, smartphones, and many other storage devices.
- Allows you to preview the recoverable photos before saving them on your device.
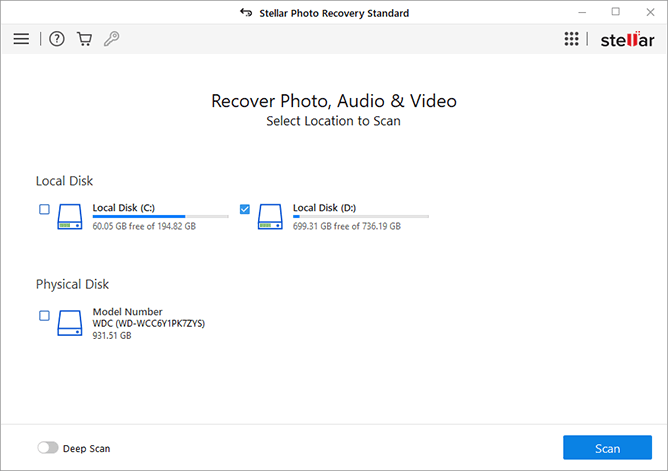
Here's how to retrieve deleted photos from a Windows or Mac device using this amazing photo recovery software:
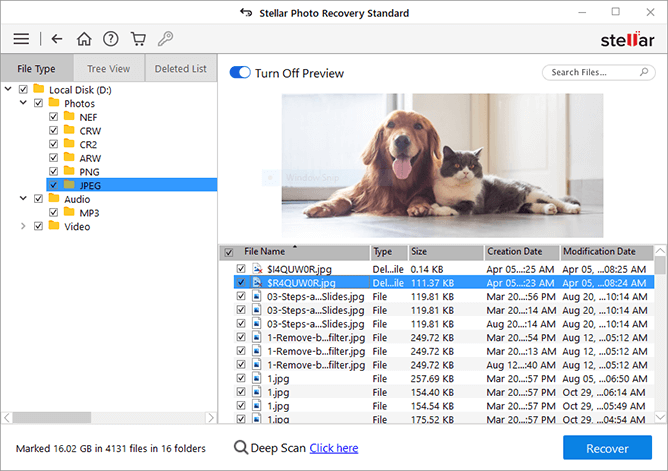
Step 1: Firstly, download and install the Stellar Photo Recovery software on your Windows PC/Mac. Launch the software and from the homepage, select the storage drive where your deleted photo was stored before deletion and click Scan.
Step 2: Wait till the scanning process is finished. Once done, preview the recoverable files and choose the photos you need to restore.
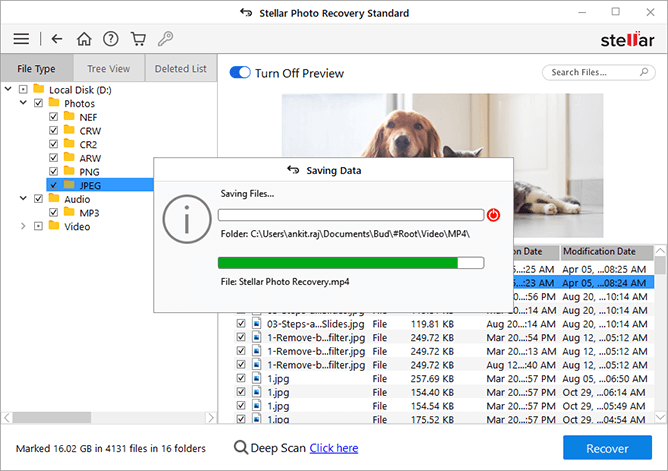
Step 3: Click the Recover button to save the selected photo(s) at the desired location on your device.
Method 04: Seeking Professional Help
If none of the above methods work, it may be time to seek help from a professional data recovery service. These services have specialized tools and expertise for recovering lost data from damaged drives, corrupted files, or overwritten data.
Some reliable services include Ontrack, DriveSavers, and Secure Data Recovery. These professional data recovery services are quite expensive, so consider them the last resort for retrieving critical files.
Preventive Tips to Avoid Photo Loss Issues Again
Losing photos can be distressful, but by implementing the aforementioned photo recovery methods you can easily restore photos lost or deleted from Windows or Mac. Moreover, you can consider the below-given preventive tips to safeguard your precious memories from future loss:
- Regular Backups: Always backup your photos to multiple locations, such as an external hard drive, cloud storage, or a NAS (Network Attached Storage).
- Enable Version Control: On Windows, ensure File History is turned on, and for Mac users, use Time Machine to create regular backups.
- Be Cautious While Deleting: Double-check every time before permanently deleting files on your device. Use confirmation dialogues to prevent accidental deletion.
- Use Reliable Recovery Software: Invest in reputable data recovery software and install it beforehand. Stellar Photo Recovery is 100% safe and secure software which offers easy photo recovery from Mac or Windows and that's too in three simple steps.
The Bottom Line
Hope, the aforementioned Windows or Mac photo recovery methods help you in recovering deleted photos easily. Whether it's checking your Recycle Bin/Trash, using backup tools like File History or Time Machine, or leveraging third-party photo recovery software, there's almost always a solution. Finally, taking steps to prevent future data loss will save you the trouble of going through the recovery process again.
Comments
Loading comments…
