Last updated: September 2025

TL;DR: This is a tutorial on how devs can use n8n (free, self-hosted automation builder), a local LLM, and Bright Data MCP (free all-in-one web extraction tool) to scrape, process, and synthesize READMEs + best practices for their project dependencies into a single Markdown “Bible” that is specific to their stack.
The Problem
Engineering teams waste time, duplicate work, and lose critical context when people leave — because their actual implementation knowledge, the way the stack really works together, isn’t captured anywhere reliable. Instead, patterns, conventions, and architectural decisions live in scattered conversations, outdated wikis, and engineers’ memories.
Individual libraries might have great docs, but the real value is in how those tools fit together in your unique setup — and that knowledge disappears fast.
The Solution: Automation + Local LLMs
So I built an agentic workflow in n8n that automatically analyzes your package.json (you can adapt this for requirements.txt) for dependencies, scrapes GitHub READMEs and best practices for them all, analyzes it using local LLMs, and outputs team-ready implementation guides personalized for your stack, not someone else’s ideal.
Think of this as your Dependabot, but for knowledge instead of dependencies.
What is n8n?n8n (pronounced en-eight-en) is an open-source automation platform — think Zapier, but self-hostable and developer-friendly — that lets you connect APIs, code, and AI agents into custom workflows, and build them visually.
Scroll down to the end for a FAQ section if you have questions 👇.
How This Compares to Alternatives:

| Solution | Cost | Setup Time | Maintenance | Self-Hosted | Best For |
| - - - - - | - - - | - - - - - - | - - - - - - -| - - - - - - -| - - - - - |
| **This N8N Workflow** | Free | 2 hours | Low (monthly runs) | ✅ Yes | Teams wanting full control, custom synthesis |
| **Manual Documentation** | Free | 8+ hours/month | High (constant updates) | ✅ Yes | Small teams (<5 devs), simple stacks |
| **Dependabot** | Free | 15 minutes | None | ❌ No | Dependency updates only (no docs) |
| **GitBook/Notion AI** | $8–20/user/month | 30 minutes | Medium | ❌ No | Teams wanting hosted solution |
| **Custom Scripts** | Free | 4–6 hours | High (maintenance) | ✅ Yes | Single-use cases, specific formats |
| **Confluence/Wiki** | $5–10/user/month | 1 hour | High (manual updates) | ❌ No | Traditional documentation teams |
| **Commercial Doc Tools** | $50–200/month | 1 hour | Low | ❌ No | Enterprise with budget, compliance needs |
Technologies Used:
The system combines three key components:
- n8n for workflow automation.
- Bright Data Web MCP for structured web scraping. For a primer on what Model Context Protocol (MCP) is— see here. For an advanced MCP use-case — see here.
- Local LLMs via Ollama (I’m using
gpt-oss:20b) to generate the best practices guide (use OpenAI/Anthropic if you’d prefer that, or are not running locally — the setup isn’t much different)
Here’s the full n8n workflow:

Prerequisites
Before running this workflow, make sure you have the following in place:
- n8n installed: Install n8n globally via npm (
npm install n8n -g). You must have a Node.js version between 20.19 and 24.x, inclusive.
- Bright Data Account: Sign up — the free tier gives you 5,000 requests/month for the MCP — then grab your API token. New users get a test API key via welcome email, but you can always generate one from Dashboard -> Settings -> User management.
Bright Data - All in One Platform for Proxies and Web Scraping
- Node.js External Axios Support: Add this environment flag to allow use of
axiosinside n8n function nodes for HTTP calls —
# For cmd.exe (current session)
> set NODE_FUNCTION_ALLOW_EXTERNAL=axios

# For PowerShell (current session)
> $env:NODE_FUNCTION_ALLOW_EXTERNAL = "axios"

# Persistent (works across sessions, but requires reopening shell)
> setx NODE_FUNCTION_ALLOW_EXTERNAL "axios"
- Run n8n: Now you can start the n8n server locally at
http://localhost:5678withn8n start
Step 1: Repository Ingestion + URI Resolution
TL;DR: Ingest your package.json, then use a N8N Code node to resolve the list of GitHub repos into the raw URLs for their README files.
What we’re doing in this stage:
The workflow starts with you picking a package.json to be read with the Read File from Disk node (you add nodes in n8n via the Plus button, or the right click context menu), if you’re running n8n locally.

💡 Pro Tip: Use forward slashes for paths here, even if on Windows.
Then, hook that up to a Extract from file node to extract from JSON. Default settings will do. Your workflow should look like this now.

For this tutorial, I’m using a simple Execute Workflow button as a trigger, but for production you’d probably want to set this up as a cron job, or use a webhook trigger.
Next, we’re going to add a Code node. This lets us execute arbitrary JavaScript (or Python, if that’s your preference) to resolve the dependencies in the previous stage, into raw README URLs:

// Code node 1: Collects GitHub README URLs for all npm dependencies in a project
const axios = require("axios");
// Get dependencies object
const dependencies = $input.first().json.data.dependencies;
const packageNames = Object.keys(dependencies);
const readmeUrls = [];
// Create async function to handle the API calls
const processPackages = async () => {
  for (const packageName of packageNames) {
    try {
      // Fetch package info from npm registry
      const response = await axios.get(
        `https://registry.npmjs.org/${packageName}`,
      );
      const packageData = response.data;
      // Try to find repository URL from various fields
      let repoUrl = null;
      const sources = [
        packageData.repository?.url,
        packageData.repository,
        packageData.homepage,
        packageData.bugs?.url,
      ];
      for (const source of sources) {
        if (
          source &&
          typeof source === "string" &&
          source.includes("github.com")
        ) {
          repoUrl = source;
          break;
        }
      }
      if (repoUrl) {
        // Extract owner/repo from various GitHub URL formats
        const patterns = [
          /github\.com\/([^\/]+)\/([^\/\.#]+)/,
          /git\+https:\/\/github\.com\/([^\/]+)\/([^\/\.]+)\.git/,
        ];
        let match = null;
        for (const pattern of patterns) {
          match = repoUrl.match(pattern);
          if (match) break;
        }
        if (match) {
          const owner = match[1];
          const repo = match[2];
          const readmeUrl = `https://raw.githubusercontent.com/${owner}/${repo}/refs/heads/main/README.md`;
          readmeUrls.push(readmeUrl);
        }
      }
    } catch (error) {
      // Silently skip packages that fail
      continue;
    }
  }
  return readmeUrls;
};
// Execute the async function and return results
return processPackages().then((urls) => [{ json: { readmeUrls: urls } }]); // n8n wants you to always return an array of objects, one for each item you would like to output.
This automates fetching the GitHub README links for all npm dependencies in a project. We need to do this because package.json lists dependencies in a format like "dotenv": ^16.3.1, which only tells you the package name and version, not where the source code lives (which would be motdotla/dotenv).
So we query the npm registry (via NPM API; API key not mandatory) for each package, extract its GitHub repository URL, and convert it into a direct raw URL for the README.md file, giving you a convenient list of all README links for the project’s dependencies.
Essentially, this is how we automate fetching the GitHub README links for all dependencies in a project without manually looking them up.
Alternative: Use a simple form input
If you want something easier — or your n8n is NOT running locally — manually enter a list of your project dependencies into a simple n8n web form (use the n8n Form Trigger**** node) where you input the owner/repo format directly:
Library 1: expressjs/express
Library 2: lodash/lodash
Library 3: motdotla/dotenv
Which means your workflow is far simpler — just a form node connected to code node — and so is your code:
const formData = $input.first().json;
// Collect all "Library X" values
const repos = Object.keys(formData)
  .filter((key) => key.startsWith("Library "))
  .map((key) => formData[key])
  .filter(Boolean);
// Convert to README raw URLs
const urls = repos.map(
  (repo) =>
    `https://raw.githubusercontent.com/${repo}/refs/heads/main/README.md`,
);
// Output: one object per line with just the URL
return [{ json: { readmeUrls: urls } }]; // N8N outputs want array of objects, always.
The tradeoff is that now you can’t directly grab your package.json, and will have to tediously enter each dependency. Your call.
How to adapt for Python: requirements.txt and pyproject.toml
You’d have to adapt all of the code in this step if using Python ecosystems — requirements.txt (list of dependencies) or pyproject.toml (recommended; full project manifests) files.
- Replace npm registry calls with PyPI JSON API calls (I believe this would be
https://pypi.org/pypi/[package]/json, but double check anyway) - On PyPI, look for metadata fields like
info.project_urls,info.home_page, andinfo.download_urlfor the GitHub links.
Why this stage matters:
We’re resolving repository identifiers into raw GitHub README URLs because that gives us a clean, markdown-only version of the file. This avoids all the noise of GitHub’s HTML rendering (ads, navigation, DOM wrappers) and guarantees we get just the content.
That’s critical, because later we’ll hand these URLs to the Bright Data MCP scraper, and having clean, predictable markdown inputs is better than scraping full GitHub pages.
Output of this stage:
[
  {
    readmeUrls: [
      "https://raw.githubusercontent.com/motdotla/dotenv/refs/heads/main/README.md",
      "https://raw.githubusercontent.com/expressjs/express/refs/heads/main/README.md",
      "https://raw.githubusercontent.com/lodash/lodash/refs/heads/main/README.md",
    ],
  },
];
Looking good! Let’s move on.
Step 2: URL Validation and Fallback Logic
TL;DR: Use another Code node with JavaScript to quickly validate README URLs and assign fallbacks.
What we’re doing in this stage:
You may have noticed a fatal flaw in our logic in the previous step — not all projects use the main branch. Some older projects still use master. Also, some projects may have Readme.md instead of README.md — and that case sensitivity will give us back a 404 when we get to the scraping.
So we have to handle that. Add another code node here that will handle the reality of GitHub’s inconsistent README locations for us:

// Code node 2: takes the list of candidate GitHub README URLs and verifies which ones actually exist (and resolves correct ones).
const axios = require("axios");
const urls = $input.first().json.readmeUrls;
async function checkUrl(url) {
  const tryUrls = [
    url,
    url.replace("/main/README.md", "/master/README.md"),
    url.replace("/main/README.md", "/master/Readme.md"),
  ];
  for (const candidate of tryUrls) {
    try {
      const res = await axios.head(candidate, { validateStatus: () => true });
      if (res.status === 200) {
        return candidate;
      }
    } catch (e) {
      // ignore and continue
    }
  }
  return "README NOT FOUND";
}
// wrap in an async IIFE
return (async () => {
  const results = await Promise.all(urls.map(checkUrl));
  return { results }; // N8N wants an array of objects for the return, one for each item you would like to output.
})();
Instead of blindly assuming which naming conventions the repository is using (main, master, or sometimes a weird variant like Readme.md casing), we run a quick HTTP HEAD check against the possible URLs to see which one actually exists — this way we don’t download the entire README with a GET request, we just check if the server says “yep, 200 OK.”
Why this stage matters:
This ensures that by the time the workflow reaches our scraping agent (Step 3), every repository is associated with a valid, accessible README URL. It saves wasted requests, avoids timeouts, and keeps the pipeline resilient to branch inconsistencies.
Add as many fallback URI combinations as you run across in the wild — I’m just including two here.
Output of this stage:
[
  {
    results: [
      "https://raw.githubusercontent.com/motdotla/dotenv/refs/heads/master/README.md",
      "https://raw.githubusercontent.com/expressjs/express/refs/heads/master/Readme.md",
      "https://raw.githubusercontent.com/lodash/lodash/refs/heads/main/README.md",
    ],
  },
];
Notice that our code has corrected the README URL’s for expressjs/express and motdotla/dotenv (lodash/lodash was fine, apparently.)
Step 3: Content Extraction with Bright Data MCP + Local LLM
TL;DR: Use a AI Agent node with a heavy reasoning model to orchestrate Bright Data MCP calls for scraping READMEs + good sources online, and then use the raw data to create a best practices guide.
What we’re doing in this stage:
We’ll set up an AI agent with n8n’s AI Agent node. The validated URLs feed into this agent, which uses an LLM and tools — from Bright Data’s MCP — for robust scraping.
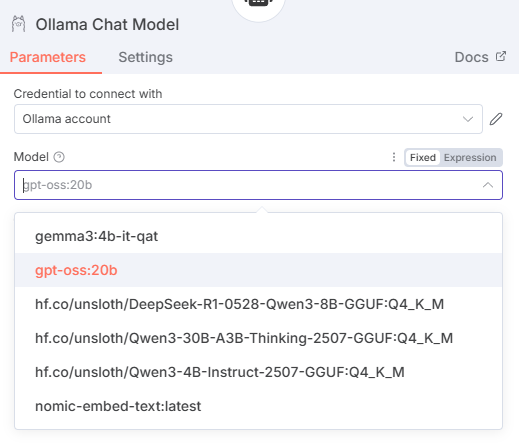
To do this, add the AI Agent node, then pick the Ollama Chat Model for the Model subnode (add a new credential using only the default Ollama URL — http://localhost:11434 — as the Base URL), and select your model of choice from the list.

You would use an OpenAI/Anthropic etc. (you can find a full list of langchain models n8n supports in their docs) chat model here instead of the Ollama one, if you’re not running locally.
Next, for the Tools subnode, choose the MCP Client Tool from the list. This will let us use tools from an external MCP server, and make them available to our AI Agent.

Now, we’ll have to add the remote Bright Data MCP server, and select which tools we want.

We’ll connect using Server Sent Events (SSE), so use this endpoint: https://mcp.brightdata.com/sse?token=MY_API_TOKEN
Substitute that with your own API token. This MCP server doesn’t need extra auth beyond the token being included in the token param.
The Bright Data MCP has 60+ tools available with a opt-in paid ‘Pro’ mode, but all we need is in the free tier:
search_engine: SERP scraping from Google/Bing/Yandexscrape_as_markdown: Extracts any page as markdown.
If you’re sure you need the Pro mode tools, append &pro=1 to your endpoint URL.
This MCP client gives our agent access to industrial-grade scraping capabilities that automatically handle proxy use/rotation, JavaScript rendering, bot detection, and CAPTCHAs — crucial for scraping GitHub’s increasingly sophisticated anti-bot measures.
Finally, let’s set up parameters for this AI agent (double click on the main AI agent node).

We’ll keep the system and user prompts separate — that’ll save you a lot of headache if you need to debug this flow.
For the user prompt, we’ll simply include the output from the previous stage (the results field — which, as you’ll remember, is an array of strings).
User Prompt:
{{ $json.results }}
That’s it.
The system prompt, though, is far more detailed — it designates this AI agent as a Best Practices Analyzer for our tech stack, and outlines the following tasks for it:
- Extract structured data from each README using
scrape_as_markdown - Use
search_engineto find additional info/context/best practices for this repository online, and then usescrape_as_markdownto extract the top 3 authoritative results. - Continue processing even if some URLs fail
- Then, for each successfully scraped library, structure the raw data, and use it to generate a best practices guide for anyone using the whole stack together — not just the individual libraries.
Let’s have a look:
System Prompt:
Reasoning: low

You are a Tech Stack Best Practices Analyzer. Your job is to create a comprehensive best practices guide by analyzing README files from a user's complete technology stack.

You have access to the following tools for web scraping and data extraction.
- `search_engine` - Scrape search results from Google, Bing or Yandex. Returns SERP results in markdown (URL, title, description)
- `scrape_as_markdown` - Scrape a single webpage URL with advanced options for content extraction and get back the results in Markdown language. This tool can unlock any webpage even if it uses bot detection or CAPTCHA.

STEP 1 - README EXTRACTION:
You will receive a list of direct README URLs in this format:
[
"https://raw.githubusercontent.com/owner/repo/branch/README.md",
// more
]

For each URL (library) in the provided list:
1. Use the scrape_as_markdown tool to extract README content from the URL
2. Use search_engine tool to find additional context about that repository on Google (use this format: owner/repo). Prioritize authoritative sources, and use scrape_as_markdown to extract the top 3 such results.
3. Continue processing remaining URLs even if some fail

STEP 2 - ANALYSIS:
For each successfully processed library, extract and structure this information:

REQUIRED FIELDS:
- repo_name: Extract from URL (e.g., "expressjs/express")
- readme_url: The URL you scraped
- branch_used: Extract from URL (main/master/etc.)
- category: "framework|library|tool|database|service"
- description: Brief what-it-does summary
- key_features: Top 3-5 standout capabilities
- installation_steps: How to add to project (npm, yarn, etc.)
- basic_usage: Minimal working example
- configuration: Key config files/options mentioned
- best_practices: Explicit recommendations from the docs
- common_patterns: Typical usage patterns shown
- integration_notes: How it works with other tools in stack
- gotchas: Warnings, pitfalls, or "don't do this" advice mentioned

STEP 3 - SYNTHESIS:
Generate a "Stack Best Practices Summary" that analyzes how these libraries work together:

CROSS-TOOL ANALYSIS:
- Load order dependencies (e.g., dotenv before Express reads process.env)
- Bundle size implications (specific imports vs full library imports)
- Performance intersections (overlapping functionality between libraries)
- Security considerations (how data flows between tools)
- Configuration conflicts or compatibility issues

UNIFIED PATTERNS:
- Setup sequence that works across the entire stack
- Shared error handling approaches that leverage multiple libraries
- Testing strategies that account for tool interactions
- Development vs production configuration differences

OUTPUT STRUCTURE:
- Stack Compatibility Matrix (✅ compatible, ⚠️ needs config, ❌ conflicts)
- Unified Setup Checklist (correct installation and initialization order)
- Cross-Tool Patterns (how to use libraries together effectively)
- Common Gotchas (pitfalls when combining these specific tools)

Focus on actionable insights a developer can immediately apply, especially interactions that individual README files don't cover.
💡 Pro Tip: The Reasoning: low part at the top of the system prompt is a gpt-oss specific quirk — this model lets you adjust the reasoning level that suits your task across three levels:
- Low: Fast responses for general dialogue.
- Medium: Balanced speed and detail.
- High: Deep and detailed analysis.
For this use case, I chose “low” because we’re processing structured data extraction, not complex reasoning tasks. The speed gain is significant when processing multiple repos & README files.
Why this stage matters:
The rest of the prompt should be pretty self-explanatory — I want a “best practices bible” for the user’s entire stack, across all provided dependencies their project has. Not just individual sections per library. Because in real life development, libraries don’t exist in isolation.
For this example stack we’ve been using (i.e. Express.js with Lodash for utilities and dotenv for environment management) individual README files will tell you:
- Express: “Use
app.listen(3000)” - Lodash: “Import specific functions:
const { isEmpty } = require(‘lodash’)” - dotenv: “Call
require(‘dotenv’).config()at app startup”
But they won’t tell you:
- Load order matters: dotenv must be configured before Express reads process.env.PORT
- Bundle size conflicts: Using full Lodash imports in Express routes can bloat server bundles unnecessarily
- Performance intersections: Lodash’s deep clone vs. Express’s JSON parsing for request bodies
- Security considerations: How environment variables from dotenv should be validated before Express middleware uses them
This is where the synthesis step becomes critical. The workflow doesn’t just extract information from each README — it analyzes the relationships and conflicts between tools in your specific combination.
Output of this stage:
The final output is exactly the “Bible” we’ve been talking about: a unified implementation guide that bridges the gap between individual library documentation and real-world development.
Our detailed synthesis step is what transformed scattered README content into actionable team guidance. The key insight is that teams need integration knowledge, not just individual tool knowledge — and that’s exactly what traditional documentation fails to provide.
Step 4: Save output as markdown
TL;DR: Output the LLM output to file. This is the “best practices bible” for our stack.
What we’re doing in this stage:
This last step is technically optional, but I don’t want to manually copy out the LLM output every single time from the chat window — do you? 😅
So we’ll save the generated guide to a file. For this, we’ll use a Convert to Text node (because we can’t save strings to file — it has to be converted to binary first) and then a Write File to Disk node.
Press enter or click to view image in full size
Press enter or click to view image in full size
As the recommendation says — this only works locally. For cloud deployments of N8N you’ll need to use a Cloud Storage node (AWS S3/Google/Dropbox etc.) to save there directly, or a HTTP Request Node (to immediately download the generated file).
Why This Approach Works
Two key infrastructure pieces made this workflow practical:
- Bright Data MCP Integration: 5,000 free monthly requests with CAPTCHA solving and anti-bot defenses mean you can automate scraping READMEs at scale reliably — no proxy hacks, no rate-limit headaches. Also saves you from having to include another MCP for browser automation. More tools = bigger context = models have trouble keeping track of everything. You don’t want that.
- n8n Orchestration: Modern development teams need automation that goes beyond simple scripts. N8N’s visual workflow builder let us chain together form inputs, LLM processing, web scraping, and output generation without writing custom orchestration code. More importantly, it provides scheduling capabilities for true automation.
Build Custom AI Agents With Logic & Control | n8n Automation Platform
Next Steps and Extensions
- Use n8n to schedule and run this workflow monthly (or even weekly, based on how often your dependencies publish) against your current tech stack to catch documentation drift — or better, use n8n’s scheduled triggers to watch package registries or GitHub releases and re-run analysis only when major versions drop.
- Add Slack/Teams/Discord nodes in n8n to automatically post updated guides to your team channels once done
- Extend the form to include private repos (with authentication)
- Store your org’s coding standards in a config file and have n8n inject them into the LLM prompt before synthesis — watch for context window pollution, though.
Frequently Asked Questions (FAQ)
Q: What happens if GitHub rate limits my requests? A: This really shouldn’t happen with the current workflow, but just in case, n8n includes automatic retry logic, and since you’re using Bright Data’s MCP you’ll have auto-proxy rotation to avoid rate limits. Still, for heavy usage, consider spacing out workflow runs or upgrading to Bright Data’s paid tier.
Q: Can this work with private repositories? A: Not in the scope of this article — but yes You’ll need to modify the Code node to include GitHub authentication headers. Add your GitHub token to n8n’s credential store and reference it in the code.
Q: Do I need to run this locally, or can I use cloud services? A: Both options work. Locally you’ll use Ollama + local n8n. For cloud, use n8n Cloud with OpenAI/Anthropic models and cloud storage nodes instead of “Write File to Disk.”
Q: What’s the difference between using Ollama vs OpenAI/Anthropic? A: Ollama runs a open-source LLM on your PC and so it’s 100% free, but requires more system resources (
gpt-oss:20brecommends ≥ 14–16GB of VRAM). Cloud providers offer more powerful models and larger context windows but cost money per request.
Q: How often should I run this workflow? A: Monthly for stable projects, weekly for actively developed projects. You should set up n8n’s cron trigger to automate this based on your needs.
Q: What if my dependencies don’t have good READMEs? A: The workflow will still make Google searches for the dependency (Step 2 of the prompt) and extract the top 3 results for best practices for it. If results are iffy, manually add documentation links for critical dependencies in those cases — Bright Data MCP can scrape everything as markdown.
Q: Can I use this with other package managers (pip, composer, poetry etc.)? A: Yes, modify the first Code node to parse
requirements.txt,composer.json,pyproject.tomlor other dependency files instead ofpackage.json. The registry APIs will be different but the overall pattern remains the same.
Q: Will this work with monorepos? A: Absolutely. Run it against each package.json in your monorepo, or modify the initial step to aggregate all dependencies before processing.
Q: How many dependencies can this handle at once? A: Successfully tested with 15 dependencies. For larger lists, I’d consider batching (process 10-20 at a time) to avoid LLM context window limits.
Q: My local LLM is running out of memory. What should I do? A: That’s a little difficult to solve. 😅 Browse Ollama for a smaller model (7B instead of 20B; requires like 8GB of VRAM) that can still do tool calls, but your output quality will suffer. I’d honestly suggest switching to a cloud LLM like OpenAI/Anthropic then.
Q: Can I customize the output format? A: Yes, modify the Write to local file node to specify different output formats (JSON, YAML, custom templates). I output Markdown but this can be adapted for any format.
TL;DR: You built a self-hostable factory for org-wide clarity
The real power here isn’t just documentation generation — it’s the reusable workflow pattern itself. Once you’ve proven the loop of extraction → orchestration → synthesis, you can apply it to:
- API documentation across microservices
- Security policies from different compliance frameworks
- Best practices from internal wiki pages and Confluence spaces
- Onboarding materials scattered across multiple tools
With Bright Data MCP handling extraction, N8N orchestrating, and a local LLM synthesizing, you’ve essentially built a self-hostable factory for org-wide clarity — one that can be fed as context/project rules for your AI assisted IDE, like Cursor.
In an era where tech stacks sprawl faster than teams can document them, automated synthesis goes from “nice to have” to “critical infrastructure.”
I feel very confident saying that the next wave of engineering velocity won’t come from writing more docs — it’ll come from automating the way we generate and evolve them.
Comments
Loading comments…