 ArgoCD is a continuous delivery tool used for Kubernetes. I see customers often submit cases where they need to understand why a service went down and who made the changes to this service. Unfortunately Kubernetes does not have a default mechanism to track these changes.
I often recommend that customers implement version control and declarative methods to define k8s resources. Enter ArgoCD…
Prerequisites:
- An existing EKS Cluster.
- AWS Load Balancer Controller Installed.
Step 1: Install ArgoCD and ArgoCD CLI tool
We first need to create a namespace for ArgoCD and install it.
kubectl create ns argocd
kubectl apply -f https://raw.githubusercontent.com/argoproj/argo-cd/v2.4.7/manifests/install.yaml -n argocd
This installation will create several resources in your cluster as shown below.
3c06303fdc15:~ ujoshuab$ kubectl get all -n argocd
NAME                                                    READY   STATUS    RESTARTS   AGE
pod/argocd-application-controller-0                     1/1     Running   0          96s
pod/argocd-applicationset-controller-5b466cfd4b-kpwkg   1/1     Running   0          98s
pod/argocd-dex-server-5c7485896f-w5k55                  1/1     Running   0          98s
pod/argocd-notifications-controller-56d55d96b5-l7c48    1/1     Running   0          98s
pod/argocd-redis-896595fb7-v8sdq                        1/1     Running   0          97s
pod/argocd-repo-server-79cfd55f98-kkdrz                 1/1     Running   0          97s
pod/argocd-server-95cc8b8cf-sc4gc                       1/1     Running   0          97s

NAME                                              TYPE        CLUSTER-IP       EXTERNAL-IP   PORT(S)                      AGE
service/argocd-applicationset-controller          ClusterIP   10.100.149.140   <none>        7000/TCP,8080/TCP            100s
service/argocd-dex-server                         ClusterIP   10.100.179.75    <none>        5556/TCP,5557/TCP,5558/TCP   100s
service/argocd-metrics                            ClusterIP   10.100.202.234   <none>        8082/TCP                     100s
service/argocd-notifications-controller-metrics   ClusterIP   10.100.214.17    <none>        9001/TCP                     100s
service/argocd-redis                              ClusterIP   10.100.60.25     <none>        6379/TCP                     99s
service/argocd-repo-server                        ClusterIP   10.100.9.152     <none>        8081/TCP,8084/TCP            99s
service/argocd-server                             ClusterIP   10.100.22.181    <none>        80/TCP,443/TCP               99s
service/argocd-server-metrics                     ClusterIP   10.100.4.200     <none>        8083/TCP                     98s

NAME                                               READY   UP-TO-DATE   AVAILABLE   AGE
deployment.apps/argocd-applicationset-controller   1/1     1            1           98s
deployment.apps/argocd-dex-server                  1/1     1            1           98s
deployment.apps/argocd-notifications-controller    1/1     1            1           98s
deployment.apps/argocd-redis                       1/1     1            1           97s
deployment.apps/argocd-repo-server                 1/1     1            1           97s
deployment.apps/argocd-server                      1/1     1            1           97s

NAME                                                          DESIRED   CURRENT   READY   AGE
replicaset.apps/argocd-applicationset-controller-5b466cfd4b   1         1         1       99s
replicaset.apps/argocd-dex-server-5c7485896f                  1         1         1       99s
replicaset.apps/argocd-notifications-controller-56d55d96b5    1         1         1       99s
replicaset.apps/argocd-redis-896595fb7                        1         1         1       98s
replicaset.apps/argocd-repo-server-79cfd55f98                 1         1         1       98s
replicaset.apps/argocd-server-95cc8b8cf                       1         1         1       98s

NAME                                             READY   AGE
statefulset.apps/argocd-application-controller   1/1     97s
Install ArgoCD CLI Since I am on mac I will use the brew package manager. Please see this link if you are using another OS [1]. You may need to restart your terminal after doing the installation.
brew install argocd
Step 2 Configuring ArgoCD:
By default ArgoCD is not publicly assessable so we will make some changed to the argo-server in order to access the ArgoCD user interface via Load Balancer.
kubectl edit svc argocd-server -n argocd
You can then modify the argocd-server service manifest as shown below. Since we have the aws-load-balancer-controller installer we can simply change the spec.type to LoadBalancer.
apiVersion: v1
kind: Service
metadata:
  annotations:
    kubectl.kubernetes.io/last-applied-configuration: |
  creationTimestamp: "2022-12-07T15:33:51Z"
  finalizers:
  - service.kubernetes.io/load-balancer-cleanup
  labels:
    app.kubernetes.io/component: server
    app.kubernetes.io/name: argocd-server
    app.kubernetes.io/part-of: argocd
  name: argocd-server
  namespace: argocd
  resourceVersion: "4232541"
  uid: 7387400f-4211-4d9b-849e-3f2ec543ae86
spec:
  allocateLoadBalancerNodePorts: true
  clusterIP: 10.100.22.181
  clusterIPs:
  - 10.100.22.181
  externalTrafficPolicy: Cluster
  internalTrafficPolicy: Cluster
  ipFamilies:
  - IPv4
  ipFamilyPolicy: SingleStack
  ports:
  - name: http
    nodePort: 31241
    port: 80
    protocol: TCP
    targetPort: 8080
  - name: https
    nodePort: 31671
    port: 443
    protocol: TCP
    targetPort: 8080
  selector:
    app.kubernetes.io/name: argocd-server
  sessionAffinity: None
  type: LoadBalancer <-------------------------------------------
After your classic load balancer is provisioned you can access the argocd ui via the load balancer dns name which can be seen from the following command.
3c06303fdc15:~ ujoshuab$ kubectl get svc argocd-server -n argocd
NAME            TYPE           CLUSTER-IP      EXTERNAL-IP                                                              PORT(S)                      AGE
argocd-server   LoadBalancer   10.100.22.181   a7387400f42114d9b849e3f2ec543ae8-795478302.us-east-2.elb.amazonaws.com   80:31241/TCP,443:31671/TCP   61m
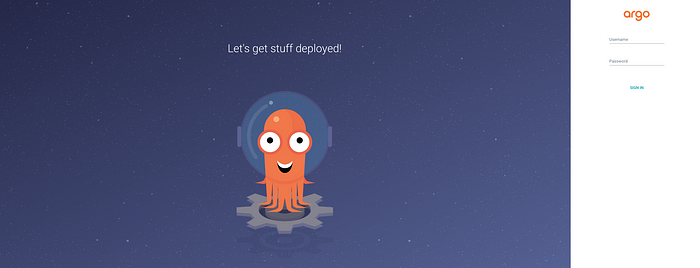
Accessing via the load balancer will bring you to the login page of ArgoCD.
 We must now get our credentials to login.
The default username is admin and you can get the password from the command below which is stored as a secret in your cluster.
kubectl -n argocd get secret argocd-initial-admin-secret -o jsonpath="{.data.password}" | base64 -dReferences:
This secret where the argocd server password is stored is not secure and should be deleted after updating the password with the command below.
argocd account update-password
*** Enter password of currently logged in user (admin):
*** Enter new password for user admin:
*** Confirm new password for user admin:
Password updated
Context 'a7387400f42114d9b849e3f2ec543ae8-795478302.us-east-2.elb.amazonaws.com' updated
3c06303fdc15:~ ujoshuab$ kubectl delete secret argocd-initial-admin-secret -n argocd
secret "argocd-initial-admin-secret" deleted
Step 3: Deploy a sample application
For this step we will deploy an application using the ArgoCD. We will create a new namespace for our application and deploy it from a Github repository. You can fork this repo or create a similar repo in your own Github account in order to edit this specification later.
kubectl create ns nginx
argocd app create nginx --repo https://github.com/jbrewer3/ArgoCDDemo.git --path argoCD --dest-server https://kubernetes.default.svc --dest-namespace nginx
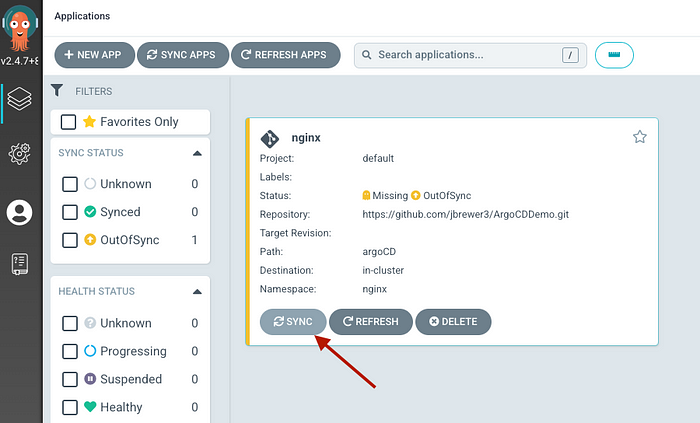
Let’s take a look at the newly deploy app as you see the app shows out of sync.
3c06303fdc15:~ ujoshuab$ argocd app get nginx
Name:               argocd/nginx
Project:            default
Server:             https://kubernetes.default.svc
Namespace:          nginx
URL:                https://a7387400f42114d9b849e3f2ec543ae8-795478302.us-east-2.elb.amazonaws.com/applications/nginx
Repo:               https://github.com/jbrewer3/ArgoCDDemo.git
Target:
Path:               argoCD
SyncWindow:         Sync Allowed
Sync Policy:        <none>
Sync Status:        OutOfSync from  (101b6ed)
Health Status:      Missing

GROUP  KIND        NAMESPACE  NAME   STATUS     HEALTH   HOOK  MESSAGE
apps   Deployment  nginx      nginx  OutOfSync  Missing
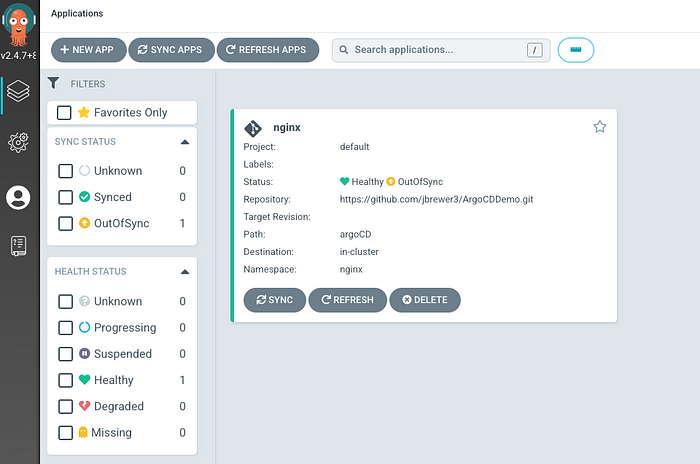
We can sync the app using the command below or from the ArgoCD.
ArgoCD UI:
 ArgoCD CLI
argocd appy sync nginx
Step 4: Update the application
Now if we go to the GitHub repo and update the application spec from 1 replica to 3 replicas as shown below, we can see in argo cd that we are out of sync.
apiVersion: apps/v1
kind: Deployment
metadata:
  creationTimestamp: null
  labels:
    app: nginx
  name: nginx
spec:
  replicas: 3
  selector:
    matchLabels:
      app: nginx
  strategy: {}
  template:
    metadata:
      creationTimestamp: null
      labels:
        app: nginx
    spec:
      containers:
      - image: nginx
        name: nginx
 After syncing the configuration we can see that 2 pods are now running in our EKS Cluster.
3c06303fdc15:~ ujoshuab$ kubectl get pods -n nginx
NAME                     READY   STATUS    RESTARTS   AGE
nginx-85b98978db-886jv   1/1     Running   0          12s
nginx-85b98978db-8jtqw   1/1     Running   0          63m
nginx-85b98978db-k76mn   1/1     Running   0          12s
Conclusion:
Thank you for walking through this demo. I hope that you have found it useful and feel free to reach out with any questions. ArgoCD is a great tool to implement K8s resources in a declarative way and helps in maintaining control of manifest files using a version control tool such as Github. I see too ofter customer resources getting brought down in production because a user pushes some imperative configuration change using kubectl, and others maintaining the cluster have no idea who made the change.