
In this walkthrough I will show you how to deploy a nginx server with a technology called Kubernetes.

WHAT THE HECK IS KUBERNETES?!
“Kubernetes is an open-source container orchestration system for automating software deployment, scaling, and management. Originally designed by Google, the project is now maintained by the Cloud Native Computing Foundation. The name Kubernetes originates from Greek, meaning helmsman or pilot.” -https://en.wikipedia.org/wiki/Kubernetes
The short name for Kubernetes is “K8s”. The 8 stands for the 8 letters between the K and the S.
Let’s get started
Before you begin you will need to have Kubernetes (or a flavor of it) already installed on your system.
Step 1.
Let’s create a pod with nginx as the image with the following command
kubect create deployment <your deployment> --image=nginx

Step 2.
Let’s check that our pod has been deployed
kubectl get deployments

Step 3.
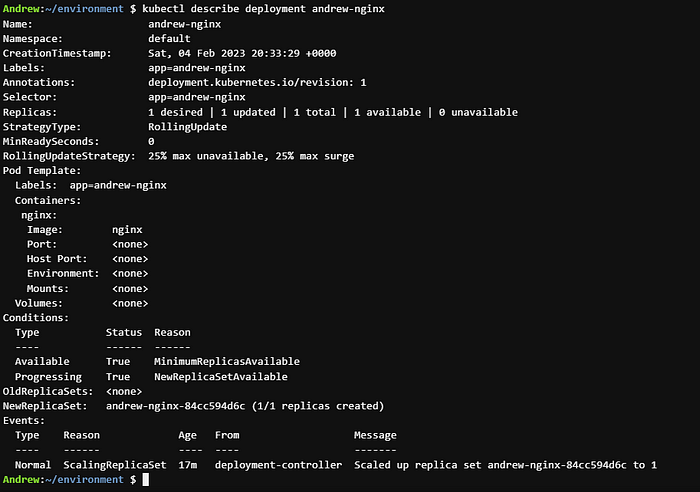
Let’s get some more info about the pod
kubectl describe deployment <your deployment>
Step 4.
Now let’s get the IP and show that our nginx image is running.
To get the IP of your pod you will need to run the follow command
kubectl get pod -o wide
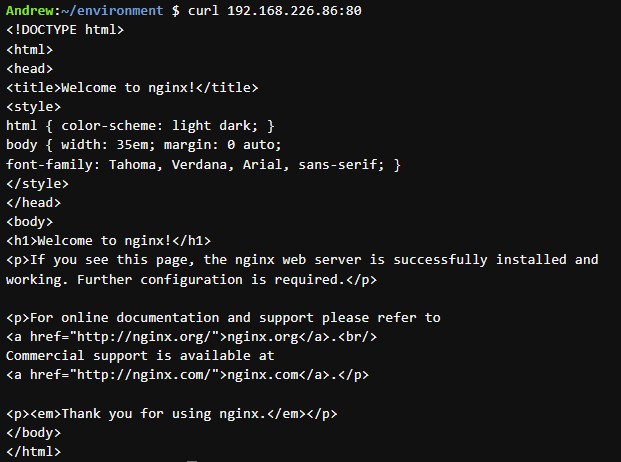
Then to see that the server is running the nginx image lets curl our IP
💡 Speed up your blog creation with DifferAI.
Available for free exclusively on the free and open blogging platform, Differ.
Step 5.
Now let’s look at the logs
kubectl logs deployment/<your deployment>

Step 6.
Now let’s delete our deployment
kubectl delete deployment <your deployment>

Step 7.
Now let’s do the same thing but with a YAML file.
Open up a text editor, I am using vim.
vi <your yaml>
Next enter in the code for a nginx server to spin up.
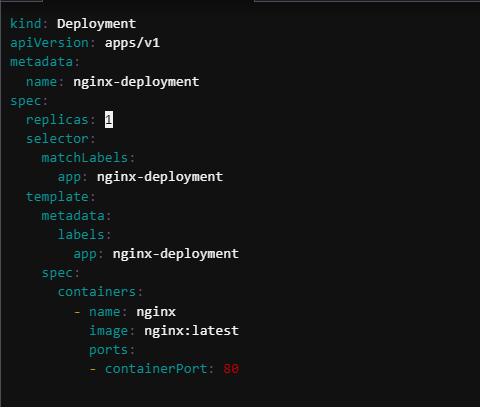
kind: Deployment
apiVersion: apps/v1
metadata:
  name: nginx-deployment
spec:
  replicas: 1
  selector:
    matchLabels:
      app: nginx-deployment
  template:
    metadata:
      labels:
        app: nginx-deployment
    spec:
      containers:
        - name: nginx
          image: nginx:latest
          ports:
          - containerPort: 80
Step 8.
Now deploy it
kubectl apply -f <your yaml>
Now lets look at the pod we just deployed
kubectl get pod

Step 9.
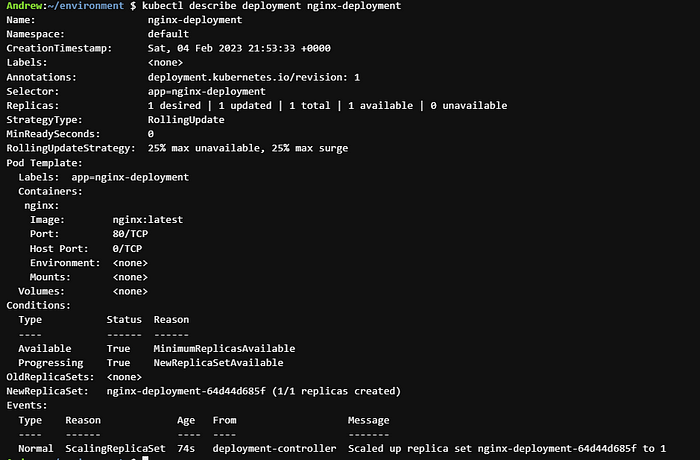
Let’s get some more info on it.
kubectl describe deployment <your deployment>
Notice there is only 1 available
Step 9.
Next lets get the IP address of our pod and curl it
kubectl get pod -o wide

Step 10.
Now let’s change our yaml file to include a Load Balancer and to deploy 4 pods instead of 1.
You will need to edit your yaml file to include the Load Balancer code. Here is that code. Also, let’s change 1 replica to 4 replicas
apiVersion: v1
kind: service
metadata:
  name: nginx-deployment
spec:
  type: LoadBalancer
  ports:
    - port: 80
  selector:
    app: nginx-deployment
---
apiVersion: apps/v1
kind: Deployment
metadata:
  name: nginx-deployment
spec:
  replicas: 4
  selector:
    matchLabels:
      app: nginx-deployment
  template:
    metadata:
      labels:
        app: nginx-deployment
    spec:
      containers:
        - name: nginx
          image: nginx:latest
          ports:
          - containerPort: 80
Now let’s deploy it
kubectl apply -f <your yaml>

Let’s look at the result
kubectl get pod
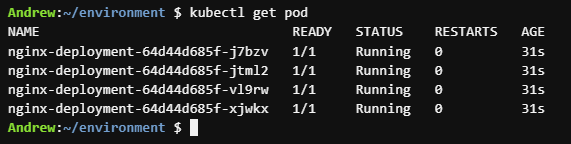
Check it out…4 pods instead of 1
Let’s get some more info
kubectl describe deployment <your deployment>
Step 11.
Next step is to get the IP. Since we have a Load Balancer and it is a service running we need run the following command
kubectl get services

Let’s curl that IP
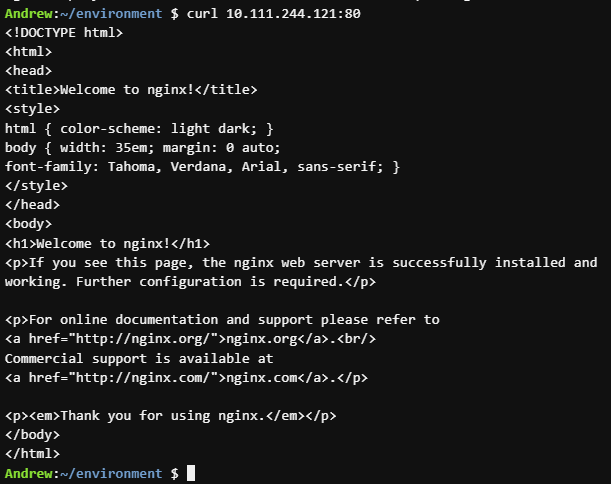
Voila! You have gone from deploying a pod from the command line to deploying a pod with a yaml file and then to deploying a load balancer and deploying 4 pods.
Thank you for following along, I hope you enjoyed this walkthrough
Comments
Loading comments…