“Hey everyone! Building on what we talked about in our previous blog post about setting up a website in just 5 minutes, I want to focus on something really important: security. In that tutorial, we showed you how to use an S3 bucket to host a website. But there’s a catch — making the bucket public can be a security risk. To fix this, I’m going to walk you through creating a Password Protected Website. This means we’ll set up the S3 bucket to be private and add a username and password requirement for accessing the site. This is a smart way to make sure things are more secure. These kinds of websites are especially useful within organizations where they follow similar secure practices.”
In the context of creating a password-protected static site, the main idea is to make sure that the S3 bucket isn’t open to the public. Instead, users will only be able to get to the content through CloudFront, which adds an extra layer of protection. Plus, before anyone can access the content, they’ll need to enter a username and password since the goal is to keep the S3 bucket private.
Let’s get into the nitty-gritty now. Here’s a step-by-step guide to walk you through creating a password-protected website using Lambda@Edge, CloudFront, and a private S3 bucket in AWS:
Step 1: Create an S3 Bucket for Your Website (Private)
- Log in to the AWS Management Console.
- Go to the Amazon S3 service.
- Click on the “Create bucket” button.
- Choose a unique and meaningful name for your bucket, e.g., “passwordprotectedwebsite.”
- Select a region US East (N. Virginia) us-east-1.
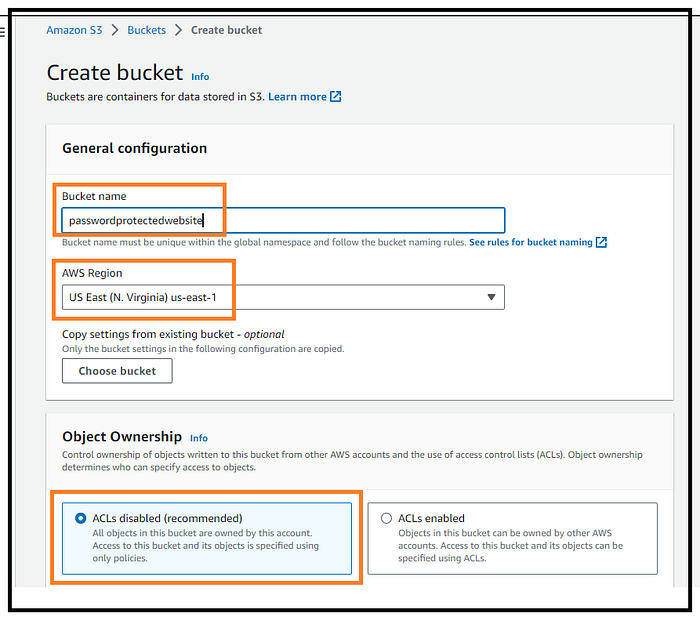
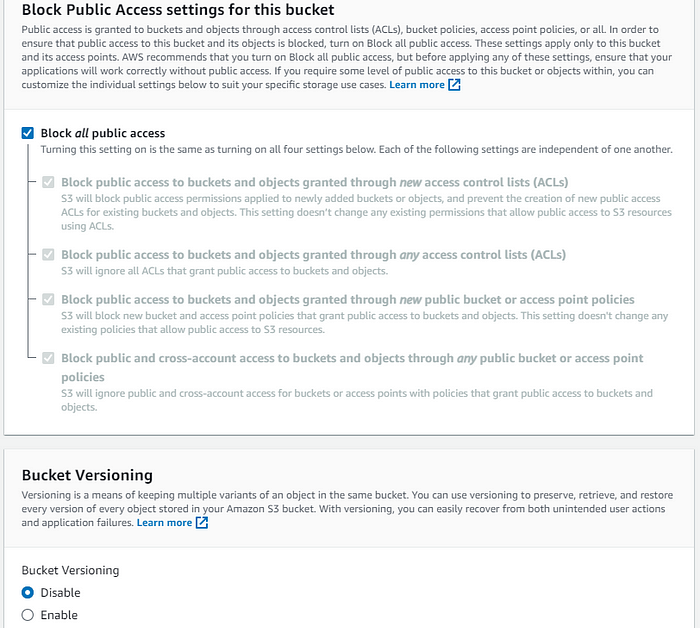
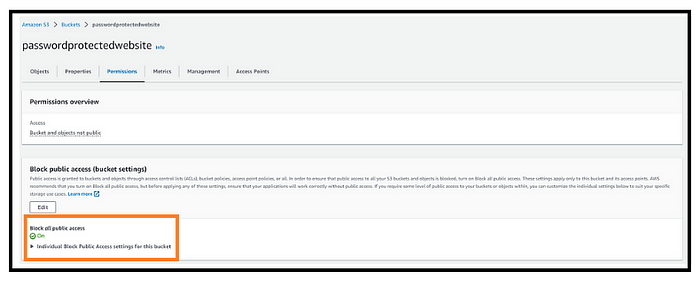
- Important: In the step, keep “Block all public access” checked. This ensures that the bucket remains private.
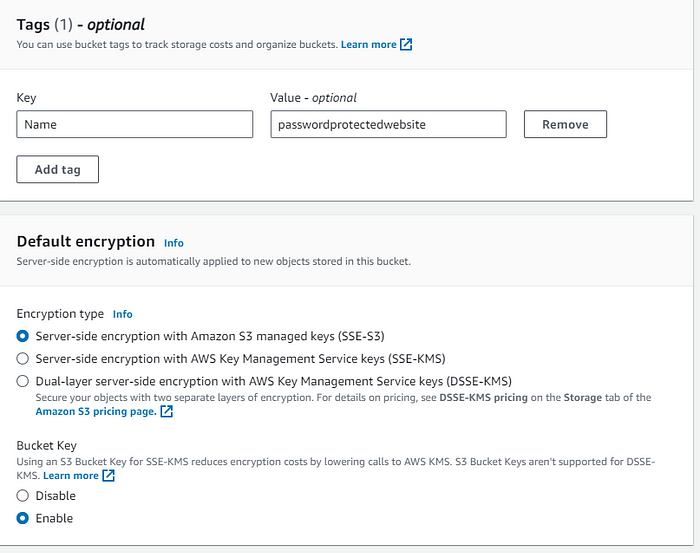
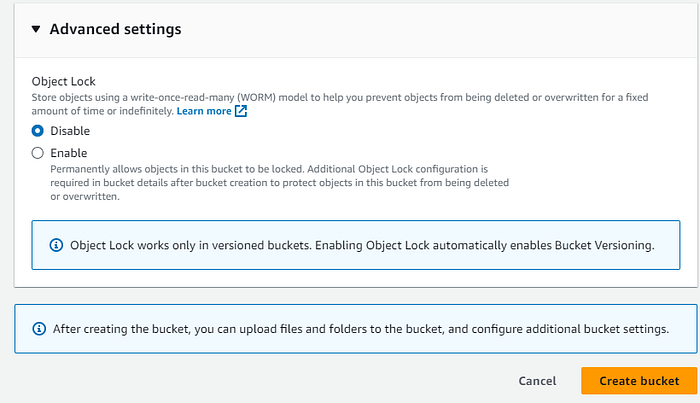
- Apply tags and retain all the default settings.
Finish the bucket creation process by clicking on the “Create bucket” button.
Step 2: Upload Your Website Content to the Private S3 Bucket
To obtain website code, search “Download sample website code” on Google, download it, and upload it to your server using the required steps.
- In your S3 bucket view, click the “Upload” button.
- Upload all the static website files (HTML, CSS, JS, images, etc.) to the bucket.
- Ensure that the uploaded files have appropriate permissions to remain private.
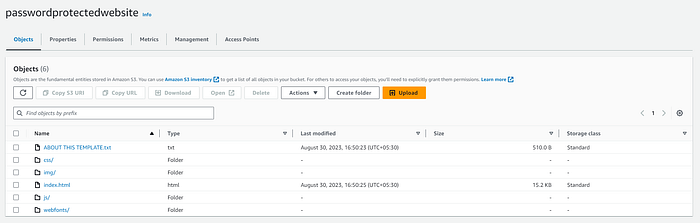
- Verify this information within the properties section as shown in the image.
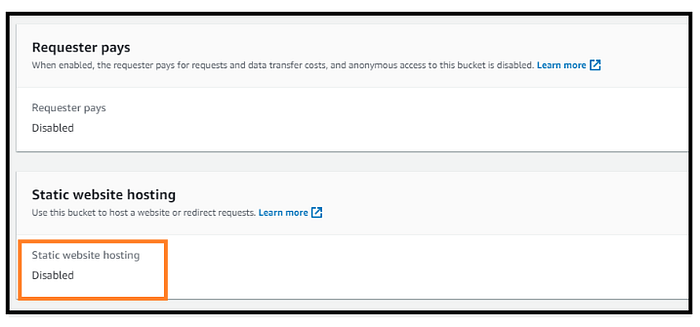
- Confirm these details within the permissions section, just like in the image.
Step 3: Create a Lambda@Edge Function for Authentication
- Go to the AWS Lambda service.
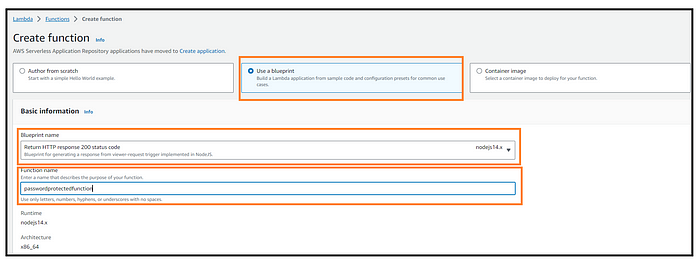
- Click “Create function.”

- Select the option “Use a blueprint.”
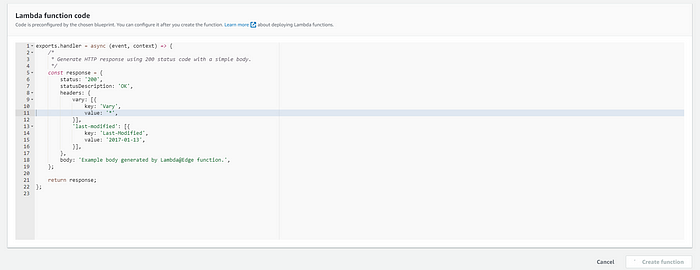
Locate and choose the blueprint titled “Blueprint for generating a response from viewer-request trigger implemented in NodeJS.” Then, provide a function name of your choice.
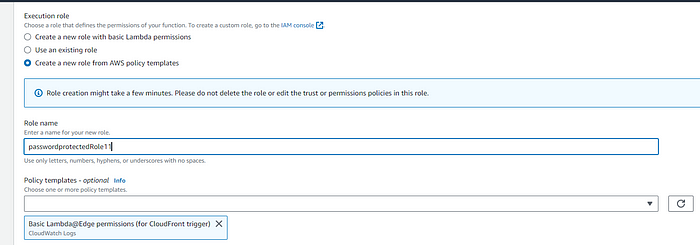
- Name the role as per your preference. Next, choose the “Basic Lambda@Edge permissions (for CloudFront trigger)” from the Policy Templates, and finally, click “Create function” following these steps.
-
After creating your Lambda function, follow these steps:
-
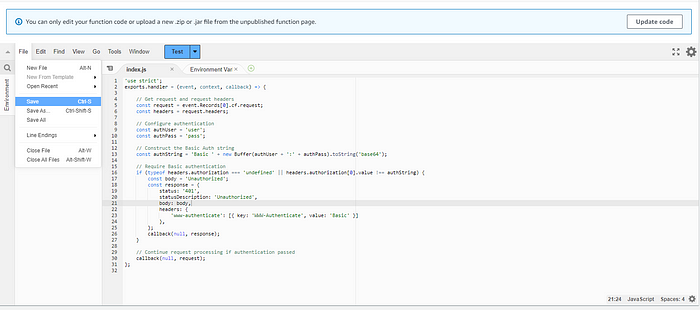
Copy the provided code.
-
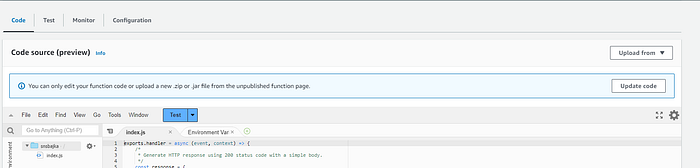
Open the “index.js” file in the Function Code section.
-
Replace the values of the
authUserandauthPassvariables with the desired username and password. -
Save your changes by clicking the “Save” button.
'use strict';
exports.handler = (event, context, callback) => {

    // Get request and request headers
    const request = event.Records[0].cf.request;
    const headers = request.headers;

    // Configure authentication
    const authUser = 'user';
    const authPass = 'pass';

    // Construct the Basic Auth string
    const authString = 'Basic ' + new Buffer(authUser + ':' + authPass).toString('base64');

    // Require Basic authentication
    if (typeof headers.authorization === 'undefined' || headers.authorization[0].value !== authString) {
        const body = 'Unauthorized';
        const response = {
            status: '401',
            statusDescription: 'Unauthorized',
            body: body,
            headers: {
                'www-authenticate': [{ key: 'WWW-Authenticate', value: 'Basic' }]
            },
        };
        callback(null, response);
    }

    // Continue request processing if authentication passed
    callback(null, request);
};
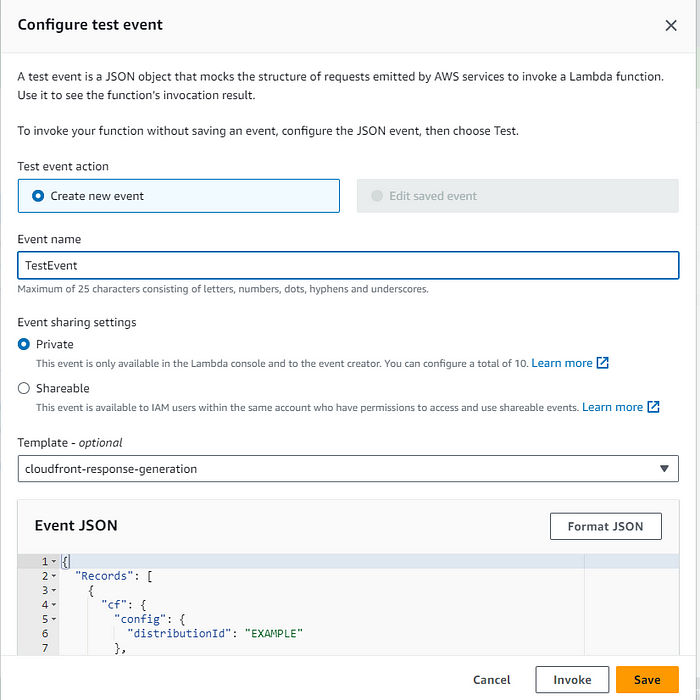
- Proceed by clicking on “Test,” then configure the Test Event, naming it “TestEvent,” and finally, save the configuration.
- Now, click on “Deploy” to publish the latest code, ensuring it is not using the default code.

- Subsequently, go to “Actions” and select “Publish New Version.”
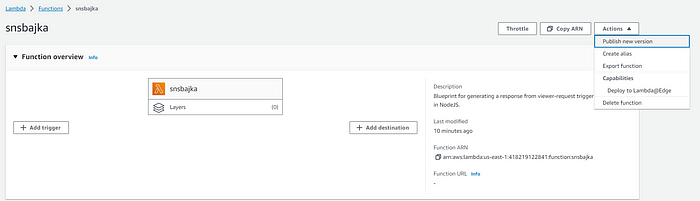
- Enter “$LATEST,” and a new version will be generated.

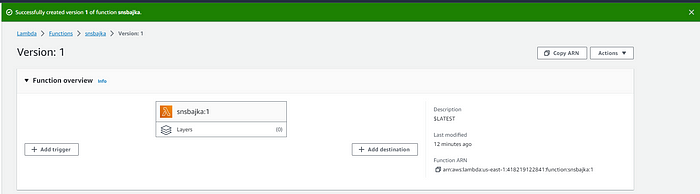
- Please select and copy the Function ARN, specifically for Version 1, as you will need to paste it into the CloudFront Distribution for Function associations.
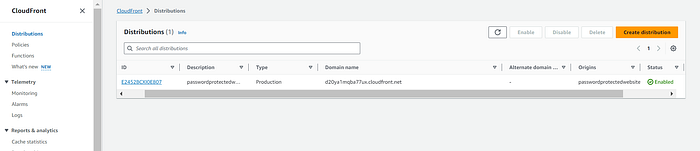
Step 4: Create a CloudFront Distribution
- Go to the AWS CloudFront service.
- Click “Create Distribution.”
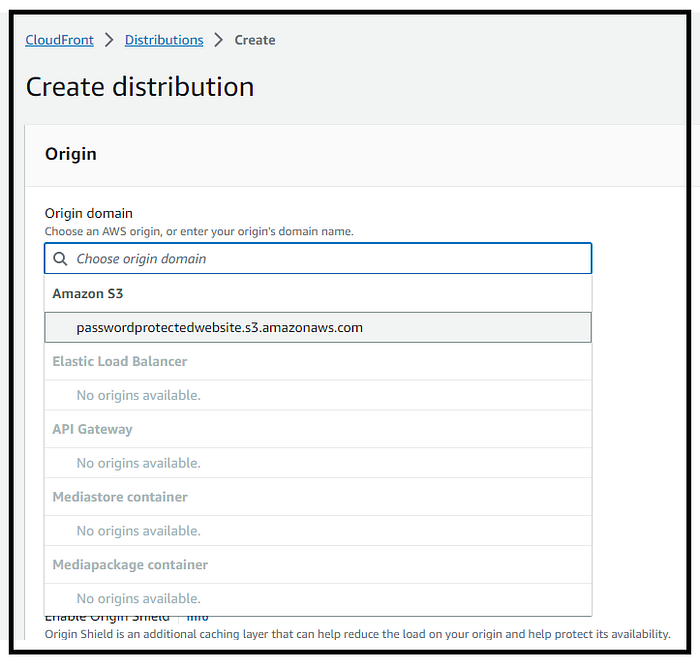
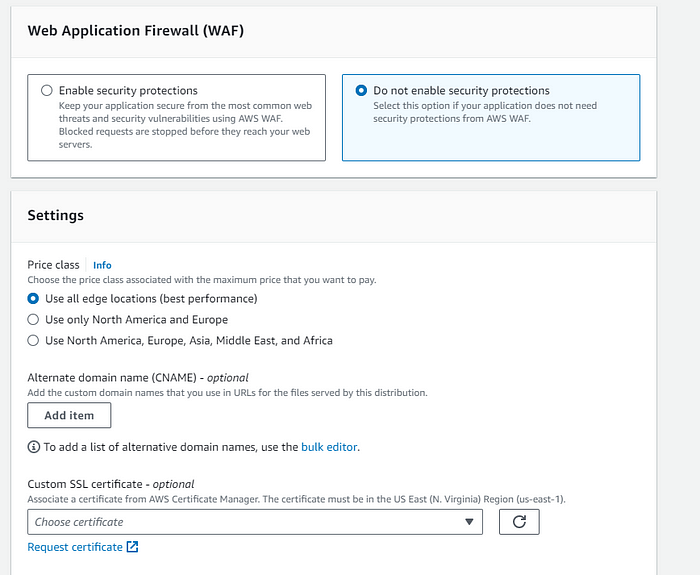
- Configure your distribution settings:
- For “Origin Domain Name,” select the S3 bucket you created earlier.
- You can leave the Origin Path as optional. Enter the name of the origin. Select “Legacy access identities,” then create a new Origin Access Identity (OAI). Next, choose the second option in the bucket policy, which is “Yes, update the bucket policy.
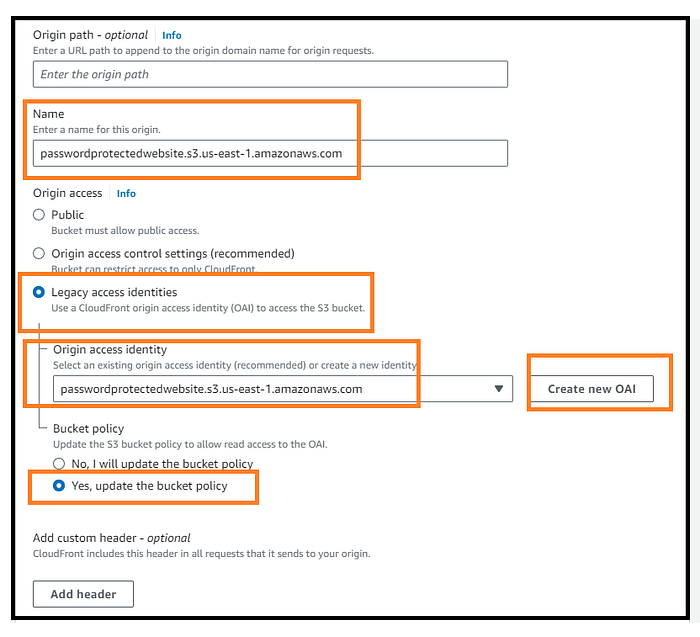
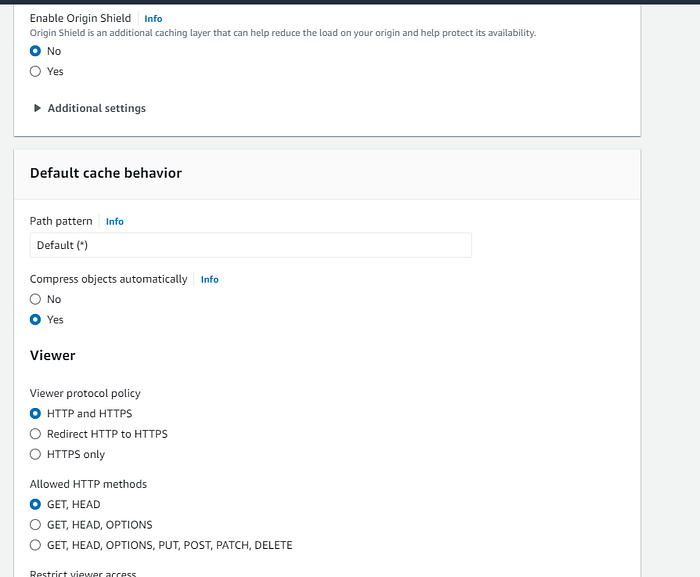
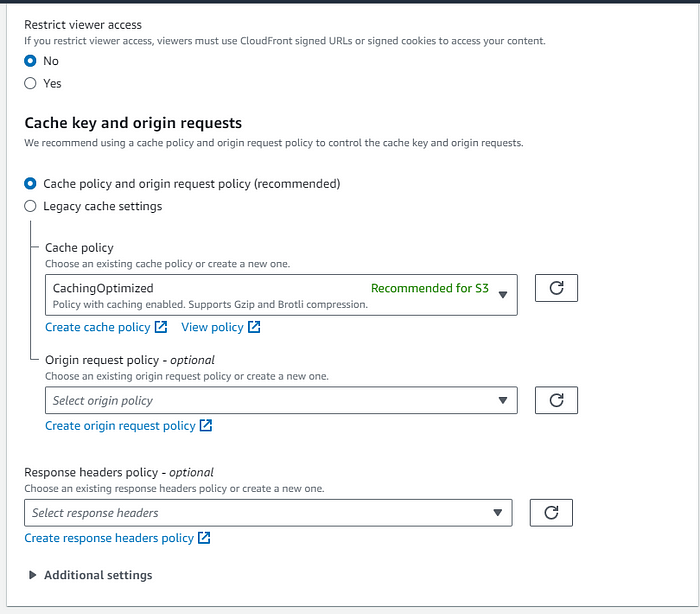
- Maintain the default settings as displayed in the provided image, ensuring they align precisely.
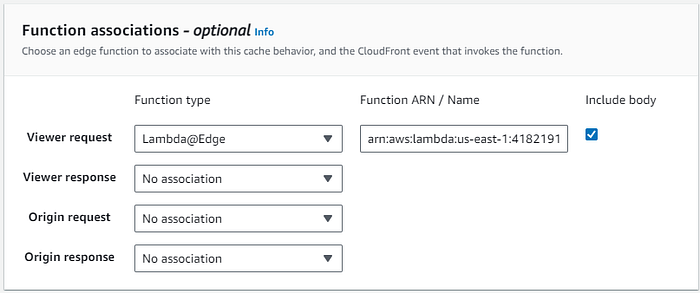
- In the Lambda Function Associations section, opt for “Viewer Request” and specify the Function ARN/Name of the Lambda@Edge function you established for authentication, utilizing the Version 1 Function ARN mentioned previously during the Lambda Function creation.
- Choose the options precisely as shown in the provided image.
- Specify “index.html” as the Default Root object and provide a description as required.
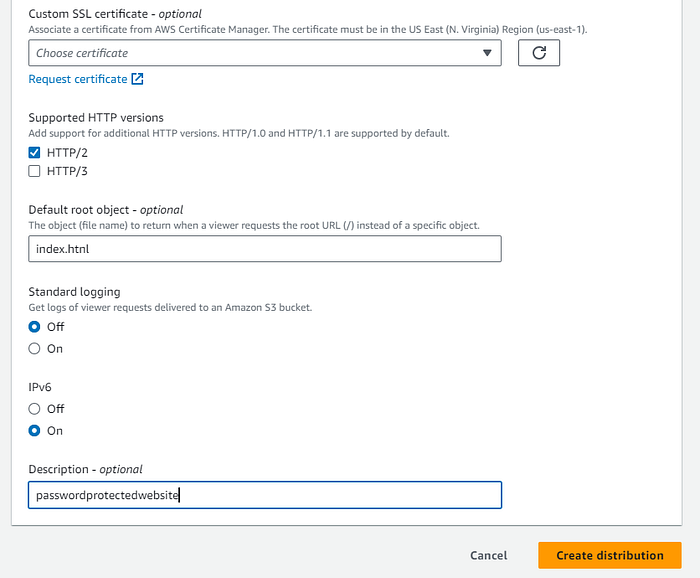
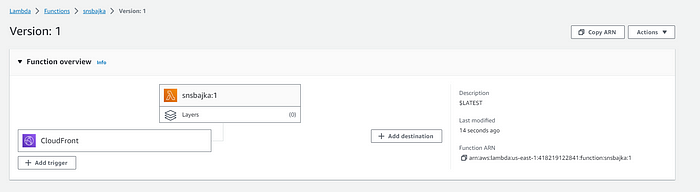
- Click on “Create Distribution” to create the distribution. Then, go to the Lambda Service Page and confirm that Cloudfront is associated with the Lambda Function as illustrated in the image below.
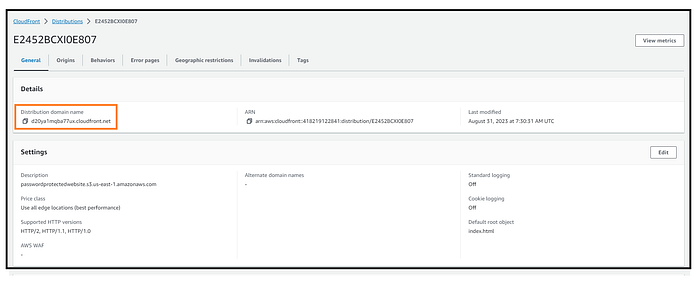
- After ensuring the distribution and Lambda Function is correctly configured and deployed, make a note of the CloudFront domain name provided in the distribution’s details.
Step 5: Testing and Deployment
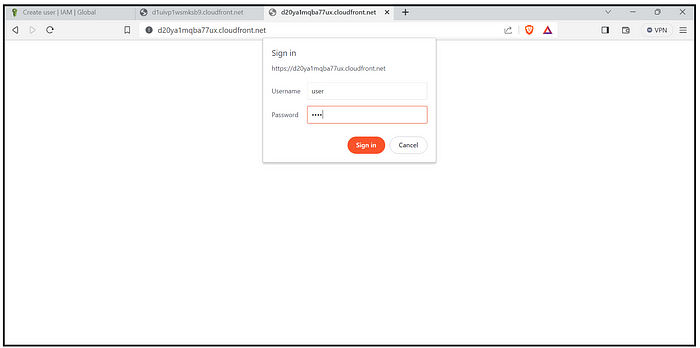
- Access your password-protected website using the CloudFront domain name, e.g.,
[https://your-cloudfront-domain.cloudfront.net](https://your-cloudfront-domain.cloudfront.net./). - You should be prompted for basic authentication credentials. Enter the username and password configured in the Lambda@Edge function.
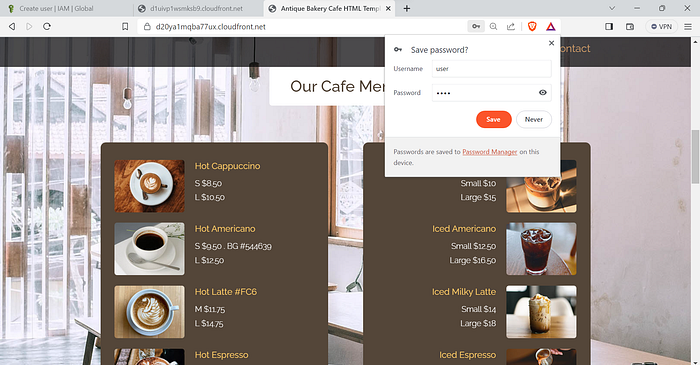
- Test the website thoroughly to ensure the password protection is working as expected.
Important note: To update the code in the Lambda Function, select “Update Code,” save your changes, and then click on “Deploy.”
By following these steps, you’ll create a password-protected website where the S3 bucket remains private and content is delivered securely through CloudFront using basic authentication. Remember to adjust settings and permissions as needed for your specific use case.
Congratulations, you have successfully accomplished and completed this task!
Reference:
I consulted this blog for guidance, although it pertains to the older AWS Console interface: https://austinlasseter.medium.com/build-a-password-protected-website-using-aws-lambda-and-cloudfront-3743cc4d09b6
I sincerely hope this blog helps you save valuable time, allowing you to cherish moments with your loved ones. Keep smiling and spread the love! 😄
Thank you for reading.🤝
Your support means the world to me. If you’ve found this blog enjoyable and informative, please take a moment to share it with others. Thank you for being a part of this journey! 🙏
Follow/Connect Me: LinkedIn | Medium | GitHub
If you like the above blog Series Please Support Me through “Buymeacoffee”.
Below are the Links to a series of Detailed | Step by Step of WordPress Website Hosting on AWS Lightsail:
Part 1: How to host a WordPress website on AWS LightSail.
Part 2: Find Login Credentials of the Dashboard of WordPress AWS Lighstail.
Part 3: Setting up a Lightsail Static IP Address from Dynamic IP Address.
Part 3.1: Dynamic IP address of Instances in AWS Lightsail.
Part 4: How to Register a Domain Name with Amazon Web Service | Register a Domain Name using AWS Route53.
Part 4.1: Connect a Route53 Registered Domain to AWS Lightsail Instance.
Part 5: Set up a Free SSL Certificate on WordPress AWS Lightsail.
Other Blogs:
Simplify Amazon RDS Stop Scheduling
Enabling EC2 Access to Limited S3 Buckets with Full/Limited Permissions
Using Automation Install webserver IIS and Create Webpage on Windows Server (AWS EC2)
Download Files with a Single Click: Simplifying S3 Bucket Downloads
Comments
Loading comments…