
Hey folks, today we are going discuss How deploy an ASGI Django Application with Nginx, Gunicorn,Daphne and Supervisor on ubuntu server.
Prerequisite:
- Ubuntu 20.04
- PostgreSQL
- Django Channels 2
- Run Django project as WSGI using gunicorn and systemd
- Configure Nginx to Proxy Pass to Gunicorn (protect from attackers)
- Configuring the Firewall
- Redis Install and Config
- ASGI for Hosting Django Channels
- Deploying Django Channels with Daphne & Systemd (running the ASGI app)
- Starting the daphne service
- Writing a bash script that tells daphne to start
- Configuring systemd to execute bash script on server boot
- Install & Start Supervisor
- Create a Supervisor Process for (celery worker & celery beat)
- Finishing. So we are ready to deploy our Application..
Project Description:
Before we will start we should discuss about what is project discription
- In that project we are scheduling notification ex: In Tax Model there is one instance tax_expire so before tax expire we need to notify user 5 days ago your tax is expiring in 5 days.
- That is way in that project we are using Django Channnels for notification and for scheduling Celery.
1. Log into Droplet with SSH and FTP:
Personally I like to use MobaXterm (it’s free) to log into my servers. It’s great because you can SSH and FTP from the same window. It’s very convenient.
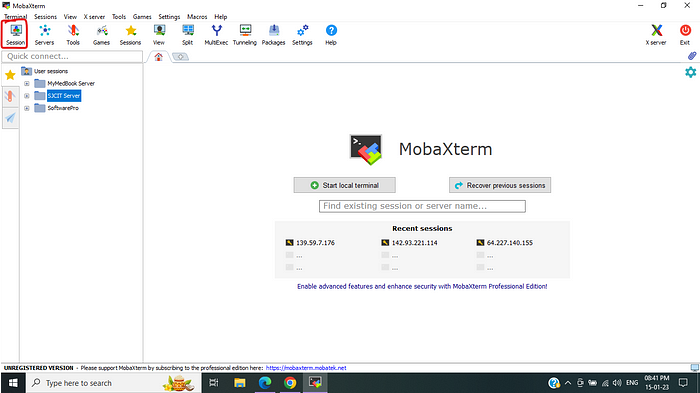 Click session and create one session for your droplet and choose SSH afterward follow below image.
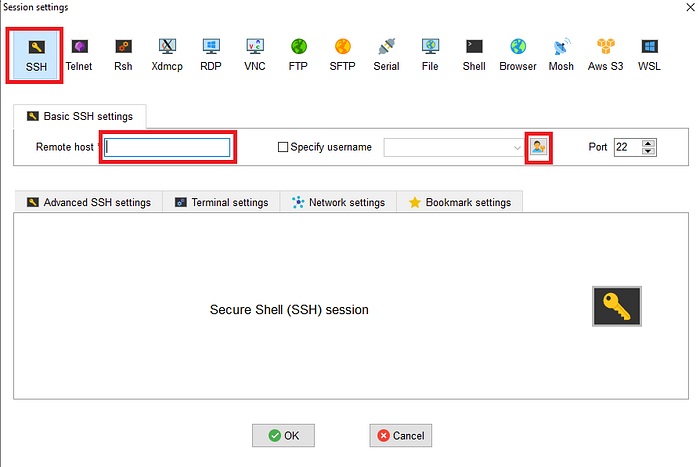 After clicking enter your Host address (IP ) and afterwards click user icon then follow below image.
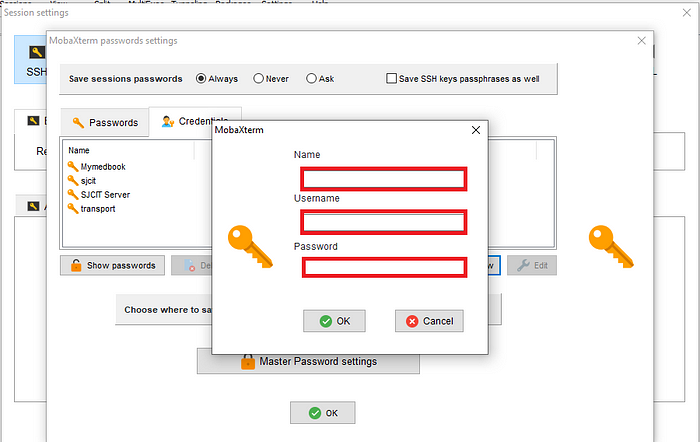 In Name section what name you want its random next your ubuntu server user name (In my case root) and next is what’s your server password
click on server first time it will ask you user and password .
Now we finished .
Now we gone update ubuntu all repository for update all packages in system.
In Name section what name you want its random next your ubuntu server user name (In my case root) and next is what’s your server password
click on server first time it will ask you user and password .
Now we finished .
Now we gone update ubuntu all repository for update all packages in system.
$ sudo apt update
$ sudo apt install python3-venv libpq-dev nginx curl
2. Setup PostgreSQL on digital ocean:
Install PostgreSQL repository and packages , By default Postgres uses an authentication scheme called “peer authentication” for local connections. This means that if the user’s operating system username matches a valid Postgres username, that user can log in with no further authentication.
$ sudo apt install -y postgresql postgresql-contrib postgresql-client
In ubuntu, PostgreSQL Provide shell to access Psql shell . In terminal type .
$ sudo su postgres
$ postgres@ubuntu:/root$ psql
$ postgres=#
Note: By default PostgreSQL using postgres user so , if you want to work postgres user then change that password.
postgres=# ALTER USER postgres WITH PASSWORD '<password>';
If you want to create new user then follow that command .
postgres=# CREATE USER <username> WITH PASSWORD '<password>';
postgres=# ALTER USER <username> WITH SUPERUSER;
If you want to check how many users PostgreSQL have then type.
postgres=# \du
Now ,we gonna exit from psql shell
postgres=# \q
postgres@ubuntu:/root$ exit
3. Config PostgreSQL for remotely:
Here, we are gone setup PostgreSQL for remotely use and graphically use by using pgadmin4 .
So for that we will config PostgreSQL for our droplet IP Address ,we need to change pg_hba.conf file.
$ cd /etc/postgresql/14/main/
$ sudo nano pg_hba.conf
Add following context end of the link of that file .
host all all all md5
and allow the host for PostgreSQL .
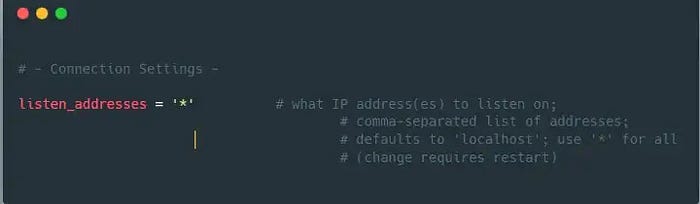
$ sudo nano postgresql.conf
Add line of code in connection settings below listen_addresses = ‘*’ . it is lookin something this in red color.
 Config, is done when any changes in PostgreSQL then we need to restart PostgreSQL service .
$ sudo service postgresql restart
$ update-rc.d postgresql enable        (Automatic start server)
4. Creating a Python Virtual Environment for your Projects:
Install pip3 package for install python package for your project
$ sudo apt install python3-pip
$ pip3 install virtualenv
Now ,create a director where to placed your project.
$ mkdir -p Demoproject
$ cd Demoproject
$ virtualenv venv
$ source venv/bin/activate
Now , Move your project by using FileZilla Client and start serving.
(venv)$ pip3 install django gunicorn uvicorn psycopg2-binary
(venv)$ pip3 install gunicorn uvicorn
If you have requriements.txt then.
(venv)$ pip3 install -r requirement.txt
5. Creating and Configuring a Django Project:
In every case your project are already to deploy if it is not the create a Django project and config setting file.
ALLOWED_HOSTS = ["server_domain_or_IP"]
#Databse settings
DATABASES = {
   'default': {
       'ENGINE': 'django.db.backends.postgresql',
       'NAME': 'demo',
       'USER': 'postgres',
       'PASSWORD': '<password>',
       'HOST': 'localhost',
       'PORT': ''
   }
}# Static files settings
STATIC_URL = "/static/"
STATIC_ROOT = os.path.join(BASE_DIR, "static")# Media files settings
MEDIA_URL = '/media/'
MEDIA_ROOT =  os.path.join(BASE_DIR, 'media')
Now, we can migrate the initial database schema to our SQLite database using the management script
(venv) $ python3 manage.py makemigrations
(venv) $ python3 manage.py migrate
(venv) $ python3 manage.py creatuperuser
We can collect all of the static content into the directory location we configured by typing.
(venv)$ python3 manage.py collectstatic
Allow connections to the development server by typing:
(venv)$ sudo ufw allow 8000
Finally, you can test your project by starting up the Django development server with this command:
(venv)$ python3 manage.py runserver 0.0.0.0:8000
In your web browser, visit your server’s domain name or IP address followed by :8000:
http://server_domain_or_IP:8000
6. Configuring gunicorn:
Lets test gunicorn’s ability to serve our application by firing the following commands. Note: Gunicorn only serve wsgi files
(venv)$gunicorn --bind 0.0.0.0:8000 transportproject.wsgi
This should start gunicorn on port 8000. We can go back to the browser to test our application. Visiting http://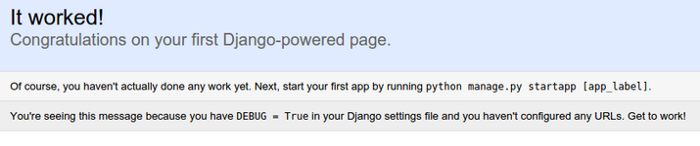 Now deactivate enviroment.
(venv)$ deactivate
7. Creating systemd Socket and Service Files for Gunicorn:
Let’s create a system socket file for gunicorn now. Inside, you’ll create a [Unit] section to describe the socket, a [Socket] section to define the socket location, and an [Install] section to make sure the socket is created at the right time:
$ sudo nano /etc/systemd/system/gunicorn.socket
Paste the contents below and save the file
[Unit]
Description=gunicorn socket

[Socket]
ListenStream=/run/gunicorn.sock

[Install]
WantedBy=sockets.target
next we gonna create service file who able to server your project .
$ sudo nano /etc/systemd/system/gunicorn.service
Paste the contents below inside this file.
[Unit]
Description=gunicorn daemon
Requires=gunicorn.socket
After=network.target
[Service]
User=root
Group=www-data
WorkingDirectory=/home/Demoproject
ExecStart=/home/Demoproject/venv/bin/gunicorn \
          --access-logfile - \
          --workers 3 \
          --bind unix:/run/gunicorn.sock \
          transportproject.wsgi:application
[Install]
WantedBy=multi-user.target
Note:
In my case I am using default user which is root.
My project directory path is on vcs is _/path/TransportProject._
In ASGI Django application we are using _asgi.py_ so _transportproject.asgi:application_
If you using Redis server as a broker then must install _redis-server_ on your system(vcs) by clinking here.
If the systemctl status command indicated an error occurred or if you do not find the gunicorn.sock file in the directory, this indicates that the Gunicorn socket was not created correctly. Check the Gunicorn socket’s logs by typing
$ sudo journalctl -u gunicorn.socket
Lets now start and enable the gunicorn socket.
$ sudo systemctl start gunicorn.socket
$ sudo systemctl enable gunicorn.socket
Lets checks gunicorn socket status.
$ sudo systemctl status gunicorn.socket
$ sudo systemctl daemon-reload
8. Configure Nginx to Proxy Pass to Gunicorn:
Now that Gunicorn is set up, you’ll need to configure Nginx to pass traffic to the process.
Start by creating and opening a new server block in Nginx’s sites-available directory:
$ sudo nano /etc/nginx/sites-available/demo
Paste the below contents inside the file created
server {
    listen 80;
    server_name 206.189.142.76;

    location = /favicon.ico { access_log off; log_not_found off; }
    location /static/ {
        root /home/Demoproject;
    }

    location / {
        include proxy_params;
        proxy_pass http://unix:/run/gunicorn.sock;
    }

    location /ws/ {
        proxy_http_version 1.1;
        proxy_set_header Upgrade $http_upgrade;
        proxy_set_header Connection "upgrade";
        proxy_redirect off;
        proxy_pass http://127.0.0.1:8001;
    }
}
location are basically use, to create a location / {} block to match all other requests. Inside this location, you’ll include the standard proxy_params file included with the Nginx installation and then you’ll pass the traffic directly to the Gunicorn socket.
Update Nginx config file at /etc/nginx/nginx.conf so we can upload large files (images)
http{
	##
        # Basic Settings
        ##
	client_max_body_size 10M;
}
NOTE: Other Wise you may face 413 Request Entity Too Large. Activate the configuration using the following command.
$ sudo ln -s /etc/nginx/sites-available/demo /etc/nginx/sites-enabled/
Restart nginx and allow the changes to take place
$ sudo systemctl restart nginx
Test your Nginx configuration for syntax errors by typing
$ sudo nginx -t
Finally, you’ll need to open the firewall to normal traffic on port 80. Since you no longer need access to the development server, you can remove the rule to open port 8000 as well.
$ sudo ufw delete allow 8000
$ sudo ufw allow 'Nginx Full'
9.Troubleshooting Nginx and Gunicorn:
- Nginx Is Displaying a 502 Bad Gateway.
$ sudo tail -F /var/log/nginx/error.log
2. Permission read and write mod.
$ chown -R www-data: /home/TransportProject/static
so why waiting serve you application with you domain ..
10. Disbale Ngnix Sites:
Some, time we want to update our site so the proper way to disable site is here.. To find the name of the domain, list all of the sites hosted on the Linode using the following command:
$ ls /etc/nginx/sites-available
To disable a site, remove the symbolic link from the /etc/nginx/sites-enabled directory.
$ sudo rm /etc/nginx/sites-enabled/example.com.conf
Reload NGINX to apply the change.
$ sudo systemctl reload nginx
Note: Use a browser to confirm the site no longer resolves. You should see an error page when you access the site. To enable the site again, re-create the symbolic link to the virtual host file.
$ sudo ln -s /etc/nginx/sites-available/example.com.conf /etc/nginx/sites-enabled/example.com.conf
Reload NGINX to apply the change.
$ sudo systemctl reload nginx
Note : Now you can serve you site without asgi .
11 Install and Setup Redis :
sudo apt install redis-server
Navigate to /etc/redis/
open redis.conf
CTRL+F to find 'supervised no' and replace with ‘supervised systemd’ and SAVE .
sudo systemctl restart redis.service
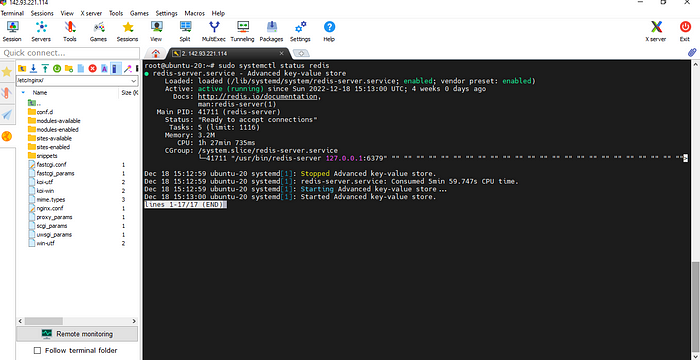
sudo systemctl status redis
 Press
Press CTRL+C to exit.
Confirm Redis is running at 127.0.0.1. Port should be 6379 by default.
sudo netstat -lnp | grep redis
sudo systemctl restart redis.service
12. ASGI for Hosting Django Channels :
ASGI (Asynchronous Server Gateway Interface), is the specification which Channels are built upon, designed to untie Channels apps from a specific application server and provide a common way to write application and middleware code.
import os
os.environ.setdefault('DJANGO_SETTINGS_MODULE', 'first_project.settings')

import django
django.setup()


from django.core.asgi import get_asgi_application
from channels.routing import ProtocolTypeRouter, URLRouter
from channels.auth import AuthMiddlewareStack
from invoice.routing import websocket_urlpatterns


application = ProtocolTypeRouter({
    'http': get_asgi_application(),
    'websocket': AuthMiddlewareStack(
        URLRouter(
            websocket_urlpatterns
        )
    ),
})
NOTE:
import os
os.environ.setdefault('DJANGO_SETTINGS_MODULE', 'first_project.settings')

import django
django.setup()
That above import and enviroment setup for asgi.py must follow that patterns other wise it’s will show
Error: NOt ready to boot you site.
$ sudo apt install daphne
And install it in your project virtual enviroment.
(venv) pip3 install daphne
Navigate to /etc/systemd/system/
Create daphne.service. Notice the port is 8001. This is what we need to use for our WebSocket connections in the templates.
$ sudo nano /etc/systemd/system/daphne.service
copy paste following script.
[Unit]
Description=Daphne service
After=network.target

[Service]
Type=simple
User=root
WorkingDirectory=/home/TransportWeb
ExecStart=/home/TransportWeb/venv/bin/python /home/TransportWeb/venv/bin/daphne -b 0.0.0.0 -p 8001 transportproject.asgi:application
Restart=always
StartLimitBurst=2

#StartLimitInterval=600
# Restart, but not more than once every 30s (for testing purposes)
StartLimitInterval=30

[Install]
WantedBy=multi-user.target
After we need to start daphne.service .
$ systemctl daemon-reload

$ systemctl start daphne.service
If you want to check status of daphne then use.
$ systemctl status daphne.service
13. Starting the daphne Service when Server boots :
With gunicorn and the WSGI application, we created a gunicorn.socket file that tells gunicorn to start when the server boots (at least this is my understanding). I couldn't figure out how to get this to work for daphne so instead I wrote a bash script that will run when the server boots.
If you want to learn script the click here.
navigate /root/
$ sudo nano boot.sh
and copy and paste.
#!/bin/sh
sudo systemctl start daphne.service
Might have to enable it to be run as a script permission for read and update chmod u+x /root/boot.sh
Tell systemd to run the bash script when the server boots
Navigate to /etc/systemd/system
$ sudo nano /etc/systemd/system/on_boot.service
copy and paste
[Service]
ExecStart=/root/boot.sh

[Install]
WantedBy=default.target
Save and close.
systemctl daemon-reload
Start it
sudo systemctl start on_boot
Enable it to run at boot
sudo systemctl enable on_boot
Allow daphne service through firewall
ufw allow 8001
Restart the server
sudo shutdown -r now
Check the status of on_boot.service
systemctl status on_boot.service
Should see this. If not, check logs: sudo journalctl -u on_boot.service
$ sudo systemctl status gunicorn
$ sudo systemctl status redis
$ systemctl status daphne.service
$ systemctl status on_boot.service
Now you are serve asgi server
14. Install & Start Supervisor :
Supervisor is a client/server system that allows users to control numerous processes over an operating system such as UNIX. The following are the key benefits of Supervisor:
- Convenience: Writing rc.d for all single process instances is inconvenient. Rc.d scripts, similarly, do not restart crashed processes automatically. However, Supervisor can be configured to automatically restart processes when they crash.
- Accuracy: In UNIX, it is frequently difficult to get accurate up/down status on processes. Supervisor starts processes as sub-processes, so it is aware of the up/down status of its children. This is easy to query for an end-user.
$ sudo apt-get update -y

$ sudo apt-get install supervisor -y

$ sudo service supervisor start
15 .Create a Supervisor Process:
Almost the same exact instructions from here With supervisor, we can run step 4 automatically, restart it if it fails, create logs for it, and start/stop it easily.
Basically, this ensures that our web server will continue to run if you push new code, server reboots/restarts/goes down and back up, etc.
Of course, if a catastrophic error occurs (or if bad code is in your Django project) then this proceess might fail as well.
All supervisor proccesses go in:
/etc/supervisor/conf.d/
So, if you ever need to add a new process, you’ll just add it there.
Let’s create our project’s celery configuration file for supervisor.
$ sudo nano /etc/supervisor/conf.d/transport_celery_worker.conf
copy and paste
[program:transport_celery_worker]
user=root
directory=/home/TransportWeb
command=/home/TransportWeb/venv/bin/celery -A transportproject.celery worker -l info

autostart=true
autorestart=true
stdout_logfile=/home/TransportWeb/celery/celery.log
stderr_logfile=/home/TransportWeb/celery/celery.err.log
for celery beat.
$ sudo nano /etc/supervisor/conf.d/transport_celery_beat.conf
copy and paste
[program:transport_celery_beat]
user=root
directory=/home/TransportWeb
command=/home/TransportWeb/venv/bin/celery -A transportproject beat -l info

autostart=true
autorestart=true
stdout_logfile=/home/TransportWeb/celery/beat/celery.log
stderr_logfile=/home/TransportWeb/celery/beat/celery.err.log
NOTE : In both file we gonna taget it by program name and logfile directory must exists otherwise it will show errors.
Now we have to update supervisor for activate the services …….
$ supervisorctl reread
$ supervisorctl update
if we want to Check Our Supervisor Program/Process Status.As we mentioned when we crated the transport_celery_worker and transport_celery_beat supervisor program, we can now do:
$ sudo supervisorctl status transport_celery_worker
$ sudo supervisorctl status transport_celery_beat
A few other useful commands (again):
$ sudo supervisorctl start myproject_celery
$ sudo supervisorctl stop myproject_celery
$ sudo supervisorctl restart myproject_celery
16. Finished:
Congratulations! You can now serve your site!
Comments
Loading comments…