🎯 I want to keep this post short and to the point. So, we will not go into details of CloudFront and creating a CloudFront distribution but we will go directly into how to invalidate the cache in CloudFront using the management console. But before we see the HOW, let’s understand the WHY.
Why do we need to Invalidate CloudFront Cache?
🔍 Now use this: “Invalidating caching from CloudFront will remove the cached content from the edge locations.”
❓ You might be wondering why we want to remove the cached content when we want it to be cached to reduce the latency.
🤔 Yes, it’s true that we want to serve content to our end users as fast as possible, but we also don’t want to serve outdated content to them, right?
🔄 So, whenever there is a change, we want our users to see the latest updates as quickly as possible. For this particular reason, we would invalidate the content from CloudFront.
🚫 After invalidation, the viewer request for which the content isn’t currently in an edge cache — is called a “Cache-Miss.” In this case, CloudFront must get the object from your origin.
🎯 On the other hand, a viewer request for which the object is served from a CloudFront edge cache — is called a “Cache-Hit.”
👉 Now, let’s learn the HOW part.
Steps to Invalidate CloudFront Cache Manually
Step 1: Access the CloudFront Console
- 🔑 Log in to your AWS Management Console.
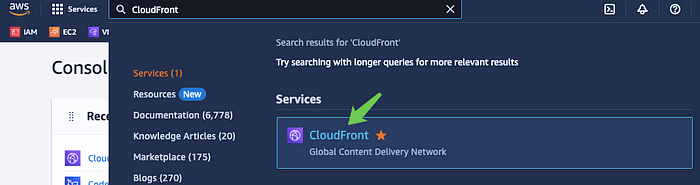
- 🔍 Navigate to the CloudFront service by searching for “CloudFront” in the AWS services search bar.
Figure — Search CloudFront in AWS Management Console:
Step 2: Select Distribution
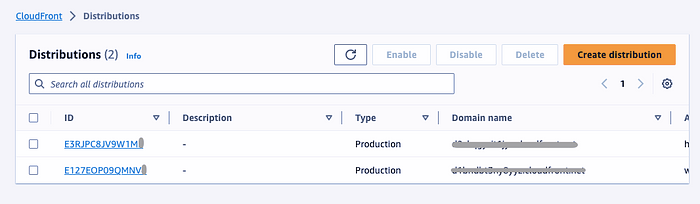
- 📊 In the CloudFront dashboard, you’ll find a list of your distributions.
Figure — Showing CloudFront Distribution in AWS Console:
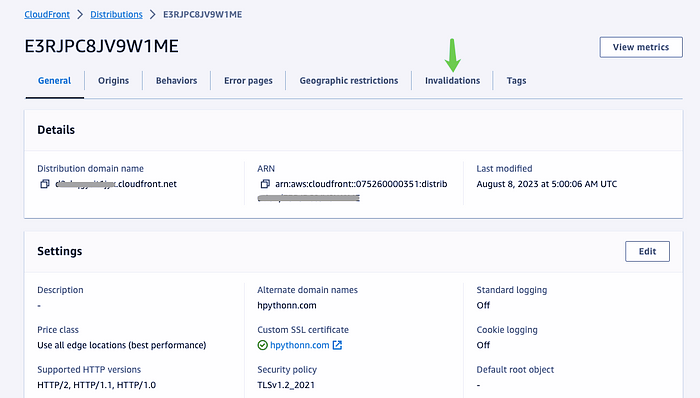
- 👉 Select the distribution for which you want to manually invalidate the cache by clicking on its ID.
Figure — CloudFront Distribution:
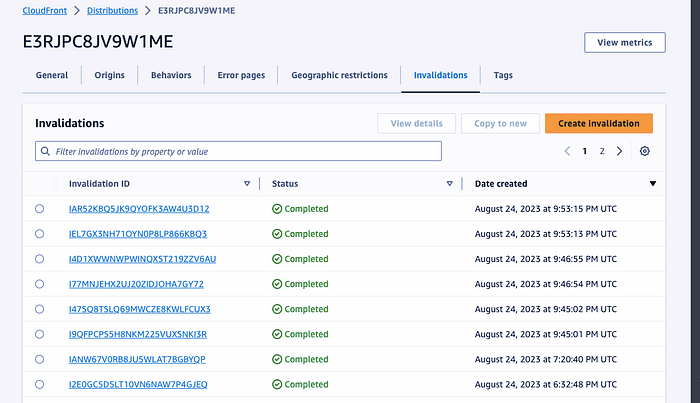
Step 3: Invalidations Tab
- 📑 Within the selected distribution’s details page, navigate to the “Invalidations” tab.
Figure — Showing Past Invalidations:
Step 4: Create Invalidation
- 🔄 Click the “Create Invalidation” button to initiate the cache invalidation process.
Figure — Showing Create Invalidation Screen:
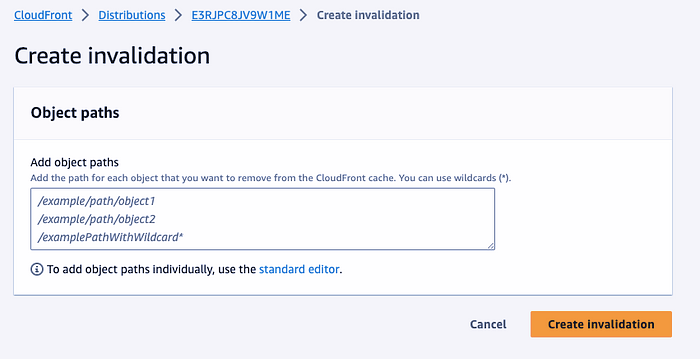
Step 5: Specify Paths
- 📁 In the “Paths to Invalidate” field, you’ll need to specify the files or paths that you want to invalidate.
- For example, let’s say you want to invalidate all the images in a specific folder:
/images/*. - You can also use wildcard characters (_) to invalidate multiple files or paths, like:
/_.htmlto invalidate all HTML files.
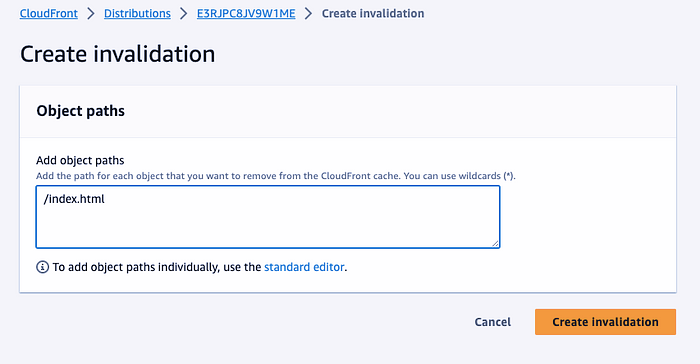
Step 6: Initiate Invalidation
- 🚀 After specifying the paths, click the “Invalidate” button to kick off the invalidation process.
Figure — Showing object path /index.html to remove from CloudFront Cache:
Step 7: Monitor Invalidation Status
- 📋 You’ll be directed to the list of invalidations, where you can monitor the status of your invalidation request.
Figure — Showing Invalidation in Progress for /index.html:
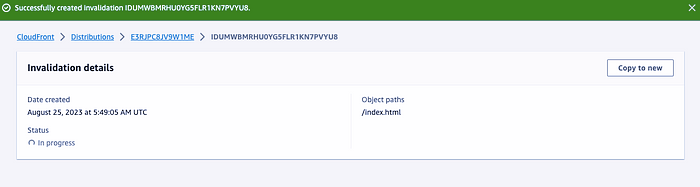
- ⏳ Keep in mind that it might take some time for the cache to be fully invalidated across all CloudFront edge locations.
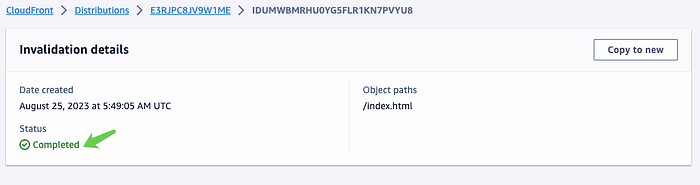
Figure — Showing Invalidation is completed:
Step 8: Verification
- 🎉 Once the invalidation status shows as “Completed,” you can verify the cache invalidation by accessing the URLs you specified.
- 🔄 CloudFront will now fetch fresh content from your origin server for the invalidated paths.
Example:
📚 Let’s consider a scenario: You have a CloudFront distribution serving static assets for your website, and you’ve recently made changes to your CSS files. To ensure that your users see the most up-to-date styles, you decide to manually invalidate the cache for all CSS files. Here’s how you can do it:
- Access the CloudFront Console.
- Select your distribution.
- Go to the “Invalidations” tab.
- Click “Create Invalidation.”
- Specify the path as
/*.css. - Initiate the invalidation.
- Monitor the invalidation status until it’s completed.
- Visit your website and observe the updated styles fetched from the origin server.
⚠️ Keep in mind that cache invalidation may take some time. It’s essential to exercise caution with invalidations, as excessive use can impact your distribution’s performance and increase the load on your origin server.
All Done! 👏 We are all set.
Feel free to share your thoughts or ask questions and connect with me on LinkedIn 👩💻
Comments
Loading comments…