My company creates custom websites for small businesses who just need a simple presence on the web. We build these single page sites using HTML and JavaScript and deploy them from GitHub to AWS S3 using AWS CodePipeline, where they are then distributed by AWS CloudFront for the world to see.
When we make an update for a client we pull the latest code, make the update, and submit a GitHub pull request to merge the code into the Main branch. The merge triggers AWS CodePipeline to pull the code automatically and push it to the AWS S3 bucket.
Here's how to set that up.
Assumptions
In this article I'm going to assume you know how to create a web page and get it checked into a Main branch on GitHub. It's going to be helpful to build your initial website creation and get it to the point where you're ready for it to deploy to S3.
Create AWS S3 Buckets
For your first pipeline you will need two AWS S3 buckets. The first will be the bucket that contains the website code you're going to deploy to the world. This bucket does not require any special permissions for CodePipeline to deploy to it.
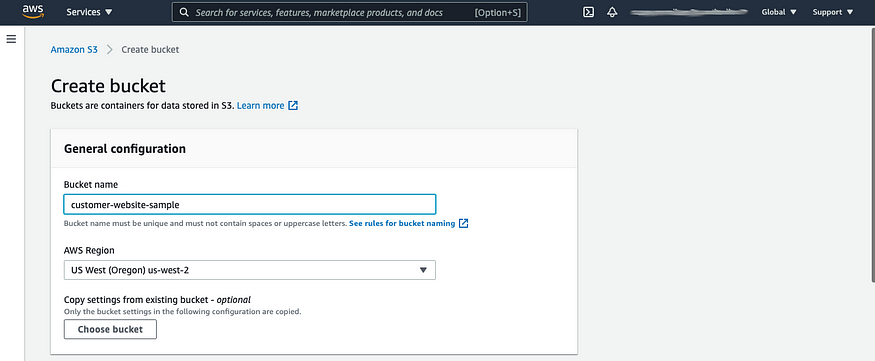
In this example I'll create an S3 bucket called customer-website-sample and leave all of the default permissions:
- Block all public access
- Bucket versioning disabled
- No Tags
- Default encryption disabled
- No advanced settings
Feel free to adjust these settings to suit your environment.
The second S3 bucket is one you will use to contain the “artifacts” that will be created by AWS when it builds the deployment pipeline used by CodePipeline. You'll reference this bucket later when creating your pipeline and you can use this same bucket for this and all future pipelines.
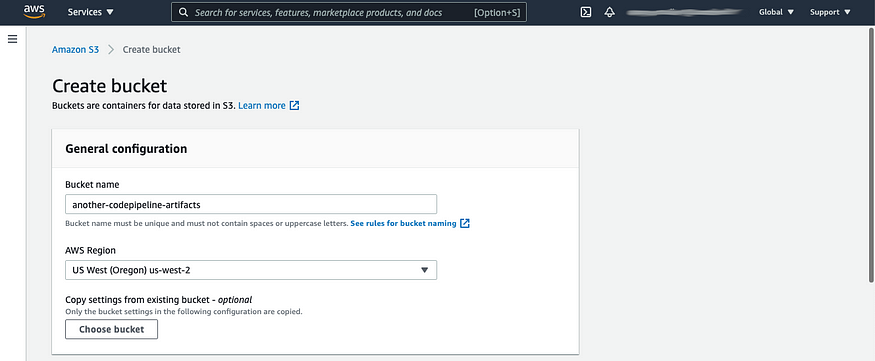
AWS S3 requires globally unique names on buckets, so we'll name this bucket another-codepipeline-artifacts (the name of my software company is Another) and, like the previous bucket, we'll leave all of the default settings the way they are.
That's it! Let's move on to creating the pipeline.
Creating the Pipeline
Log into your AWS account and then navigate into the AWS CodePipeline Service.
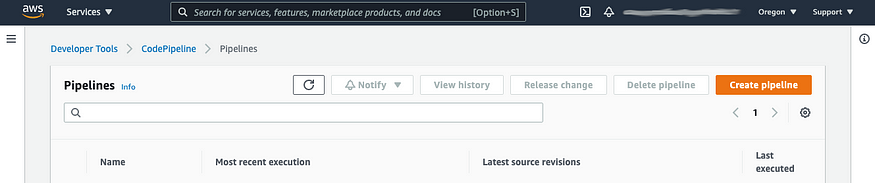
Select the orange Create pipeline button in the upper right. This will open the Choose pipeline settings dialog screen seen below.

Under Pipeline name we'll name this pipeline Sample-Customer-Website. The name can't contain spaces or special characters.
AWS will require a service role that has appropriate permissions to interact with other AWS services like S3. Although you're able to create unique roles for each pipeline you create, for your first pipeline I recommend that you choose New service role and select the check box to allow AWS CodePipeline to create it for you. If you're creating and deploying the same sorts of sites to AWS S3, it's likely you will be able to re-use this same service role for future pipelines.
You can also accept the default role name suggested by AWS if you want. In this example I'm changing the role name to AWS-CodePipeline-Service-Role. The next time I create a pipeline, I will select the existing service role option and choose this one from the list.
Do not click the orange Next button yet!
Expand the Advanced Settings section on this screen.
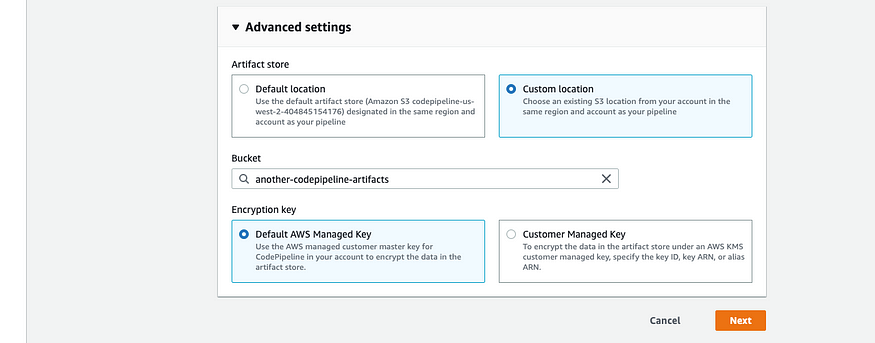
Under Artifact store choose the Custom location radio button and then select the AWS S3 bucket that you created in the earlier step for all CodePipeline artifact storage. In this example that is the another-codepipeline-artifacts bucket.
Now click the orange Next button. This will open the next setup screen, which is the Add source stage dialog. This is where you'll connect to your GitHub repository.
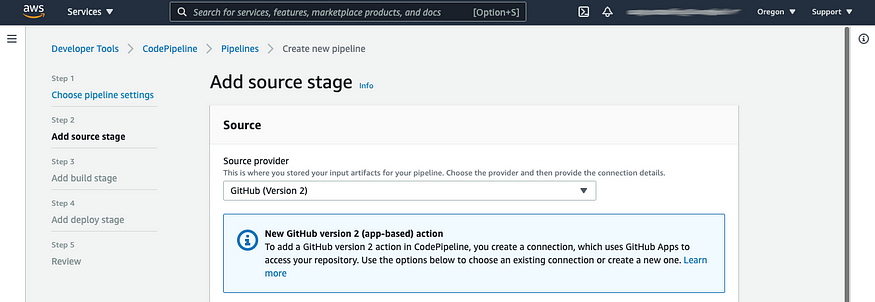
In the Source provider dropdown select GitHub (Version 2) (you can read more about the features and differences between the Version 1 and Version 2 options in AWS documentation using the Learn more link provided in the informational message).
This opens the rest of the screen for all the necessary parameters to connect to your GitHub account.
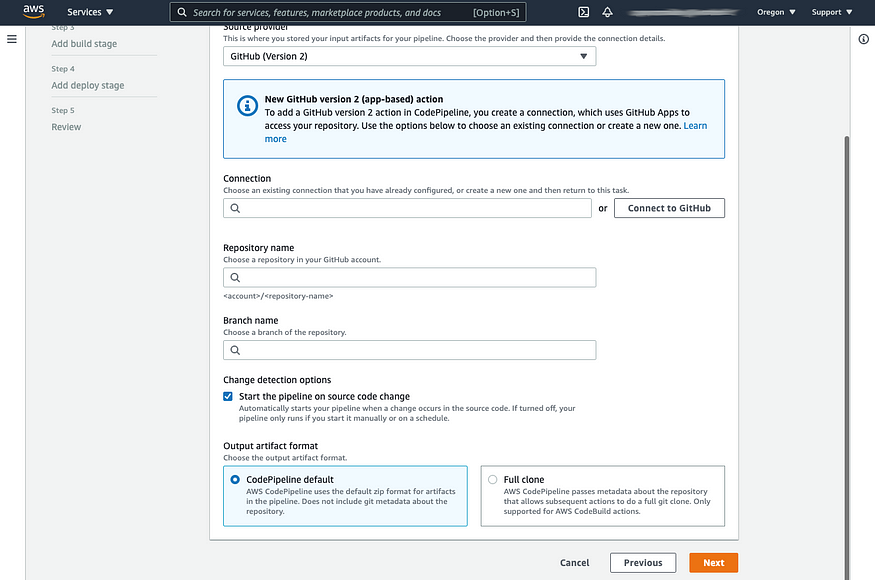
If this is your first CodePipeline connection to GitHub, choose the Connect to GitHub button on the right. This will open a new AWS Developer Tools window where you'll create a new connection. If you're not already logged into GitHub, you will be prompted to login.
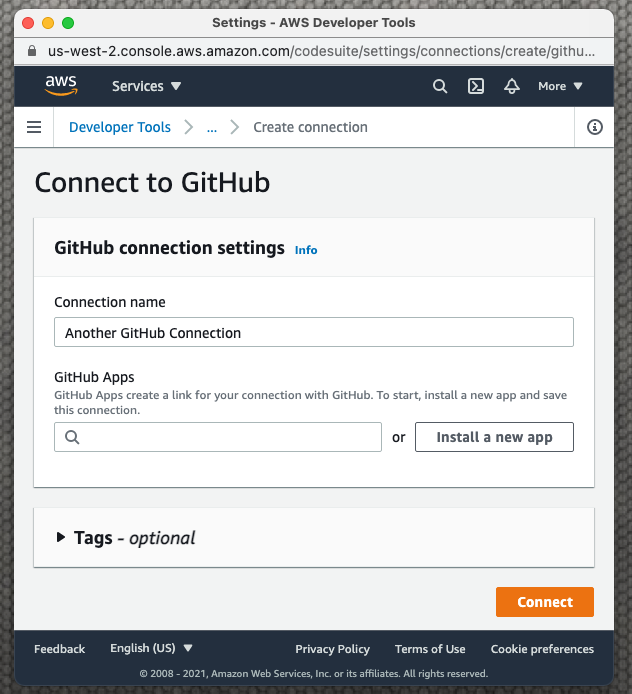
Under Connection name give your new connection a unique name. In this case I'm naming mine Another GitHub Connection to create a connection to my GitHub organization for Another.
Next select the Install a new app button. This will open an AWS Connector for GitHub window that allows you to select the appropriate GitHub account or organization.
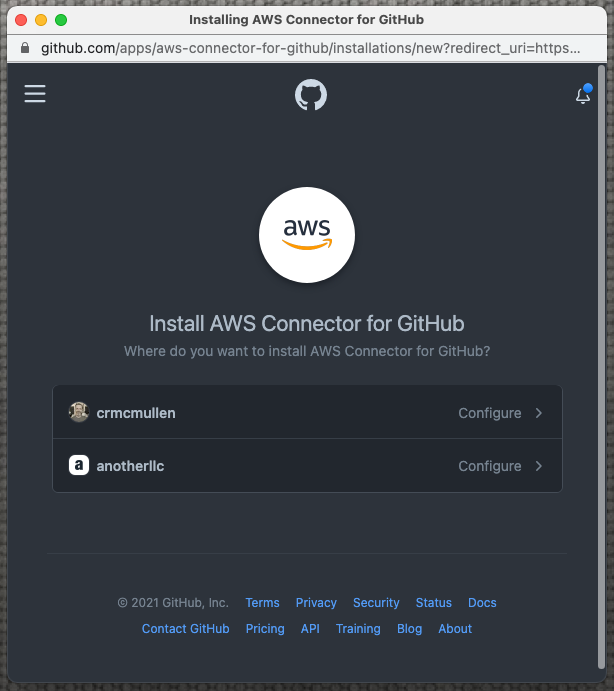
For my example I'm selecting the “anotherllc” organization. This will take you to a screen where you'll choose your repository access settings for AWS.
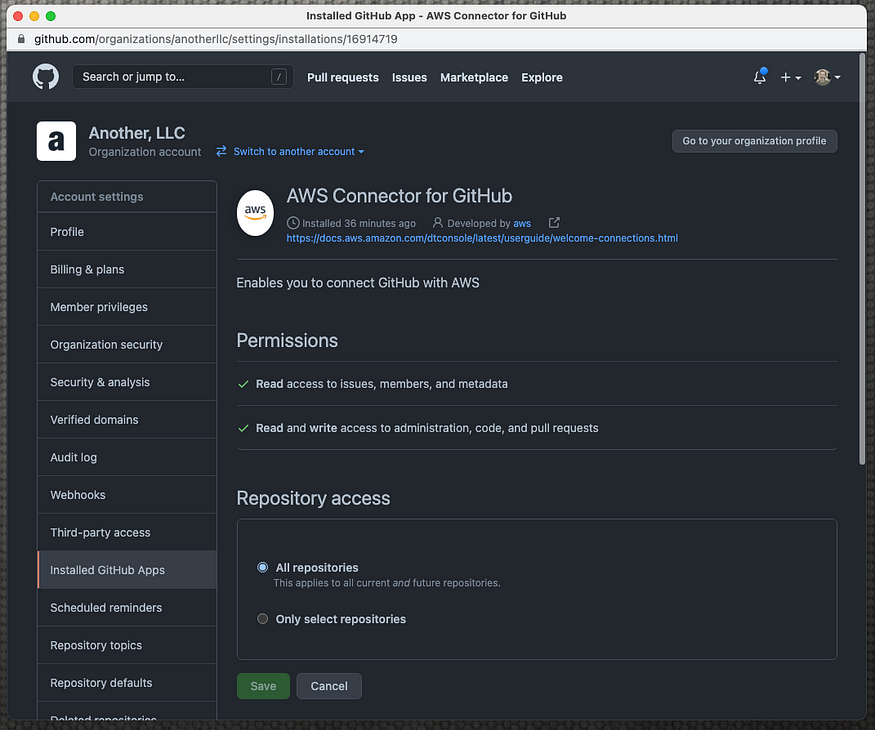
Since I am going to be using this connector for all future AWS CodePipeline connections, I am going to grant access to All repositories and click the green Save button.
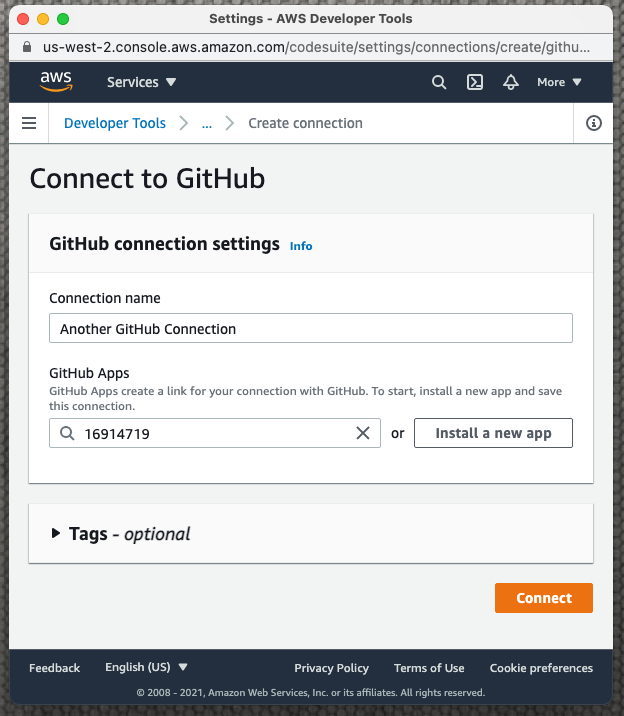
This returns me to the AWS Developer Tools window where we now see a unique App ID assigned by AWS in the GitHub Apps selector.
Click the orange Connect button to continue. This returns you back to the AWS CodePipeline setup and you should see the new connection filled into the Connection selector and a success message telling you that your GitHub connection is ready to use!
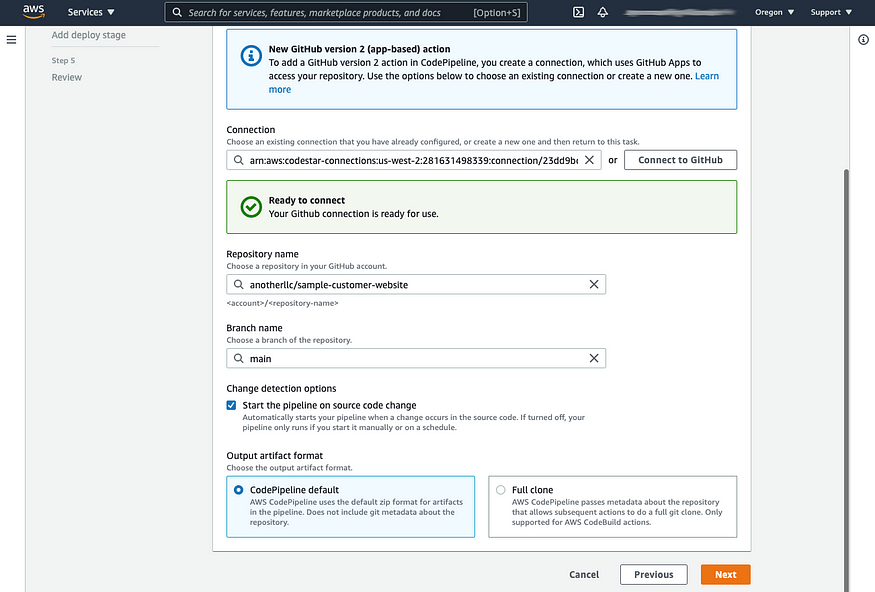
Now in the Repository name selector choose the repository from the list that contains the website code you're wanting to deploy.
In the Branch name selector, choose the branch that you want deployed. In my example I chose the main branch.
Finally, in the Change detection options make sure the box for Start the pipeline on source code change is checked. This enables a webhook that listens for changes to the GitHub branch and kicks off your pipeline. In my example it will be triggered automatically when I merge a pull request into the main branch.
For Output artifact format leave the CodePipeline default selected.
Click the orange Next button. This will take you to the next step, which is the Add build stage screen.
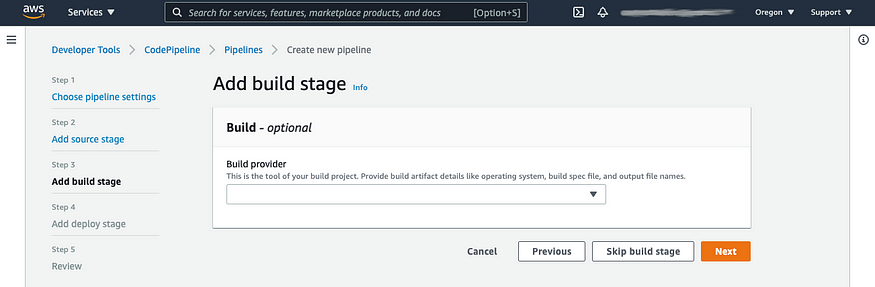
Because this example is a simple web page that requires no compilation or special deployment considerations, we can simply choose the Skip build stage button. You'll then be asked “Are you sure?” and be prompted to confirm your selection. On the dialog prompt select the orange Skip button.
This brings us to the final Add deploy stage configuration screen where we'll choose where CodePipeline should deploy your code.
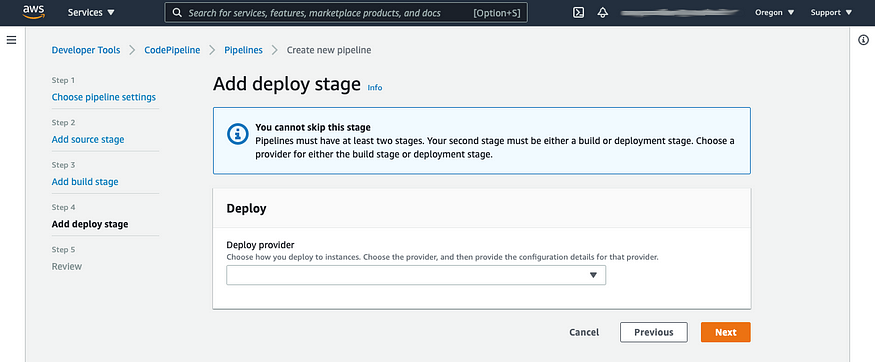
In the Deploy provider selector choose Amazon S3. This will populate the screen with the settings required connect CodePipeline to the AWS S3 bucket we created for our site in the first section of this article.
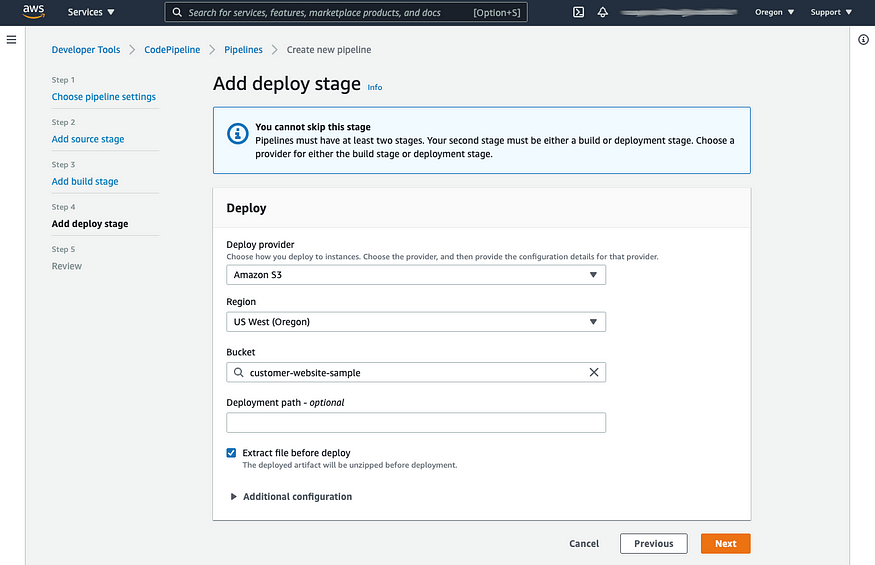
Choose the appropriate AWS Region if necessary and in the Bucket selector choose the AWS S3 bucket we created in the earlier step. In this example it's the customer-website-sample bucket I created.
Check the box for Extract file before deploy next.
This will hide the S3 object key field and display the optional Deployment path field. You would use the Deployment path option if you were deploying sites to specific folder within the S3 bucket. But in this case the S3 bucket is dedicated to this site, so it can be left blank.
Click the orange Next button. This will take you to the final step where you can scroll down and review all of your configuration settings for this pipeline.
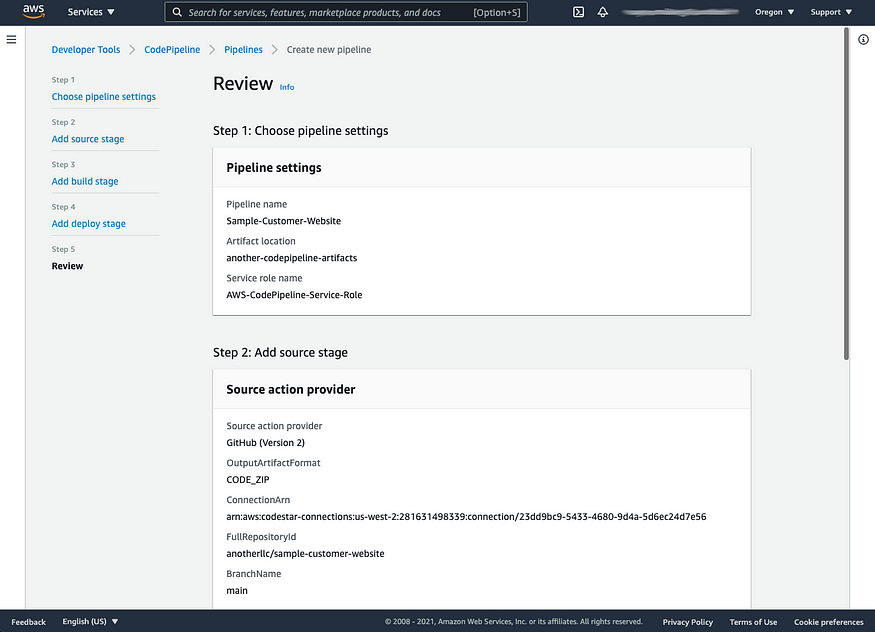
If you're happy with everything up to this point, scroll down and click the orange Create pipeline button at the bottom of the screen.
This will save all of your settings and create your AWS CodePipeline. It will then trigger your first deployment and pull the latest code from the GitHub repository branch you specified and deploy it to your AWS S3 bucket.
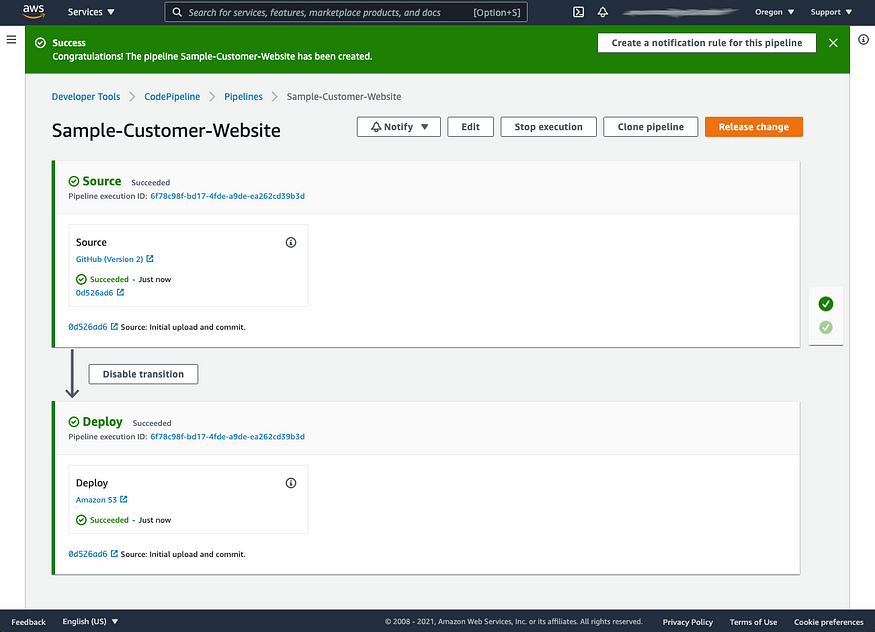
You'll be able to watch as the CodePipeline job works through each step. As it completes each one it will mark it with a green success indicator. Once the Deploy section completes your code will now be found in your AWS S3 bucket!
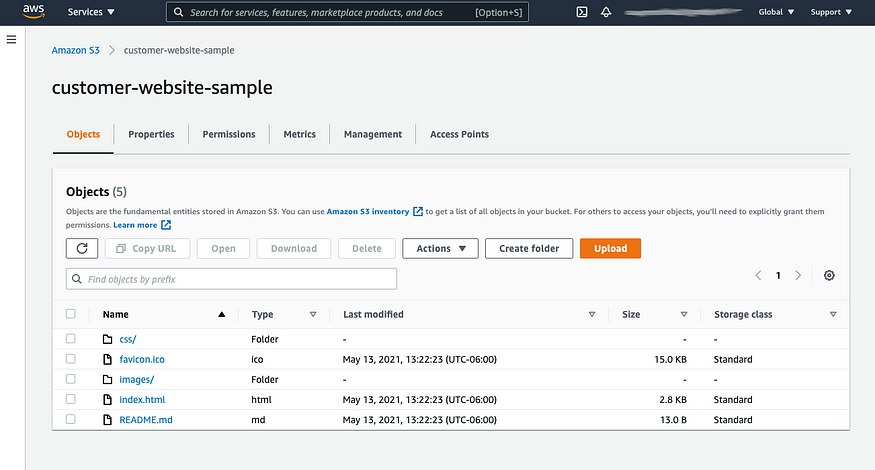
If we head back over to the S3 bucket we created earlier we'll see that all of the folders and files created in that website project are now there. If you have AWS CloudFront connected to this bucket, the process to deploy via CloudFront will kick in automatically and you should see website updates in your browser within minutes, if not almost immediately.
And there you have it! You've now created a simple continuous integration and deployment to S3 using AWS CodePipeline and GitHub.
If you found this article helpful then please make sure to check out my other articles that provide advice on setting up your development environment as well as some code examples for your projects.
Comments
Loading comments…