In this tutorial, we will go through a step-by-step process of animating transitions between different routes (or views) of our application using Next.js 13 with the new App Router structure. All that using only CSS and no extra third-party libraries.
What is the View Transitions API
View Transitions API provides a way to create an animated transition between two documents (Views), without creating an overlap in the transition.
View Transitions make this process easy and strait-full, by allowing you to make your DOM change without any overlap between states, by creating a transition animation between the states using snap-shotted views.
The current implementation of this API targets single page applications (SPAs), In this tutorial, we will explain how to do that using NextJS 13 with the new App folder.
Read more about View Transitions API here.
Is View Transitions API wildly adopted by modern browsers?
At the time when this article is written, View Transitions API is adopted by Chrome (v 111+), Edge browser (v 111+) and Opera browser (v 97+) all in the production versions, and on Android system : on android browser and Chrome for android.
Before going with this tutorial
We have talked about View Transitions API before in this article:
Create Dynamic Web page Transitions with the Built-In View Transitions API No Third-Party Libraries
We had explained what this API, how to enable it in all supported browsers and how to use it, All that in a step-by-step guide, with a working application (MPA: multipage application), with full source code, all using only Vanilla JavaScript.
You must carefully read the CSS implementation before going on with tihs tutorial, because we will not explain the View Transitions API again.
Then in a second article, in the same subject, we have talked about using the same View Transitions API, but we had used ReactJS.
Now we will continue in the same approach, but now using the new NextJS 13 with app router and without using any extra third parties libraries, all of that using CSS.
What we are building
In this article, we will create a multipage application, using NextJS 13 and the App Router structure, we will use the new View Transitions API to create animations when we navigate between different views (pages) all of that using only CSS.
In our application, we have three different animations:
- View animation (grow up)
- Header Animation (slide from the right)
- Content Animation (slide from the left)
This is an animated GIF, showing our final application in action:

Let’s code
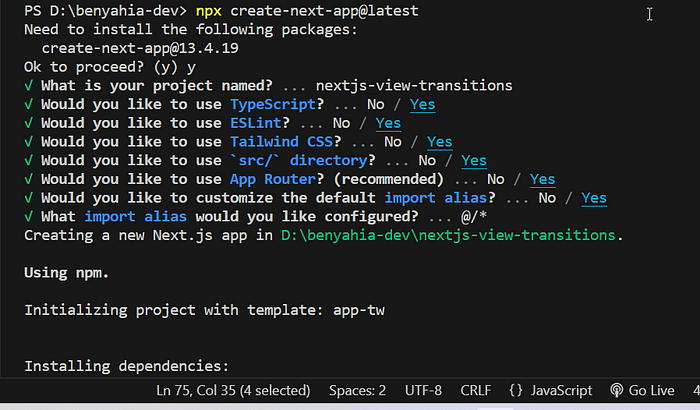
First, we will create a new NextJS 13 app with the App router enabled:
npx create-next-app@latest
Be sure to choose “Yes” for the App router:
Now we should clean up the code:
For src/app/global.css:
@tailwind base;
@tailwind components;
@tailwind utilities;
And for src/app/page.tsx
export default function Home() {
  return <></>;
}
We will start par extending the default document type in NextJS, to add the new experimental View Transinions API:
In the src folder, Create a new folder: types, and in it create a file with the name: extendedDocument.ts
export interface ExtendedDocument extends Document {
  startViewTransition?: any;
}
We will use this new extendedDocument type to replace the default document in our NextJS code.
With the same logic, we will extend the useRouter hook from NextJS to make it support the new View Transitions API:
useAnimatedRouter hook:
In the src folder create a new folder: hook, and in it create a file named: useAnimatedRouter.ts
    "use client";
    import { ExtendedDocument } from "@/types/extendedDocument";
    import { useRouter } from "next/navigation";

    export default function useAnimatedRouter() {
      const router = useRouter();
      const viewTransitionsStatus = () => {
        const extendedDocument = document as ExtendedDocument;
        let status = "Opss, Your browser doesn't support View Transitions API";
        if (extendedDocument?.startViewTransition) {
          status = "Yess, Your browser support View Transitions API";
        }
        return status;
      };
      // Navigate to the new route
      const animatedRoute = (url: string) => {
        const extendedDocument = document as ExtendedDocument;
        if (!extendedDocument.startViewTransition) {
          return router.push(url);
        } else {
          extendedDocument.startViewTransition(() => {
            router.push(url);
          });
        }
      };
      return { animatedRoute, viewTransitionsStatus };
    }
This hook exports two functions:
- viewTansitionsStatus : Check if the browser support the new View Transitions API.
- animatedRoute: Encapsulate the default
router.push()method and changes its behavior, if the browser support our API, it encapsulates it with the startViewTransition() function (please see the previous articles for more detail about this function), if not it will return with default behavior of router.push()
animatedLink component
Now we will overwrite the default bahavior of NextJS Link component, to make it support the new View Transitions API:
In the src folder create a new folder: components, and in it create a file: animatedLink.tsx
"use client";
import useAnimatedRouter from "@/hooks/useAnimatedRouter";
import Link from "next/link";
import React from "react";

type Props = {
  href: string,
  children: React.ReactNode,
};
export default function AnimatedLink({ href, children }: Props) {
  const { animatedRoute } = useAnimatedRouter();
  return (
    <Link
      href={href}
      onClick={() => {
        animatedRoute(href);
      }}
      passHref
    >
      {children}
    </Link>
  );
}
As you can see, we are using the animatedRoute() function from our newly created hook to overwrite the default onClick behavior of the Link component.
We are using “use client” here, to make this component client only.
And we are passing the passHref props here, this will allow the Link component to pass the href prop to the children.
Header component:
import Link from "next/link";
import React from "react";
import AnimatedLink from "./animatedLink";

export default function Header() {
  return (
    <div className="bg-slate-700 text-slate-50 py-4 ">
      <div className="container mx-auto flex gap-2">
        <AnimatedLink href="/">Home</AnimatedLink>
        <AnimatedLink href="/about">About</AnimatedLink>
        <AnimatedLink href="/contact">Contact</AnimatedLink>
      </div>
    </div>
  );
}
We are using the AnimatedLink component here like the default Link component. To point the three pages: Home, About and Contact.
Footer component:
"use client";
import useAnimatedRouter from "@/hooks/useAnimatedRouter";
import React from "react";

export default function Footer() {
  const { viewTransitionsStatus } = useAnimatedRouter();
  return (
    <footer className="bg-gray-800 opacity-75 text-white p-1 text-center fixed bottom-0 left-0 right-0">
      <span>{viewTransitionsStatus()}</span>
    </footer>
  );
}
We are using the viewTransitionsStatus() function from our new created hook: useAnimatedRouter to show a message in the bottom of our application.
Layout File
Now in the Layout.tsx file in the src/app folder, modify the code to include the <Header/> and the <Footer/> components
import Header from "@/components/header";
import "./globals.css";
import type { Metadata } from "next";
import { Inter } from "next/font/google";
import Footer from "@/components/footer";

const inter = Inter({ subsets: ["latin"] });

export const metadata: Metadata = {
  title: "Create Next App",
  description: "Generated by create next app",
};

export default function RootLayout({
  children,
}: {
  children: React.ReactNode,
}) {
  return (
    <html lang="en">
      <body className={inter.className}>
        <Header />
        {children}
        <Footer />
      </body>
    </html>
  );
}
Our three pages:
Modify the page.tsx in the src/app folder like this:
export default function Home() {
  return (
    <div className="flex flex-col h-screen items-center justify-center bg-amber-100 gap-10">
      <h1 className="text-4xl pageHeader">Home Page</h1>
      <p className="mx-10 pageContent text-center line-clamp-3">
        Lorem ipsum dolor sit amet, consectetur adipiscing elit. Sed ac urna
        auctor, viverra sapien. Donec euismod turpis eget massa lobortis, eget
        scelerisque justo.
      </p>
    </div>
  );
}
This is our Home page.
The same for the About page in the folder: src/app/about, create a new file named: page.tsx
export default function About() {
  return (
    <div className="flex flex-col h-screen items-center justify-center bg-amber-200 gap-10">
      <h1 className="text-4xl pageHeader">About Page</h1>
      <p className="mx-10 pageContent text-center line-clamp-3">
        Lorem ipsum dolor sit amet, consectetur adipiscing elit. Sed ac urna
        auctor, viverra sapien. Donec euismod turpis eget massa lobortis, eget
        scelerisque justo.
      </p>
    </div>
  );
}
In the folder: src/app/contact, create a new file named: page.tsx
export default function Contact() {
  return (
    <div className="flex flex-col h-screen items-center justify-center bg-amber-300 gap-10">
      <h1 className="text-4xl pageHeader">Contact Page</h1>
      <p className="mx-10 pageContent text-center line-clamp-3">
        Lorem ipsum dolor sit amet, consectetur adipiscing elit. Sed ac urna
        auctor, viverra sapien. Donec euismod turpis eget massa lobortis, eget
        scelerisque justo.
      </p>
    </div>
  );
}
Take a close look at the <h1> and <p> tags in the three pages:
<h1>contain the class: pageHeader<p>contain the class: pageContent
We will use these CSS classes to animate these section later
globals.css file
Now we will use the magic of View Transitions API to animate our application using only CSS.
All the magic happen in this file: globals.css:
@tailwind base;
@tailwind components;
@tailwind utilities;

/* Animate the page header separatly */
.pageHeader {
  view-transition-name: page-header;
}

/* Animate the page content separatly */
.pageContent {
  view-transition-name: page-content;
}

::view-transition-old(root) {
  animation: fade-and-scale-out 0.5s ease-in-out 1 forwards;
}

::view-transition-new(root) {
  animation: fade-and-scale-in 1s ease-in-out 1 forwards;
}

::view-transition-old(page-header) {
  animation: hide 1s ease-in-out 1 forwards;
}

::view-transition-new(page-header) {
  animation: slide-right 2s ease-in-out 1 forwards;
}

::view-transition-old(page-content) {
  animation: hide 1s ease-in-out 1 forwards;
}

::view-transition-new(page-content) {
  animation: slide-left 2.5s ease-in-out 1 forwards;
}

/* First Animation */

@keyframes fade-and-scale-in {
  from {
    opacity: 0;
    transform: scale(0);
  }

  to {
    opacity: 1;
    transform: scale(1);
  }
}

@keyframes fade-and-scale-out {
  from {
    opacity: 1;
    transform: scale(1);
  }

  to {
    opacity: 0;
    transform: scale(0);
  }
}

/* Second Animation */

@keyframes hide {
  from {
    opacity: 1;
  }

  to {
    opacity: 0;
  }
}

@keyframes slide-left {
  from {
    opacity: 0;
    transform: translateX(-100%);
  }

  to {
    opacity: 1;
    transform: translateX(0);
  }
}

@keyframes slide-right {
  from {
    opacity: 0;
    transform: translateX(100%);
  }

  to {
    opacity: 1;
    transform: translateX(0);
  }
}
We will explain every part of this file:
@tailwind base;
@tailwind components;
@tailwind utilities;
This is a part of TailwindCSS default configuration, it's present by default in our globals.css file.
/* ... */

::view-transition-old(root) {
  animation: fade-and-scale-out 0.5s ease-in-out 1 forwards;
}

::view-transition-new(root) {
  animation: fade-and-scale-in 1s ease-in-out 1 forwards;
}

/* ... */

@keyframes fade-and-scale-in {
  from {
    opacity: 0;
    transform: scale(0);
  }

  to {
    opacity: 1;
    transform: scale(1);
  }
}

@keyframes fade-and-scale-out {
  from {
    opacity: 1;
    transform: scale(1);
  }

  to {
    opacity: 0;
    transform: scale(0);
  }
}
This part of the code will animate the root element of the views (our pages), and the state of the animation changes between the old and the new state, for that we have two CSS keyframe animations:
-
  fade-and-scale-in
  -
  fade-and-scale-out.../\*
  Animate
  the
  page
  header
  separatly
  \*/
  .pageHeader {
  view-transition-name: page-header;
}
...::view-transition-old(page-header) {
  animation: hide 1s ease-in-out 1 forwards;
}
::view-transition-new(page-header) {
  animation: slide-right 2s ease-in-out 1 forwards;
}
.../\* Second Animation \*/@keyframes hide {
  from {
    opacity: 1;
  }
  to {
    opacity: 0;
  }
}
@keyframes slide-right {
  from {
    opacity: 0;
    transform: translateX(100%);
  }
  to {
    opacity: 1;
    transform: translateX(0);
  }
}
In this part of the code, we had created a new view-transition container, with the using: view-transition-name: page-header, with is assigned to the CSS class: pageHeader
We will use this name: “page-header” to assign a new animation (hide and slide-right).
/* ... */

/* Animate the page header separatly */
.pageContent {
  view-transition-name: page-content;
}

/* ... */

::view-transition-old(page-content) {
  animation: hide 1s ease-in-out 1 forwards;
}

::view-transition-new(page-header) {
  animation: slide-left 2.5s ease-in-out 1 forwards;
}

/* ... */

/* Second Animation */

@keyframes hide {
  from {
    opacity: 1;
  }

  to {
    opacity: 0;
  }
}

@keyframes slide-left {
  from {
    opacity: 0;
    transform: translateX(-100%);
  }

  to {
    opacity: 1;
    transform: translateX(0);
  }
}
With the same logic, we had created a new view-transition container, with the using: view-transition-name: page-content, with is assigned to the CSS class: pageContent.
We will use this name: “page-content” to assign a new animation (hide and slide-left).
Full complete source code (on GitHub)
GitHub - adelpro/nextjs-view-transitions
Live Demo with source code (on Codesandbox)
Twitter: @adelpro Portfolio: https://adelpro.github.io
Comments
Loading comments…