In the previous part, we discussed the following IDEs in detail:
Well, let’s check the other IDEs that you may find helpful for macOS.
Sublime text 4
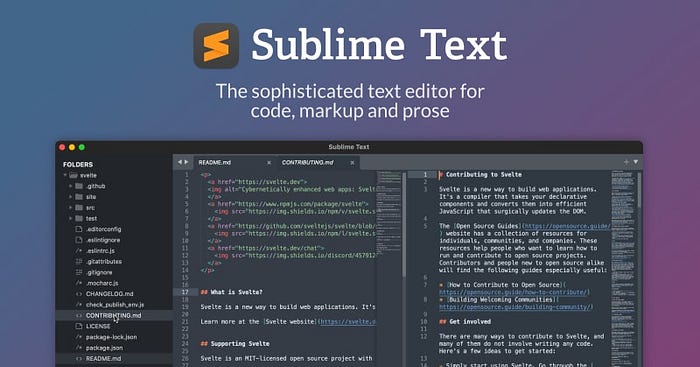
Sublime Text Editor, introduced in 2008, has established itself as a leading code editor renowned for its user-friendly interface, extensive features, and cost-free accessibility. This powerful tool appeals to both novice and experienced developers, offering a wide range of functionalities such as multi-tab selection, seamless integration with Git, customizable key bindings, file pattern management, and a native command-line interface that enhances workflow efficiency. Moreover, developers can effortlessly personalize Sublime’s interface themes and color schemes, allowing for visual customization according to individual preferences.
In terms of programming language support, Sublime Text is versatile and adaptable, accommodating a variety of languages by default. However, it excels in supporting Python, thanks to its core foundation combining C++ and Python. In fact, one could argue that Sublime Text is unrivaled as a code editor for comprehending Python, as it inherently incorporates elements of the language itself.
Features:
- Syntax highlighting: Clear and readable highlighting for Python code.
- Code autocompletion: Basic suggestions for functions, variables, etc.
- Multiple selections and editing**: Edit multiple sections simultaneously.
- Powerful search and replace: Advanced search with regex support.
- Customizability: Personalize the editor with themes and plugins.
- Split editing: Work with multiple code snippets or files at once.
- Build systems: Run Python scripts from within the editor.
- Integration with external tools: Connect with linters, formatters, etc.
Here’s a step-by-step guide on how to use Sublime Text 4 on macOS:
- On macOS, download Sublime Text 4 from its download page.
**⌘+Space**to open Spotlight Search then search for “terminal”, then run**sublime --version**, it will return to the build number.- Open a file in Sublime Text from the terminal with
**sublime <filename>** - Go to Sublime Text > Preferences > Settings. This will open a new window with two files open: the default program settings on the left-hand side and the user settings on the right-hand side (both files will be called “Preferences. sublime-settings”)
Watch the video here: How to Install and Use Sublime Text on MacOS
Useful Keyboard Shortcuts:
**⌥+Left Mouse Button**- To select the block**⌥+⌘+Left Mouse Button**- Add to the selection**⌥+⇧+⌘+Left Mouse Button**- Remove from the selection**Alt+W**- Toggle exact matches
Also, check the latest Sneat Bootstrap 5 Django 4 Admin Template. It is the best Django Admin Dashboard.

Xcode
Xcode 14 is the latest version of Apple’s integrated development environment (IDE) for macOS, iOS, iPadOS, watchOS, tvOS, and macOS servers. It was released on June 6, 2022, at WWDC 2022.
Besides, Xcode 14 includes a number of new features and improvements, including:
- A new multiplatform app experience, which makes it easier to develop apps that work across multiple Apple platforms.
- Enhanced editor features, such as improved syntax highlighting and code completion.
- Support for testing and deploying apps from Xcode Cloud.
- A number of performance improvements, which make Xcode faster and more responsive.
Xcode is a powerful IDE that can be used for a variety of programming languages, including Python. It has a number of features that make it convenient to use for Python development, including:
- Integrated debugger: Xcode includes a powerful debugger that can be used to step through Python code line by line and inspect variables.
- Code completion: Xcode provides code completion, which can help you save time by suggesting possible completions for your code.
- Linting: Xcode can be used to lint Python code, which helps you find potential errors in your code.
- REPL: Xcode includes a REPL, which allows you to interactively enter and execute Python code.
Overall, Xcode is a powerful and convenient IDE that can be used for Python development. However, it is important to note that Xcode is a large and complex IDE, and it may not be the best choice for beginners. If you are new to Python development, I recommend using a simpler IDE, such as PyCharm or Visual Studio Code.
Ultimately, the decision of whether or not to use Xcode as a Python IDE is up to you. If you are looking for a powerful and feature-rich IDE with support for multiple Python versions, then Xcode is a good option. However, if you are new to Python development or are looking for a simpler IDE, then I recommend using a different IDE.
Here’s a step-by-step guide on how to use Python on Xcode14:
- Open Xcode -> open a new project -> choose macOS -> choose a template -> name it — save it.
- Open file -> go to add package -> type in the search box “http://github.com/pvieito/PythonKit.git”
- Install PythonKit
- Highlight project name -> press command n -> type in the search box playground -> choose macOS -> choose a template — name it — save it.
- The playground document now will recognize the import PythonKit
- import PythonKi t
Also, check this tutorial video,
Useful Keyboard Shortcuts
- Build:
**⌘+B**. - Run:
**⌘+R**. - Test:
**⌘+U**. - Stop:
**⌘+.** - Clean:
**⌘+⇧+K**. - Clean the build folder:
**⌘+⇧+⌥+K**. - Open quickly:
**⇧+⌘+O**. - Code completion:
**⌃+Space** **⌃+⌘+T**- add a secondary editor- Fix all errors in scope:
**⌃+⌥+⌘+F**
For further commands check the official list.
Wingware
Wing’s editor enhances the efficiency of interactive Python development through the provision of contextually appropriate auto-completion and documentation, inline error detection, code quality analysis, enforcement of PEP 8 guidelines, assistance with function invocation, automatic editing capabilities, import management, refactoring tools, code folding options, multi-selection capabilities, customizable code snippets, and various other features. Additionally, Wing can emulate popular editors such as vi, emacs, Eclipse, Visual Studio, XCode, and MATLAB.
Features:
- Solid Editor Basics
- Intelligent Auto-completion
- Error Detection and Code Quality Analysis
- Auto-editing
- Import Management
- Refactoring
- Multi-selection
- Code Snippets & much more.
Requirements:
- Wing runs on macOS 10.15+ as a notarized native application, both on Intel and Apple Silicon (M1+) processors.
- Only 64-bit Python will work with Wing on macOS.
Here’s a step-by-step guide on how to use Wingware on macOS:
- On macOS, Wing is installed simply by opening the distributed disk image and dragging it to the Applications folder, and optionally from there to the taskbar.
- Go to http://wingware.com/
- Select “ Download” on the top right
- Select the “Wing IDE 101” tab (Wing 101 is free!)
- On the right you’ll see a green button; click on this to download the Wing Installer
- Click on the Wing IDE “.dmg” file in your download window
- From the folder that opens, drag the WingIDE link (feather icon) to your launchpad (or wherever you want to start Wing from)
- Start Wing by double-clicking on the app folder
Note: The installation location for Wing is referred to as WINGHOME. On macOS, this is the name of Wing’s .app folder.
Useful Keyboard Shortcuts:
**Alt+Down**- Move to screen next line**Alt+F3**- Bring up the search manager in search mode**Alt+f6**- Run the last test**⌘+Alt+F6**- Re-run all the previously failed tests in the debugger.**⌘+Alt+-**- Fold up all Python methods, expand all classes, and leave other fold points alone
For further commands check the official list.
Thonny
Thonny IDE is one of the best IDE for beginners with no prior Python experience to learn Python development. Besides, Thonny comes with Python 3.10 built in, so just one simple installer is needed and you’re ready to learn programming. (You can also use a separate Python installation, if necessary.) The initial user interface is stripped of all features that may distract beginners.
It is very basic and simple in terms of features that even new developers easily understand. It is very helpful for the users who use the virtual environment. Furthermore, Thonny has a simple infrastructure for extensions as well.
Best Features:
- Thonny provides the ability for the users to check how the programs and shell commands affect the Python variables.
- It provides a simple debugger with F5, F6, and F7 function keys for debugging.
- It offers the ability for a user to see how Python internally evaluates the written expression.
- Python function call opens a new window with a separate local variables table as well as a code pointer.
- It also supports the good representation of function calls, highlighting errors, and auto code completion features.
Here’s a step-by-step guide on how to use Thonny on macOS:
The Thonny+Python bundle is supported on macOS 10.11 and later (it may also work on 10.9 and 10.10, but this is not tested). On older systems, you can install Python and Thonny separately.
- Installer with Python 3.10 (universal2)
- thonny-4.0.2.pkg (44.3 MB)
- Re-using an existing Python installation (for advanced users)
pip install thonny
Install & Run
- Install Python 3.7 or later (or choose an existing installation).
- Install the Thonny package with
pip(possiblypip3) using your operating system command line. - Run Thonny package.
Opening Py files with Thonny:
- Right-click on a file with the
.pyextension. - Choose
Get Info. - Under
Open with:selectThonnyin the drop-down. - Click the
Change All...button. - Click the
Continuebutton when it asksAre you sure you want to change all similar documents to open with the application “Thonny”?
Also, check this video: How to Download and Install Thonny IDE
Useful Keyboard Shortcuts:
**⌘+F5**- Run programs step by step**⌘+F6**- Big step**⌘+F7**- Small Step**Alt+3**- To comment**Alt+4**- To uncomment
If you want to change the default shortcuts, you can follow the instructions on this official github-page
PyDev
PyDev is a third-party plug-in for Eclipse that provides an Integrated Development Environment (IDE) for Python programming. It allows you to step through your code line by line and examine the values of variables. This can be very helpful when you are trying to track down a bug in your code. Besides, it is free and open-source software, and it is actively developed and maintained by a community of users and contributors. It is a popular choice for Python developers, and it is used by a wide range of organizations, including Google, NASA, and the BBC.
Furthermore, Pydev’s integration with Django makes it easy to develop web applications in Python. Django is a popular web framework that provides several features that can make it easier to develop web applications. Pydev’s integration with Django allows you to use Django’s features directly from within Pydev.
Features:
- Code completion
- Code analysis
- Debugging
- Refactoring
- Unit testing
- Integration with Django & more
Requirements
- Java 11: Important: If you don’t have Java 11, the update process may appear to succeed, but PyDev will simply not show in the target installation. See Getting Started Guide > Install for troubleshooting.
- Python (3.6 or newer)
- PyPy (3.6 or newer)
- Eclipse 4.6 (Neon) onwards
Here’s a step-by-step guide on how to use PyDev on macOS:
- Install Eclipse: Download and install Eclipse from the Eclipse website.
- Launch Eclipse: Open Eclipse from the Applications folder.
- Install PyDev: Go to “Help” > “Eclipse Marketplace” and search for “PyDev”. Click “Go”, then “Install” to install PyDev.
- Configure Python Interpreter: Go to “Window” > “Preferences” > “PyDev” > “Interpreters” > “Python Interpreter”. Click “New…” and select your Python interpreter binary.
- Create a PyDev Project: Right-click in the “PyDev Package Explorer” view, and select “New” > “PyDev Project”. Enter a project name, choose the Python interpreter, and click “Finish”.
- Create Python modules: Right-click on the project name, select “New” > “PyDev Module”. Give it a name and click “Finish”.
- Run and Debug Python code: Right-click on the module or script, and select “Run As” > “Python Run” to execute.
- For debugging, set breakpoints and choose “Debug As” > “Python Run”.
Note on Mac OS: You can use the command “/usr/libexec/java_home -v 1.8” to get the base path for the JVM (though you also need to append “/bin/java” to the output of said command to the -vm arg in eclipse.ini).
Useful Keyboard Shortcuts:
**⌘+K**- Find Next**⌘+F**- Find & Replace**⌘+Q**- Last edit**⌘+1**- Quick Fix / Content Assistants**⌘+Space**- Code completion**⌘+Numpad+-**- Python Collapse
For further shortcuts, check the official list. You can use “Cmnd” instead of “Ctrl”
Conclusion:
So, that’s it. These are some of the best Python IDEs for Mac users. All of these are compatible with Mac and work perfectly. Although, with updates in versions, there can be little changes or if you are using an old version of IDE or Python, then things can be a bit different.
Picking a text editor or IDE to use tends to be a weirdly personal decision for each developer. Yet it makes sense when you realize that you are going to spend hours upon hours every day in your chosen environment so why not make sure it is enjoyable and highly productive?
The only “best” editor choice is to pick one that works well for you and stick to it. Master your tool so it gets out of your way and enables as much time in programming flow as possible.
Well, we hope you find this collection helpful and noteworthy. Feel free to recommend suggestions or changes in the comment section below.
Happy Coding.
Written by Abhijeet Dave for ThemeSelection.
Comments
Loading comments…