Photo by Denise Jans on Unsplash
👋 Hello Folks!
Today, I am writing a small article to outline how you can leverage AWS Lambda with FFmpeg & Node 18.
Disclaimer: I am not a professional on AWS & maybe there are better ways to make it. It engages only my experience.
Uses cases are multiple, but let’s say that you require video processing and editing.
In my personal experience, I have used it many times in order to:
- Generate thumbnails
- Create covers
- Generate GIFs
- Create short clips
Recently, we have implemented a service to automate subtitles generation, with OpenAI. However, before delving into the main topic, we first need to extract the audio track from the video, in the .mp3 format, in order to provide input to the service. But that is not the focus of this article. Utilizing a Lambda function proves highly beneficial when you require significant computational power for a short duration, if only to keep your invoice in check.
Before we begin, it’s important to clarify that AWS Lambda functions come with certain limitations that we must consider when tackling such resource-intensive tasks:
- Runs for 15 minutes maximum; after that, you will experience a timeout
- Limited to 10 Go of RAM
- Limited to 10 Go of ephemeral storage
In my experience, it''s largely sufficient! After this small presentation, it''s time to deep into the technical stuff.
Create the AWS Lambda
Before all, we need to create your Lambda Function.
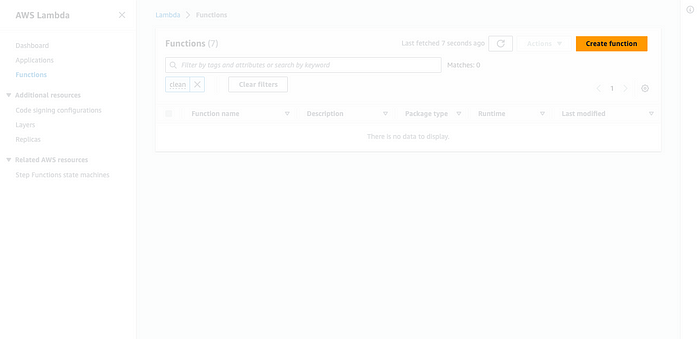
 Search Lambda Function
Starting with a simple thing, creating your AWS Lambda is very simple. Go into your AWS administration and type “Lambda” in the search bar.
 Dashboard Lambda function
Click on the Create function button action in order to launch the rocket.
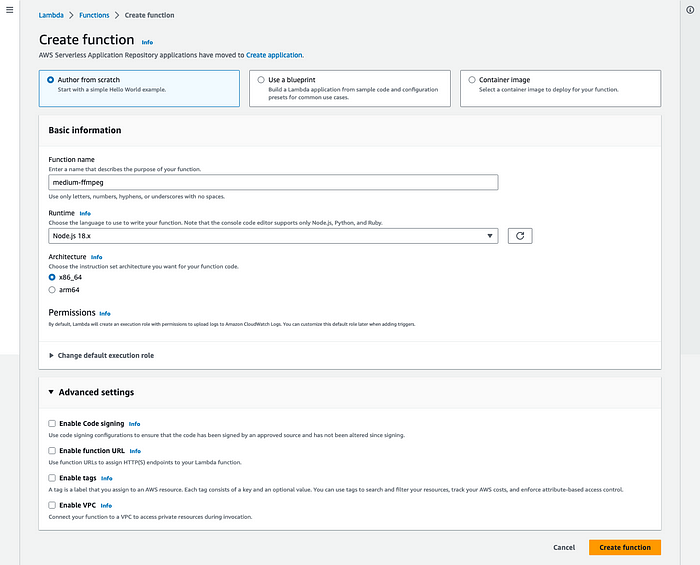 Create Lambda function from scratch
Your Lambda is ready, but for the moment, if you want to try it with the Test action button, (you have to configure a test, you can let it like that and give it a name as"default") nothing will happen and that''s not interesting.
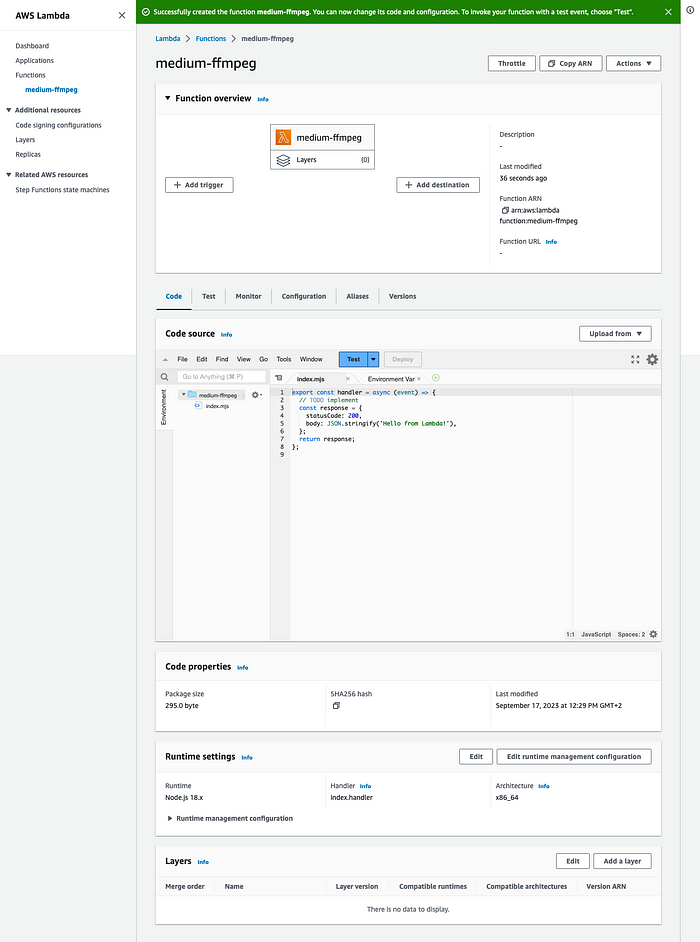 Your fresh Lambda Function
Adding your FFmpeg Layer
Before all, let''s download the AMD64 binary library here: https://johnvansickle.com/ffmpeg/ thanks to John Van Sickle for these precious resources!
Why AMD? If you remember, we chose this architecture when we created the lambda.
After downloading it, you can extract it and rename the folder to FFmpeg. It’s more user-friendly and this detail has it’s importance on the path that you will use in your future commands.
 Create a new Layer
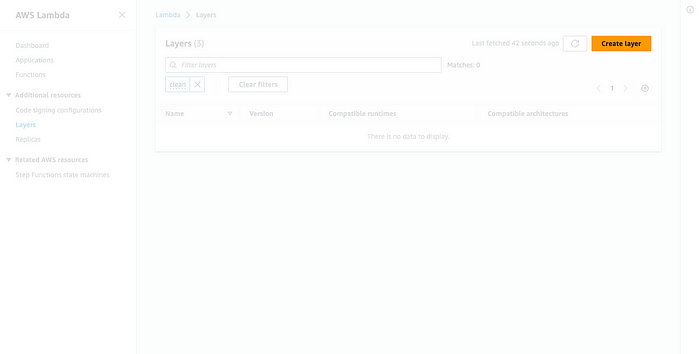
When you are on your Lambda function, in your left sidebar, you can find in the navigation items Layers. Go to this page to create a new Layer with FFmpeg.
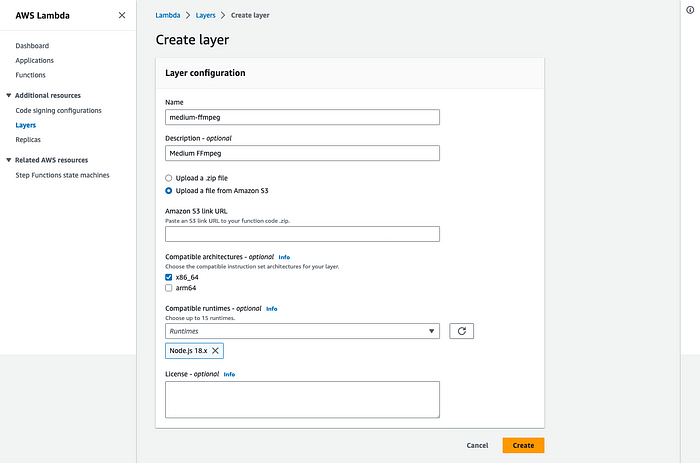 Layer configurations
Unfortunately, the FFmpeg library that you downloaded is too heavy to be uploaded by the interface (it’s limited to 10Mo), so, you have to provide an S3 Link URL to your binaries in your layout (Amazon S3 Link URL). I won’t explain to you how you have to make it’s not the subject today and I am sure you will find a lot of articles on this subject on Medium.
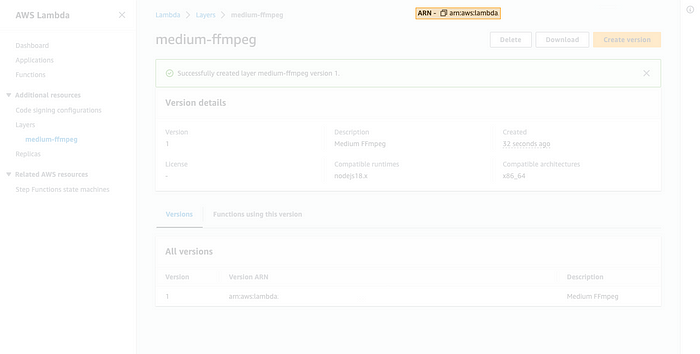 Copy-Paste your ARN resource
Great, your layer is created with success. It''s time to link the Lambda with the new Layer. For this, you have to copy-paste the ARN resource ID (TIPS: you can copy-paste it to your clipboard if you click on the little icon located on top of the screen).
You can now go back to your Lambda function previously created.
 Link Layer with Lambda function
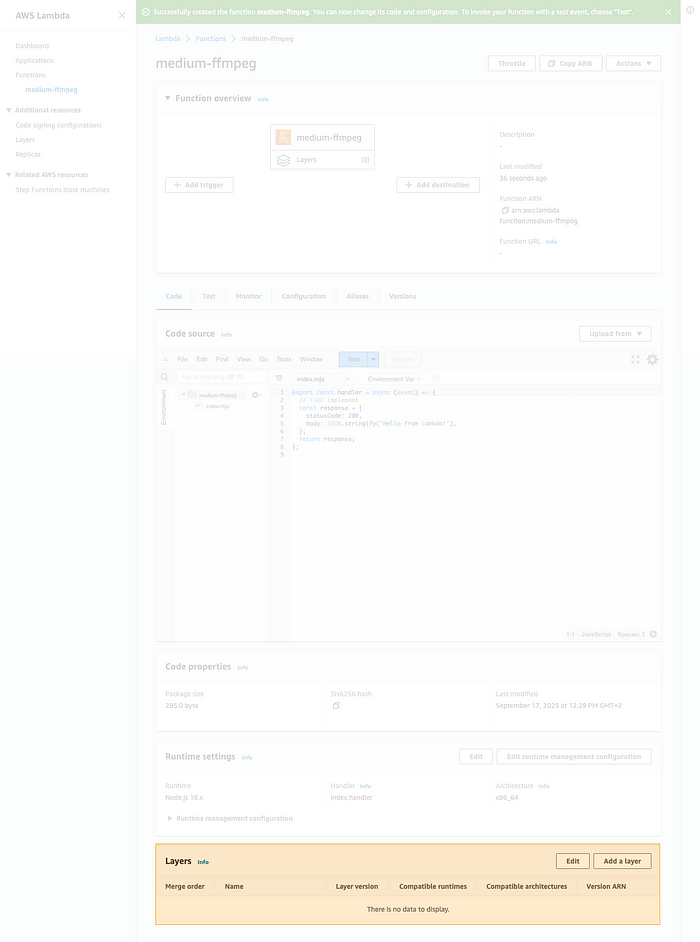
At this step, you can link your new layer to your Lambda Function. I invite you to click on the Add a Layer button action.
 Add Layer to the Lambda function
As you can see above, you have to specify an ARN and copy it in the field intended for this purpose (it should be in your clipboard if you followed the previous step).
Lambda Function configuration
In this part, we will configure our function to give it more resources and an entry point in order to play with it.
 Configurations tab
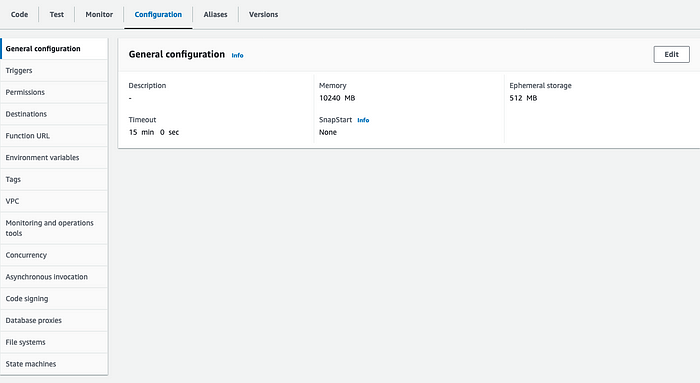
Select the Configuration tab.**** In this screen, you should have an Edit button use it to give your Lambda a boost!
 Edit basic settings
In this screen, we will modify two things. First, I ask you to update the Memory field**** and put as value the maximum! Second, update the Timeout field with a value of 15 minutes.
Great, now we are ready to start the most exciting moment of this explanation. The coding time!
Adventure time!
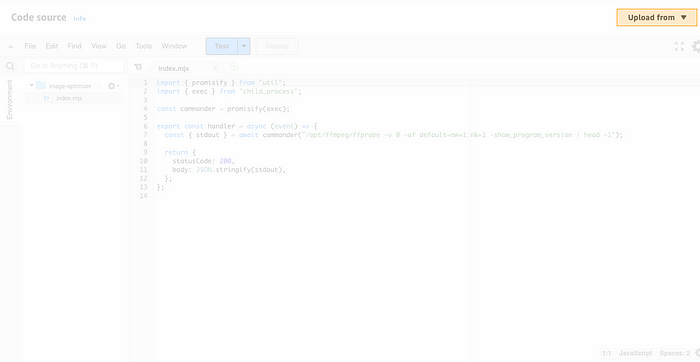
Go back to the Code tab in your Lambda function. We will take a look if the FFmpeg is ready to make some manipulation. You can start to copy-paste this code into your index.mjs file. Click on the Test button action & see
import { promisify } from ''util'';
import { exec } from ''child_process'';

const commander = promisify(exec);

export const handler = async (event) => {
  const { stdout } = await commander(''/opt/ffmpeg/ffprobe -v 0 -of default=nw=1:nk=1 -show_program_version | head -1'');

  return {
    statusCode: 200,
    body: JSON.stringify(stdout), //For me, N-66244-g468615f204-static...
  };
};
With this snippet, you can see if the FFmpeg is installed & the version currently executed into your function. Normally, your function returns you a 200 status code.
FFmpeg commands
Ok, we have FFmpeg installed, we can execute some commands. Let''s start with two commands.
First, we want to extract a small part of the video.
To extract a specific portion of a video using FFmpeg, such as from 2 seconds to 10 seconds, you can use the -ss (start time) and -t (duration) options. Here''s the FFmpeg command to achieve this:
ffmpeg -i input.mp4 -ss 00:00:02 -t 00:00:08 -c:v copy -c:a copy output.mp4
Here’s what each part of the command does:
-i input.mp4: Specifies the input video file, in this case, "input.mp4." but you can put a URL if you want.-ss 00:00:02: Specifies the start time, which is 2 seconds.-t 00:00:08: Specifies the duration of the portion to extract, which is 8 seconds (to reach the 10-second mark).-c:v copy: Copies the video track without re-encoding, preserving video quality.-c:a copy: Copies the audio track without re-encoding, preserving audio quality.output.mp4: Specifies the output file name, in this case, "output.mp4."
Second, we want to extract one image from a video in order to make a cover.
To extract a single frame from a video using FFmpeg, you can use the -ss (start time) option to specify the time position (in seconds) where you want to capture the frame, and the -vframes option to indicate that you want to capture a specific number of video frames. Since you want to capture only one frame, set -vframes to 1. Here''s the FFmpeg command:bashCopy code
ffmpeg -i input.mp4 -ss 00:00:02 -vframes 1 output.jpg
In this command:
-i input.mp4: Specifies the input video file, "input.mp4" in this example.-ss 00:00:02: Specifies the time position where you want to capture the frame, here at 2 seconds into the video.-vframes 1: Indicates that you want to capture only one video frame.output.jpg: Specifies the output file name and format, in this case, "output.jpg" for a JPEG image.
You could add some parameters from your URL. event.rawQueryString you could have this kind of thing url=https://www.pexels.com
Let''s mix everything together
It''s the last part, we will apply what we learn together. Making edits on one video and saving the asset in a S3 Bucket.
I suggest that you create a small project on your computer to take advantage of the IntelliSense feature offered by Visual Studio Code.
# Create a folder & go into it
mkdir example && cd example

# Init the project & pass the prompts
npm init -y && touch index.mjs

# Install AWS Client S3 to store the result of your FFmpeg manipulation
npm install @aws-sdk/client-s3
In your index.mjs we will put all our logic, of course, you could create a project with Typescript and push the compilation result to your lambda but for the moment we will make that simple!
import { promisify } from "util";
import { exec } from "child_process";
import * as fs from "fs";
import * as os from "os";

const commander = promisify(exec);

export const handler = async (event) => {
  const URL = ''https://your-video-url.mp4'';

  const workdir = os.tmpdir();
  const filename = `example-${Date.now().toString()}.jpg`;
  const outputFile = path.join(workdir, filename);
  console.log("🚀 @debug:output", outputFile);

  await commander(`/opt/ffmpeg/ffmpeg -i "${url}" -ss 00:00:01 -frames:v 1 ${outputFile}`);

  return {
    statusCode: 200,
    body: JSON.stringify(filename),
  };
};
Indeed, if you replace the
URLvariable with a valid URL to a video and launch a Test in order to launch your function, you will see that the video is created into the function storage. I''m assuming that you have a AWS account with a S3 Bucket and we will upload the resulting file to the Bucket.
import { promisify } from "util";
import { exec } from "child_process";
import * as fs from "fs";
import * as os from "os";

const commander = promisify(exec);

const uploadFile = async ({ from, contentType, path }) => {
  const s3 = new S3Client({
    region: ''AWS_REGION'',
    credentials: {
      accessKeyId: ''AWS_ACCESS_KEY_ID'',
      secretAccessKey: ''AWS_SECRET_ACCESS_KEY'',
    },
  });

  const body = fs.createReadStream(from);

  const command = new PutObjectCommand({
    Key: path,
    Body: body,
    ContentType: contentType,
    Bucket: ''AWS_BUCKET_NAME'',
  });

  return s3.send(command);
};

export const handler = async (event) => {
  const URL = ''https://your-video-url.mp4'';

  const workdir = os.tmpdir();
  const filename = `example-${Date.now().toString()}.jpg`;
  const outputFile = path.join(workdir, filename);
  console.log("🚀 @debug:output", outputFile);

  try {
    await commander(`/opt/ffmpeg/ffmpeg -i "${url}" -ss 00:00:01 -frames:v 1 ${outputFile}`);

    await uploadFile({
      from: outputFile,
      contentType: "image/jpg",
      path: `AWS_BUCKET_PATH/${filename}`,
    });

    return {
      statusCode: 200,
      body: JSON.stringify(filename),
    };
  }
  catch(error) {
    console.log(''@error'', error);

    return {
      statusCode: 500,
      body: JSON.stringify(''Something was wrong during the video manipulation''),
    };
  }
};
⚠️ You have to replace
AWS_BUCKET_PATH,AWS_BUCKET_NAME,AWS_ACCESS_KEY_ID,AWS_SECRET_ACCESS_KEYvariable in this script above.
🚀 Tips: If you want more flexibility, Lambda Function allows you to add environment variables. You can find this feature in the Configuration > Environment variables
 Add environment variables
 Edit environment variables
After adding them, you could use them in your script withprocess.env.WHATEVER_YOU_WANT ! Awesome, Right?
You can compress your index.mjs and your node_modules . After that, you can upload your code and Try it again!
 Upload your code
Next steps?
Today, I don''t want to develop more topics, I try to make something very straightforward. As you can see it''s not very flexible, but you could add some Triggers to your Lambda function (API Gateway, Event Bus…). That way, you could add a security layout but for the moment, you can access your Lambda from the outside with its URL.
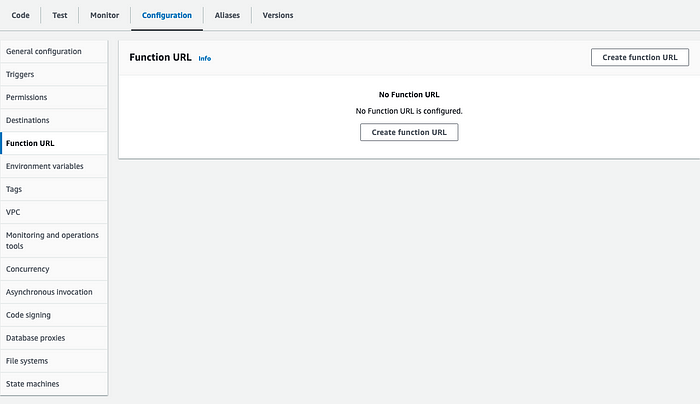 Create function URL
If and when you want to create a Function URL, you have to be careful if you put the Auth type as NONE, everyone can call your lambda but it''s a good exercice.
On top of that, you could use the parameter event passed to your handler function and working with the query parameters in your URL.
// When you call your lambda with your function url
// Example: https://my-lambda-url?url=https://my-s3.com/interview.mp4
export const handler = async (event) => {
  // Event object passed in your lambda as rawQueryString key and having
  // your query parameters as string ''url=https://my-s3.com/interview.mp4''
  const queryParameters = event.rawQueryString;

  const parameters = queryParameters.split(''&'')
    .reduce((accumulator, current) => {
      const [key, value] = current.split(''='');
      if (!key || !value) return accumulator;

      accumulator[key] = value;
      return accumulator;
    }, {});

  console.log(''@debug'', parameters);
  // Should give { url: ''https://my-s3.com/interview.mp4'' }

  const workdir = os.tmpdir();
  const filename = `example-${Date.now().toString()}.jpg`;
  const outputFile = path.join(workdir, filename);

  await exec(`/opt/ffmpeg/ffmpeg -i "${parameters[url]}" -ss 00:00:01 -frames:v 1 ${outputFile}`);

  return {
    statusCode: 200,
    body: JSON.stringify(parameters),
  };
};
You can make it better and cleaner if you bind your Lambda with API Gateway, you can create as
POSTand get directly the query parameters, body… but if you want to practice without that you could take this snippet.
Conclusion
I hope this article was helpful and clear enough. FFmpeg offers numerous possibilities, and you can discover many examples and useful commands online. Alternatively, you can ask ChatGPT to generate a command using natural language, which you can then copy and paste into your Lambda function to create your assets and perform other tasks. I encourage you to explore and experiment with it!
Comments
Loading comments…