IAM roles are very useful for EC2 instances for accessing other AWS resources (such as S3, SQS, etc).
You don’t have to hardcode IAM credentials in the application code. Instead, you just assign the IAM role to the EC2 instance with required permissions and your applications installed in the EC2 instance will make use of the role to access the AWS resources that you want them to be accessed.
In this tutorial, we will assign SQS full access role to an existing EC2 instance with AWS CLI.
……………………………………………………………………………
Here are the high level steps -
- Create an IAM Role.
- Attach Policy with the Role.
- Create an Instance Profile.
- Add the Role to the Instance Profile.
- Associate the Instance Profile with the EC2 instance
— — — — — — — — — — — — — — — — — — — — — — — — — —
Step 1: Create an IAM Role
Copy the below policy and save it in a JSON file named Trust-Policy.json.
{
“Version”: “2012–10–17”,
“Statement”: [
{ “Effect”: “Allow”,
“Principal”: { “Service”: “ec2.amazonaws.com” },
“Action”: “sts:AssumeRole” }
]
}
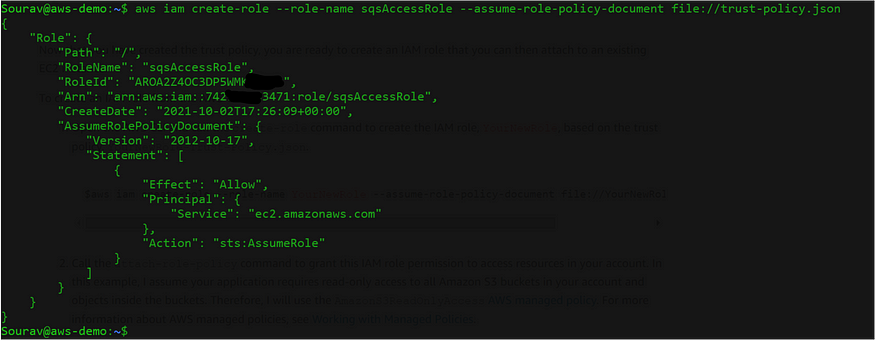
Execute the below command to create the role with the trust policy.
$aws iam create-role --role-name sqsAccessRole --assume-role-policy-document file://Trust-Policy.json

Fig: IAM Role creation
— — — — — — — — — — — — — — — — — — — — — — — — — —
Step 2: Attach a Policy with the Role
Specify the policy ARN that you want to be attached with the role.
Here I have given the SQS full access policy. Change it as per your requirement.
$aws iam attach-role-policy --role-name sqsAccessRole --policy-arn arn:aws:iam::aws:policy/AmazonSQSFullAccess

Fig: Policy assignment
Verify the policy assignment —
$aws iam list-attached-role-policies --role-name sqsAccessRole

Fig: Verify policy assignment
— — — — — — — — — — — — — — — — — — — — — — — — — —
Step 3: Create an Instance Profile
$aws iam create-instance-profile --instance-profile-name sqsAccessInstanceProfile

Fig: Instance profile creation
— — — — — — — — — — — — — — — — — — — — — — — — — —
Step 4: Add the Role to the Instance Profile
$aws iam add-role-to-instance-profile --role-name sqsAccessRole --instance-profile-name sqsAccessInstanceProfile

Fig: Add role to instance profile
— — — — — — — — — — — — — — — — — — — — — — — — — —
Step 5: Associate the Instance Profile with the EC2 instance
Modify the EC2 Instance ID and execute the command.
$aws ec2 associate-iam-instance-profile --instance-id i-0f999e6d4637 --iam-instance-profile Name=sqsAccessInstanceProfile

Fig: Instance profile association
Run the below command to verify the association status.
$aws ec2 describe-iam-instance-profile-associations

Fig: Verify the instance profile association
— — — — — — — — — — — — — — — — — — — — — — — — —
We have successfully assigned the SQS access role to the EC2 instance.
Let’s log inside the EC2 and try to list all the SQS queues.

Enjoy! :)