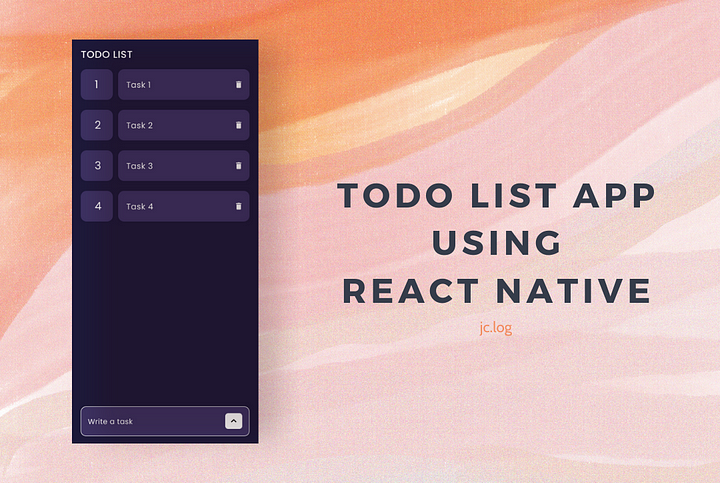
TodoList App using React-Native
Hello folks, today we will see how to build a ToDo list app using React Native. Learning how to build a TodoList app will help teach you a lot of basic concepts of React Native. I always like to build this type of small project to get comfortable with a framework.
To get the best result, don't just read the post. Please make the app yourself after reading the post to understand the concepts on your own. Trust me, creating the app on your own will clear all your doubts.
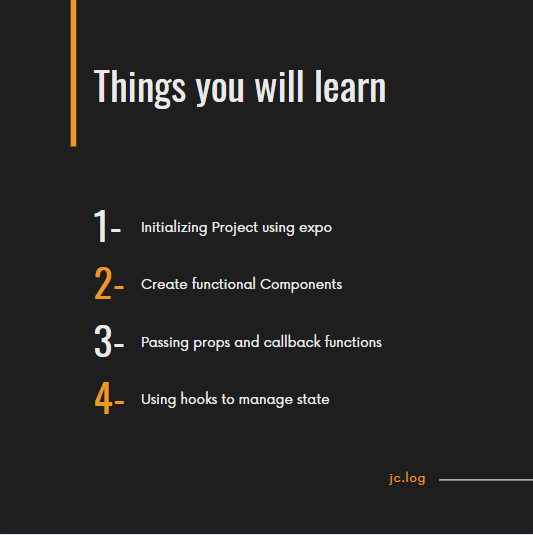
Let's start by installing expo using the below command:
npm install -g expo-cli
After this, we can initialize our project by executing the following command in the terminal:
expo init myTodoListApp
Our project setup is complete so we can move forward and build our TodoList app.
This is the design of our TodoList app:
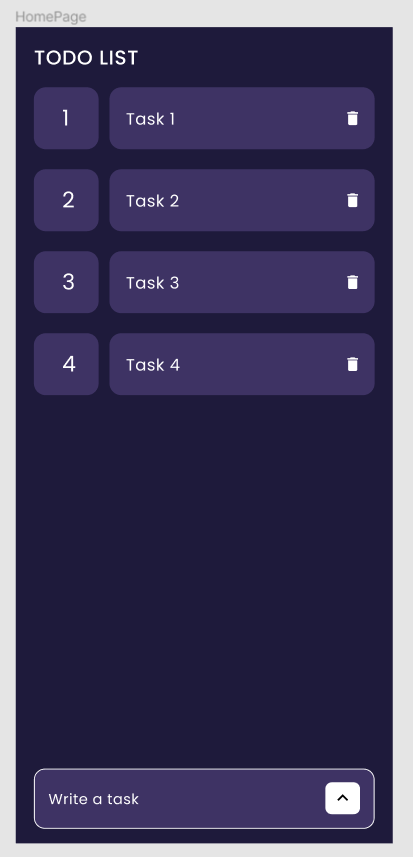
HomePage Design
There are three components to build here:
-
Heading (Quite simple)
-
Task Item
-
Task Input Field with a Button
Let's head to App.js file and start building these components.
We will use a Text component to build our heading and give some styling to it.
After executing this code, you will see the following output:
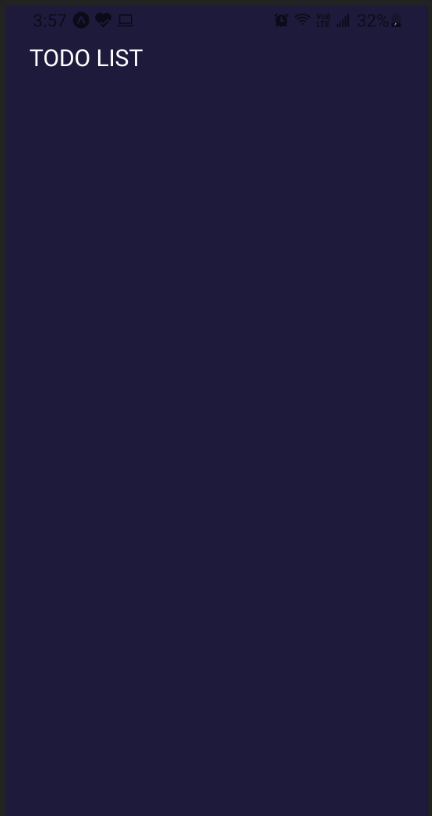
Heading
Now let's create a new file called TaskItem.js which will be a separate component for each task.
This is the UI component we are trying to build:
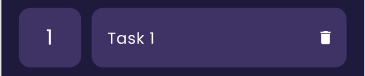
Task Item
There will be a wrapper view, which will have two children, first one is the index container and the other container will have the task text and a delete icon.
We will accept the index, task and deleteTaskas props to this component. deleteTask is a callback function passed from the parent component to delete the specific task. We will call this callback function when the delete icon is pressed. For Icons, I have used in-built MaterialIcons provided by expo.
Next is the input field with a button which will add a task to the list when pressed. We will create a new file called TaskInputField.js which will be another functional component.
In this component, we will use one hook to handle the input field state.
const [task, setTask] = useState();
Also, this component accepts a callback function in props, which will add a task to the list. After adding the task, we will clear the input field.
I have wrapped the TextInput into KeyboardAvoidingView to avoid hiding it from the keyboard.
This is the result after we add this code:
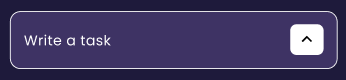
Task Input Field
Now in the App.js, we are going to add those functional components under the heading component.
We will create a hook for handling the state of tasks by using the following line of code. tasks will be an empty array initially.
const [tasks, setTasks] = useState([]);
After that, we will create two functions for adding and deleting a task.
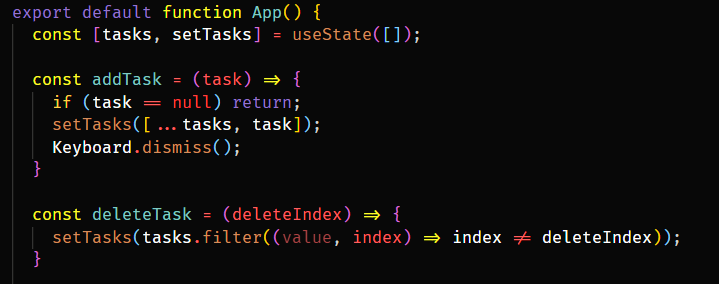
We will pass addTask function into TaskInputField component and deleteTask function into TaskItem component as props.
Here is the full code of App.js after we add all the above mentioned:
So as you can see, we are iterating over all the tasks and rendering TaskItem accordingly. We are also using ScrollView to handle scrolling.
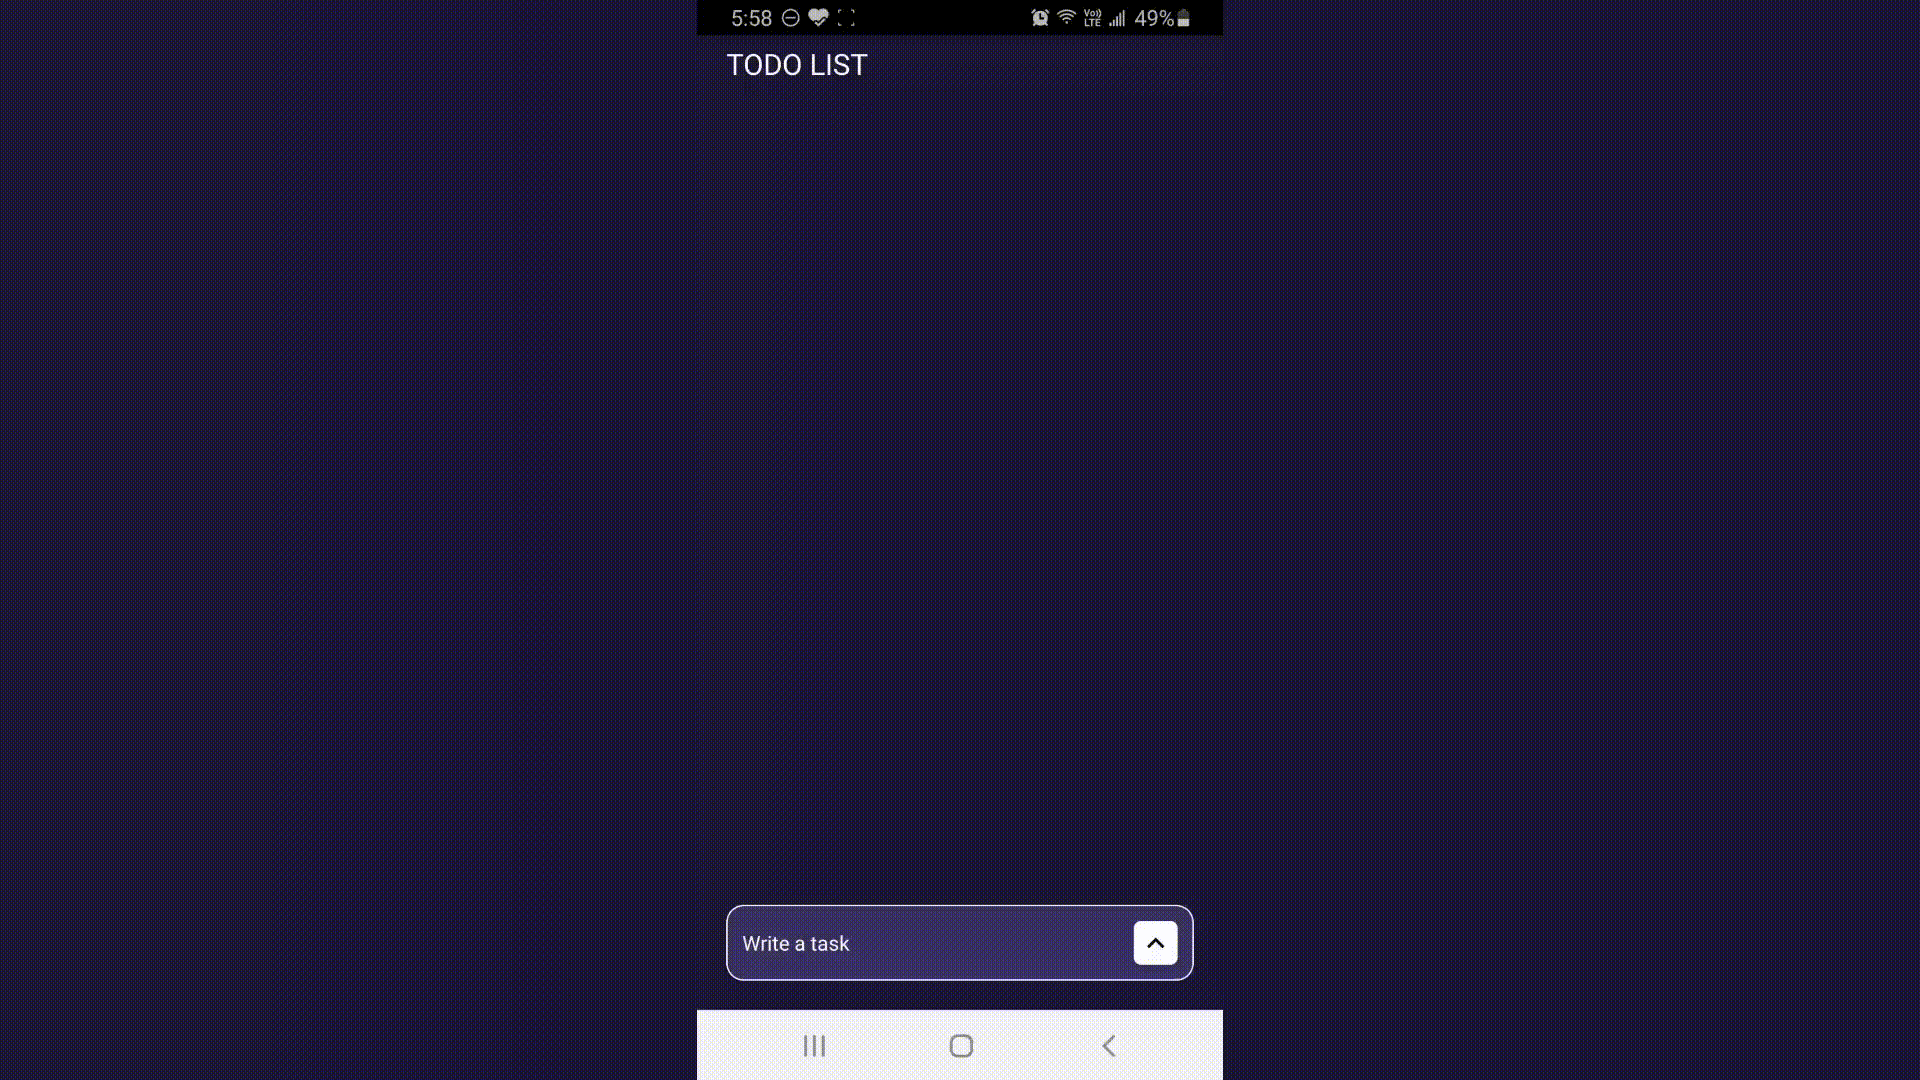
We are done now. Here is the final output:
Here is the Github link for the project. Hope you find it helpful.
That's it for this one. Hope you liked it. I am thinking of expanding this project by adding more complex functionalities.
Thank you for reading.
Comments
Loading comments…