
A proxy is a gateway between a client and the entire internet. But there are several use cases for a proxy. For example: if you’re inside a corporate network, there are 99% chances that you’re behind a proxy which controls your access to the internet by allowing and restricting what you can visit and what you can’t visit. Such kind of proxy is known as forward proxy.
If we talk about server side, let’s say you are having an application deployed on some servers and are exposed to internet, but you want to implement a middleman which can prevent the direct exposure of your application servers to the internet, chances are you want to have a proxy server which can take requests from the clients on internet and forward them to your application servers, and then send the response back to them. Such kind of proxy is known as reverse proxy.
Concept of forward proxy
Let’s understand this by a simple example. You are in a company having computers A, B and C and these computers want to access website X, but the administrator has blocked the direct access to internet for corporate safety but he has setup a proxy server P through which internet can be accessed.
Forward proxy graphical representation:

The proxy server referred in the above scenario is the forward proxy server.
Concept of reverse proxy
Let’s say you are a client C accessing a website W. But the website administrator has blocked the direct access to the servers and implemented a proxy P which takes requests from you and forwards them to the actual servers and then take the responses from them and send them to you. You are under impression that you are accessing the website directly C -> W, but in fact, you are accessing the proxy server which in turn forwards your request to the actual application server i.e. C -> P -> W.
The representation is as below:
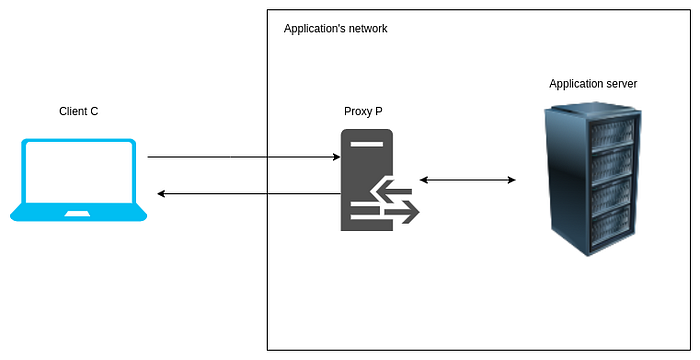
The proxy server referred in the above scenario is the reverse proxy server.
Coding a proxy server
Full code can be found at github: https://github.com/kasattejaswi/nodejs-proxy-server
Enough with the theory, let’s jump right into coding of our proxy server. For the development, we are going to use certain node.js inbuilt modules for network. The first one is net module, and the second one is stream module. It’s important to take a look at these modules first before proceeding into the coding. For documentation and a precise explanation of these modules, you can refer the below links:
Net Module:
- Official docs: https://nodejs.org/api/net.html
Stream Module:
- Official docs: https://nodejs.org/api/stream.html
- A very crisp explanation: https://www.freecodecamp.org/news/node-js-streams-everything-you-need-to-know-c9141306be93/
Now in order to begin, make sure you have node.js installed in your system and any IDE ready.
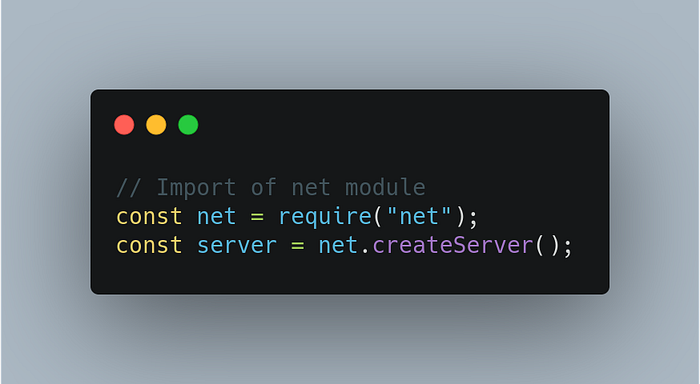
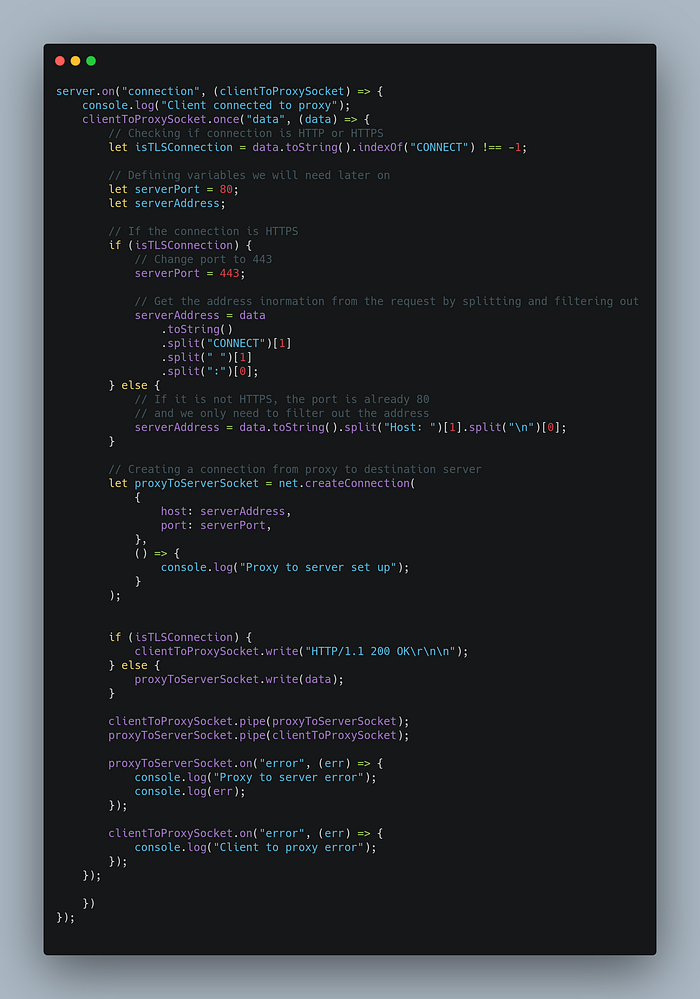
First, we will import net module into our code and call createServer()
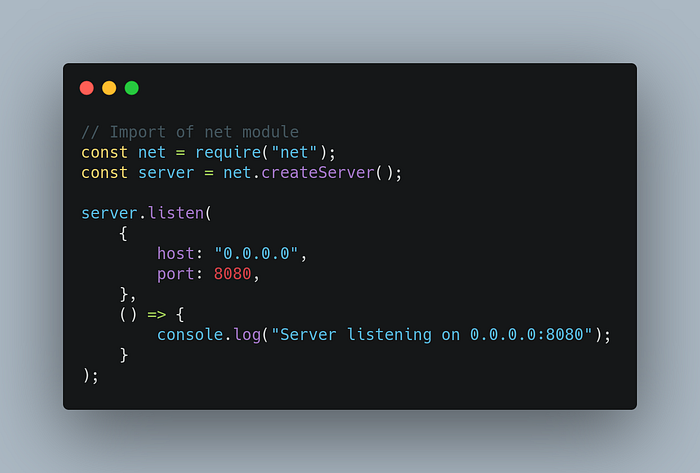
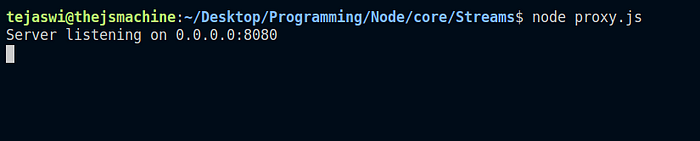
Once our server is initialized, we can listen on 0.0.0.0 host (for accepting incoming request from all IPs) and 8080 port and in the callback, we can log that the server is running on 0.0.0.0:8080
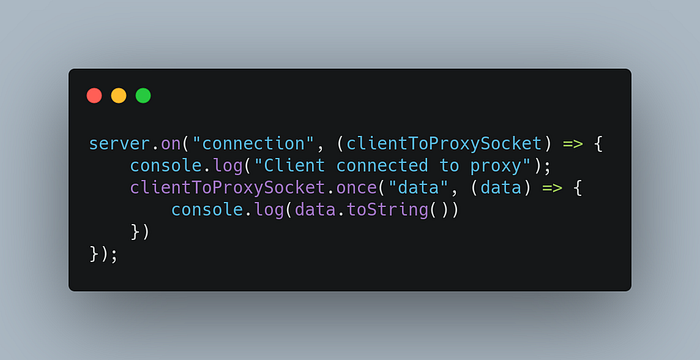
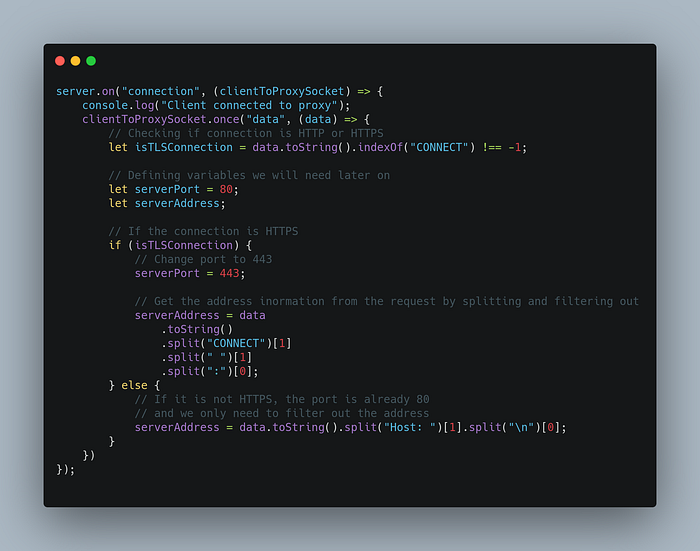
Net module triggers certain events whenever a new request comes to the server. For now we are going to listen “connection”, “error” and “close” events. For these, let’s add some listeners.

Connection event gives us a socket object with the details about the request that is captured by the server. Error event provides us an error which is passed in the callback. So in the above example, we have logged the data.
In the above code, clientToProxySocket also triggers an event “data” once the data is received. For each request, since we need to get the data only once, we will listen only once for the “data” event only for the first time and gather enough data from it.
Till this point, we have now setup a simple server which will receive requests and prints the details of the requests in the console. In order to test it, we need to first setup our test environment.
Setting up a test environment
For this, I am going to use Mozilla Firefox. However you can use any of the browsers, the procedure will be same.
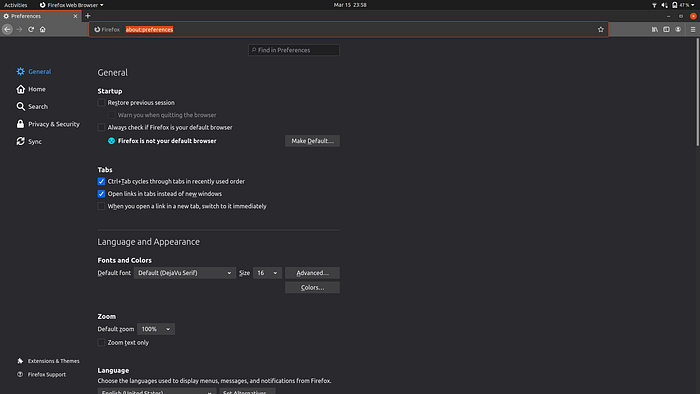
In your address bar, type about:preferences and a settings page will open up.
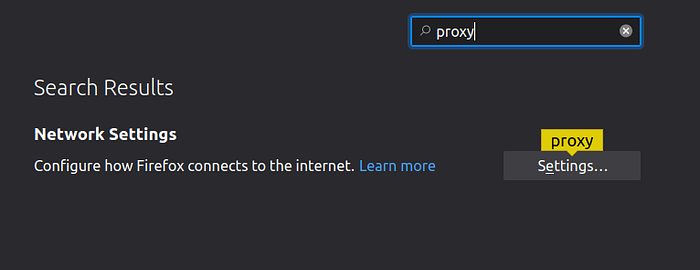
Search for proxy in the search box and proxy option will be filtered out.
Click on Settings and a proxy setup page will open up. Select “Manual proxy configuration”. In that, for HTTP Proxy, mention localhost and port as 8080 and checkbox for “Also use this proxy for FTP and HTTPS”. They will now look something like this.
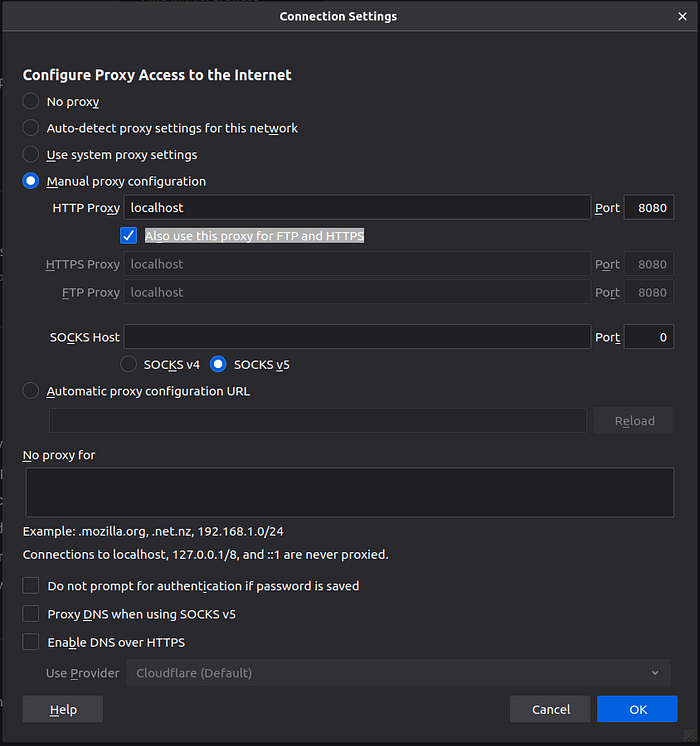
Click on OK and you’re done with the setup of test environment.
Getting request details
Now since our basic server and test environment is ready, let’s run it for the first time and see what details we get in request. We will make two requests — one will be http and the other will be https.
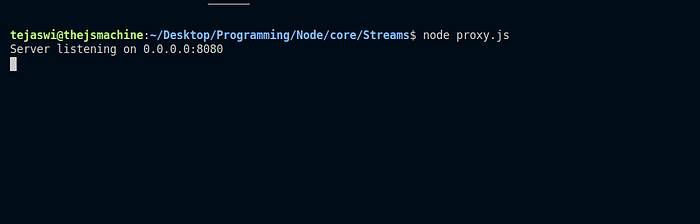
As here you can see, our server listening log is now printed and it is ready to accept incoming requests.
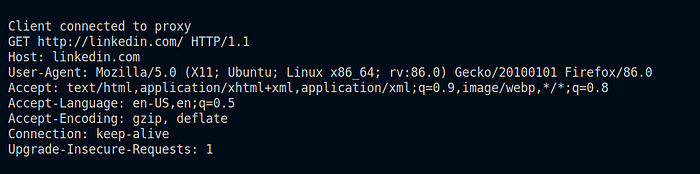
For testing, we are going to use linkedin.com as http and https URL.
When we enter linkedin.com, we got following data:
Now, let’s try with https://linkedin.com. We got the following data:
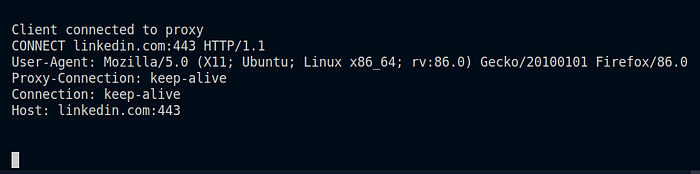
Here, there is a major difference in both the requests. For http, we got GET request with http in address. In case of https, we got CONNECT with 443 port number. So we will use this for checking if the request is http or https and will assign ports accordingly. We will assume that the destination website is following the standard methods and is using port 80 for http connection and port 443 for https connection. We won’t be covering custom ports as of now but they can be obtained in a similar manner.
Till now if you check your browser’s window, the page will keep on loading and loading and will eventually timeout since it never got a response from our proxy server.
For checking if the connection is http or https, we will use CONNECT string present in the request. Let’s add that code.
Till this point, we have all the necessary information for forwarding the request to the destination. But how? The answer is node.js streams. If we talk about the request from client to proxy server, it is a readable stream and if we talk about proxy to destination, it is writable stream. But when the data is received from destination to proxy, it will be a readable stream and then when it is sent back to client from proxy server, it will be a writable stream. If we perform a piping, we can forward the requests to both ends.
So let’s start by creating a connection from proxy server to destination using createConnection() method using net module with the host and port that we have extracted from the client’s request.
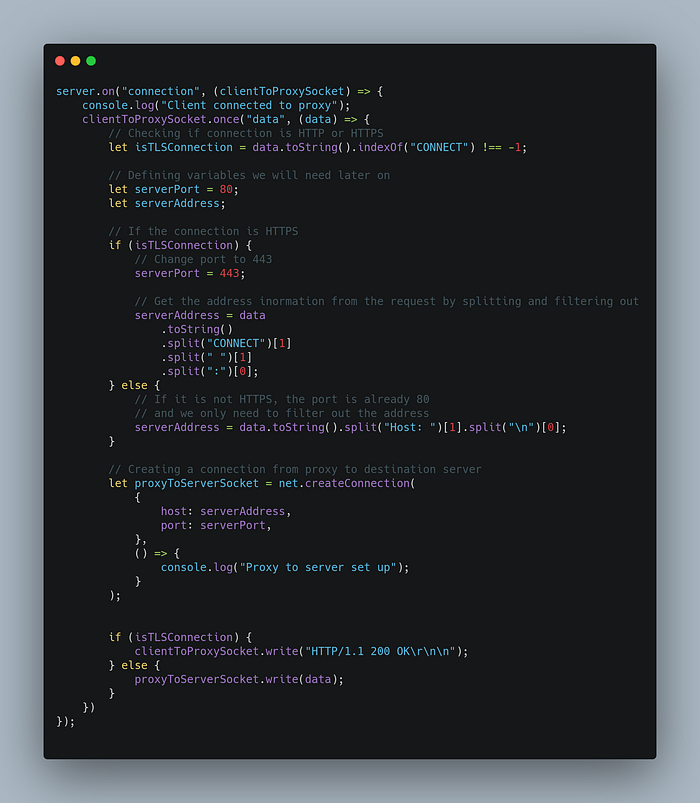
Now we can simply pipe the streams and capture errors if any on client to proxy and proxy to destination.
And that’s it. Our full fledged proxy server is ready.
Let’s run it and visit our website now.

The Linkedin page is opened successfully. If we see the console, we are having tons of requests printed.
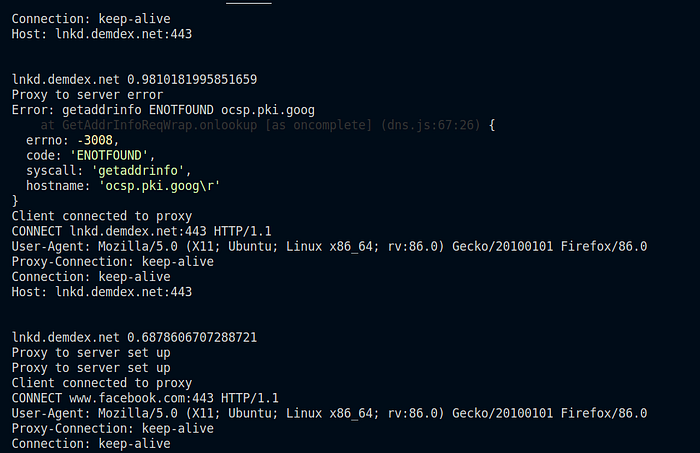
This shows that our proxy server is working properly. There are a lot more enhancements we can do in this code. We can use it as a reverse proxy by running it in a server and customising it accordingly.
Full code can be found at GitHub: https://github.com/kasattejaswi/nodejs-proxy-server
Comments
Loading comments…