In this tutorial we are going to show you step by step how to use the OpenAI API based on GPT-3 to generate AI content for the following use cases:
- Generate product descriptions
- Generate job descriptions Generate tweets
- Cold emails
- Social media adverts (eg. Facebook Ads)
- Business idea pitch
- Youtube video ideas
- Youtube video description
- The process
GPT-3 was trained on over 45TB of data from the internet and is capable of producing human-like content. The model we will be working with today is a “completion” model. This means that we suggest to it what we want, and it completes the writing on our behalf, using artificial intelligence to determine the outputs.

I am particularly excited about GPT-3 because, for the first time, AI functionality is going to be made available to average developers who do not have the skill-set to create and train their own models. Imagine training a model with just 10 TB of data yourself.
Starting Code — AI Content Generator with Python Flask and GPT-3
In the interest of time, I have made the Python Flask code available for our application. The code already includes a working flask app with all the HTML pages, routes, and files that you will need. You can get it from GitHub here:
GitHub - skolo-online/ai-content-starting-template
You can clone the repo via:
git clone https://github.com/skolo-online/ai-content-starting-template.git
Then install the required libraries:
pip install flask openai
Then get your API key from OpenAI and add it to the config file and you are ready to go.
Video Tutorial — AI Content Generator with Python Flask and GPT-3
You can also watch the full video tutorial on YouTube here:
Let us get started.
Use Playground to get Python Code
The very first step is to try and use the playground tool, that OpenAI has made available to test the code and functionality. This is a great tool to test your prompts and adjust the model parameters to get the results you seek.
Let us take the “cold email” use case, for example, head over to the Playground and try to generate some email content.
Go to https://beta.openai.com/playground?model=davinci-instruct-beta-v3
Adjust the response output to 200, and leave the temperature at 0.7. Also note the model we are using is davinci-instruct-beta-v3 which is much better at this type of use-cases, where you give it an instruction for completion.
Enter the following text into the input:
Generate a cold email about CRM Software.
The output will look like:
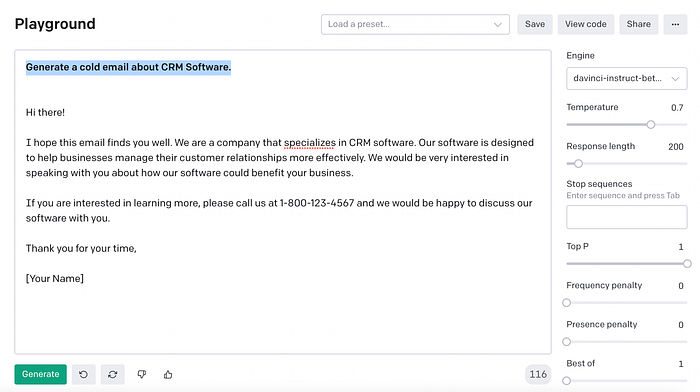
You can play around with the instruction prompt, changing the text, until you get the results that you want, but in our case the instruction we gave worked pretty well for CRM Software. However, if you had a brand or keyword that is not popular, you might want to add some description to help the AI along.
Extract the Python API code from Playground
You can now click on the “view code” button at the top to get the code for Python.

Export Playground Code in Python
- Press this button to view the code.
- Press this button to decide on the type of output — you can also select curl and json libraries as alternatives.
Flask Application AI Content Generator with GPT-3
We are now ready to export this code to our flask application that we downloaded from GitHub. create a new file called aicontent.py and in this file, you can paste the following code:
import openai
import config
openai.api_key = config.OPENAI_API_KEY

def openAIQuery(query):
	response = openai.Completion.create(
		engine="davinci-instruct-beta-v3",
		prompt=query,
		temperature=0.8,
		max_tokens=200,
		top_p=1,
		frequency_penalty=0,
		presence_penalty=0)

	if 'choices' in response:
		if len(response['choices']) > 0:
			answer = response['choices'][0]['text']
		else:
			answer = 'Opps sorry, you beat the AI this time'
	else:
		answer = 'Opps sorry, you beat the AI this time'
	return answer
This code will allow you to call the function:
openAIQuery(query)
Provide it with a query word like this statement we tested above:
Generate a cold email about CRM Software.
And it will return a response from the API, which we will parse to get to the answer we can display back to the user.
Contents of the app.py file.
Inside the Flask Application — rewrite the route for cold email generation to look like so:
from flask import Flask, render_template, request
import config
import aicontent

def page_not_found(e):
	return render_template('404.html'), 404

app = Flask(__name__)
app.config.from_object(config.config['development'])
app.register_error_handler(404, page_not_found)

@app.route('/', methods=["GET", "POST"])
def index():
	return render_template('index.html', **locals())

@app.route('/cold-emails', methods=["GET", "POST"])
def coldEmails():

	if request.method == 'POST':

		submission = request.form['coldEmails']
		query = "Write a cold email to potential clients about: {}".format(submission)
		openAIAnswerUnformatted = aicontent.openAIQuery(query)
		openAIAnswer = openAIAnswerUnformatted.replace('\n', '<br>')
		prompt = 'AI Suggestions for {} are:'.format(submission)

	return render_template('cold-emails.html', **locals())
I will not cover the HTML template here, you can look at the GitHub code and youtube videos for more information.
Review the Results from the front-end
When you run the application the following will happen:
- A user will be able to enter the search query from the front-end form, which will be captured in the request.form object to the server.
- This query will be appended to the use case query that is already hard-coded into the specific route. For example, “Write a cold email to potential clients about: {}”.format(submission) — is the final query being sent to the API, the submission is what the user entered.
- We will call the aicontent function from the Flask View function with: aicontent.openAIQuery(query)
- We capture the response from the aicontent function and make it available to be displayed in the front-end for the user.
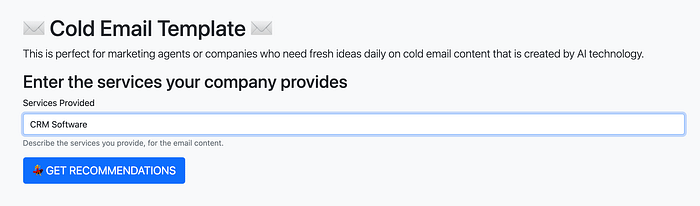
User input Example 1 — AI Cold Email Generation
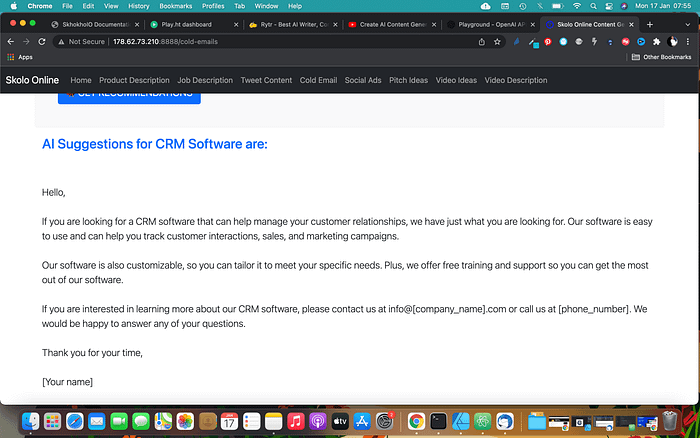
User Output Example 2 — AI Cold Email Generation
Do try out the code and see what happens.
Thank you for reading.
Comments
Loading comments…