
Next.js 13 is a total game-changer.
It has made building the next generation of the web much, much more intuitive for developers, implementing bleeding-edge React 18 features via the new app directory - like Server Components, native async/await support (finally!), and Streaming HTML - with streamlined nested routes/layouts via folder-based routing, and better DX (and infinitely better type-safety!) in doing SSR/SSG/ISR with its extended fetch API.
Coving every shiny, bleeding-edge new feature in Next.js 13 would take more time than we have, so today, let's quickly talk about the most critical part of literally any app you'll ever develop - the data fetching story - building *this *app on top of a Postgres database as a learning exercise. Oh, and we'll be using GraphQL (via WunderGraph ) to get data out of our database, because we don't compromise on developer experience 'round these parts.
What's Wrong With Vanilla SSR?
To understand the problem in data fetching using SSR in Next.js 12 and below, let's first talk about the sequence of events that needs to happen to get data from the server to the client.
- First, on receiving a request from the client for a specific page, the server fetches the data required (from the database, API, wherever).
- The server then renders the HTML for the page.
- The rendered HTML and JavaScript bundle for the page are sent to the client.
- Finally, React hydrates the page to make it interactive.
The problem is that these steps are sequential and blocking.
The server can't render the HTML for the page before all the data has been fetched, and the users' browser can't hydrate the page with JavaScript until the code for every component on the page has been downloaded. So there's always going to be a noticeable delay between when the client requests the page and when it arrives, fully rendered and interactive.
This is the (in)famous data waterfall problem. Now, you could mitigate some of this issue with code splitting (dynamic imports) or prefetching data for specific routes (with the <Link> component's prefetch prop)...but there's a more direct solution.
What if a rendering pass were interruptible? What if you could pause/resume/abandon an in-process render while still ensuring a consistent, performant UI?
That's exactly what Next.js 13 (building on React 18's beta features - namely, Concurrent Rendering - now lets you do.
You couldn't parallelize the render pipeline before, but now, you can progressively send chunks of HTML from the server to the client instead - the server keeps a connection open, sending a stream of UI, as it is rendered, to the frontend - instantly rendering parts of a page that do not require data, then gradually streaming in sections that do require data as their data dependencies resolve. This enables parts of the page to be displayed sooner, without waiting for all the data to load before any UI can be rendered.
Reducing Time To First Byte (TTFB) and First Contentful Paint (FCP) this way ensures a better user experience, especially on slower connections and low-powered devices.
Streaming SSR - The How-To.
Next.js 13 gives you two ways to implement Streaming SSR. Let's take a look at both, in code.
I'll be using a Postgres datasource (the famous Chinook database) for my example, using WunderGraph to make it accessible through JSON-RPC to my Next.js frontend.
WunderGraph is a crazy huge DX win when used as an API Gateway or Backend-for-Frontend - introspecting your datasources (no matter if they're Apollo federations, OpenAPI-REST APIs, GraphQL APIs, relational or document-based databases; here's a full list) and consolidating them into a virtual graph layer that you can define type-safe operations on, and access via JSON-RPC - using GraphQL only as a development tool, not a public endpoint.
Let's get started.
Step 0a: Set Up the Database
First off, the easiest way to get a Postgres database going is with Docker, and that's what I'm doing here. But since these databases use TCP connection strings, you could use literally any Postgres host you want - including DBaaS ones like Railway.
docker run --name mypg -e POSTGRES_USER=myusername -e POSTGRES_PASSWORD=mypassword -p 5432:5432 -d postgres
This will set up a Docker Container named mypg for you, with the username and password you specify, at port 5432 (localhost), using the official postgres Docker Image (it'll download that for you if you don't have it locally)
I'm assuming you'll have your own data to go along with this, but if you don't, get the Chinook_PostgreSql.sql file from the official Chinook repo here, and run it (perhaps via a Postgres client like pgAdmin) to seed the Chinook database (it's a record store's catalog; artists, their albums, its songs, with some sample transactions and invoices)
Step 0b: Set Up WunderGraph + Next.js
First off, we can set up both the WunderGraph server and Next.js using WunderGraph's create-wundergraph-app CLI, so let's do just that.
npx create-wundergraph-app my-project -E nextjs
When that's done, cd into the directory you just created (you didn't leave my-project as is, did you...?), and npm i && npm start. Head on over to localhost:3000 and you should see the WunderGraph + Next.js starter splash page pop up with the results of a sample query, meaning everything went well.
Step 0c: Set Up Tailwind CSS for Styling (Optional)
I love utility-first CSS, so I'm using Tailwind for styling throughout this tutorial. Install instructions here.
You could use any other styling approach you want, but remember styling solutions - including component libraries - that depend on CSS-in-JS engines like emotion do not currently work with the new app directory structure.
Step 1: Define Our Data
Check out wundergraph.config.ts in the .wundergraph directory in your root.
const spaceX = introspect.graphql({
  apiNamespace: "spacex",
  url: "https://spacex-api.fly.dev/graphql/",
});

// configureWunderGraph emits the configuration
configureWunderGraphApplication({
  apis: [spaceX],
  //...
});
See this? That's how easy it is to add your datasources as dependencies when using WunderGraph. Define your datasources as JavaScript/TypeScript variables, tell WunderGraph to introspect them, and then add them to your project config as a dependency array. This Configuration-as-code approach means your frontend can stay entirely decoupled, making onboarding, maintenance, and iteration much, much easier for you as a developer.
Following this pattern, let's add our Postgres database.
const db = introspect.postgresql({
  apiNamespace: "db",
  databaseURL: `postgresql://${process.env.DB_PG_USER}:${process.env.DB_PG_PWD}@${process.env.DB_PG_HOST}:5432/chinook`,
});

// configureWunderGraph emits the configuration
configureWunderGraphApplication({
  apis: [db],
  //...
});
I'm using a Postgres instance at localhost, but you might not be, so using ENV variables for my DB connection string keeps this tutorial dynamic. Add your username, password, and host values to .env.local accordingly.
Save this config file, and WunderGraph will consolidate this data into a virtual graph. Now you'll need to define the operations you want to actually get data out of it. WunderGraph makes getting the exact relations you want in one go (as well as cross-source data JOINs!) a cakewalk with GraphQL.
Create an AlbumById.graphql file in .wundergraph/operations.
query ($albumId: Int!) {
  Album: db_findUniqueAlbum(where: { AlbumId: $albumId }) {
    Title
    Artist {
      Name
    }
    Track {
      TrackId
      Name
      Composer
      Milliseconds
    }
  }
}
Now, when you hit save in your IDE, the WunderGraph server will build the types required for the queries and mutations you've defined on all of your datasources, and generate a custom Next.js client with typesafe hooks you can use in your frontend for those operations. How cool is that?!
Step 2: How to Build it in Next.js 12
Next.js 13 is built for progressive adoption. You can still have parts of your app in the old pages directory, but everything you put in the new app directory will opt into the beta features - you'll just have to make sure none of your routes conflict between the two.
This affords us a unique opportunity for this tutorial - build our app the old-fashioned way - using Next.js 12 (and the pages directory)...and then upgrade it to Next.js 13 (using the app directory) taking full advantage of nested layouts, hybrid architecture (Server Components and Client Components together) and Streaming + Suspense. Fun!
So let's get the bulk of the work out of the way, first.
1. _app.tsx
2. index.tsx
useQuery is the WunderGraph-generated typesafe data fetching hook we'll be using to get our data.
Essentially, you call useQuery with an options object, specifying --
- an operation by name (the filename of the GraphQL operation you created in the previous step),
- pass in an
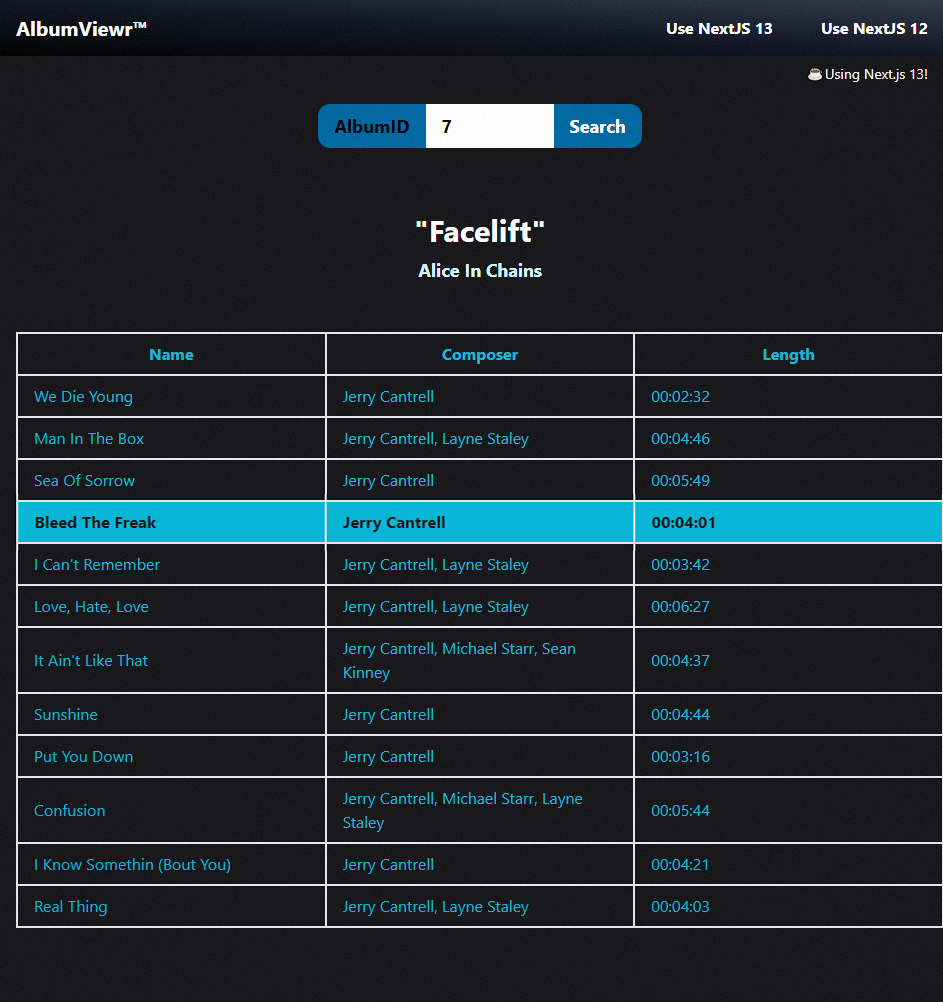
AlbumIDas an input (and our form UI lets you increment that instead of typing it in manually),
And in data, get back its output - a tracklist for the specified album, with composer and runtime (in milliseconds; you can use a utility function to convert that to a more readable Hh:Mm:Ss string format)
3. DataTable.tsx
Not much to see here, this just displays the data in a fancy table. For completion's sake, here's the secondsToTime utility function this uses.
export default function secondsToTime(e: number) {
  const h = Math.floor(e / 3600)
      .toString()
      .padStart(2, "0"),
    m = Math.floor((e % 3600) / 60)
      .toString()
      .padStart(2, "0"),
    s = Math.floor(e % 60)
      .toString()
      .padStart(2, "0");

  return `${h}:${m}:${s}`;
}
Got all of that? Whew. Take a breather. Now, it's time to get this working for Next.js 13.
Step 3: Upgrading to Next.js 13
Part 1: Configuration
First off, make sure you have Node.js v16.8 or greater.
Then, upgrade to Next.js v13 (and React 18). Don't forget ESLint if you use it!
npm install next@latest react@latest react-dom@latest
If using ESLint...
npm install -D eslint-config-next@latest
Finally, opt into Next.js 13's app directory paradigm by explicitly stating so in next.config.js
/* @type {import('next').NextConfig} */ const nextConfig = { experimental: { appDir: true, }, }; module.exports = nextConfig;
Part 2: Layouts - Your New Best Friend.
In Next.js 13, routing follows a folder-based hierarchy. You use folders to define routes, and special files with reserved names - layout.js/tsx, page.js/tsx, and loading.js/tsx - to define UI, with page.js/tsx being the minimum required.
How does this work? For starters, your _app.tsx contents (including global styles) are going to move to the root layout.tsx which exports a default functional component, say, RootLayout(), that serves as the layout for the entire route segment. If layout.tsx is at a root level, all pages in your app will inherit it.
Every other route segment nested within can have its own layout.tsx and page.tsx (meaning you now have much more flexibility in building complex, nested layouts, without needing wrappers or a rigid global layout), and they'll still inherit the layout of their parent route segment automatically.
Each exported layout component intelligently avoids unnecessary re-renders while navigating between sibling route segments.
Additionally, you can colocate everything else this route segment needs (unit tests, MDX docs, storybook files) to its directory. No more messy imports.
The best part? Anything in the app directory is a React Server Component by default - meaning you can fetch data at the layout level for each route segment and pass them down to be rendered. You can't use hooks and browser APIs in these Server Components, but you don't need to - you can now natively async/await data directly in Server Components without needing the very type-unsafe getServerSideProps pattern - and explicitly have snippets of your UI opt into Client Components wherever you actually need interactivity/hooks.
So what does that mean for the app we're building?
It means our app directory is going to end up looking like this.
Let's tackle this one by one, root level up.
1. layout.tsx
2. head.tsx
You could have any external scripts you require placed here, too (as a <Script> imported from next/script).
3. app/albums/layout.tsx
An important gotcha to keep in mind: you cannot use a Server Component directly in a Client Component. They'll have to be nested children; not direct imports.
4. app/albums/page.tsx
Don't be alarmed if your route segment page.tsx's end up being minimal!
Part 3: Streaming SSR
For the actual Streaming HTML implementation, Next.js 13 gives you two choices.
Option A: Instant Loading States with loading.tsx
Use a special file called loading.js/tsx, that lets you specify a canonical 'Loading' state for all your data fetching at a route segment level.
The idea is simple: If one of your components within a route segment isn't ready to render yet (no data, bad data, slow connection; whatever) Next.js is going to show the UI rendered by this file in place of your data - and then automatically replace it with your actual component's UI + data once the latter's rendering is complete. All navigation is immediate and interruptible. You aren't blocked waiting for the route contents to load fully before navigating to another route.
Using a loading.tsx this way will let you designate critical and non-critical parts of a page. You can pre-render critical UI chunks (loading indicators such as skeletons and spinners, or a product image, name, etc) while non-critical chunks of the UI (comments, reviews, etc.) stream in.
This is good UX because it lets users understand that something - anything - is happening, and that your app didn't freeze and/or crash.
5. app/albums/[id]/loading.tsx
And your [id]/page.tsx is as simple as it gets. No need to manually do conditional rendering, checking if data is undefined, and displaying loading messages/spinners/skeletons if it is.
If you want to use the typesafe data fetching hooks (that use Vercel's SWR under the hood - useQuery, useMutation, etc.) generated by WunderGraph, you'll need to explicitly make this a Client Component - with a top-level "use client" module pragma-like statement.
6. app/albums/[id]/page.tsx
A common gotcha: Don't forget to add suspense: true to useQuery's options!
Want to reap the advantages of a React Server Component (much faster data fetching, simple native async/await, zero JS shipped to the client) instead? No problem! Using default WunderGraph configs, each operation (.graphql file) you have, is exposed as JSON-RPC (HTTP) at:
<http://localhost:9991/app/main/operations/[operation_name]>
So now, your [id]/page.tsx is going to look like this:
You can directly import the types generated by WunderGraph (AlbumByIdResponseData here; and you could even import AlbumByIdResponse if you wanted to type the API response itself!) - so you're not missing out on any of the promised end-to-end typesafety, even if you aren't using WunderGraph's client-specific hooks.
💡 This is what makes WunderGraph fully compatible with frameworks that aren't React or Next.js.
Also...would you look at that - first class async/await support at a component level. Thank you for finally recognizing that data fetching operations in webdev are inherently asynchronous operations, React!
Option B: Manual Suspense Boundaries with <Suspense>
Think you know better than Next.js and want to drive manual, stick shift and all? Then define your Suspense Boundaries yourself, for granular, component-level Streaming.
No more loading.tsx. With this approach, your [id].page/tsx will need to import <Suspense> and set Suspense Boundaries manually for each piece of data-aware UI that needs to be rendered on this page (in our case, it's just for <DataTable> )
Sticking with the default Server Component approach here.
💡 Remember, though, that unlike loading.tsx, defining manual Suspense Boundaries will delay navigation until after the new segment loads.
I'm just using a simple <p> Loading...</p> here but you could, of course, define more complex fallback UIs - skeletons, spinners, custom images. Import and use them in fallback as you see fit!
Finally, our Form component remains mostly unchanged - except for one fact. Our Form needs user interactivity, using hooks and browser APIs. So, if you're extracting it out into its own component, explicitly make it a Client Component with "use client"
Our DataTable can be reused as is. However, note that when using Dynamic Route Segments, you can pass URL params via props, effectively sharing state via the URL even if they're Server Components. A good pattern to remember!
Let's close it out with the Navbar that we'll use to switch between the Next.js 12 and 13 versions of what we just built.
Note Next 13's new <Link> component! Much more intuitive, no longer needing a nested <a> tag.
That's All, Folks!
Fire up your browser, head on over to localhost:3000, and try out the two versions of your app, swappable via the Navbar - one that uses old-school Next.js 12 and the pages directory, and one that uses Next.js 13, with Streaming SSR, Suspense, and a hybrid architecture of Server and Client Components - both with end-to-end typesafety enabled by WunderGraph as our API gateway/BFF.
Next.js 13 is not ready for production use yet - heck, even Vercel says so in their official Beta Next.js docs! But Vercel's progress on Next.js 13 has been rapid, its features incredibly useful for building awesome, user-friendly, accessible user experiences...and if you're using WunderGraph, you can do all of that without compromising on typesafety, or the developer experience to boot!
Get hyped. We have some fun, fun days ahead as full stack developers.
Comments
Loading comments…