Today we will be deploying Elastic Cloud on Kubernetes into our AWS EKS Cluster.
Prerequisites:
- An Existing AWS EKS Cluster [1]
- AWS Load Balancer Controller [2]
- EBS CSI Driver [3]
- Ensure that your EC2 instances are large enough to run the required workload. I am using t3.large instances
- Certificate in AWS Certificate Manager
Step 1:
We must first install the ECK Operator which per documentation [4] is used for automating the deployment, provisioning, management, and orchestration of Elasticsearch, Kibana, APM Server, Beats, Enterprise Search, Elastic Agent and Elastic Maps Server on Kubernetes.
We will install the ECK Custom Resource Definitions and install the operator.
kubectl create -f https://download.elastic.co/downloads/eck/2.6.1/crds.yaml
kubectl apply -f https://download.elastic.co/downloads/eck/2.6.1/operator.yaml
Step 2:
Now we can install our Elastic Search Cluster and verify that it become ready. This is where the ebs-csi-driver comes into play. Elastic Search deploys as a Stateful Set with requests/consumes storage via a PV/PVC.
kubectl apply -f https://raw.githubusercontent.com/jbrewer3/Kubernetes/main/Monitoring/ELK/ElasticSearchCluster.yaml
# you can us watch flag below to see the pods come to a ready state
kubectl get pods --watch
NAME                         READY   STATUS    RESTARTS   AGE
elasticsearch-es-default-0   1/1     Running   0          5m16s

# to verify your cluster has come to a grean state run the command below
kubectl get elasticsearch
NAME            HEALTH   NODES   VERSION   PHASE   AGE
elasticsearch   green    1       8.6.1     Ready   6m6s
Get you password to login. The default username is elastic. You will need this later so save it somewhere
kubectl get secret elasticsearch-es-elastic-user -o go-template='{{.data.elastic | base64decode}}'
Step 3:
Deploy Kibana
kubectl apply -f https://raw.githubusercontent.com/jbrewer3/Kubernetes/main/Monitoring/ELK/Kibana.yaml
kibana.kibana.k8s.elastic.co/kibana created

#ensure kibana comes to green status

kubectl get kibana
NAME     HEALTH   NODES   VERSION   AGE
kibana   green    1       8.6.1     60s
Enable access to Kibana via AWS ALB
First we will need to edit the Kibana kubernetes service to change the service type to NodePort.
kubectl edit svc kibana-kb-http
 ===
  selector:
    common.k8s.elastic.co/type: kibana
    kibana.k8s.elastic.co/name: kibana
  sessionAffinity: None
  type: NodePort <------------------Change this from ClusterIP to NodePort
 ===
When you are done editing your can save and exit the text editor (shift + : wq!)
Now that we have setup our service to accept incoming requests on a random NodePort we will now create a Ingress which will deploy our Application Load Balancer.
curl -O https://raw.githubusercontent.com/jbrewer3/Kubernetes/main/Monitoring/ELK/KibanaIngress.yaml
We need to make some edits to this file as shown below input your Certificate ARN and public subnets associate with your cluster
 alb.ingress.kubernetes.io/certificate-arn: #Certificate ARN goes here
 alb.ingress.kubernetes.io/subnets: #subnet id or subnet name (subnet-xxx, My_Subnet)
You can now apply the ingress config
kubectl apply -f KibanaIngress.yaml
ingress.networking.k8s.io/kibana-ingress created

kubectl get ingress kibana-ingress
NAME             CLASS   HOSTS   ADDRESS                                                                  PORTS   AGE
kibana-ingress   alb     *       k8s-default-kibanain-044dca0cfe-1896852438.us-west-2.elb.amazonaws.com   80      30s
Once your ALB has completed provisioning as seen below you should be able to access the ALB via browser DNS name.


Using the username (elastic) and you password that you retrieved earlier you can login to your Kibana instance.
Step 4:
Deploy FileBeat and MetricBeat
We have access to our Elastic Dashboard but we have not yet setup and data to be streamed so that we can visualize it.
We will first setup FileBeat
kubectl apply -f https://raw.githubusercontent.com/jbrewer3/Kubernetes/main/Monitoring/ELK/filebeat.yaml
beat.beat.k8s.elastic.co/filebeat configured
Next Metricbeat
kubectl apply -f https://raw.githubusercontent.com/jbrewer3/Kubernetes/main/Monitoring/ELK/metricbeat.yaml
beat.beat.k8s.elastic.co/metricbeat created
clusterrole.rbac.authorization.k8s.io/metricbeat created
serviceaccount/metricbeat created
clusterrolebinding.rbac.authorization.k8s.io/metricbeat created
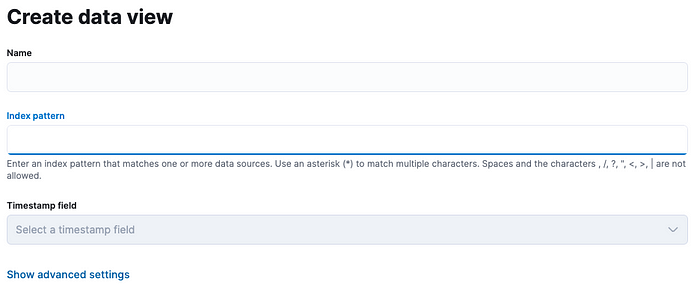
Ensure that you create the index’s for these in the dashboard as seen below. If you do not see the index’s created automatically you can do so with the following steps.
Click the sandwich icon top left corner > Discover > Dropdown menu > + Create a data view
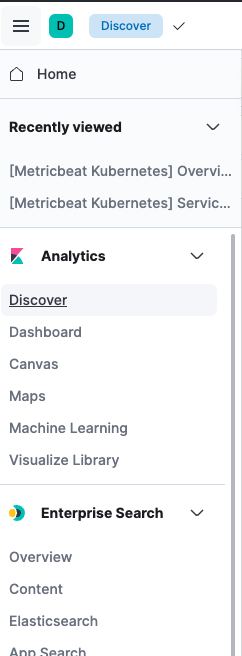
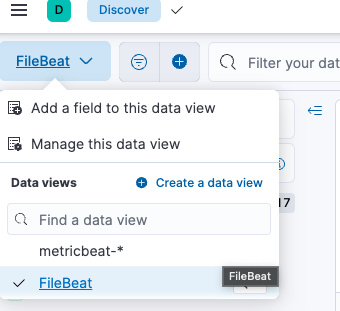
You can then add the index to see data from your Filebeat and Metricbeat deployments. Name you index pattern and specify the patter. For our purposes the pattern should be filebeat-_ and another one for metricbeat-_
Step 5:
Enjoy the hard work and dive deeper into all the things Elastic has to offer.
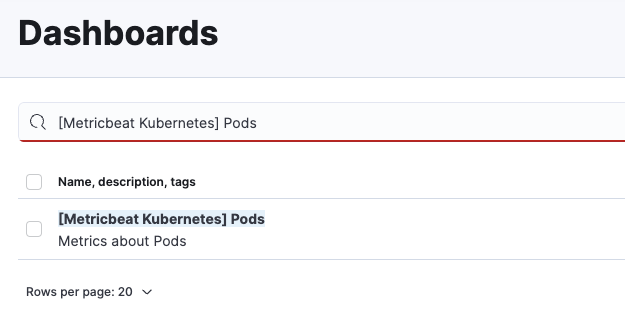
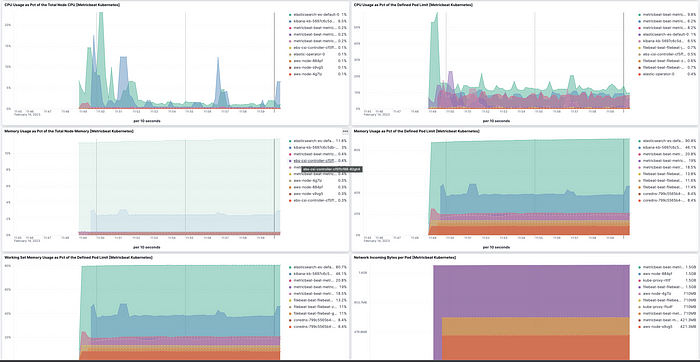
The deployments we created have some built in metric dashboard such as the one below.
Sandwich Idcon > Dashboard > search input
You will also see log files in the Discover tab.
Conclusion:
I hope that you have found this article helpful in your next Elastic Cloud on Kubernetes deployment. Elastic can very a very complex setup and I highly recommend exploring on your own and reading through some of the documentation.
If you have any questions or concerns when going through this setup please do not hesitate to reach out to me.
References:
[1] https://docs.aws.amazon.com/eks/latest/userguide/create-cluster.html
[2] https://docs.aws.amazon.com/eks/latest/userguide/aws-load-balancer-controller.html
[3] https://docs.aws.amazon.com/eks/latest/userguide/ebs-csi.html
Comments
Loading comments…