In this lesson we will be deploying a simple Node.js application on a AWS EC2 instance. We’ll also use Nginx as a reverse-proxy so sit back and stay tuned.

For those who don’t know EC2 (Elastic Compute Cloud) is an AWS service that allows users to rent virtual machines.
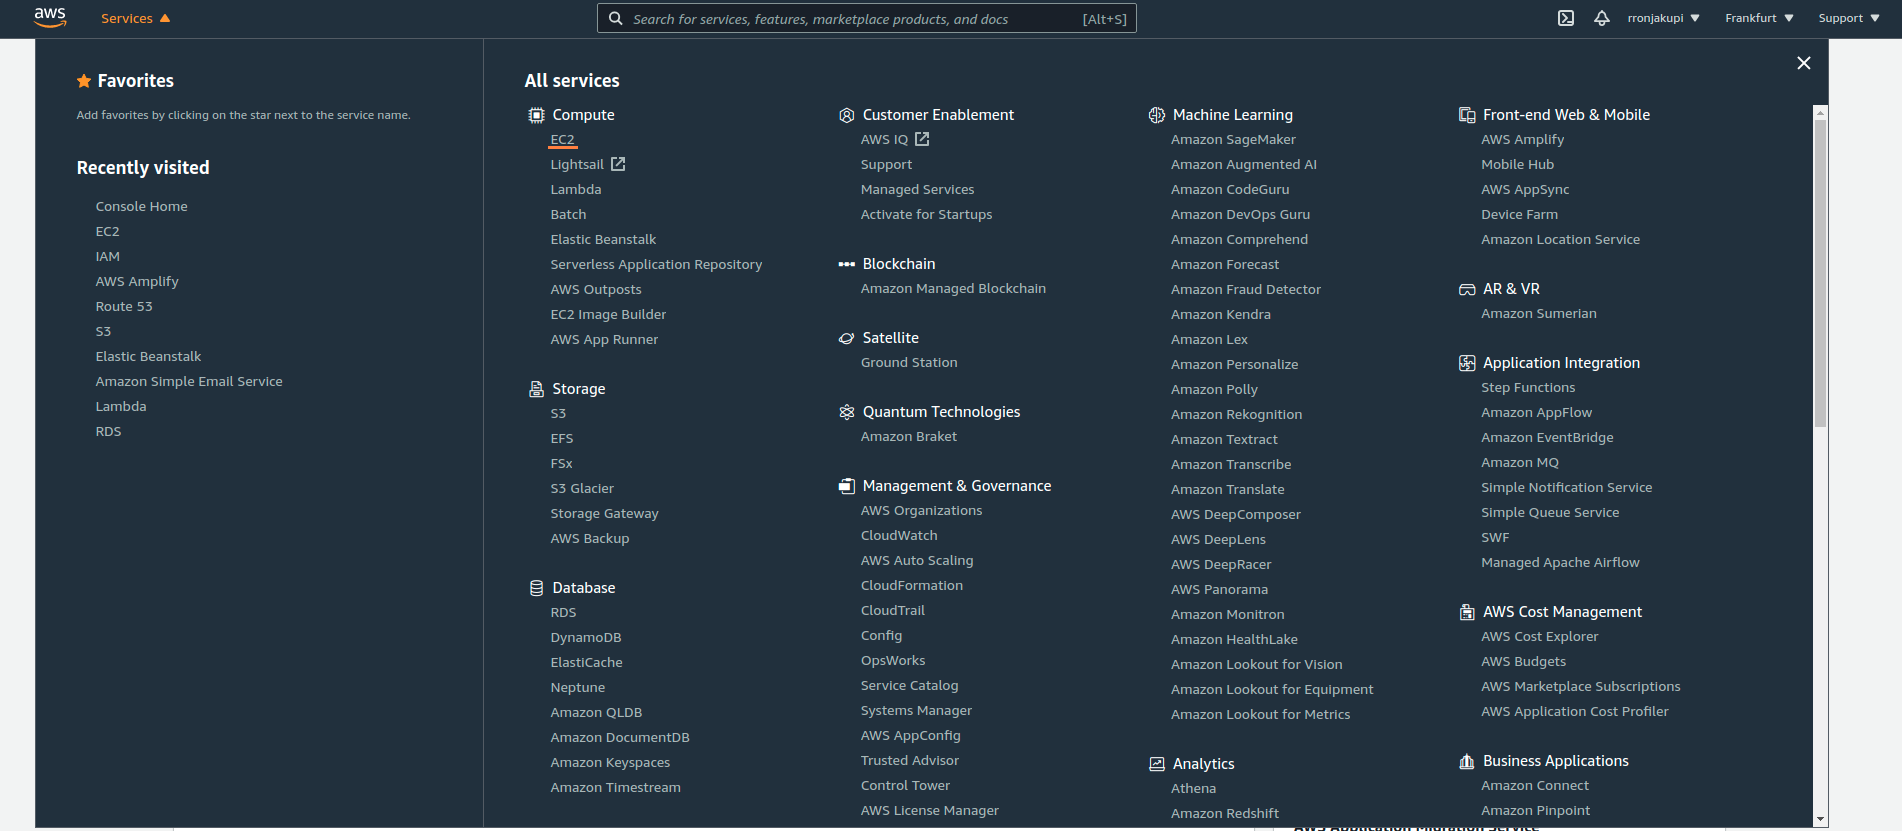
The first step is launching an EC2 instance, and to do that we will need to login into AWS and under the Services tab -> Compute, click on EC2.
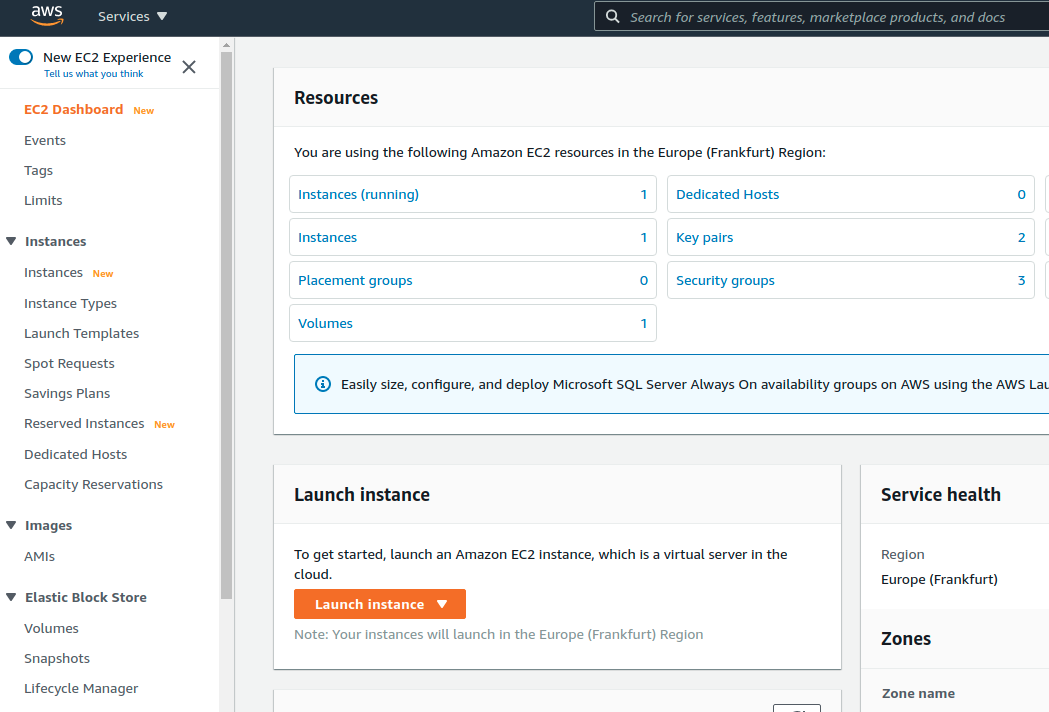
After navigating to the EC2 dashboard, click on the “Launch Instance” button.
This will take us to the AMI (Amazon Machine Images) selection page. For this lesson we want our application to run on a Linux environment so we will choose Ubuntu 20.04 LTS which is also free-tier available.

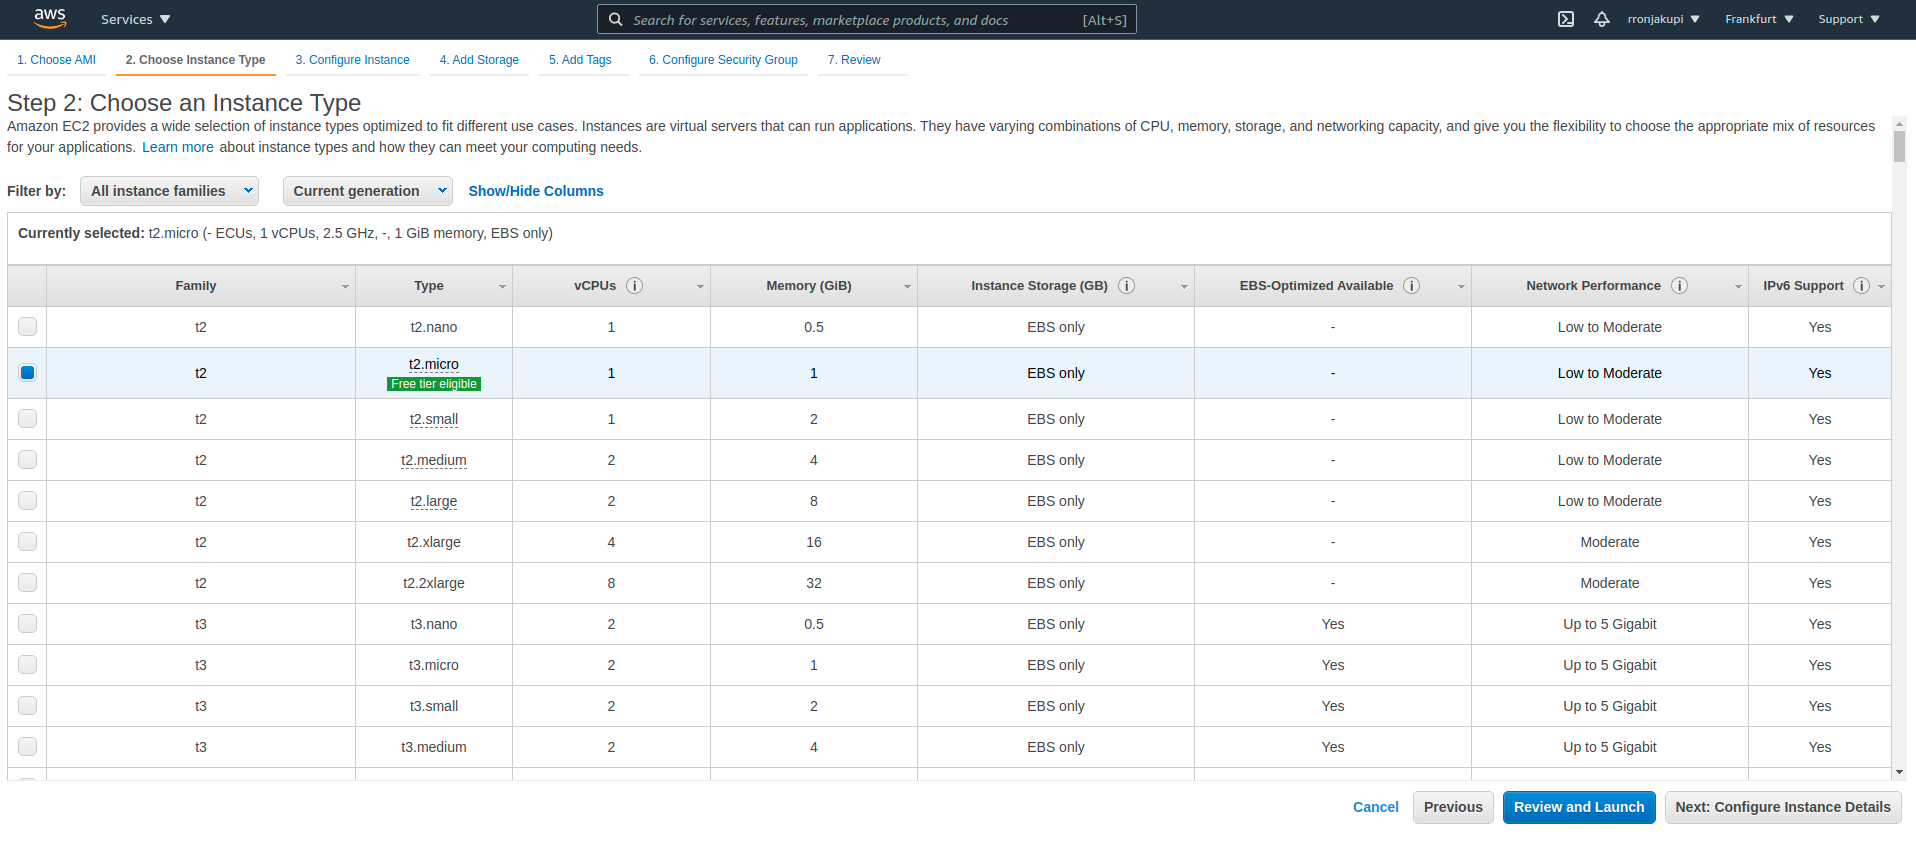
After choosing the AMI, we will have to choose the instance type. We will select the t2.micro.
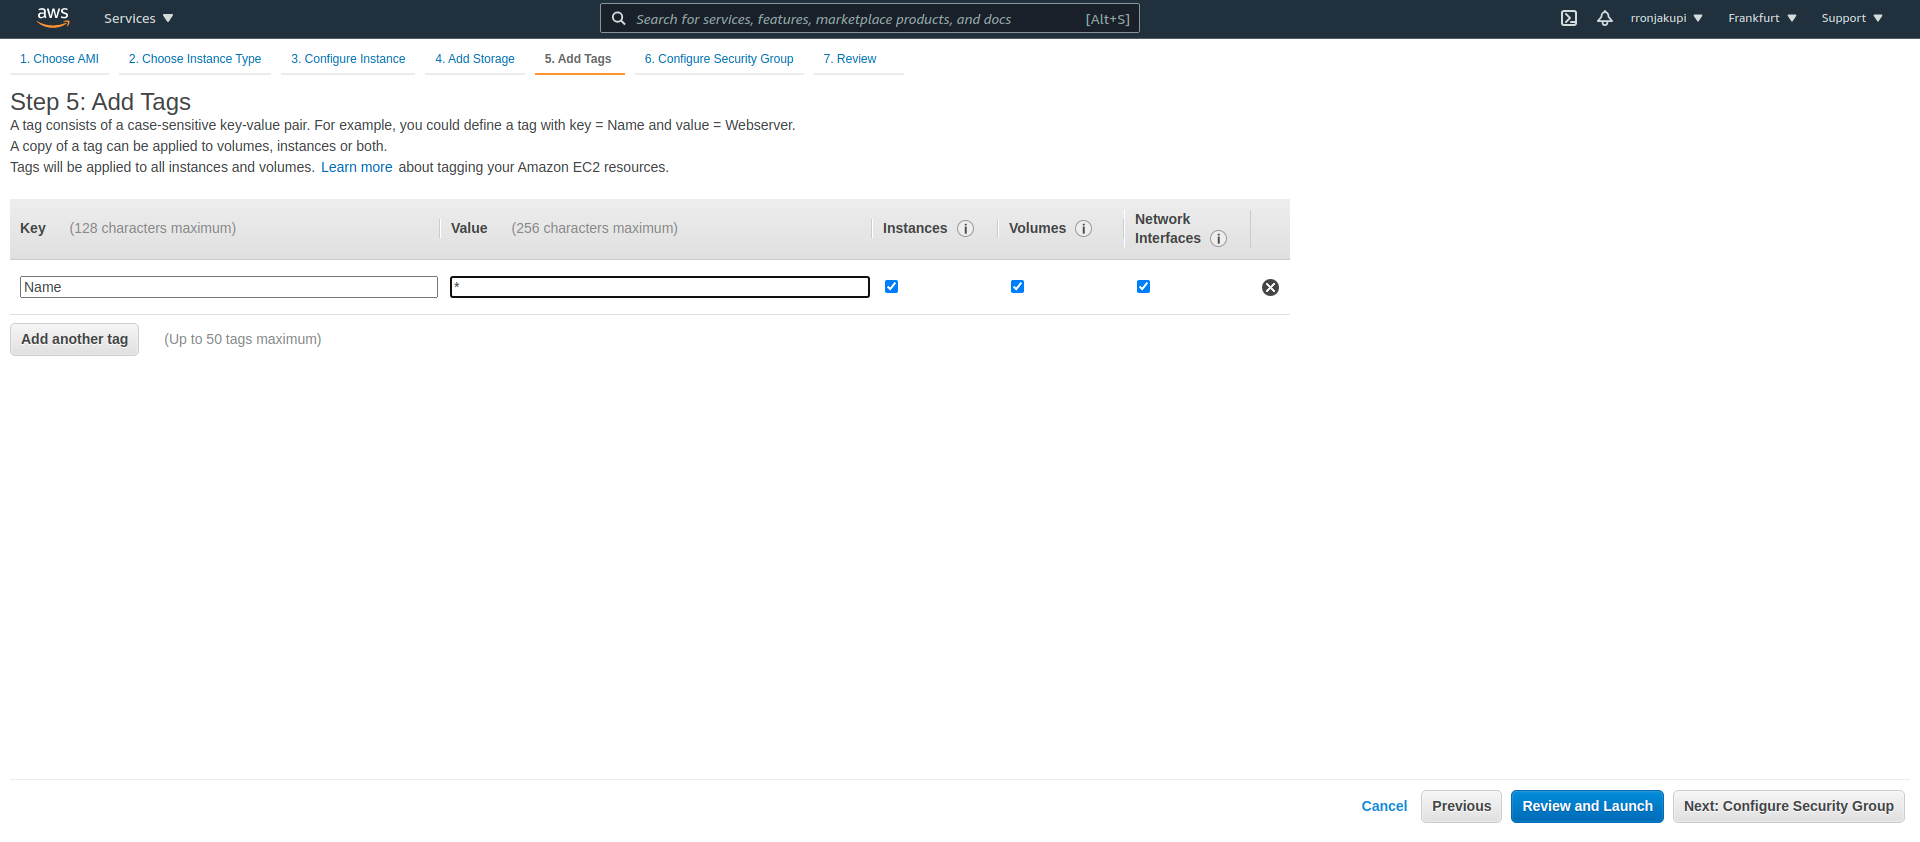
After selecting the instance type, leave the default configurations for step 3 and 4. In step 5 we are introduced with tags, which are key-value pairs. Here we will a tag called Name with a value of “Test-EC2”. This tag is important for identifying because it will be the instance name. Note that the tags are optional so you can skip this step too.
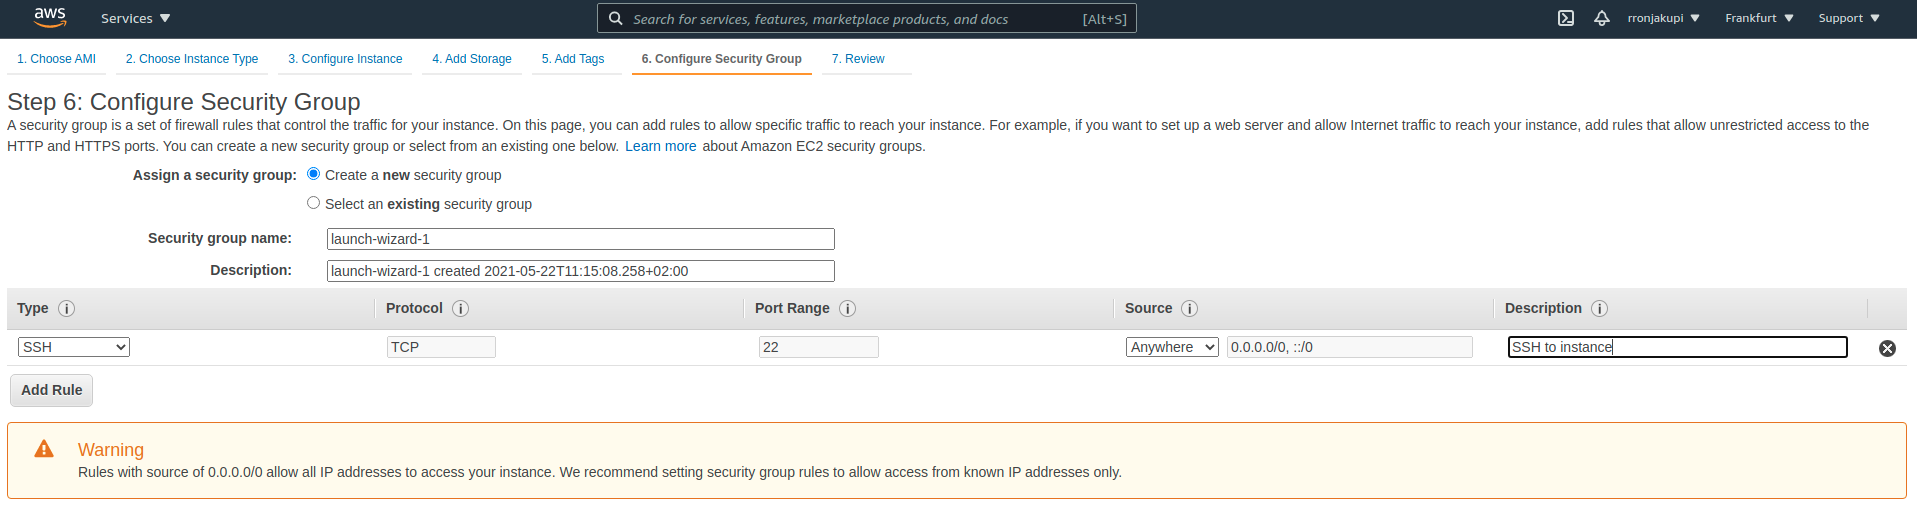
After adding the tags, click on the “Next: Configure Security Group” button. A security group acts like a firewall to control the traffic of our instance. Here we can create a new security group for our instance or select an existing one. We will create a new security group and for now the only modification we will make is on the SSH rule where we will change source (inbound) IP to ‘Anywhere’, but it’s highly preferred to only allow access to known IP’s.
Learn more about Security Groups here.
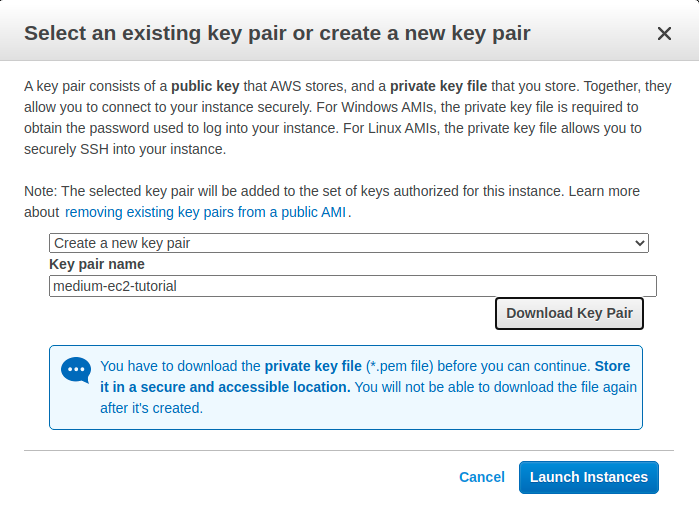
After changing the SSH inbound rule click on the “Review and Launch”. Here you will see all the details and the configurations of the instance. After reviewing, press the “Launch” button, this will open up a modal which will prompt us to select an exist key pair or create a new one.
Key pairs consists of a public key that AWS stores and a private key that we store. This key allows us to safely connect to our instance (I am using Ubuntu so in my case through SSH).
You can learn more about AWS EC2 key pairs here.
For this lesson we will create a new key pair and name it however we like. After naming it press on the “Download Key Pair” button and finally press the “Launch Instance”.
Congratulations, we just launched our EC2 instance!
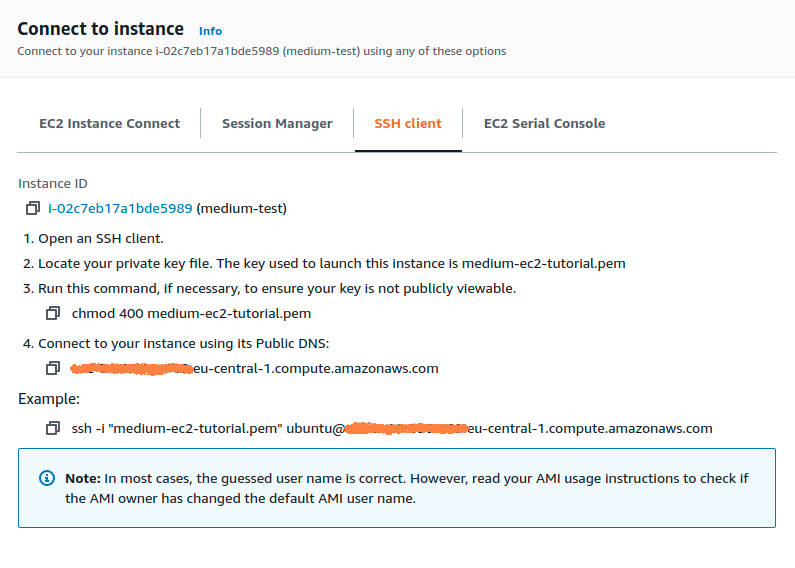
Now it’s time to connect to our new instance. In the instance details click on the “Connect” button.
After navigating to the page we will see multiple options for connecting like: EC2 Instance Connect, Session Manager, SSH client and EC2 Serial Console.
For this case we will connect through SSH.
You can learn more about SSH here.
First cd over to the directory where the PEM key exists and run chmod 400
After SSH into the instance the first thing that we need to do is install Node.js and we can do that by running the following commands:
curl -sL https://deb.nodesource.com/setup_12.x | sudo -E bash -
sudo apt install nodejs
To verify that Node.js is installed in our instance run:
node -v
Once we verify that Node.js is installed in our instance let’s create a folder and initiate a new NPM repository.
mkdir sample-app
cd sample-app
npm init -y
We’ll be using ExpressJS, which is a minimalist Node.js server framework.
Let’s install express and create a new file called index.js.
npm install --save express
touch index.js
After the file has been created, use your favorite code editor to edit index.js. I will use vim.
vim index.js
Paste the sample code:
const express = require('express');

const app = express();

const PORT = process.env.PORT || 3000;

app.get('/',(req, res) => res.send('Hello World'));

app.listen(PORT, () => console.log(`Server listening in port ${PORT}`))
We also need to modify the package.json file to have a npm start script which runs the index.js script.
{
  "name": "sample-app",
  "version": "1.0.0",
  "description": "",
  "main": "index.js",
  "scripts": {
    "start": "node index.js"
  },
  "keywords": [],
  "author": "",
  "license": "ISC",
  "dependencies": {
    "express": "^4.17.1"
  }
}
After saving, run npm start and you should see: Server listening in port 3000.
The server is running but if we go to our public IPv4 DNS address in port 3000, we see that we can’t reach the site. That’s because we haven’t configured the Security Group to allow inbound rules for HTTP and HTTPS.
Let’s go to our instance’s Security Group and add new rules which allow access from outside.

Besides the HTTP and HTTPS inbound rules, we added a new Custom TCP rule for port 3000 since our server is running in port 3000. After adding the rules click on “Save rules” button and go to the instance IPv4 address,
[http://ec2-<IPv4-address>.<aws-region>.compute.amazonaws.com:3000](http://ec2-3-66-190-169.eu-central-1.compute.amazonaws.com:3000/)
where you will see a “Hello World” message. Note that we haven’t added SSL encryption so you can’t access it through HTTPS.
Since we need our NodeJS application running, we will install a library called pm2, which will keep our application running on the background.
Let’s run the following commands to install and start our application with pm2:
sudo npm i -g pm2
pm2 start index.js
Our application is not running in the background so even if we quit from the SSH connection the application still will be running.
Finally, we’re going to use Nginx as a reverse-proxy to redirect out application to the default port 80.
 Nginx
Nginx
Let’s start by install Nginx in our instance, and we do that by running the following:
sudo apt-get install nginx
To verify the installation run the following:
nginx -v
Once we verify that Nginx is installed in our instance, we can configure it to work as a reverse-proxy.
Let’s edit the default file which exists in /etc/nginx/sites-enabled/default
server {
   listen         80 default_server;
   listen         [::]:80 default_server;
   server_name    localhost;
   root           /usr/share/nginx/html;

location / {
       proxy_pass [http://127.0.0.1:3000](http://127.0.0.1:3000);
       proxy_http_version 1.1;
       proxy_set_header Upgrade $http_upgrade;
       proxy_set_header Connection 'upgrade';
       proxy_set_header Host $host;
       proxy_cache_bypass $http_upgrade;
   }
}
After saving, we need to restart the Nginx service and we do that by running the following command:
sudo service nginx restart
This is it guys, hope you enjoy it!
Comments
Loading comments…