In this article, we will understand how we can push files to AWS S3 using Node.js and Express.
Pre-requisites:
-
An AWS account.
-
Basic Express setup which will upload files in the backend using Multer. If you want to learn about basic file upload in Node.js, you can read this.
This article will be divided into two parts:
-
Creating AWS S3 Bucket and giving it proper permissions.
-
Using JavaScript to upload and read files from AWS S3.
1. Creating AWS S3 Bucket and giving it proper permissions
a. Creating the S3 bucket
→ Log in to the AWS console and search for S3 service

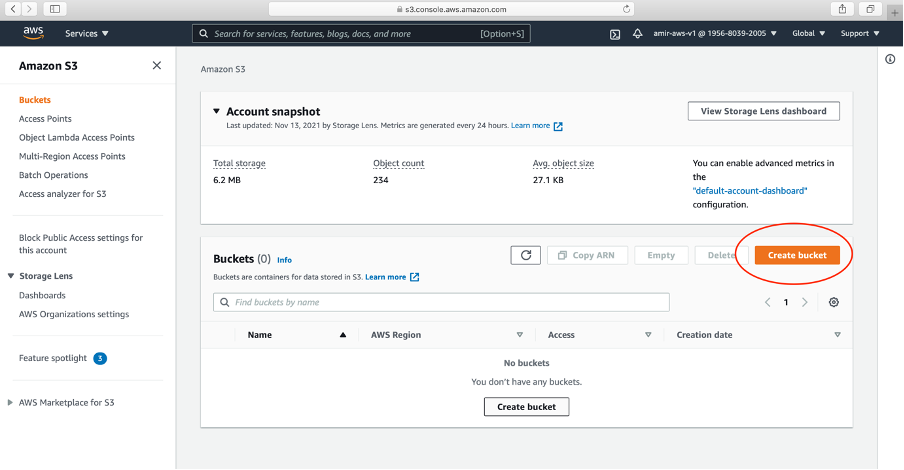
→ Create a bucket. Click Create bucket.
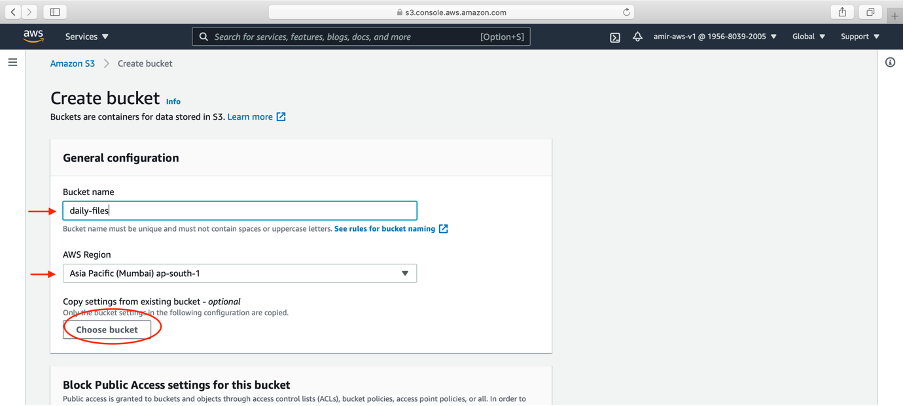
→ Write your bucket name and AWS region. Click Create bucket button

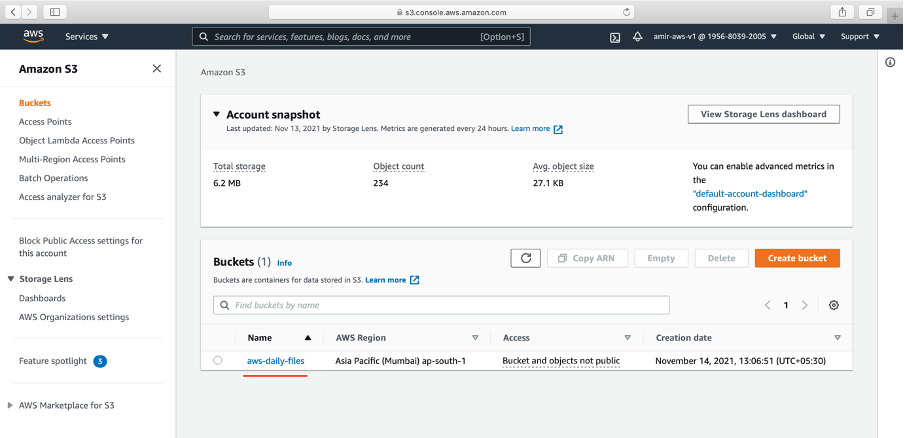
→ The bucket is successfully created. We will upload file to this bucket using Node.js
→ In your Node.js application, we will need bucket name and regions.
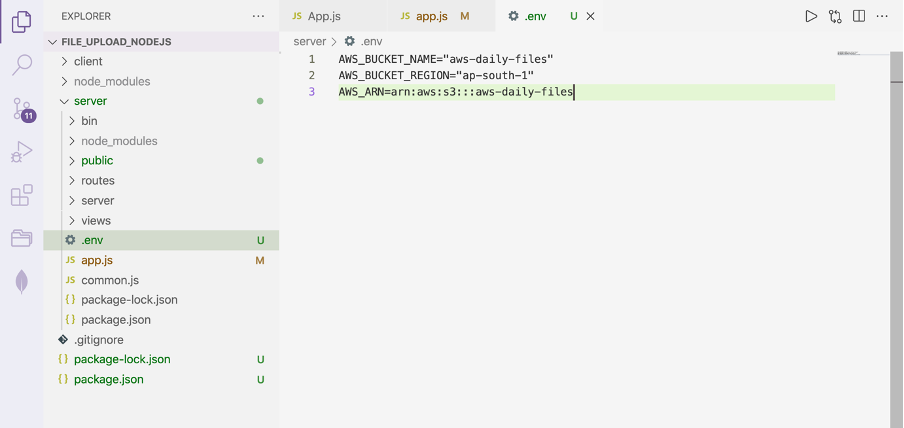
→ As we are the creator of this S3 bucket, I can read, write, delete and update from the AWS console. If we want to do it from the Express server. We need to give some permissions using IAM policies.
b. Creating IAM Policy:
→ Go to the IAM service in AWS

→ Click Policies
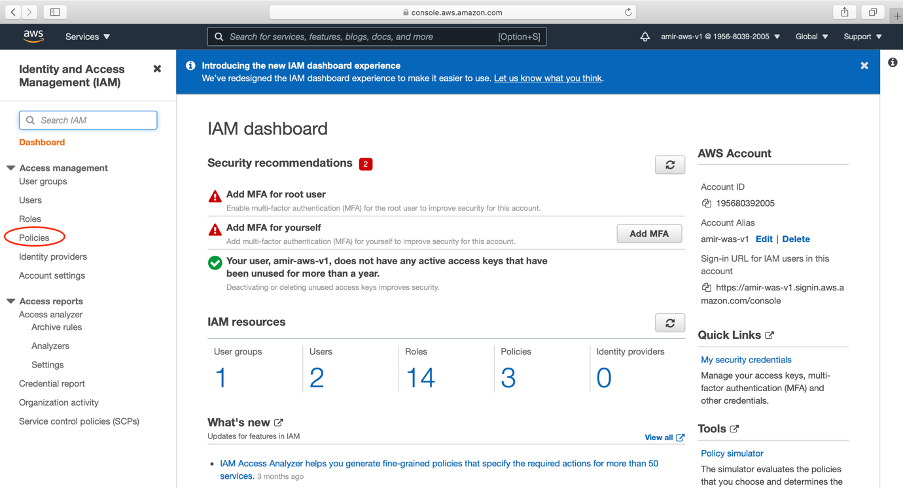
→ Click Create Policy button
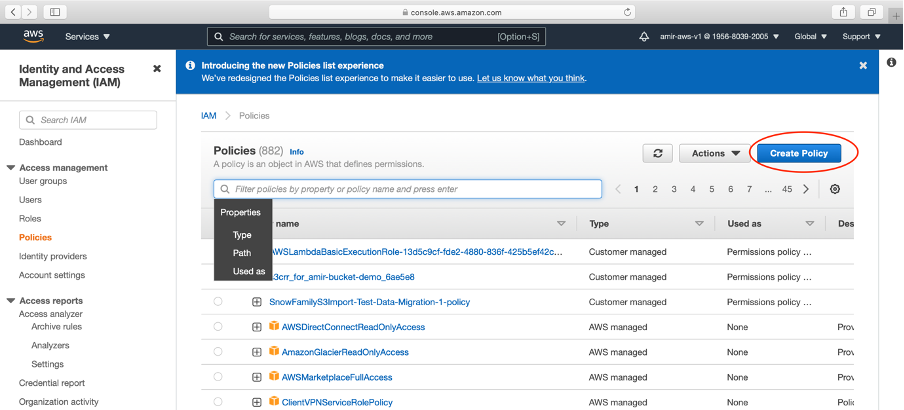
→ We will now create our policy. This is specific to our newly created bucket.
→ Click Chose a Service and select S3
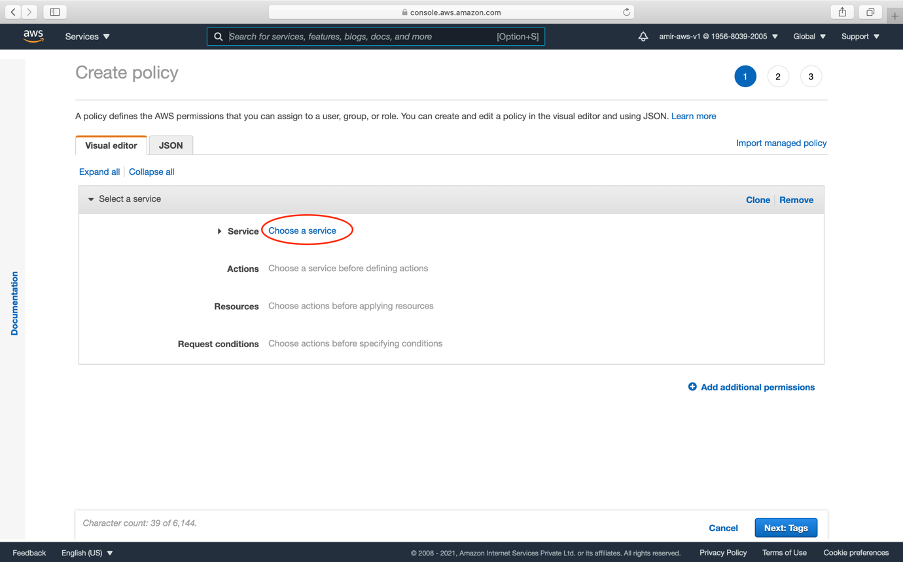
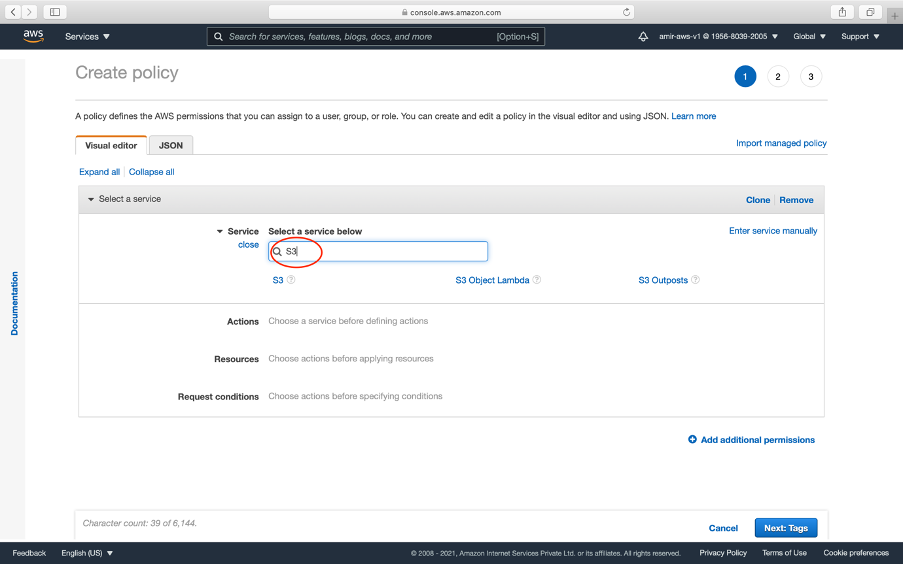
→ There are many S3 permissions we can give to the bucket. For uploading and reading below permissions will be sufficient
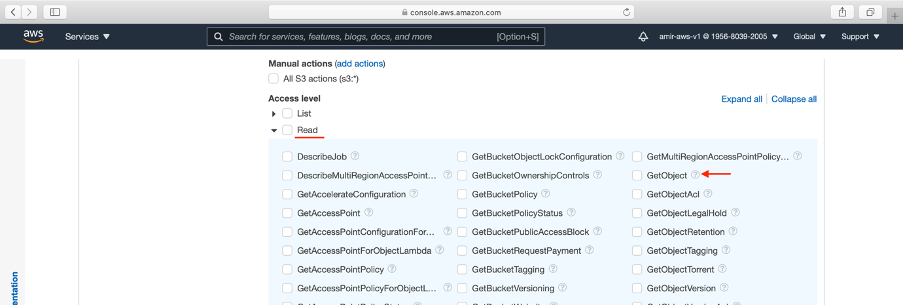
getObject — reading from S3 putObject — writing to S3 deleteObject — delete from S3
→ Click Write and select putObject and deleteObject
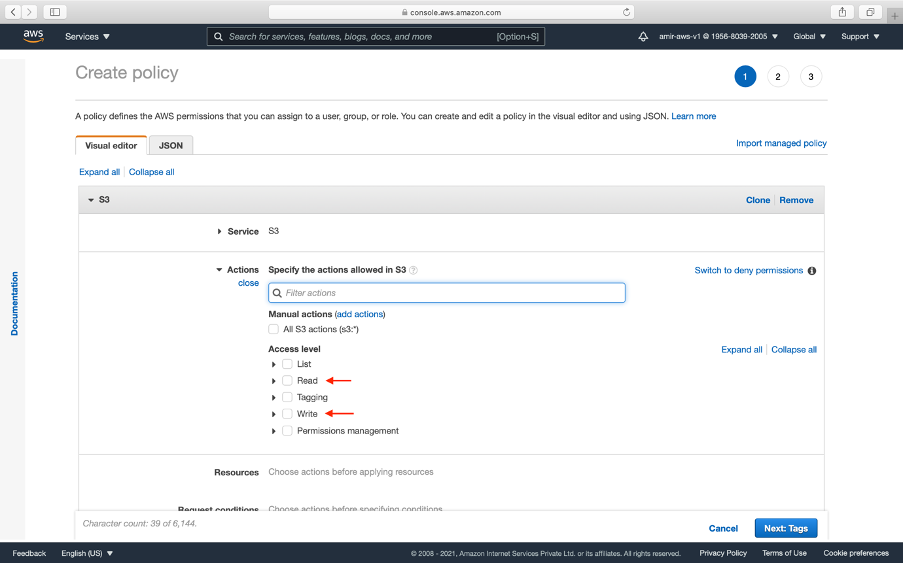
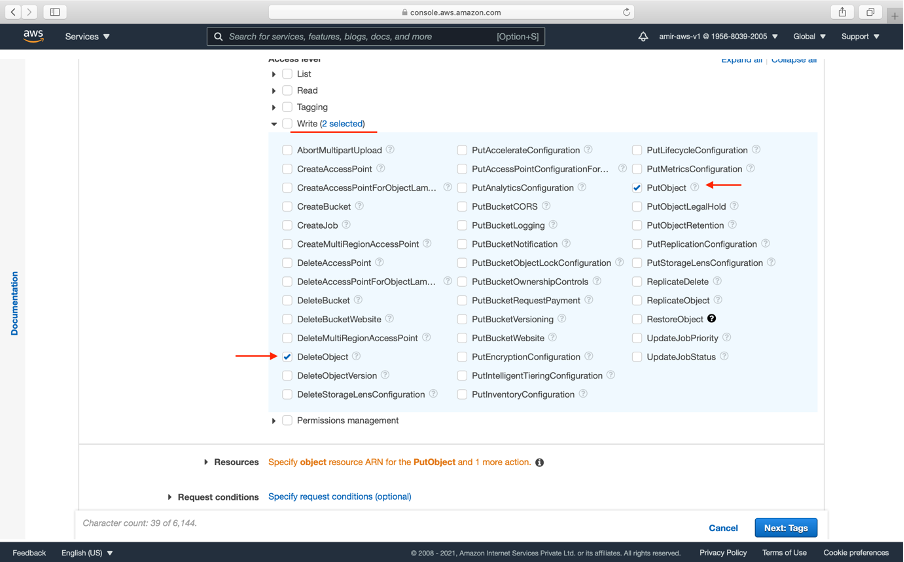
→ Click Read and select getObject
→ The next step is to add ARN. ARN means you bucket identity
arn:aws::s3:::<your_bucket_name> // ARN SYNTAX
eg. arn:was::s3::::aws-daily-sales
→ We are choosing a specific ARN because the rules will be applied to a specific S3 bucket.
→ Click add arn
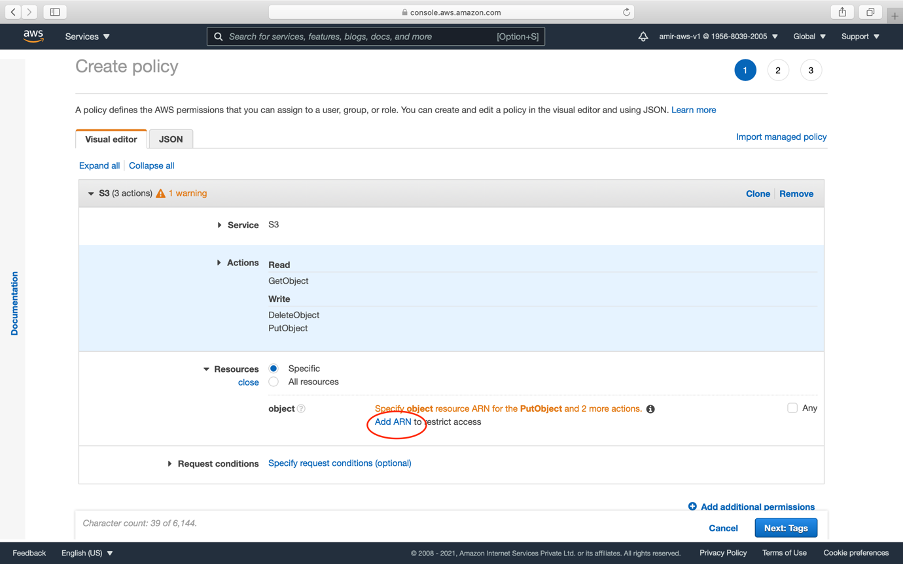
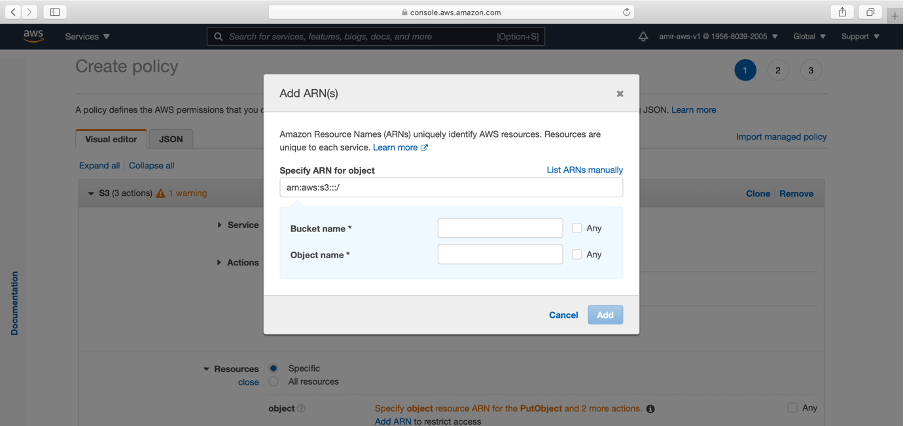
→ Paste your bucket name and tick Any for Object name.
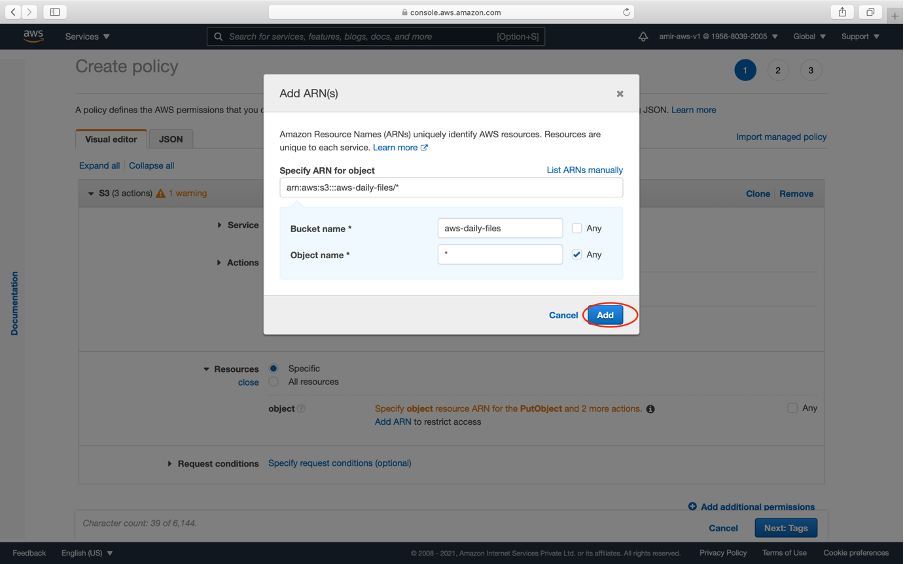
→ We now hot a couple of next buttons
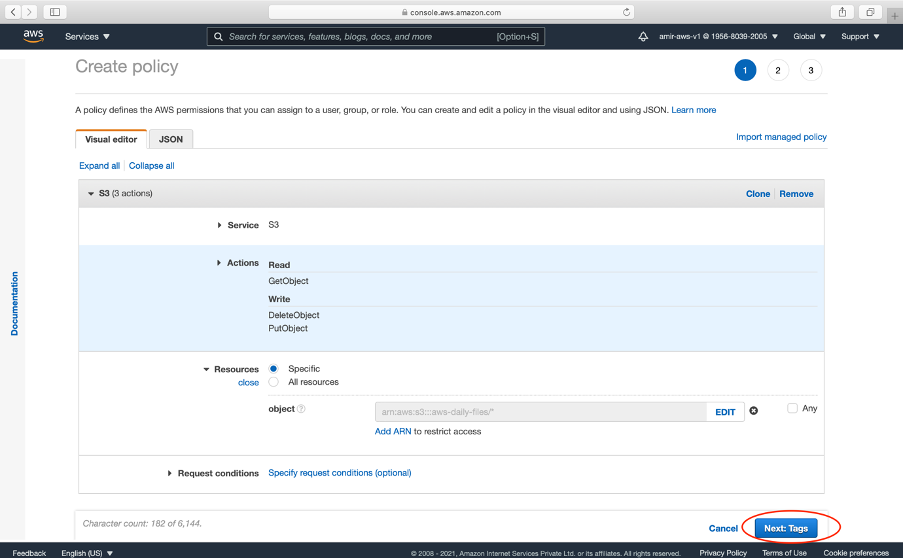
→ Click Create policy
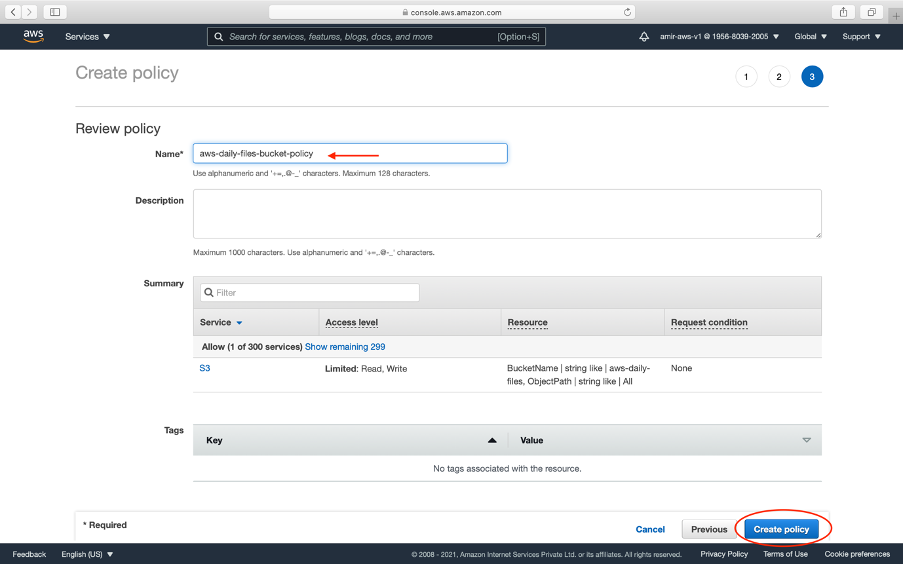
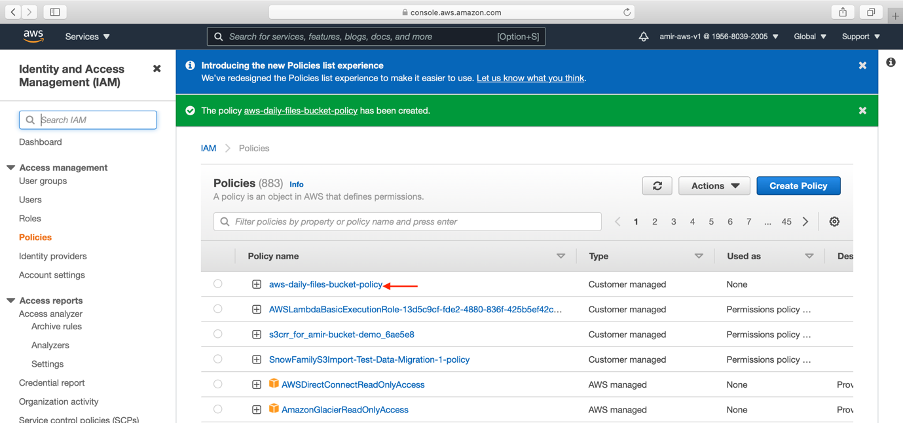
→ We now see our policy created. It has read, write and delete access.
c. Create a IAM User:
→ This can be a physical user or a code which will access the S3 bucket.
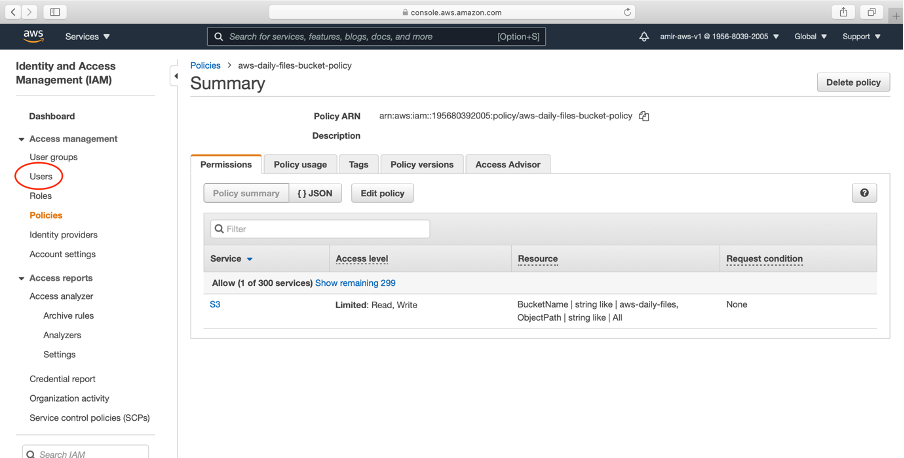
→ Click Users from left explorer in IAM
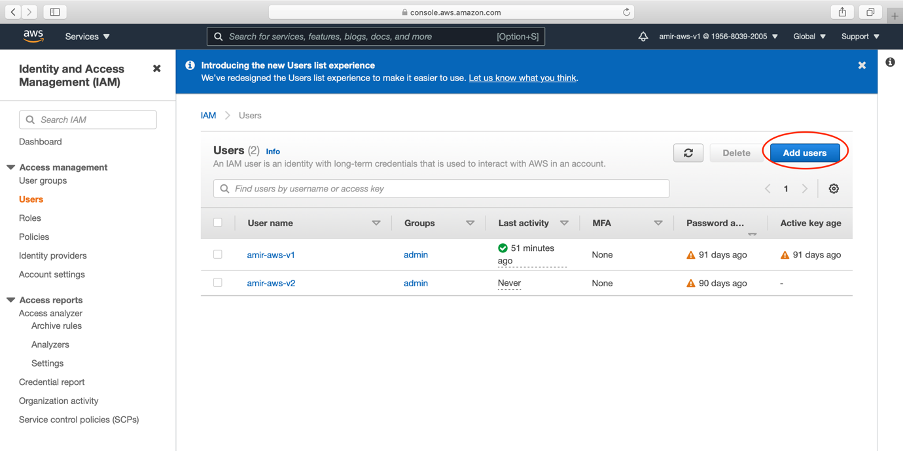
→ Click Add users
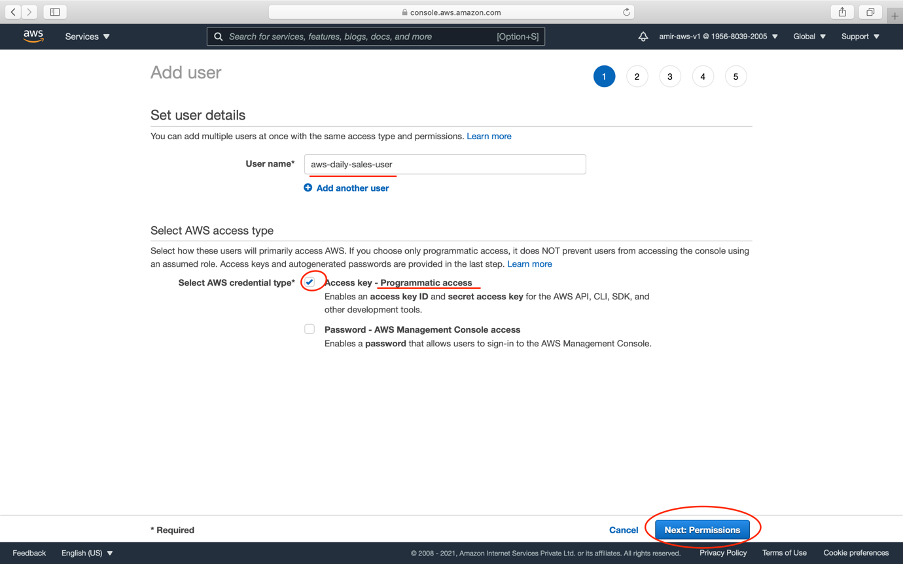
→ Write the name of the user. As our Express app will access the S3.
Giving programmatic access means a **code/server **is the user which will access it. For our case Node.js app
→ In the end, we will get Access Key Id and Secret key to use in the JavaScript app as shown below:
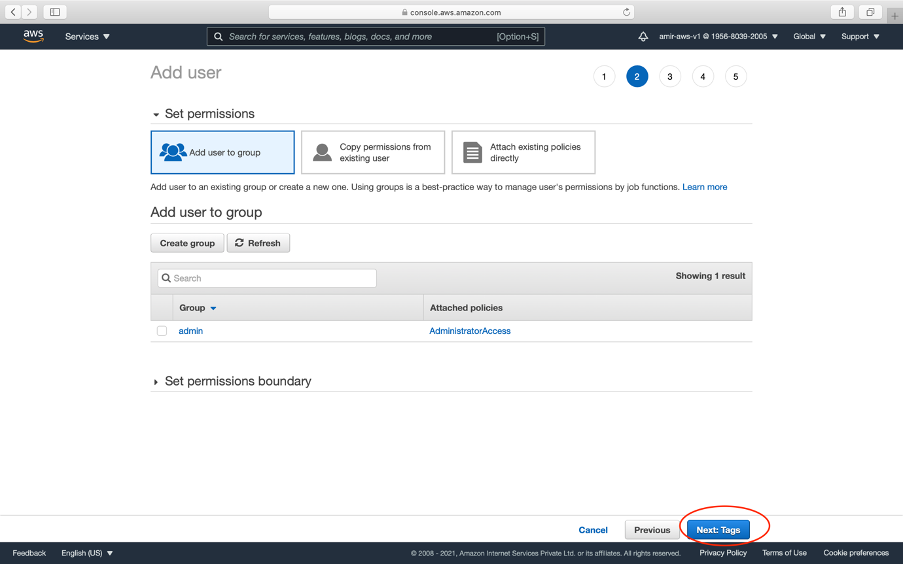
→ In the third tab, we attach our IAM policy created above. We now click a couple of next buttons
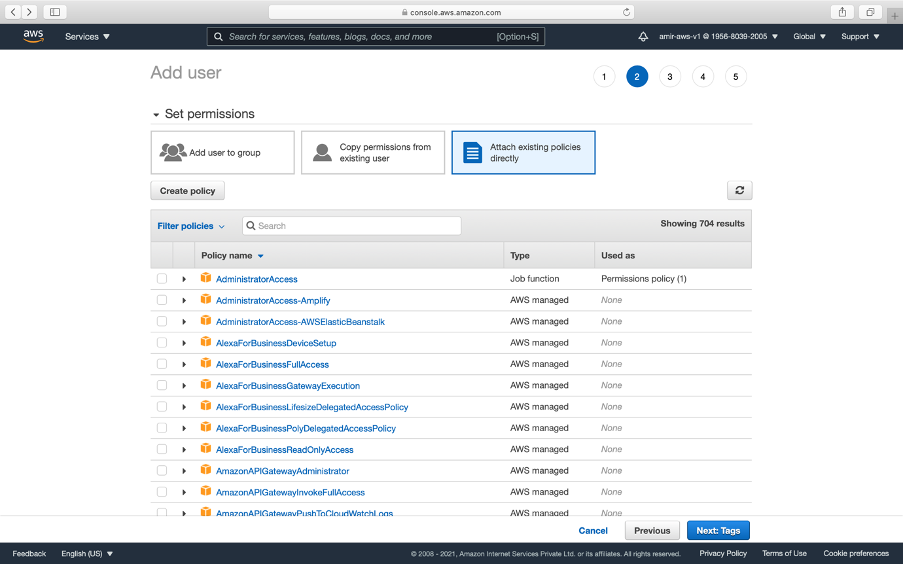
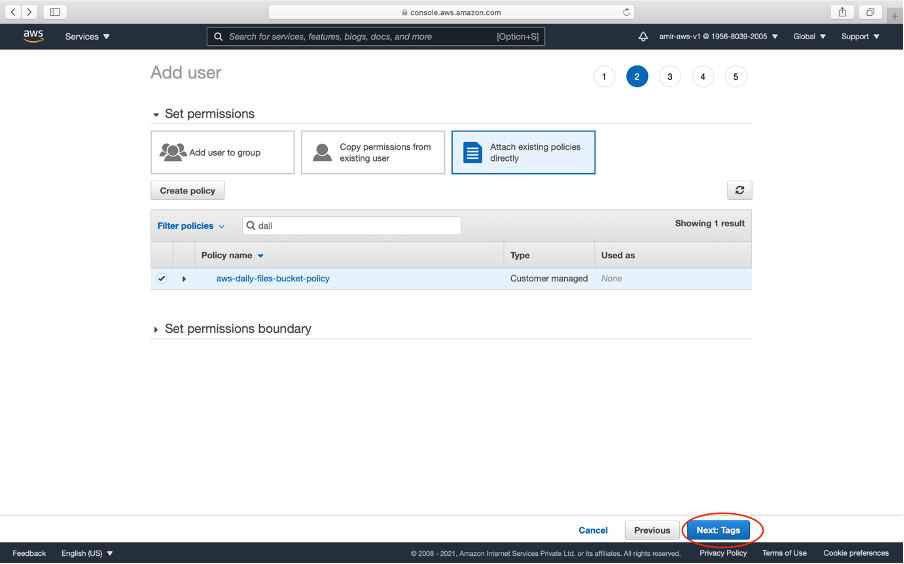
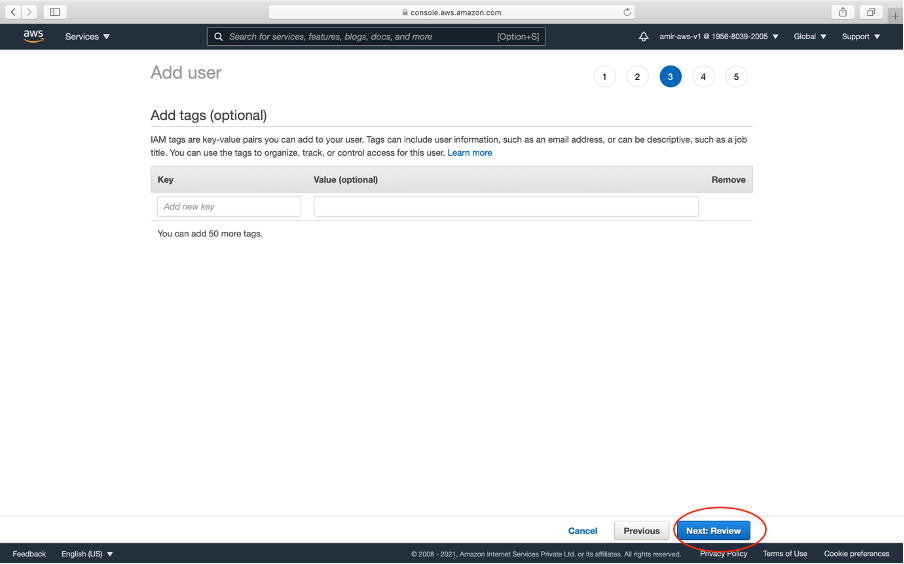
→ Click Create User button
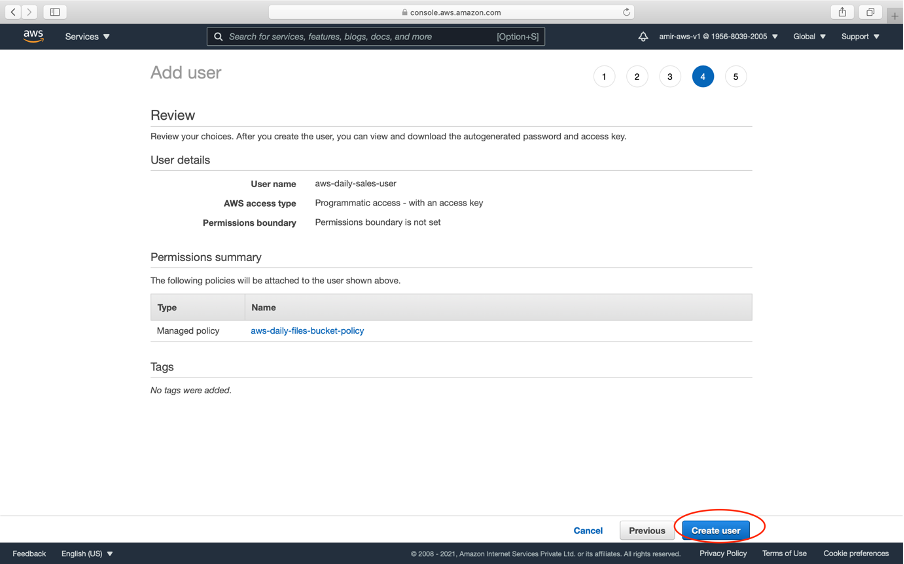
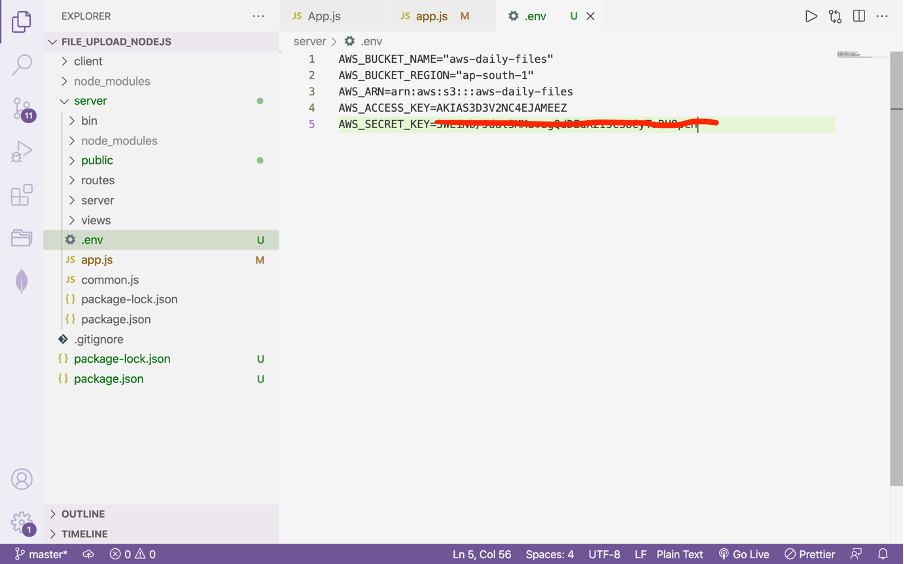
→ We get **Access Key Id and Secret key **(Never share your secret key with anyone for security reasons)
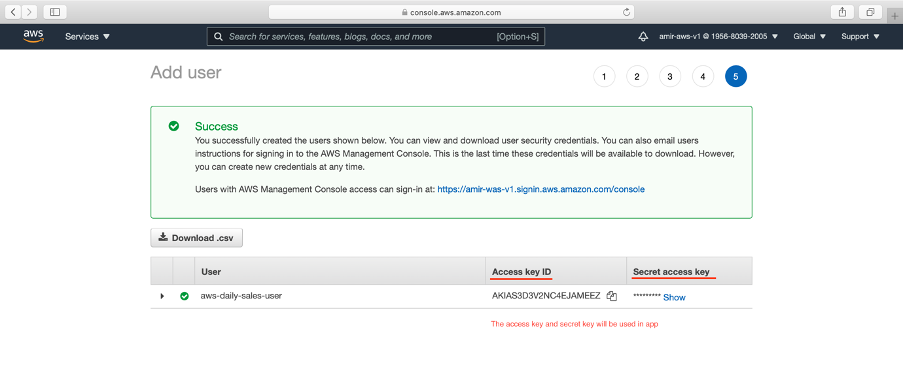
→ Paste in your .env file of the application
→ The next step is to write some javascript code to write and read code to S3.
2. Using JavaScript to upload and read files from AWS S3
a. Recap of file uploading (using Multer):
→ Express has two POST routes — single and multiple to upload single and multiple images respectively using Multer.
→ image is saved in server/public/images.
→ A client app that calls the two route utilizing frontend
For the complete article, please read it here.
b. Integrating AWS with Express
→ Create .env file and paste your AWS credentials
AWS_BUCKET_NAME="aws-daily-files"
AWS_BUCKET_REGION="ap-south-1"
AWS_ARN=arn:aws:s3:::aws-daily-files
AWS_ACCESS_KEY=AKIAS3D3V2NC4EJAMEEZ
AWS_SECRET_KEY=3WE************************pcH
→ Install AWS SDK using the below command
npm install aws-sdk dotenv
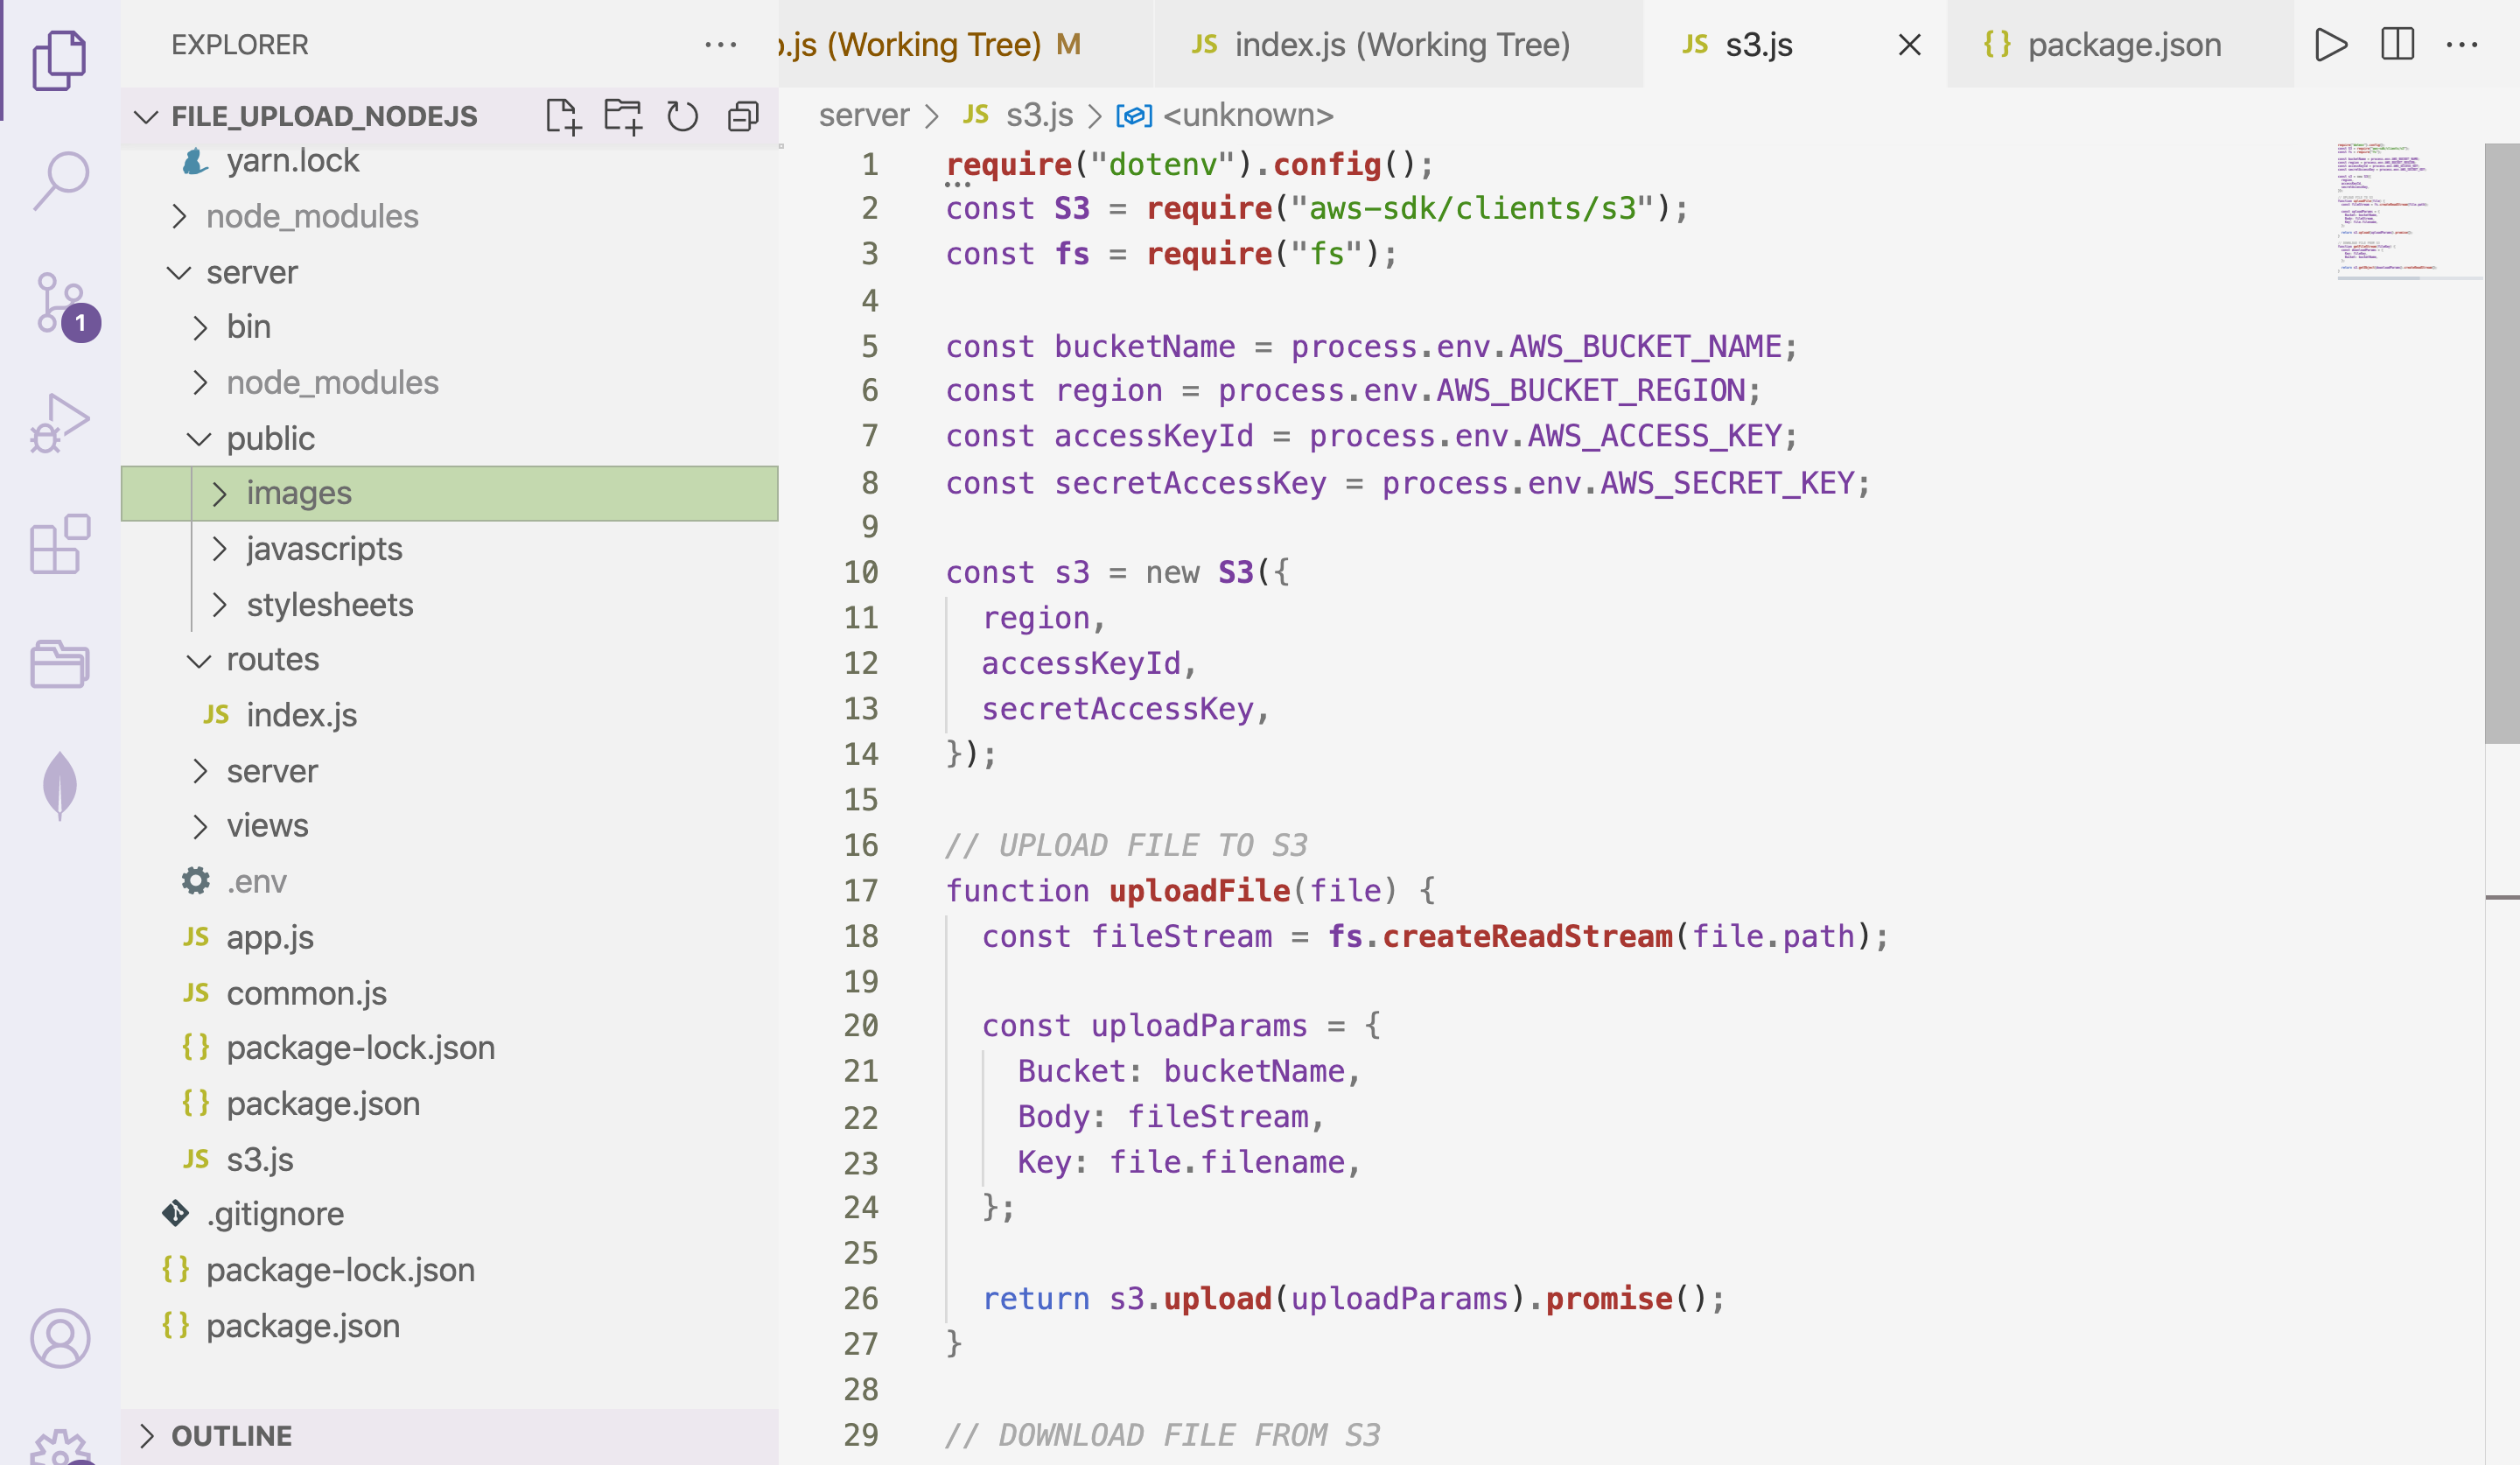
→ Create s3.js file in your application
c. Writing to S3:
**require**("dotenv").**config**();

const **S3** = **require**("aws-sdk/clients/s3");

const **fs** = **require**("fs");

const bucketName = process.env.AWS_BUCKET_NAME;

const region = process.env.AWS_BUCKET_REGION;

const accessKeyId = process.env.AWS_ACCESS_KEY;

const secretAccessKey = process.env.AWS_SECRET_KEY;

const s3 = new **S3**({

  region,

  accessKeyId,

  secretAccessKey,

});


*// UPLOAD FILE TO S3*

function **uploadFile**(file) {

  const fileStream = **fs**.**createReadStream**(file.path);

  const uploadParams = {

    Bucket: bucketName,

    Body: fileStream,

    Key: file.filename,

  };

return s3.**upload**(uploadParams).**promise**(); // this will upload file to S3

}

module.exports = { **uploadFile **};
→ Now go to your routes file
server/router/index.js
var **express** = **require**("express");

var router = **express**.**Router**();

const upload = **require**("../common");

const { **uploadFile **} = **require**("../s3");

const **fs** = **require**("fs");

const **util** = **require**("util");

const **unlinkFile** = **util**.**promisify**(**fs**.**unlink**);


router.**post**("/single", upload.**single**("image"), async (req, res) => {

  console.**log**(req.file);

*  // uploading to AWS S3*

  const result = await **uploadFile**(req.file);  // Calling above function in s3.js

  console.**log**("S3 response", result);

*  // You may apply filter, resize image before sending to client*

*  // Deleting from local if uploaded in S3 bucket*

  await **unlinkFile**(req.file.path);

  res.**send**({

    status: "success",

    message: "File uploaded successfully",

    data: req.file,

  });

});

module.exports = router;
→ We have created a basic frontend that sends data to Express as POST multipart data
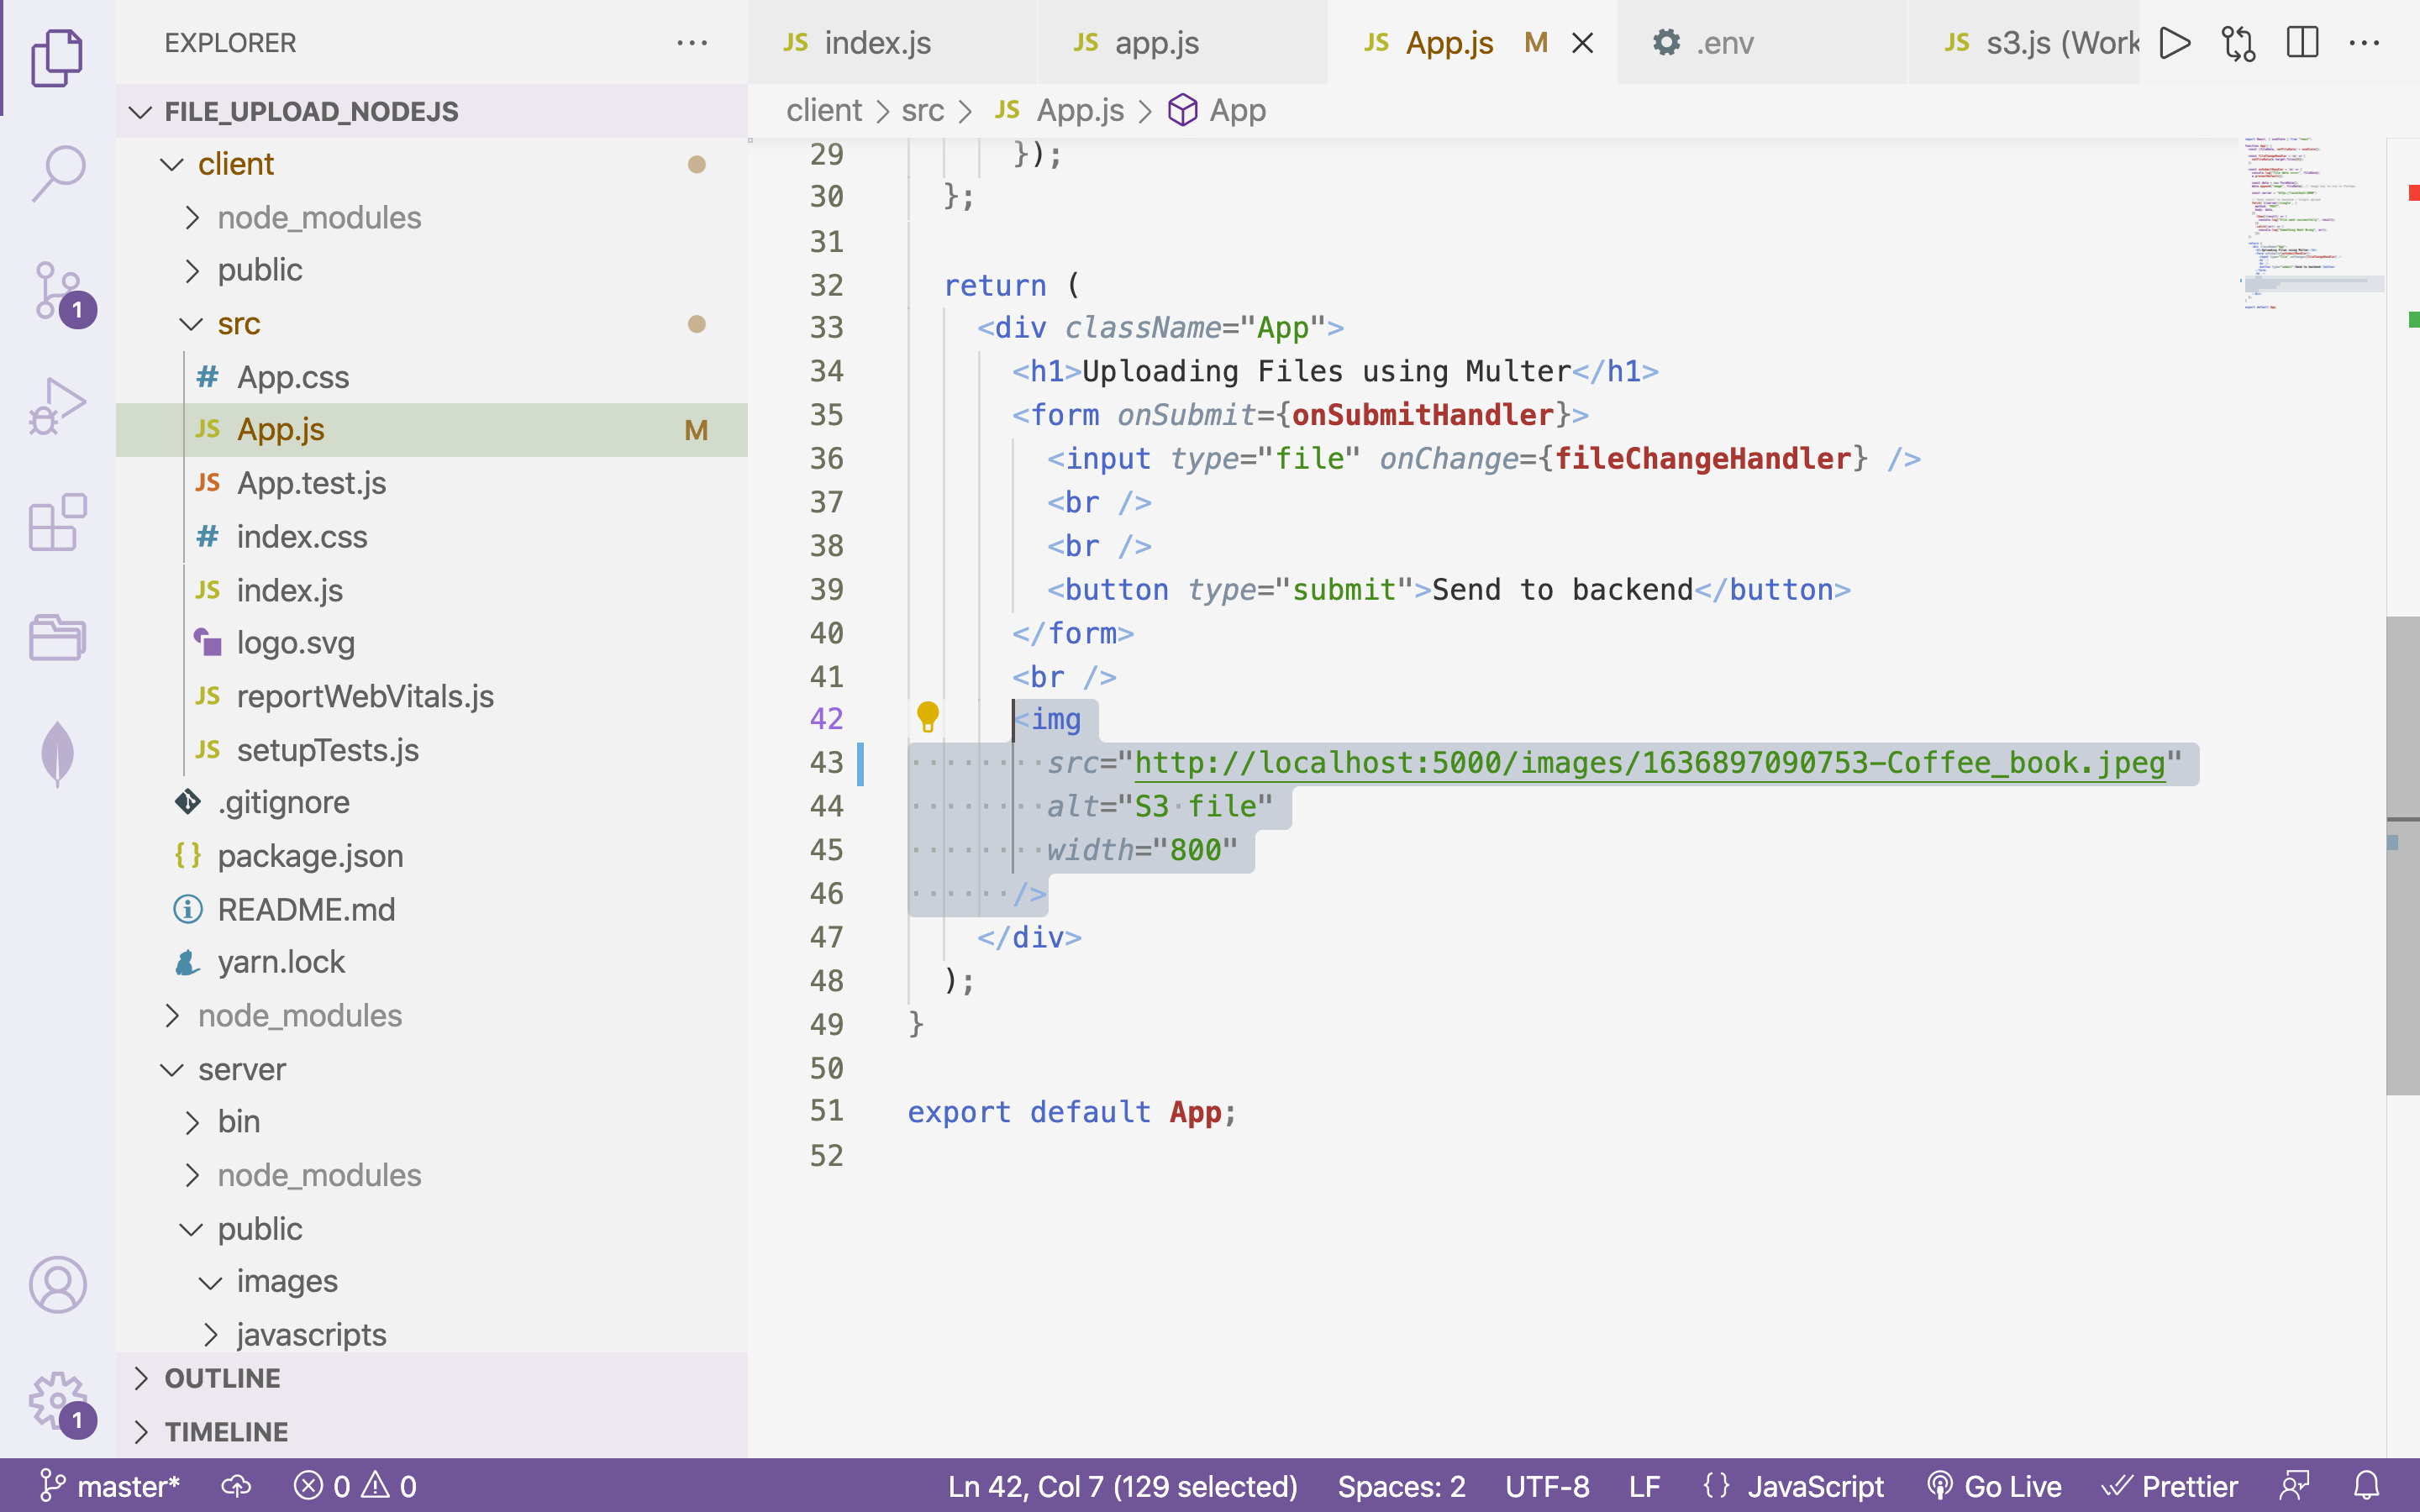

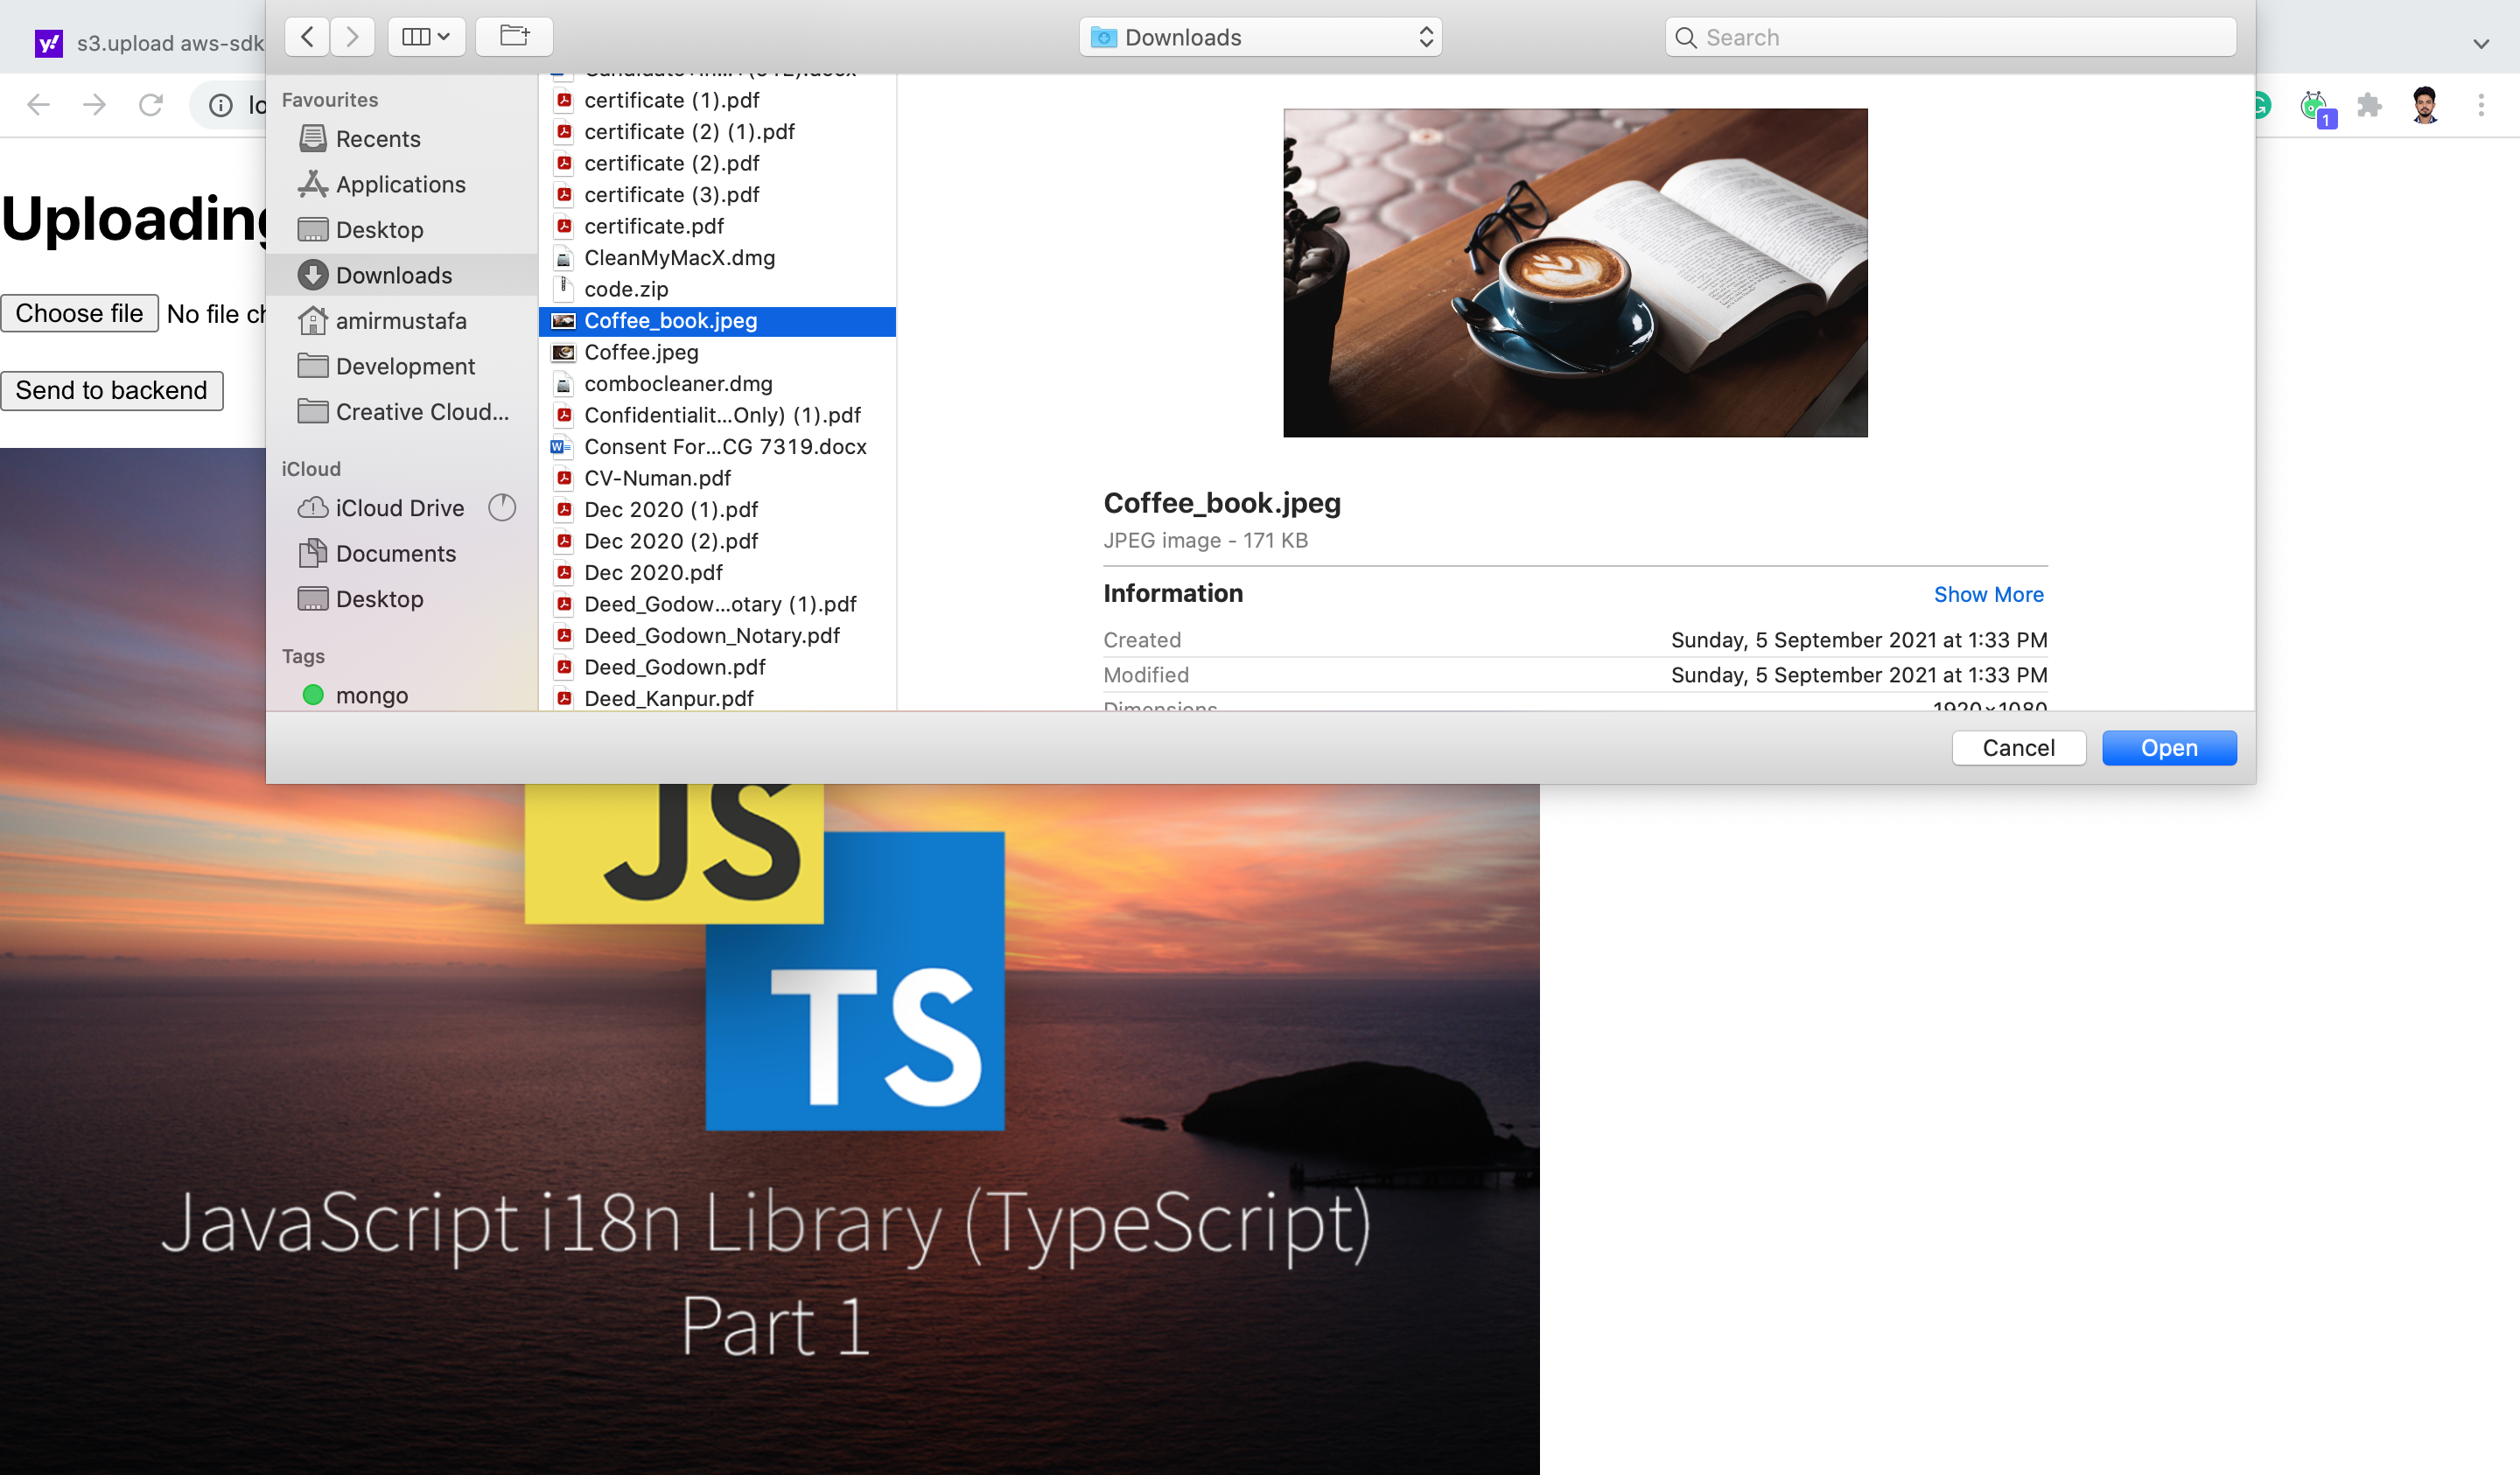
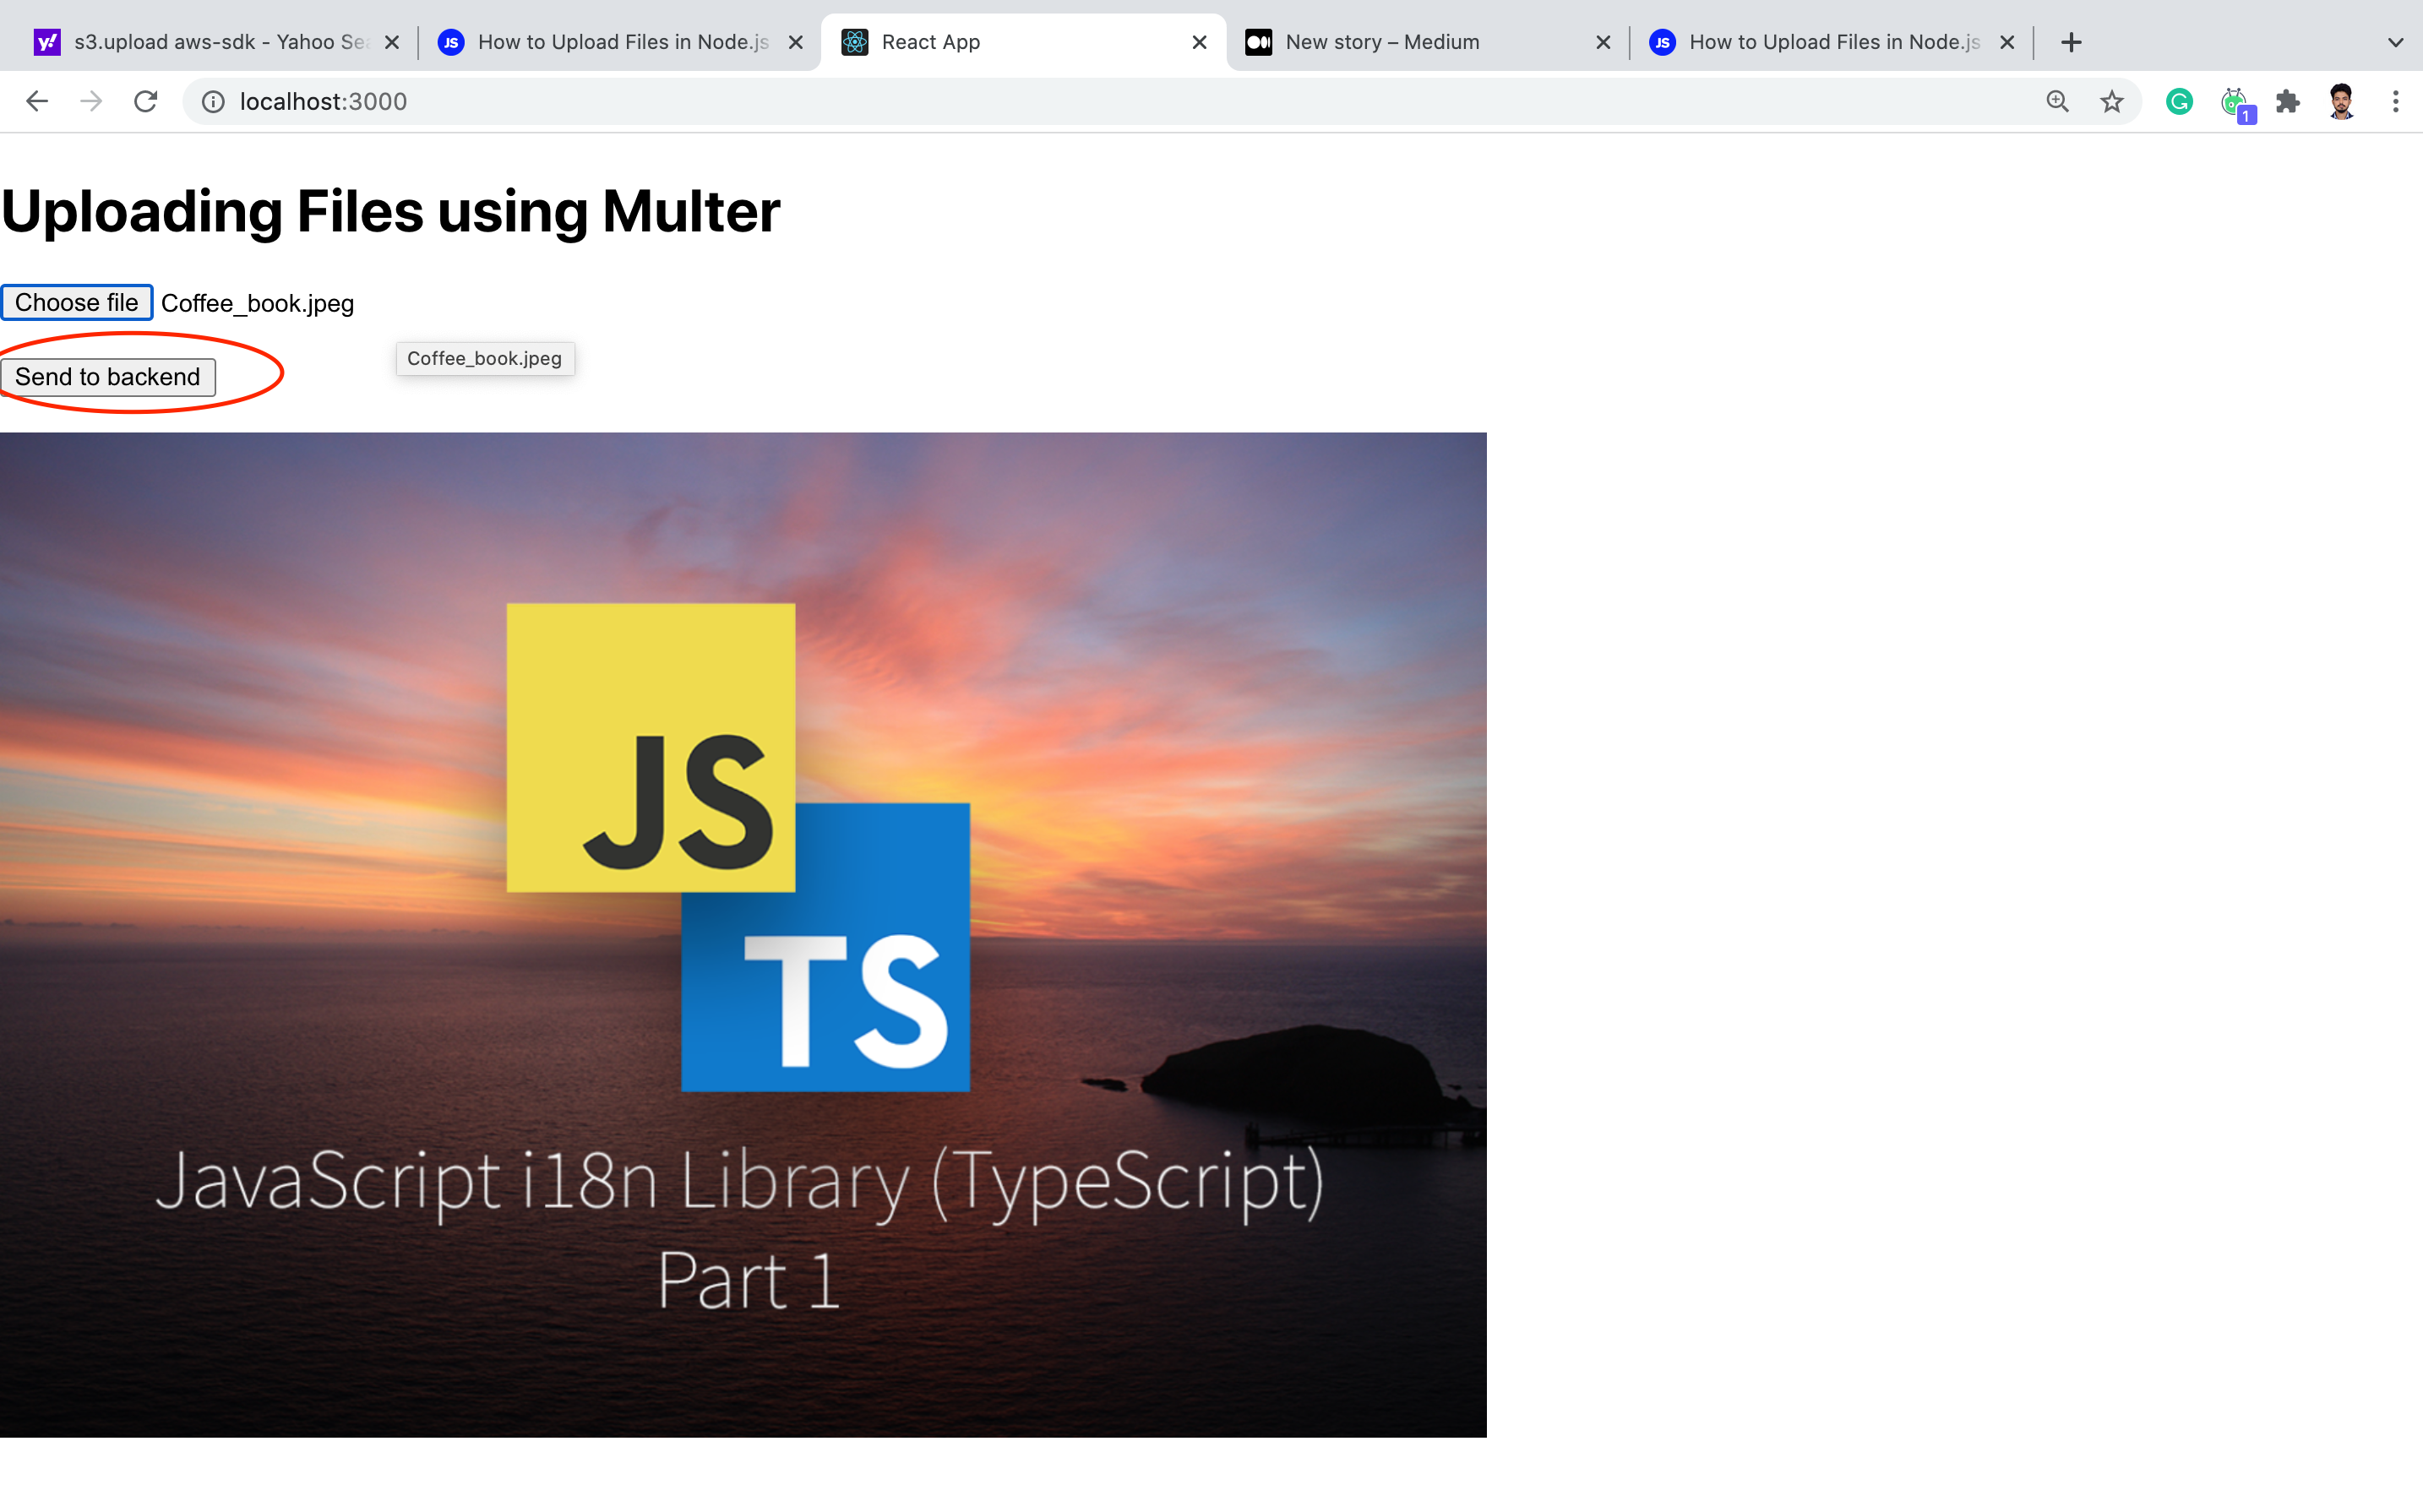
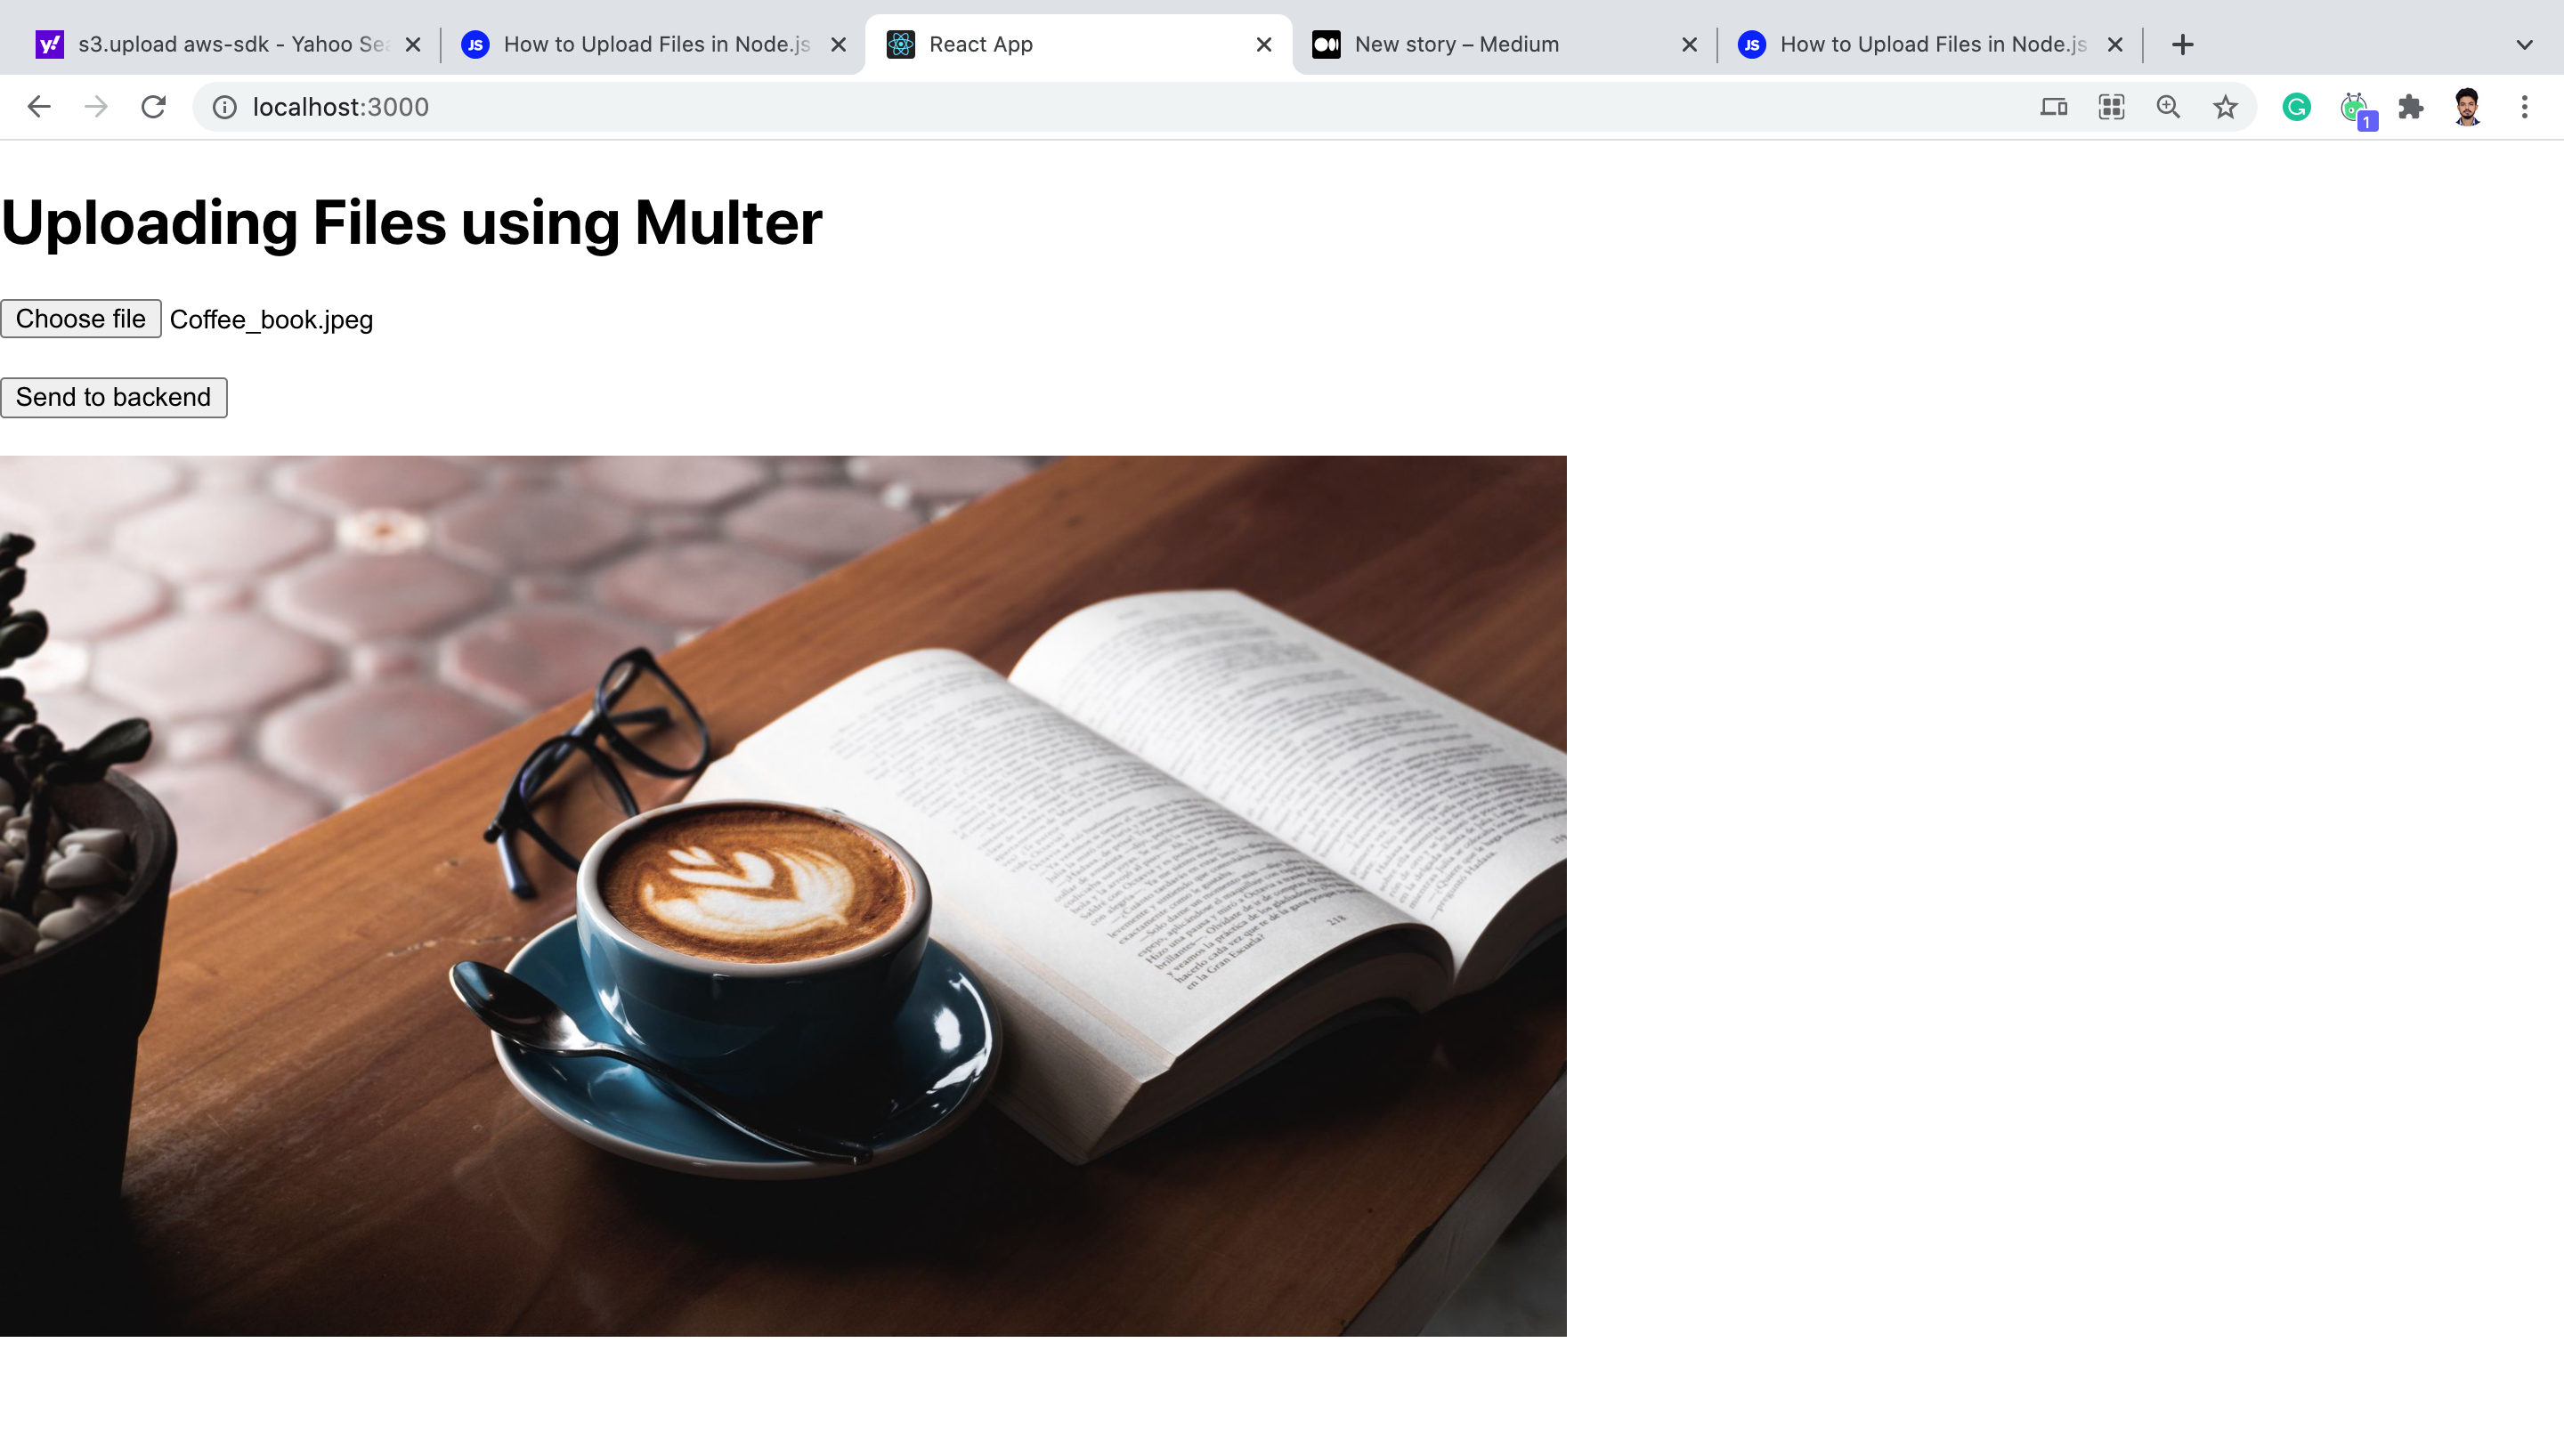
→ Reading data from S3 and printing in the client will do below. For now we will see data will be uploaded and is also therein S3 bucket in AWS console.
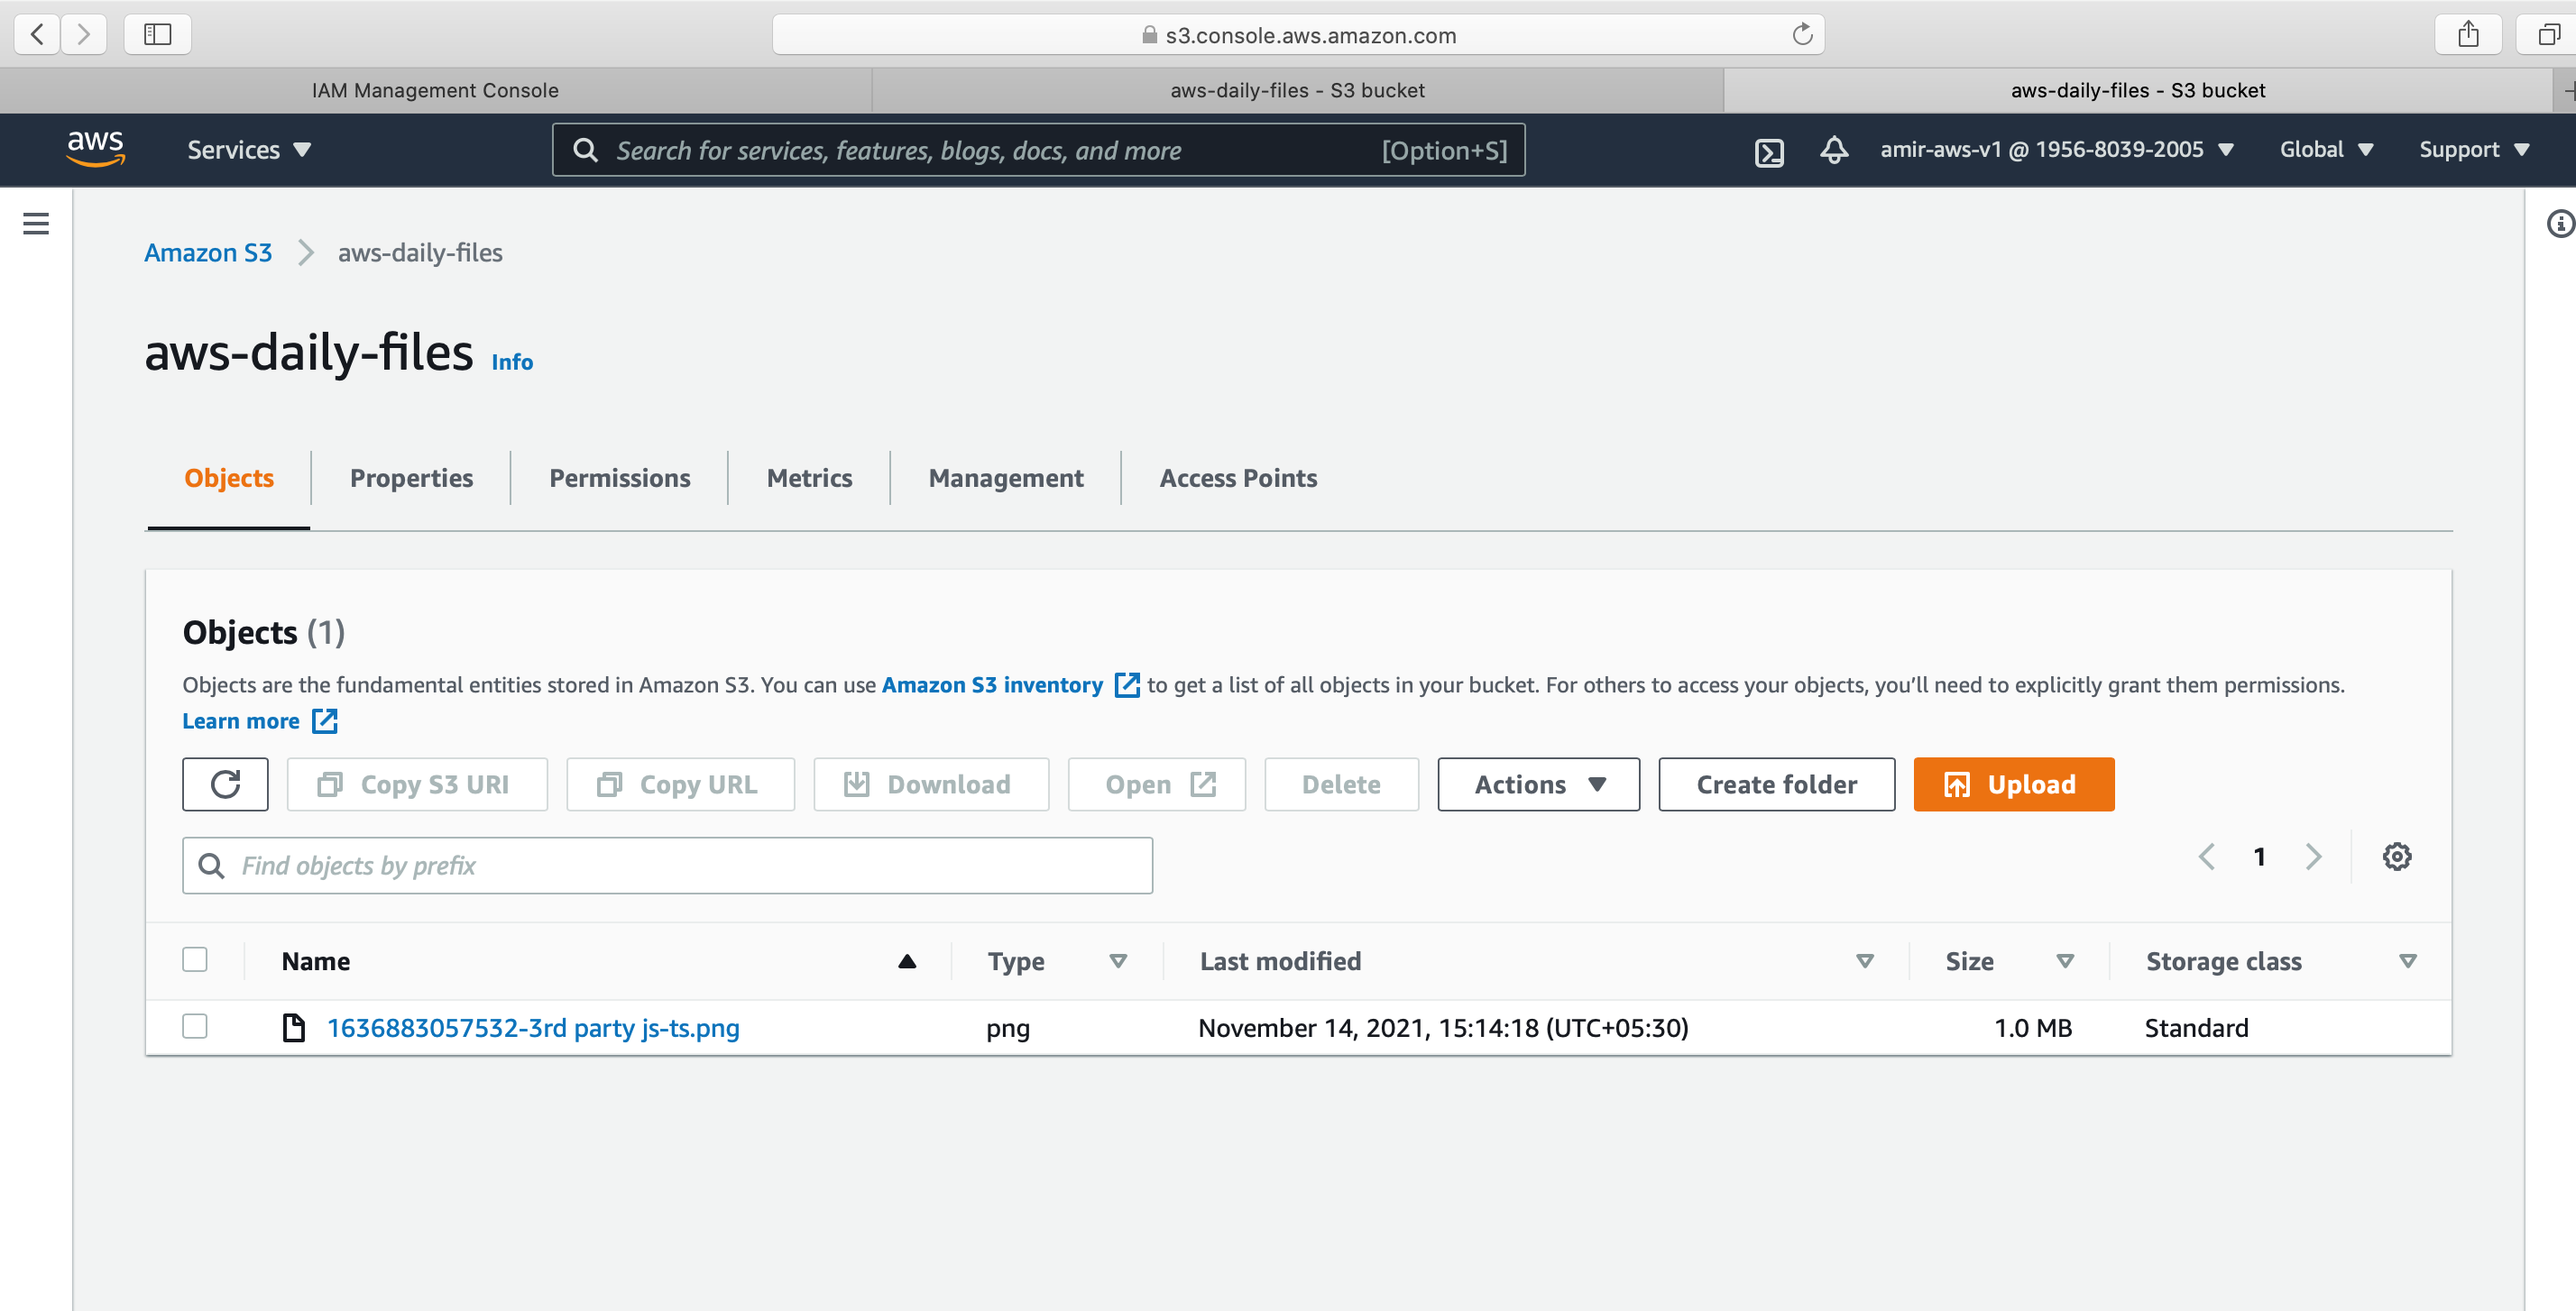
AWS console before uploading
→ Click Send to backend button
→ In the Node.js server terminal, we see a response printed from S3. Here the key is the file name and the path is the location to file.
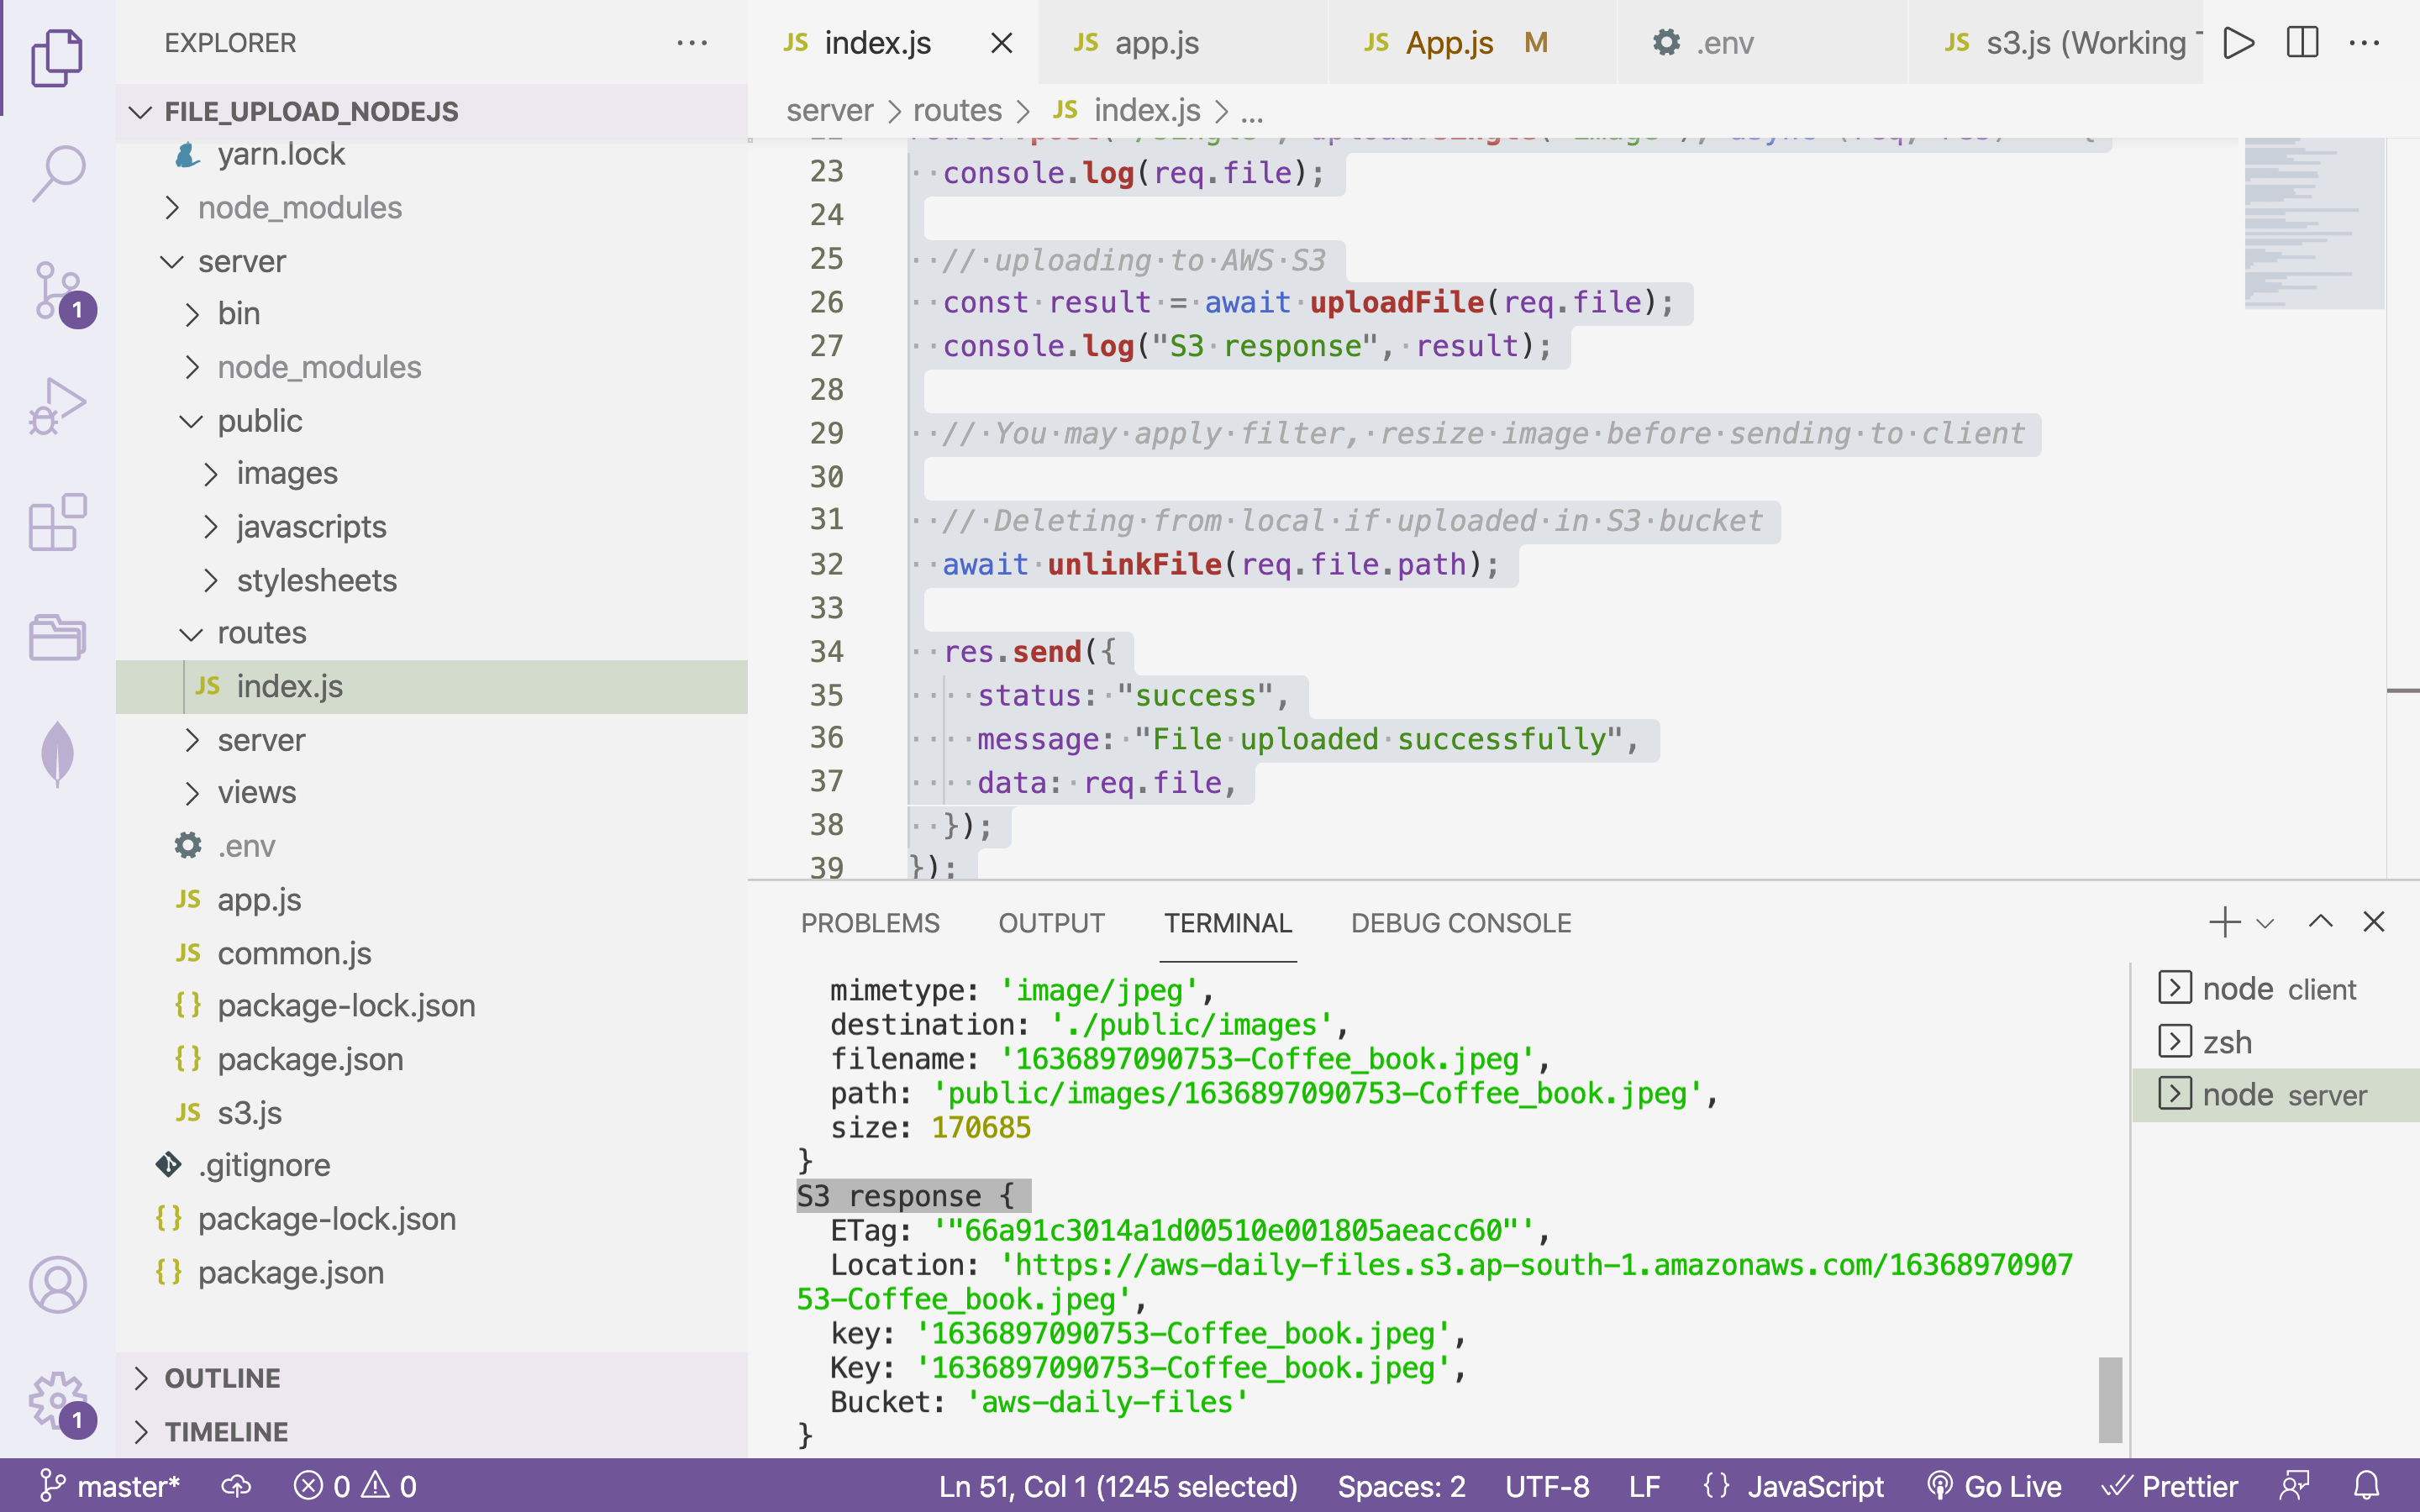
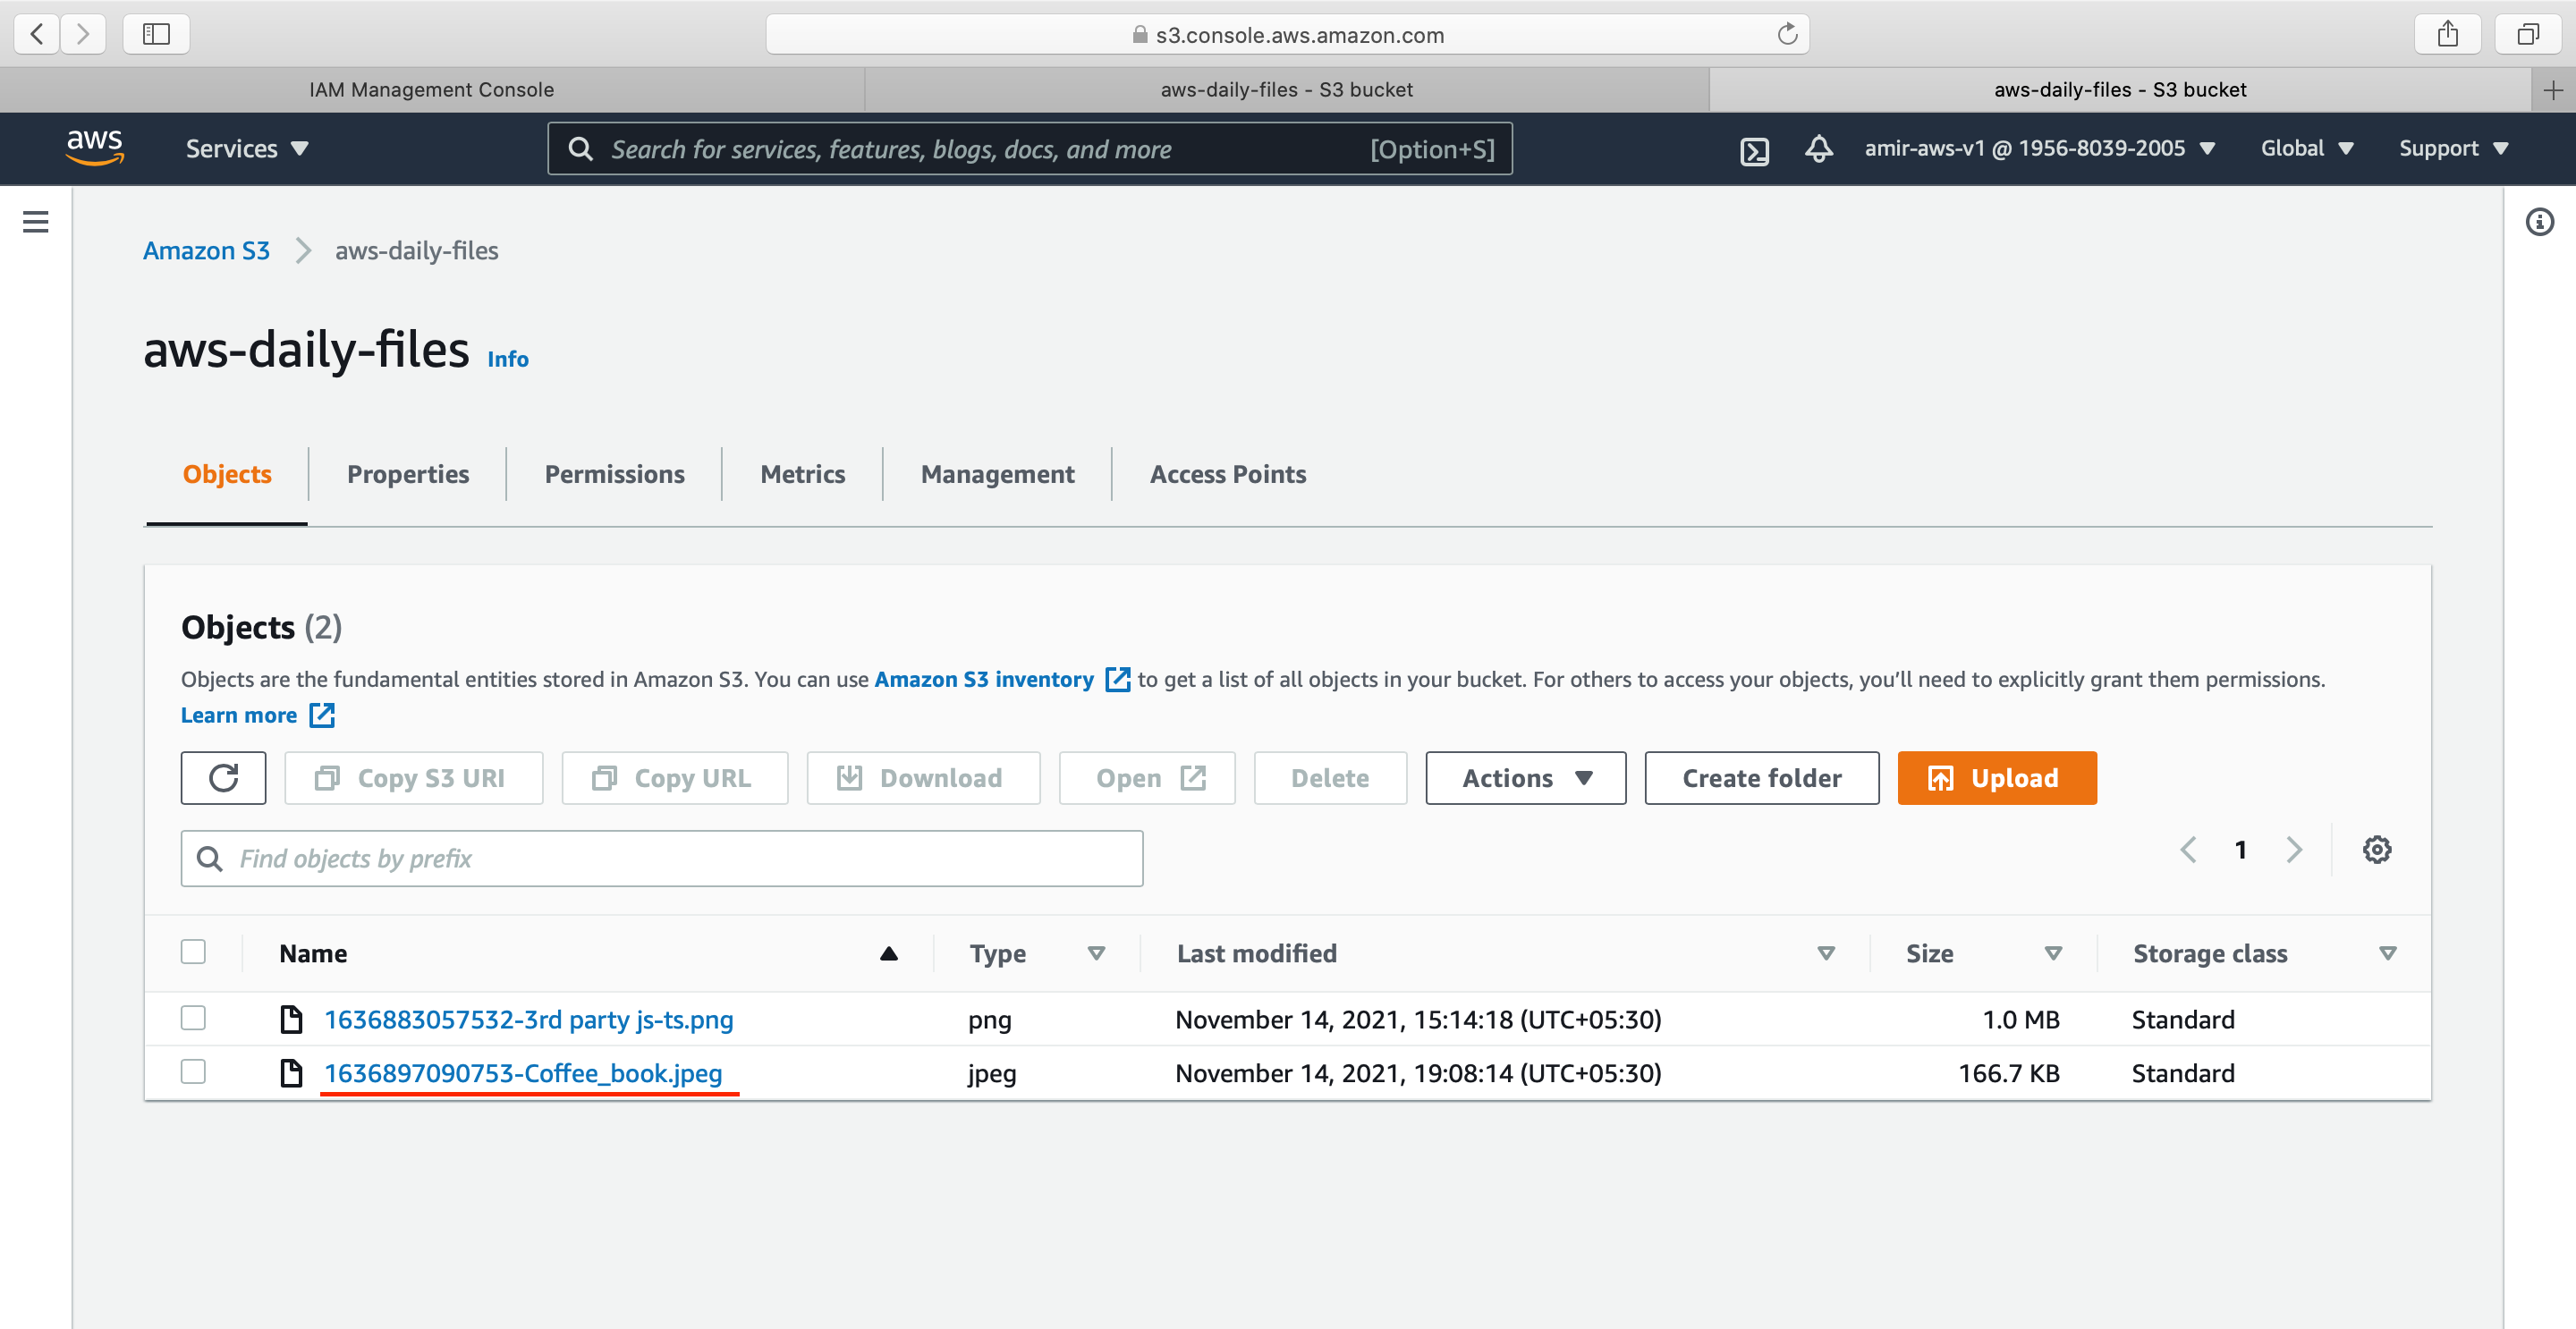
→ Let us check the S3. We see a new file is uploaded in S3
d. Reading file from S3:
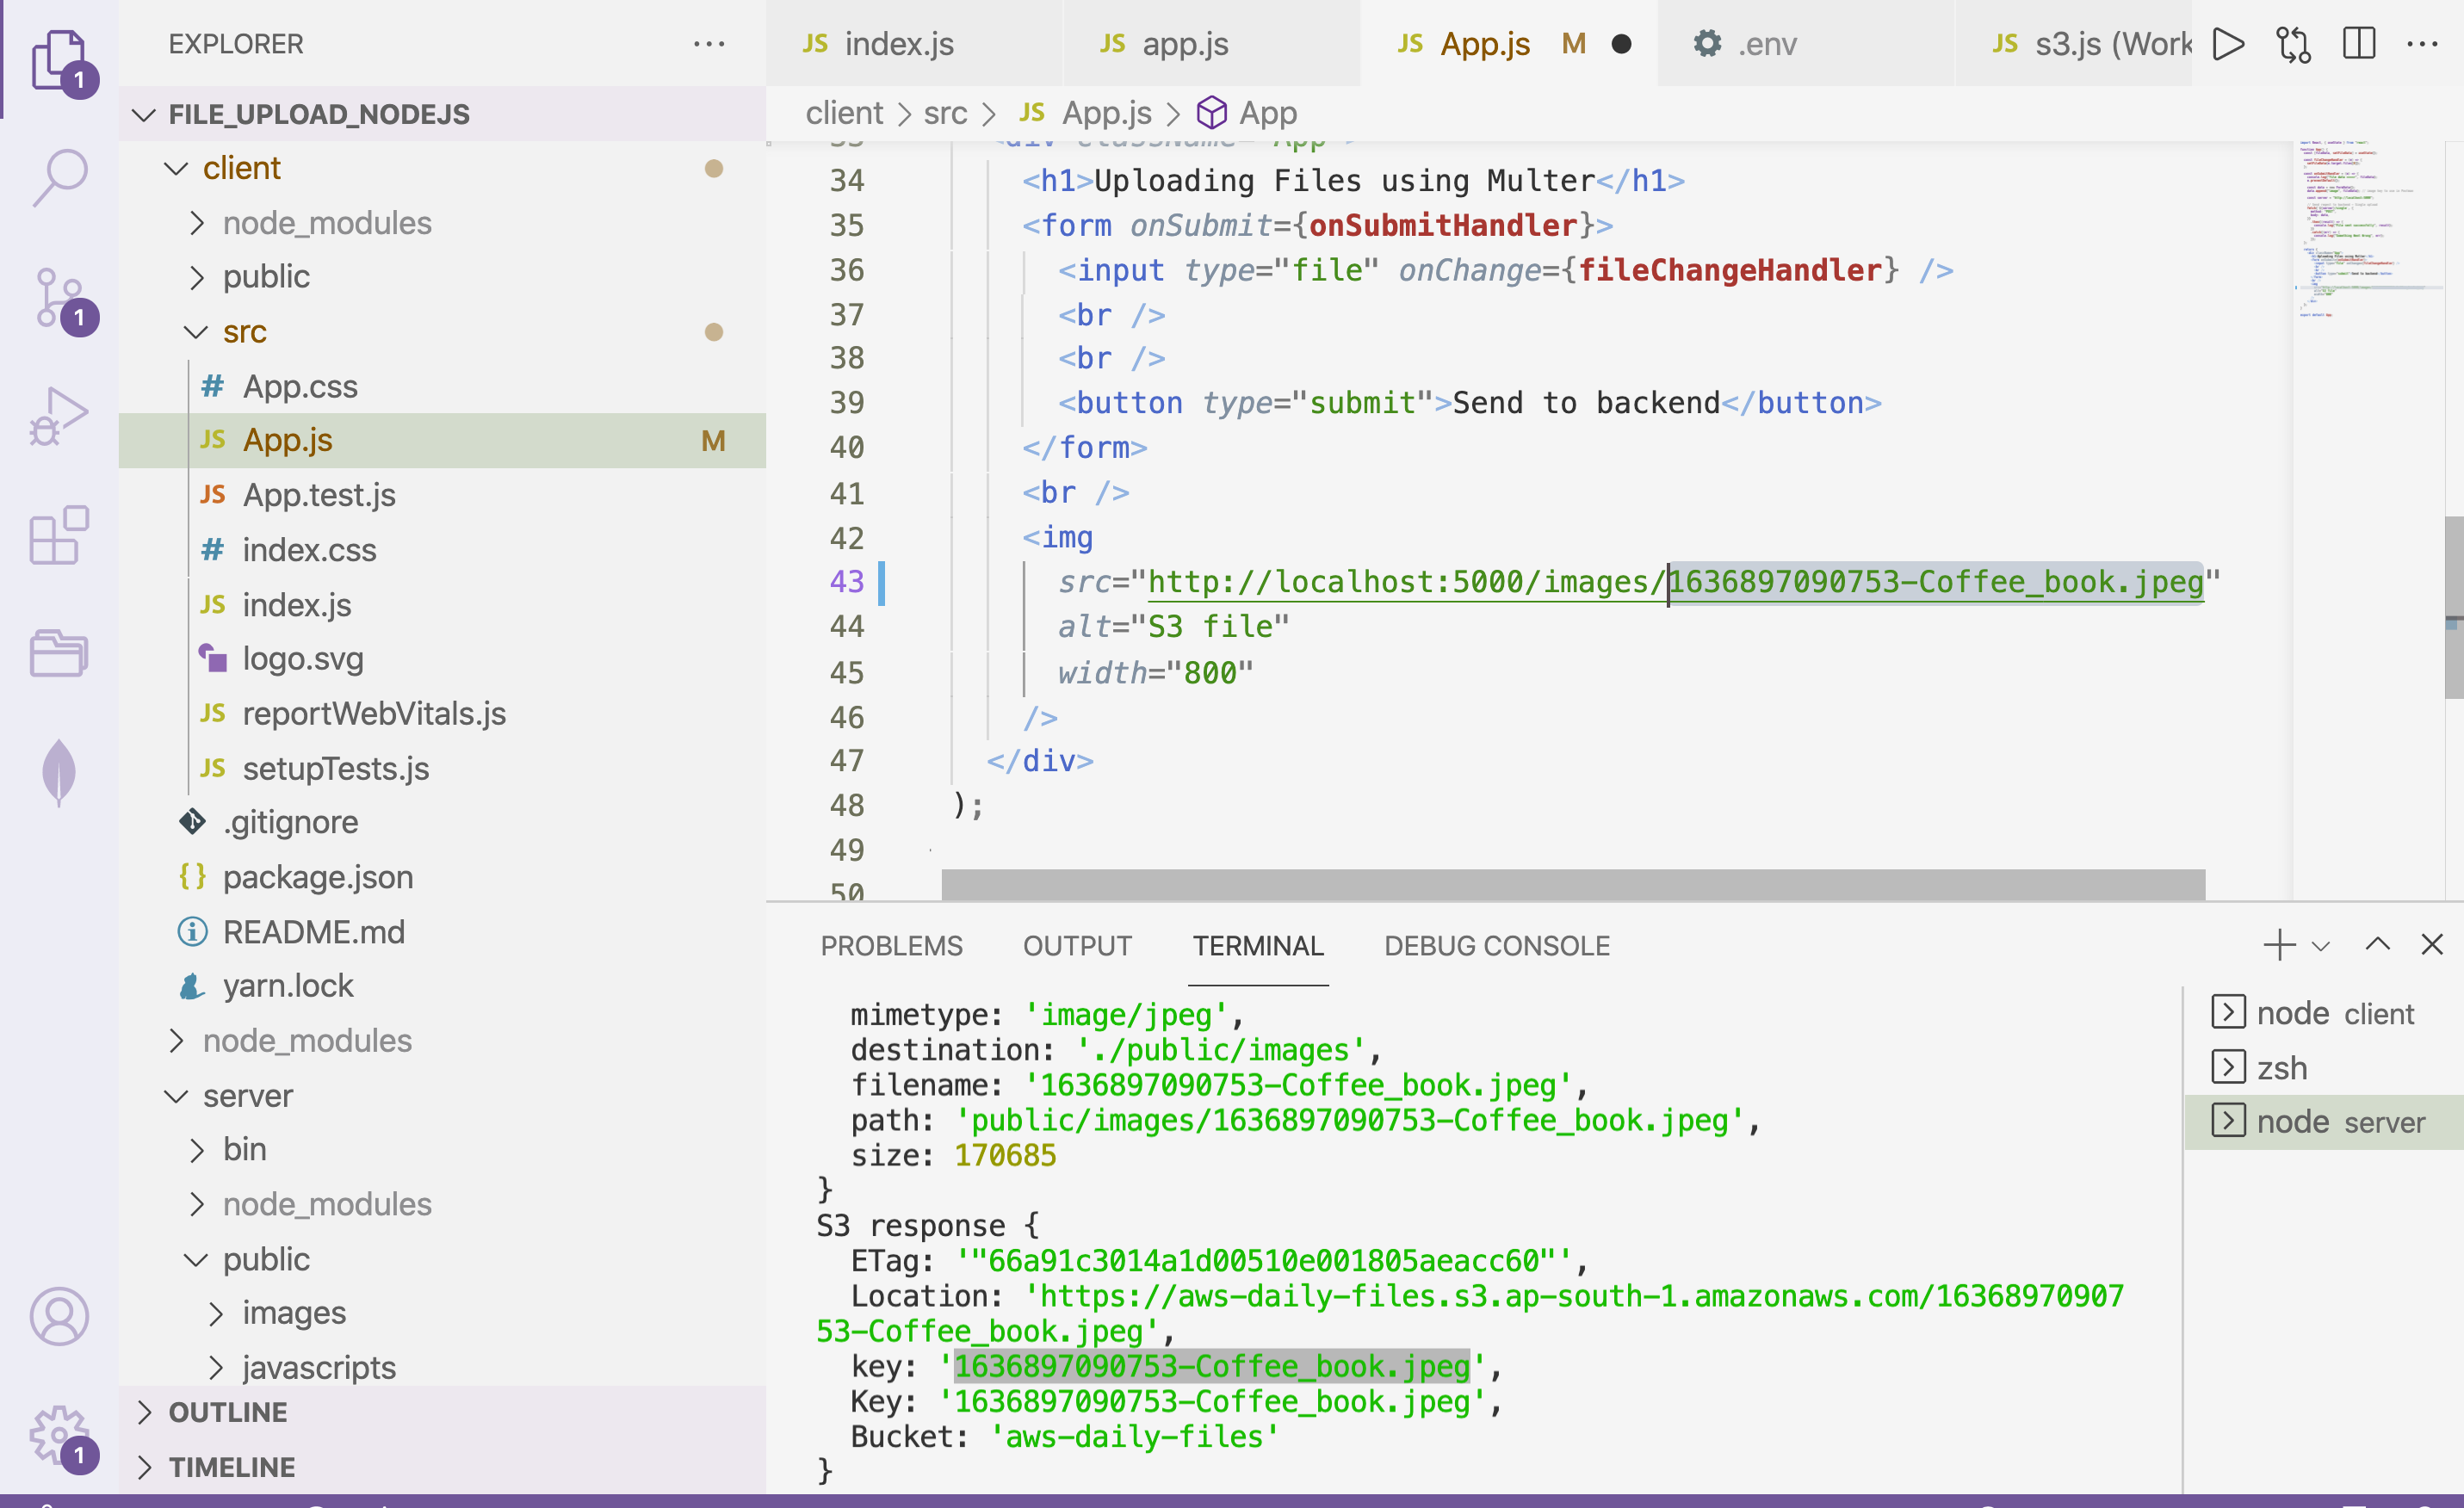
→ We see from the above image new image is reflecting client-side from S3. Let us write the code for it.
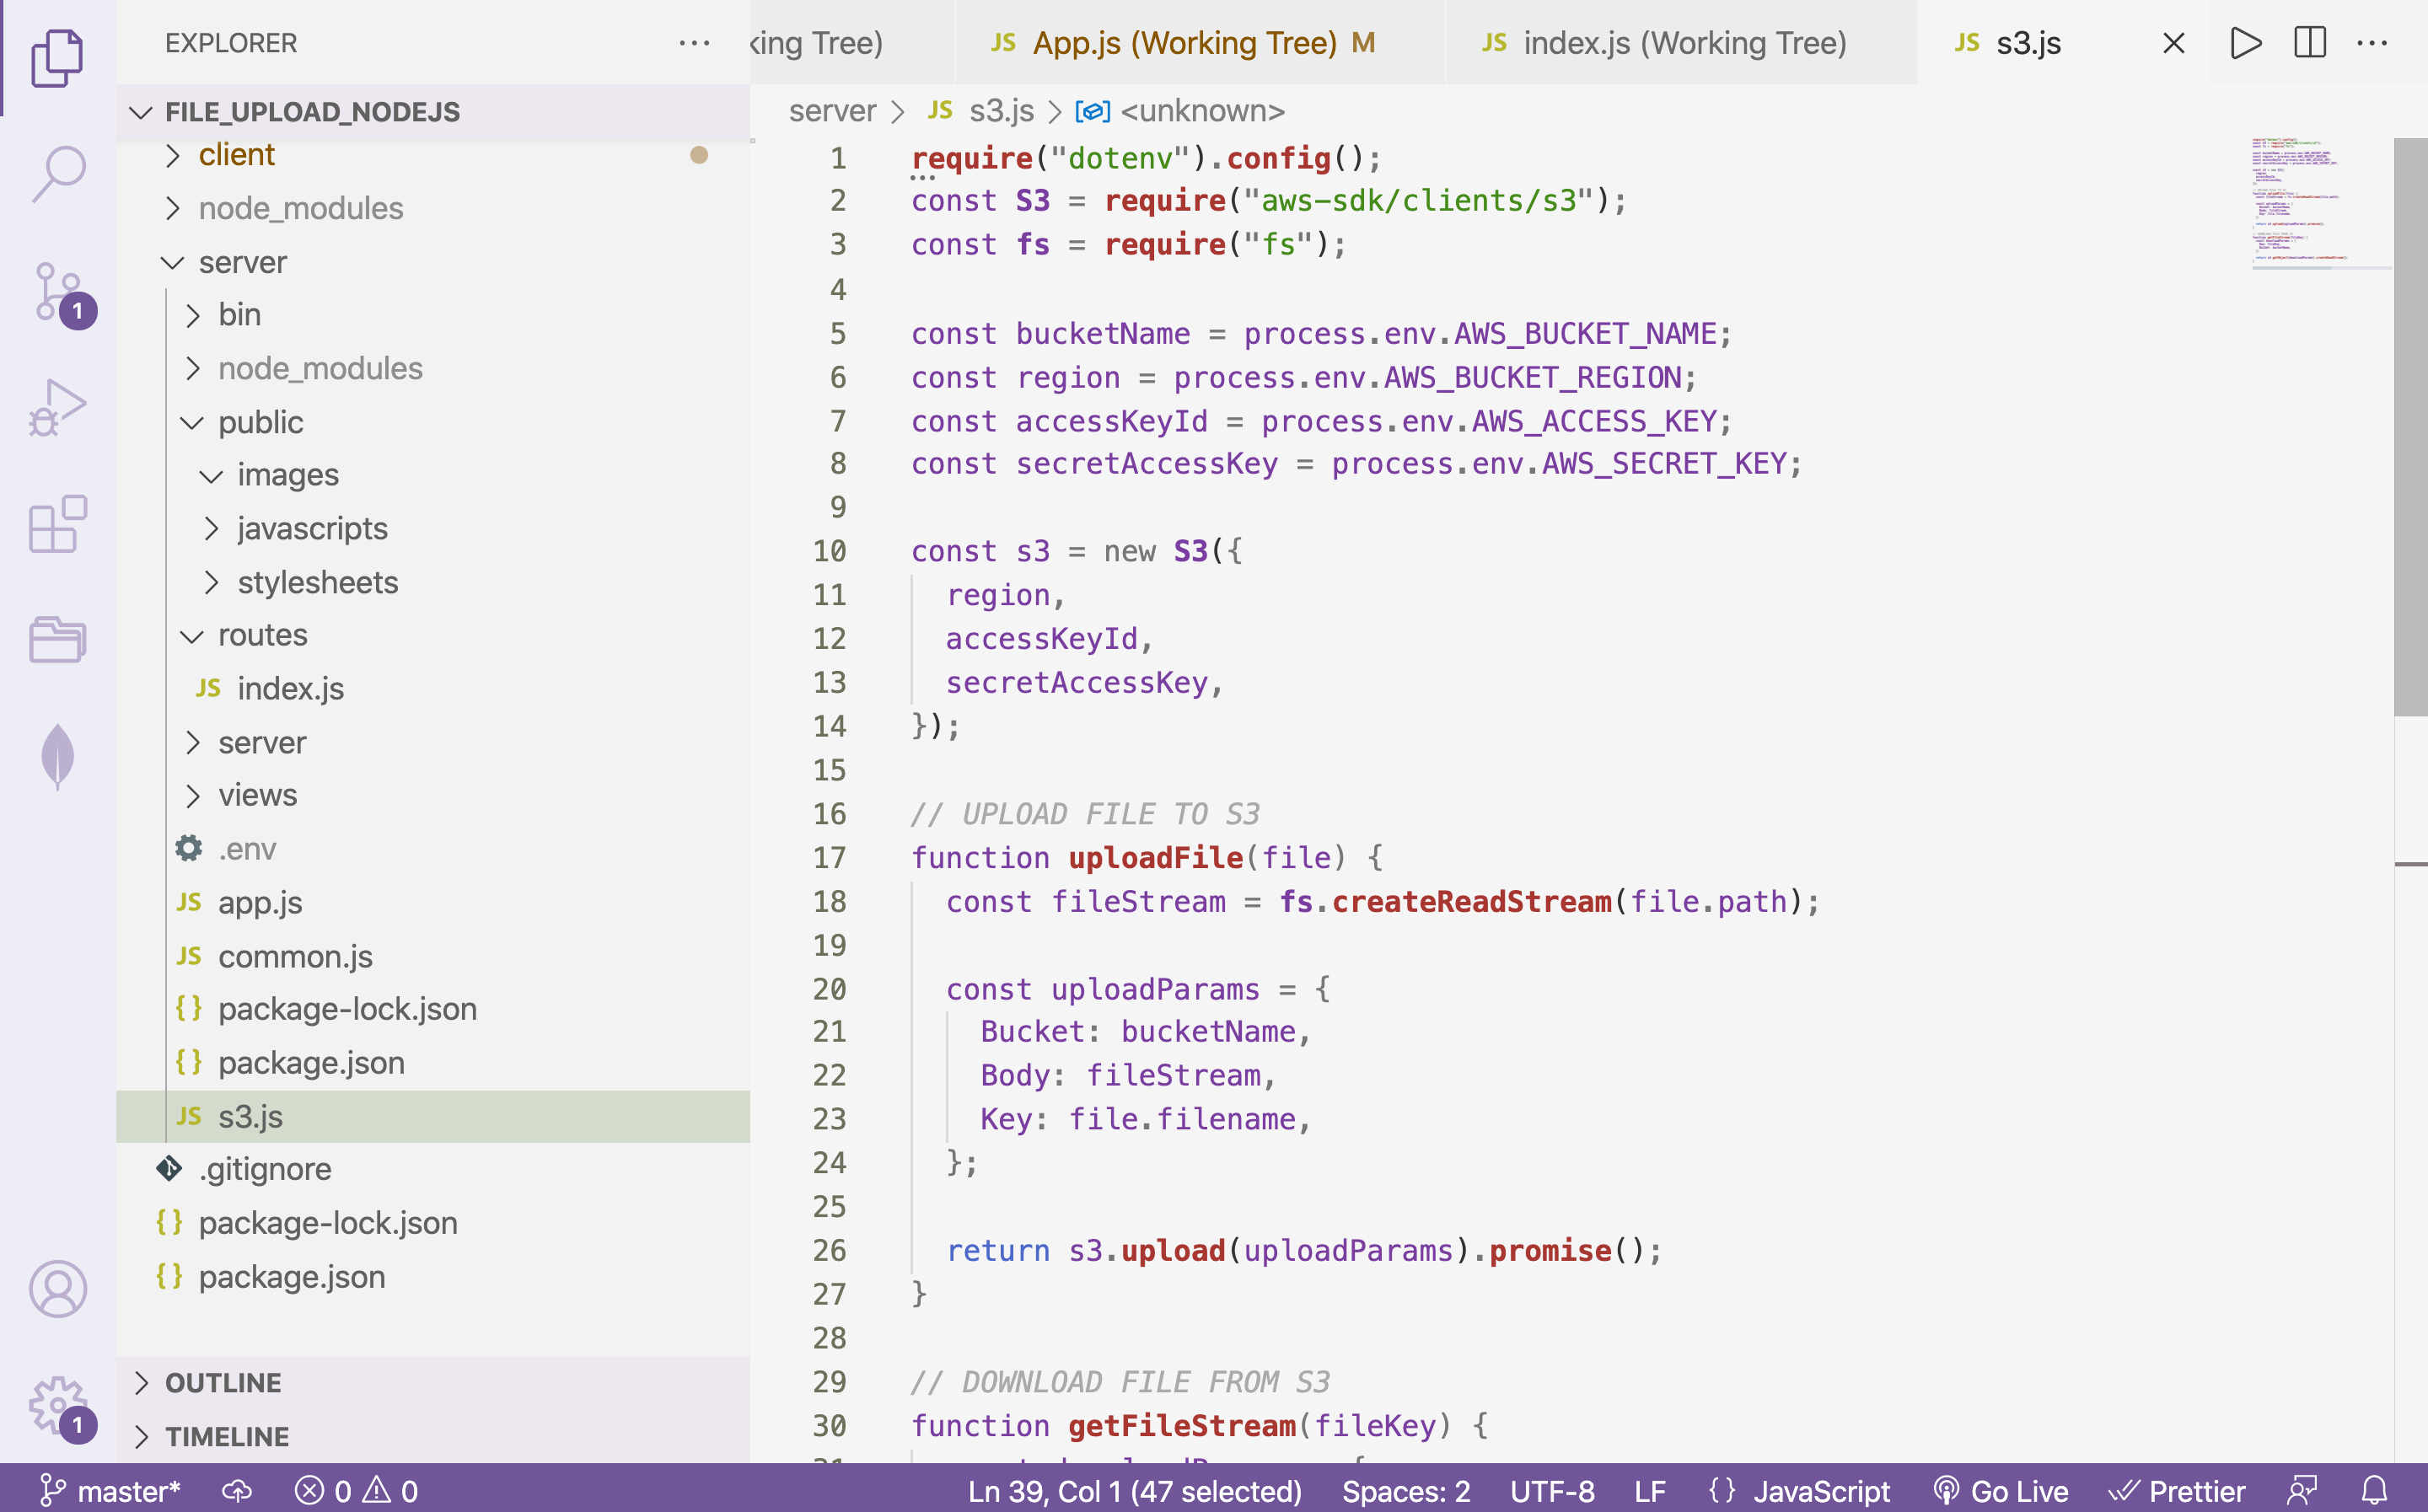
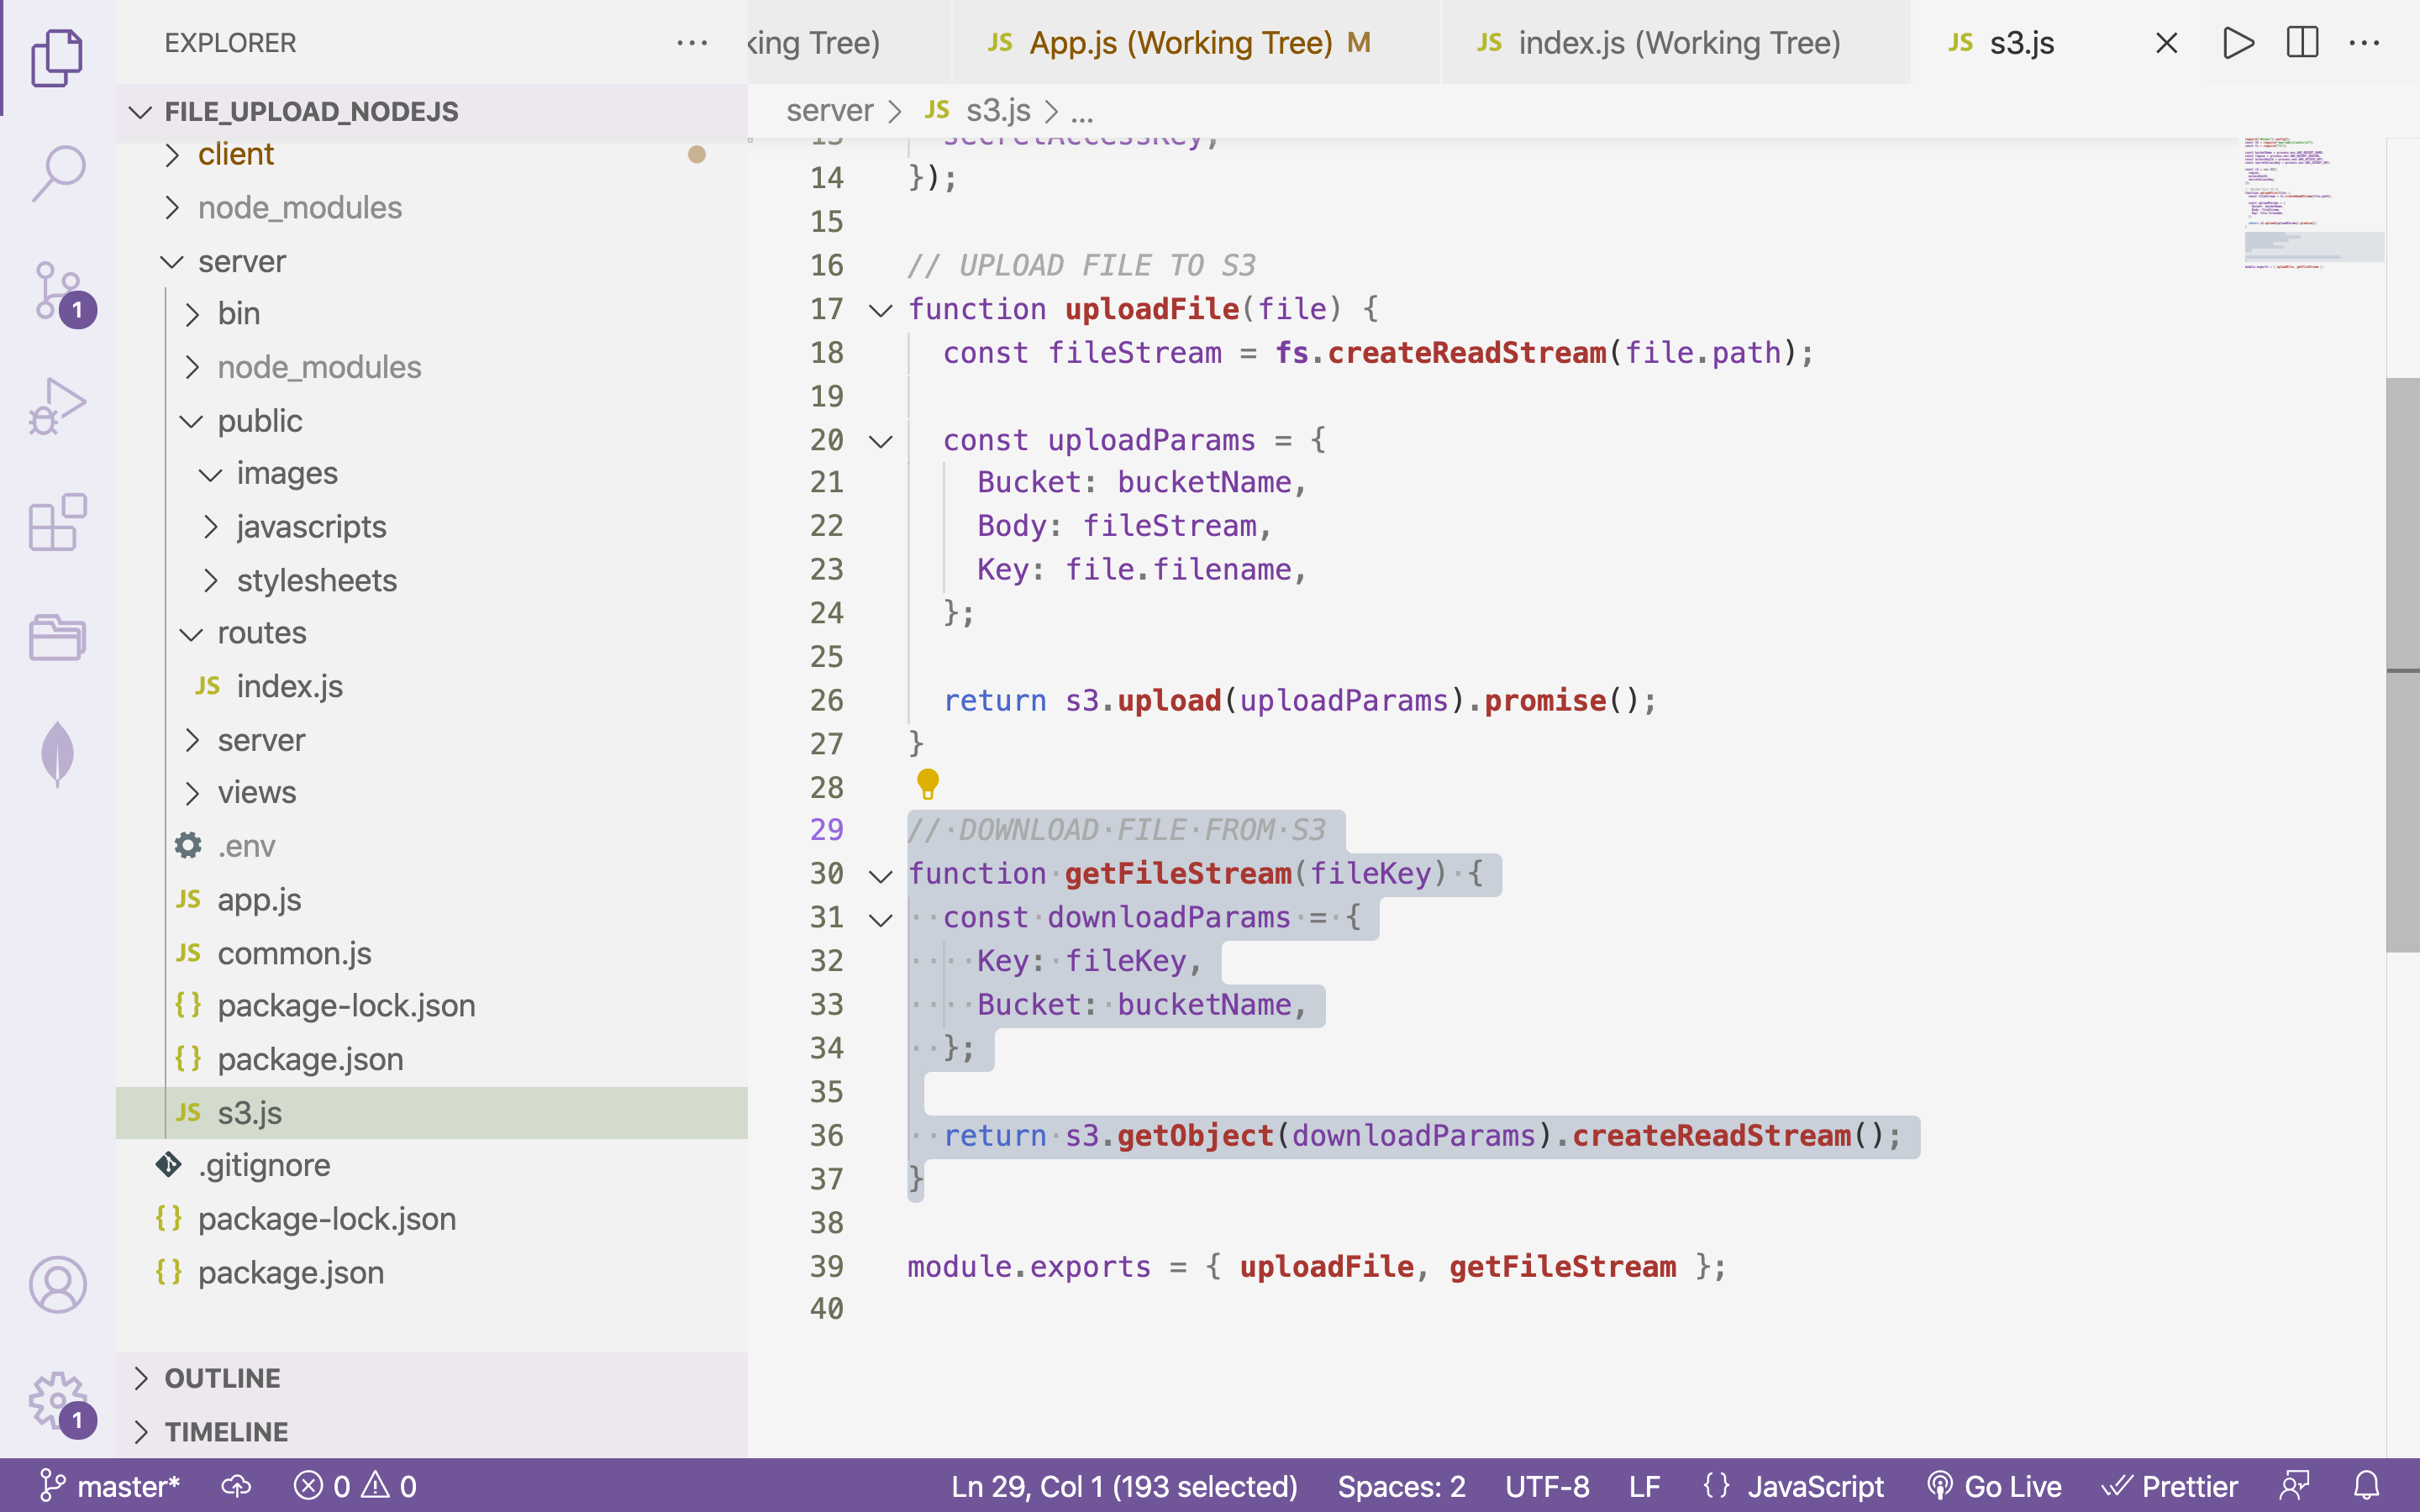
server/s3.js
**require**("dotenv").**config**();

const **S3** = **require**("aws-sdk/clients/s3");

const **fs** = **require**("fs");

const bucketName = process.env.AWS_BUCKET_NAME;

const region = process.env.AWS_BUCKET_REGION;

const accessKeyId = process.env.AWS_ACCESS_KEY;

const secretAccessKey = process.env.AWS_SECRET_KEY;

const s3 = new **S3**({
  region,
  accessKeyId,
  secretAccessKey,
});

*// DOWNLOAD FILE FROM S3*

function **getFileStream**(fileKey) {

  const downloadParams = {

  Key: fileKey,

  Bucket: bucketName,

};

return s3.**getObject**(downloadParams).**createReadStream**();

}

module.exports = { **uploadFile**, **getFileStream** };
→ Use this function routes
server/routes/index.js
var **express** = **require**("express");

var router = **express**.**Router**();

const upload = **require**("../common");

const { **uploadFile**, **getFileStream** } = **require**("../s3");

const **fs** = **require**("fs");

const **util** = **require**("util");

const **unlinkFile** = **util**.**promisify**(**fs**.**unlink**);


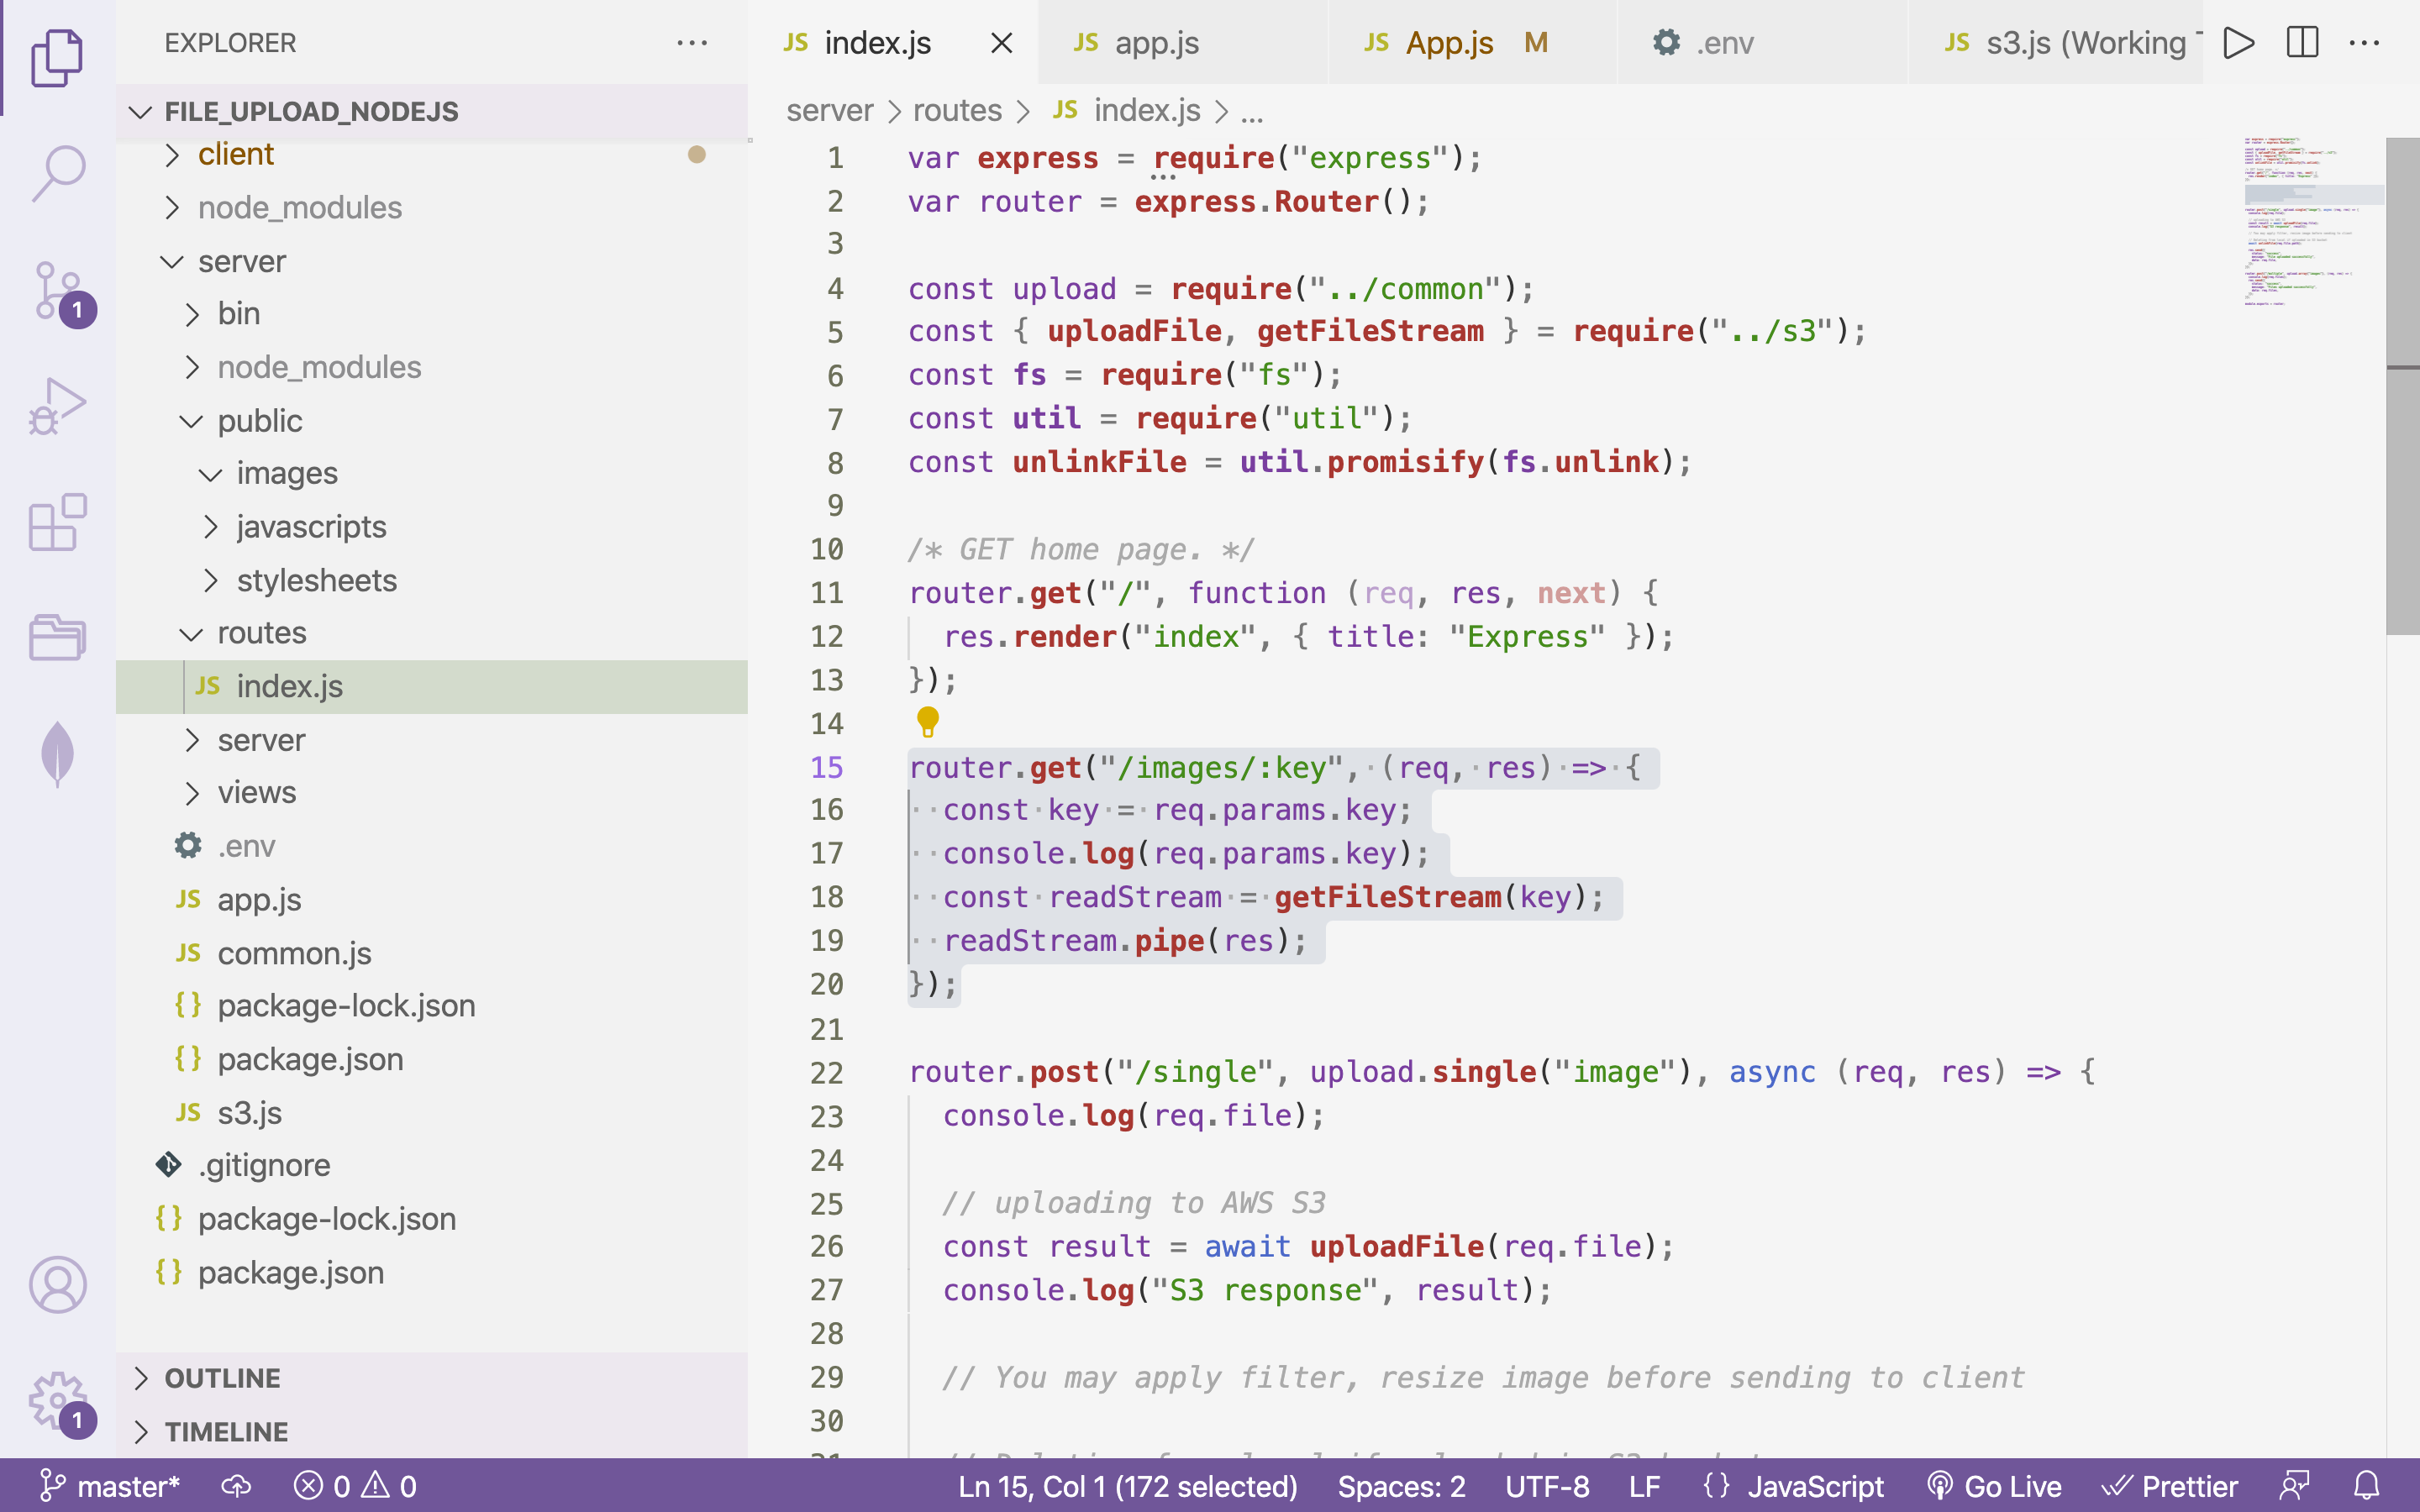
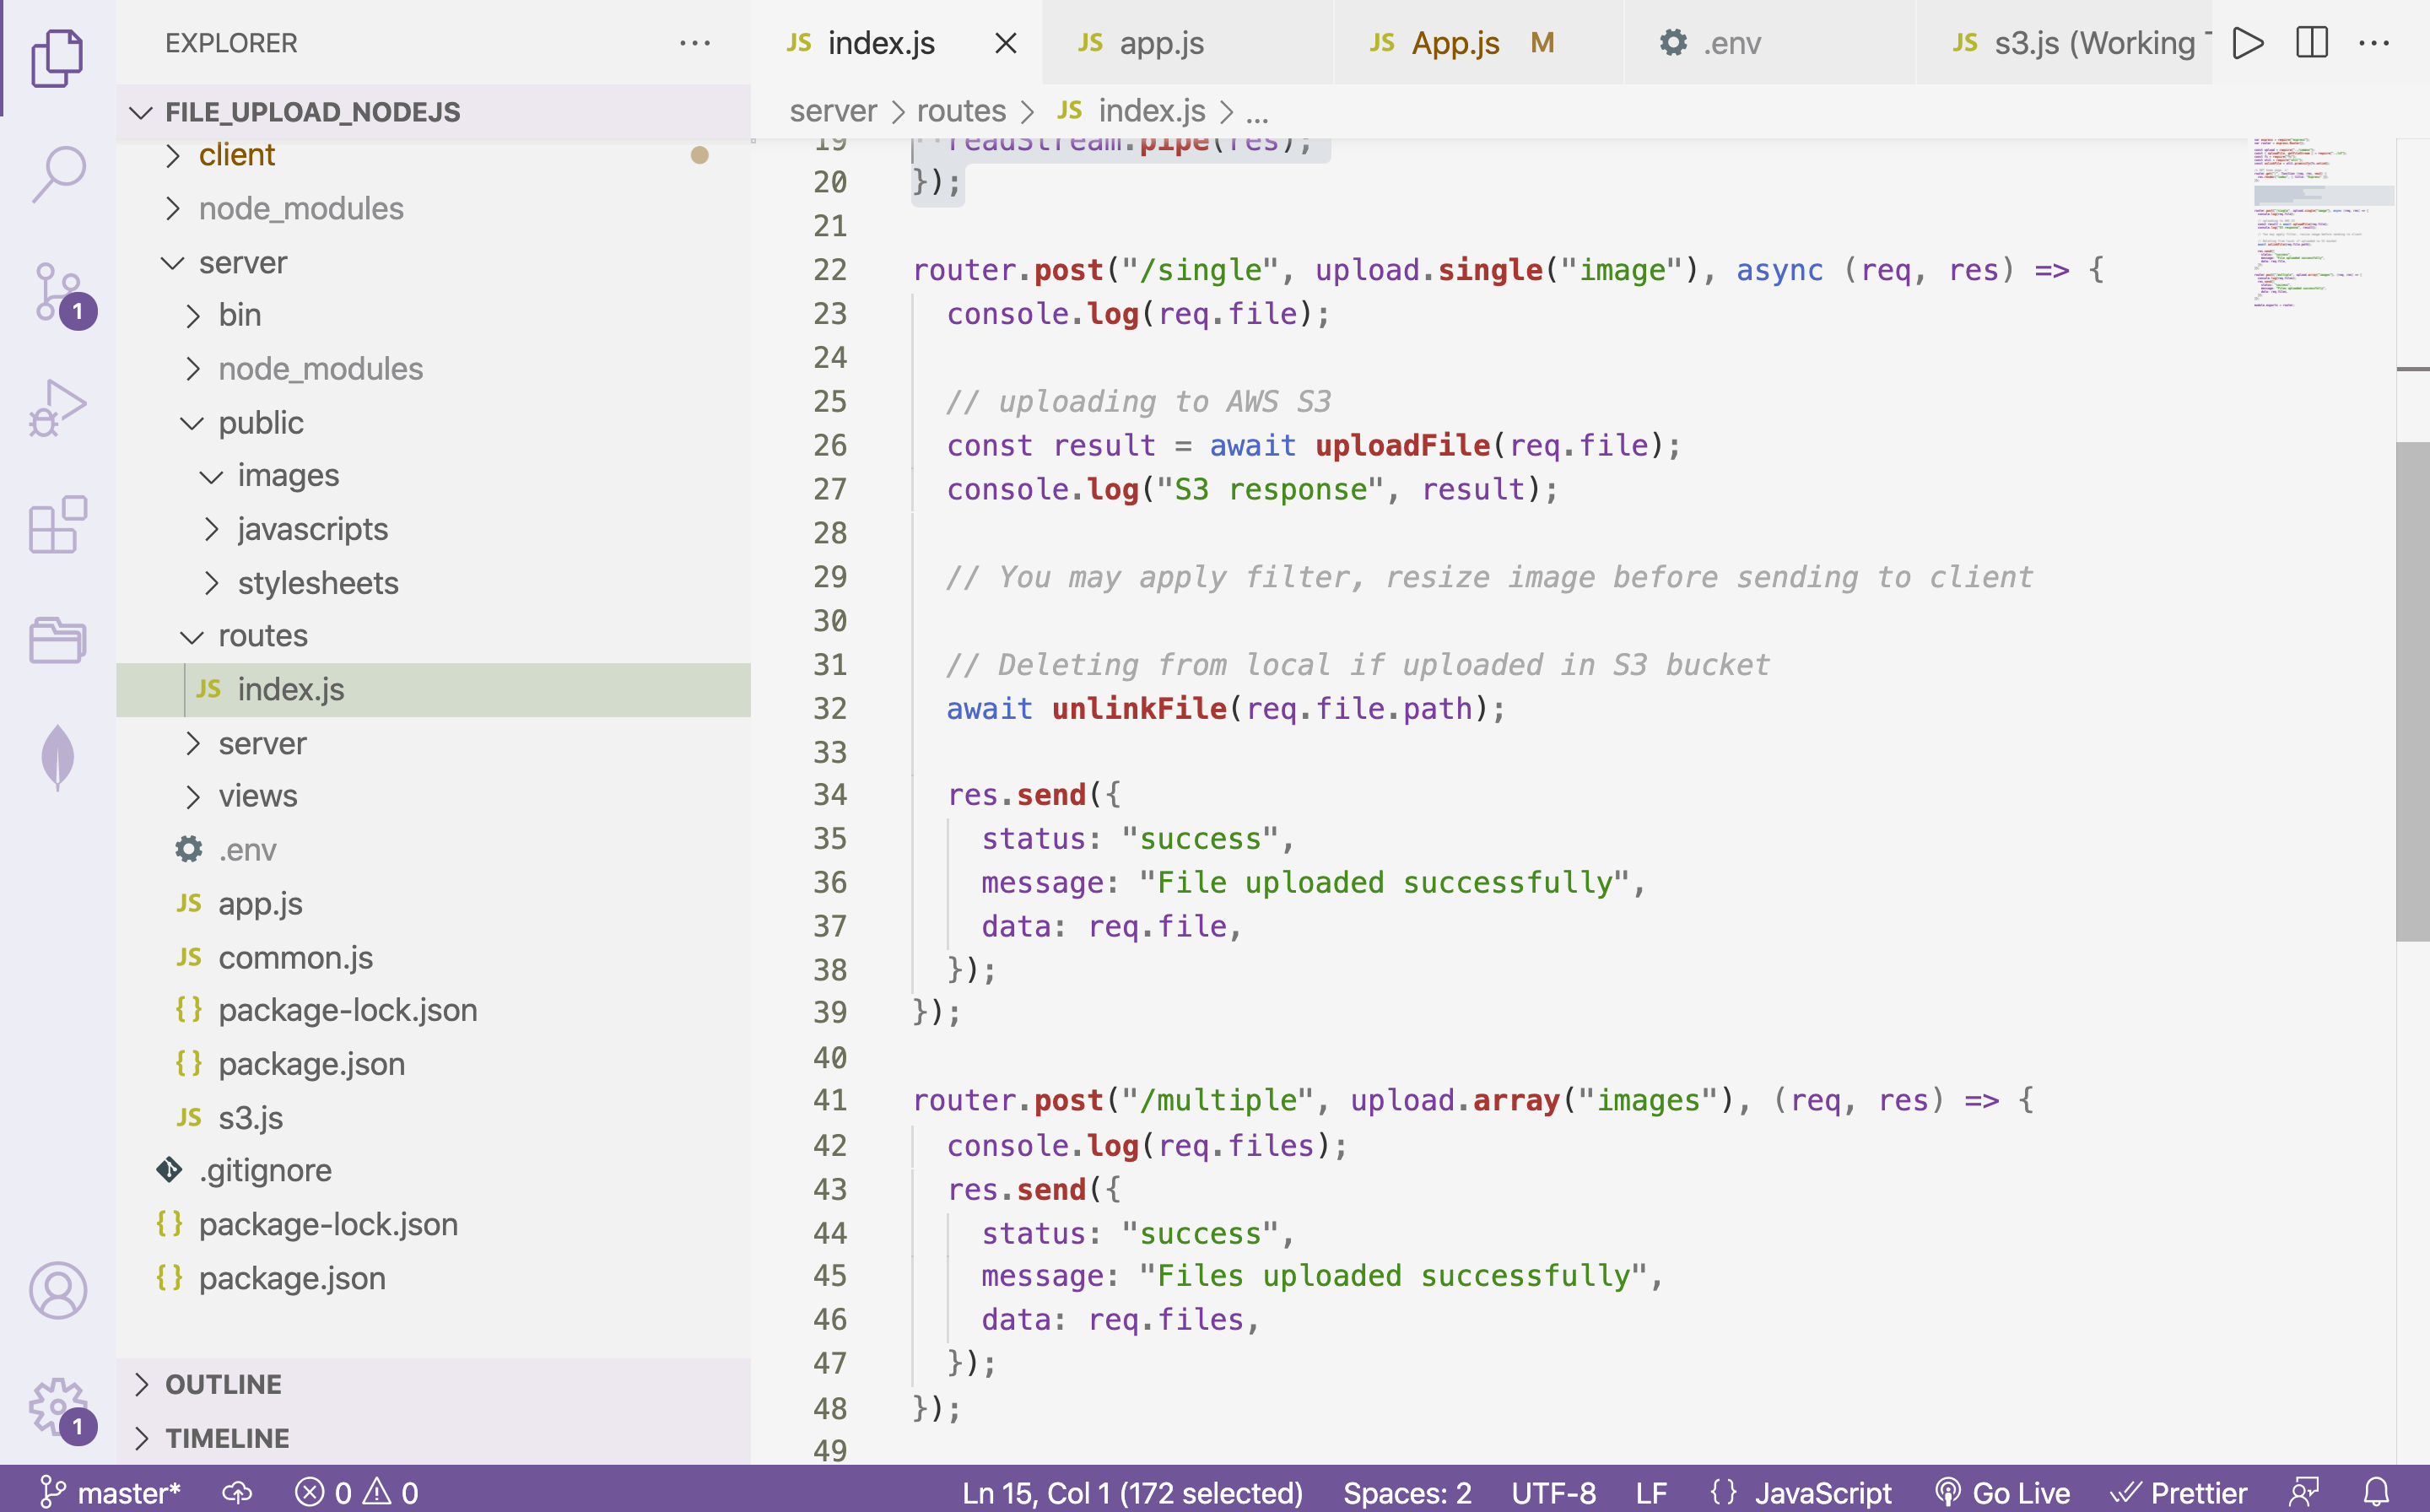
router.**get**("/images/:key", (req, res) => {

  const key = req.params.key;

  console.**log**(req.params.key);

  const readStream = **getFileStream**(key);

  readStream.**pipe**(res);  // this line will make image readable

});

// eg <serverurl>/images/[1636897090753-Coffee_book.jpeg](https://s3.console.aws.amazon.com/s3/object/aws-daily-files?region=ap-south-1&prefix=1636897090753-Coffee_book.jpeg) // to be used in client
→ In the frontend, we will utilize the **S3 response key **and use it in the client

Video:
Repository:
https://github.com/AmirMustafa/upload_file_nodejs
Closing Thoughts:
We have learnt how to upload and read files from the AWS S3 bucket.