OpenAPI
OpenAPI defines some standards which are used;
-
for the design of RESTful web servers,
-
for testing APIs, without accessing source codes,
-
for the documenting of APIs
You can inform the users of your APIs with OpenAPI about
-
the endpoints
-
CRUD operations
-
Authentication methods
-
Contact information
Swagger
Swagger is a set of open-source software tools built around the OpenAPI Specification with which we can build, document, and test our APIs.
You can get more information about Swagger from its web site.
In this article, I will talk about;
-
how to implement Swagger to a RESTful web server built with Node.js
-
Swagger UI
-
API documentation
I will go on to tell assuming that you are familiar with Node.js and RESTful API concepts at least at a basic level and I will use VS Code as the code editor.
Firstly let's create a RESTful web server:
I navigate the cursor to the file I will create the project in the terminal and I am creating the package.json file with the following command:
npm init --y
Since I won't use a database in the project, let's create fake data. For that, I am creating a file called data.js and adding an array that consists of some info in JSON format. The scenario of the fake data is that some authors and their posts.
data.js file
Now let's add the packages that are necessary to create the server:
npm install express cors morgan body-parser dotenv
For the convenience of Syntax;
i) let's add the babel modules to the project:
npm install @babel/core @babel/node @babel/preset-env
ii) let's create the .babelrc file and add the following code:
{
  “presets”: [“@babel/preset-env”]
}
And finally, let's add the following code to scripts field in the package.json file.
“start”: “nodemon — exec babel-node src/index.js”,
If you don't have nodemon in your PC, I advise installing it globally.
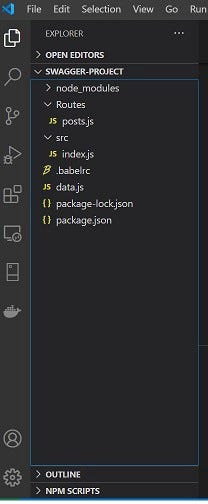
And then let's create the src/index.js file and add the following codes:
As you can see, we will reach the posts.js file which includes the APIs, from index.js file with /posts endpoint.
Now let's create the posts.js file and add to it CRUD operations:
the posts.js file
In the last case, the project files should look like this:
Now we have a RESTful web server that runs on the 4001 port. You can run it simply with the npm start command. You can test the CRUD operations with Postman.
Maybe you find it a little complicated that testing APIs with Postman. Here Swagger comes into play.
Adding Swagger to the project
Firstly, let's install two modules that are necessary for documentation and user interface (UI):
npm install swagger-jsdoc swagger-ui-express
And I am importing these two modules in the index.js file:
import swaggerUI from “swagger-ui-express”;
import swaggerJsDoc from “swagger-jsdoc”;
And now, in index.js let's make some necessary definitions for documentation of APIs and implementation of Swagger UI:
The options variable is an OpenAPI object. It is possible to give some information regarding APIs with this (title, version information, contact information, etc.).
For more information, you can check this link.
And we see that implementation is possible only with one single line code.
It will be more clear when we see the definitions underthe definition field on the display. Note that the server URL and APIs are specified in the options variable.
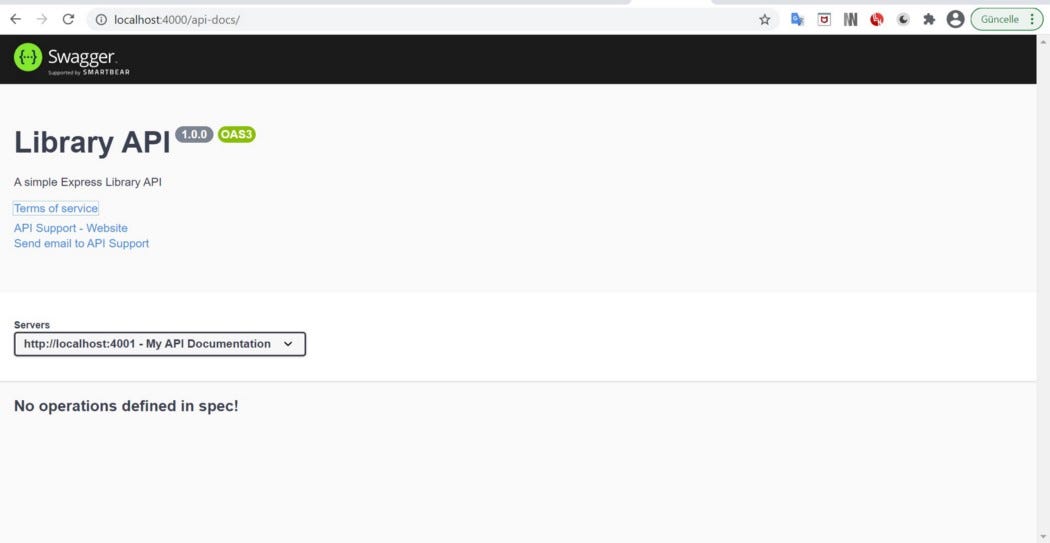
Now we can display Swagger UI with /api-docs endpoint after we run the server:
And now we can make the specifications that will display and run our APIs that are in the Routes/posts.js file on the Swagger screen. We used the JSON format to define the options variable in the index.js file. But we will use the YAML format for schema definitions. (It is possible to use both formats).
Components Object
I am beginning by defining the Components Object. This object is defined to be used in various parts of the documentation. We can say that is a schema of the data we will use. Unless it won't be called by any property of documentation, it has no effect on APIs.
For more information about how to add more properties to Components Object, you can check this link.
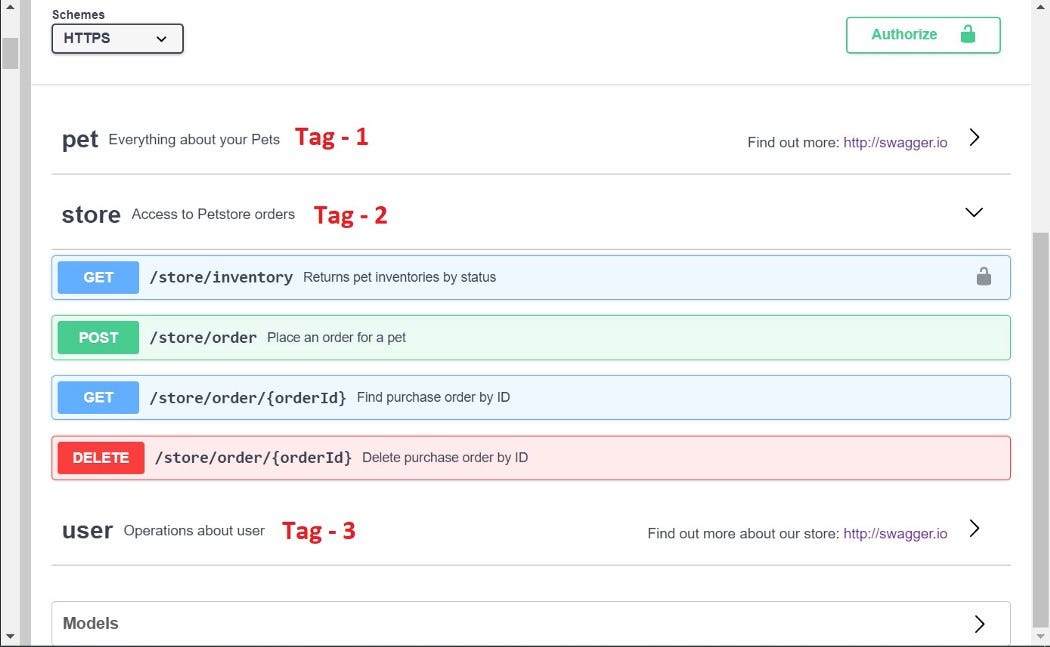
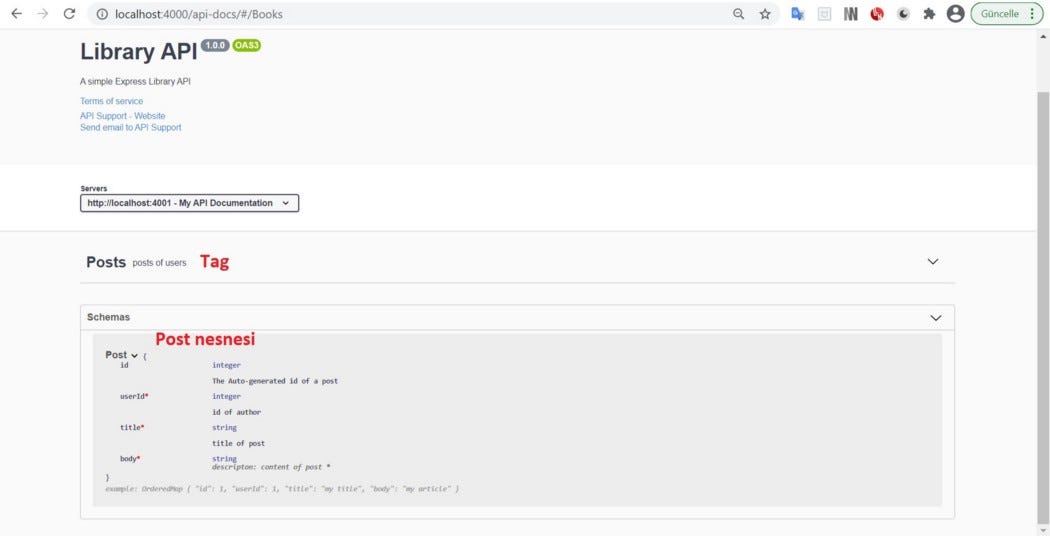
Tags
With the Tags feature of Swagger we can create a list of Tags with which we can distinguish which function on Swagger UI belongs to which data. Since we have APIs that belong just to the Posts data, there won't be confusion about API functions. But in the documentation that includes APIs related to multiple data, Tags are inevitable.
Let's try to understand the Tag issue better with a screenshot from another RESTful API documentation:
Our user interface (UI) looks like this yet:
Documentation of HTTP Methods
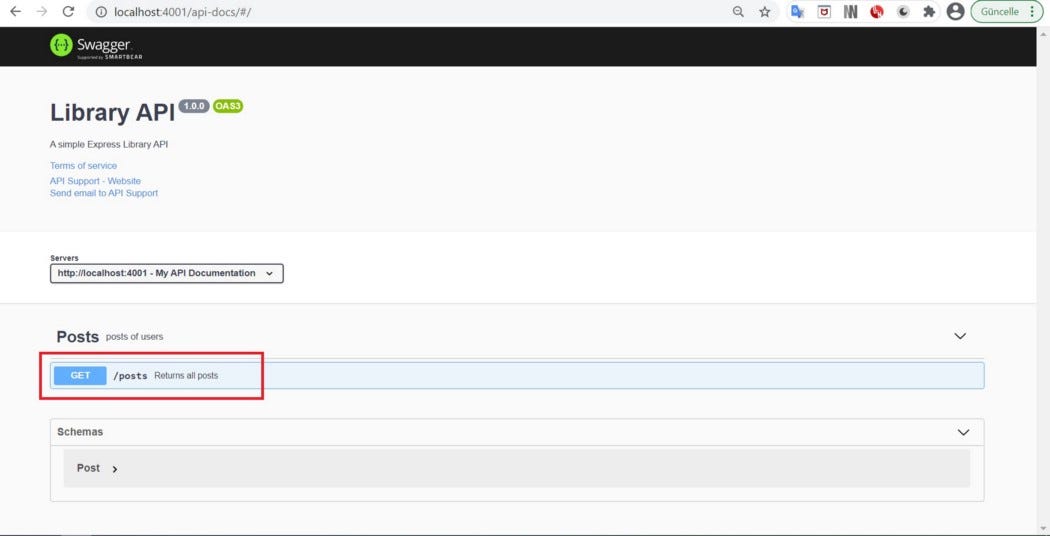
GET Method
Let's start with the documentation of the GET operation:
If you need to talk about, first we specified the endpoint:
/posts
Then we added a description and specified to which tag it belongs. Then we added responses information.
For more information on the documentation of HTTP Methods, you can check this link.
For more information on the responses object, you can check this link.
We will see that the *GET *function has been added to the Posts Tag on Swagger UI:
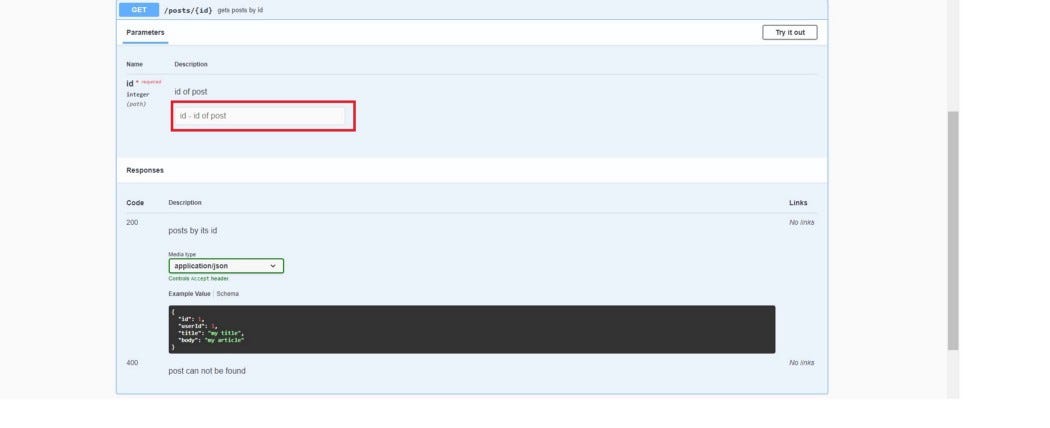
GET Method with parameter
Now let's make the documentation of the function that calls a single post by the id:
Note that unlike the previous one, the id is added to the path as /posts / {id}. Since we now need a parameter in the function to be able to call a post by its id, a parameters object has been added to the documentation. Since we have chosen the “adding the parameter to the path” method while accessing the API, the following statement is included under the parameters field.
-in : path
It is also possible to do this in different ways.
For more information on the parameters object, you can check this link.
The GET method that calls data by the id parameter will look like this in the interface:
POST Method
Now let's make the documentation of the POST method that add a new post to current data:
With the above documentation, the POST button (green one) shown below will be added in the Swagger interface:
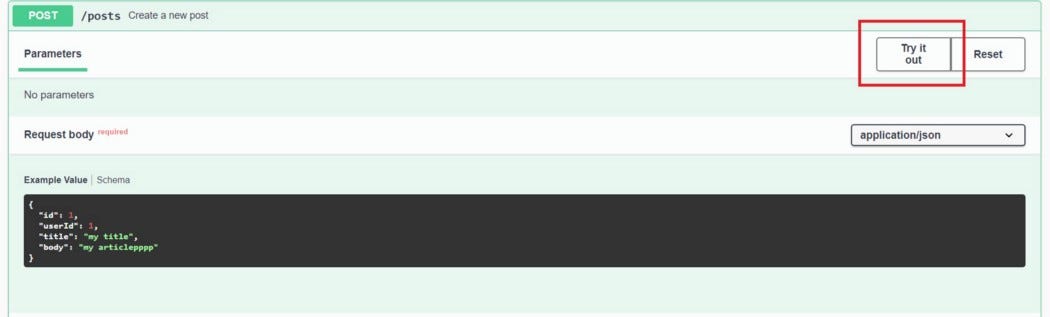
When we look at the documentation, we will see the requestBody field, unlike the others. This provides us an area in which we can create a new post in the POST function in the Swagger UI. This area will open when the Try it out button is clicked. An example post object in the schema we defined at the beginning comes as default in this area. Fields can be changed on the example if desired.
For more information about requestBody, you can check this link.
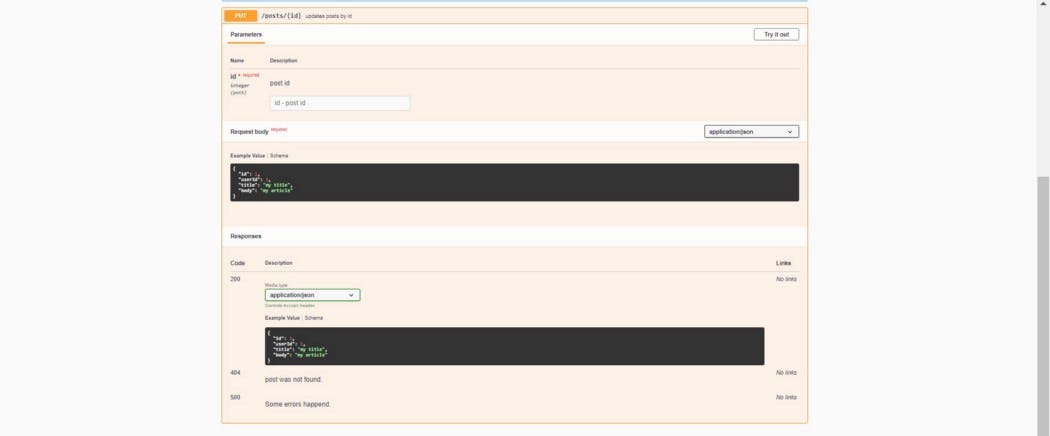
PUT Method
As it is known, in the RESTful approach, existing datas are updated with the PUT function. For this, the id of the data to be updated is usually required. Therefore, we add a parameter field to the documentation of the PUT function and the expression {id} right after the / post endpoint. To update the properties of the data captured with its parameter, we add requestBody as in the POST function. We add the 404 response to the responses section for the case of the absence of data belonging to the entered id information:
The put operation on the Swagger display will look like this:
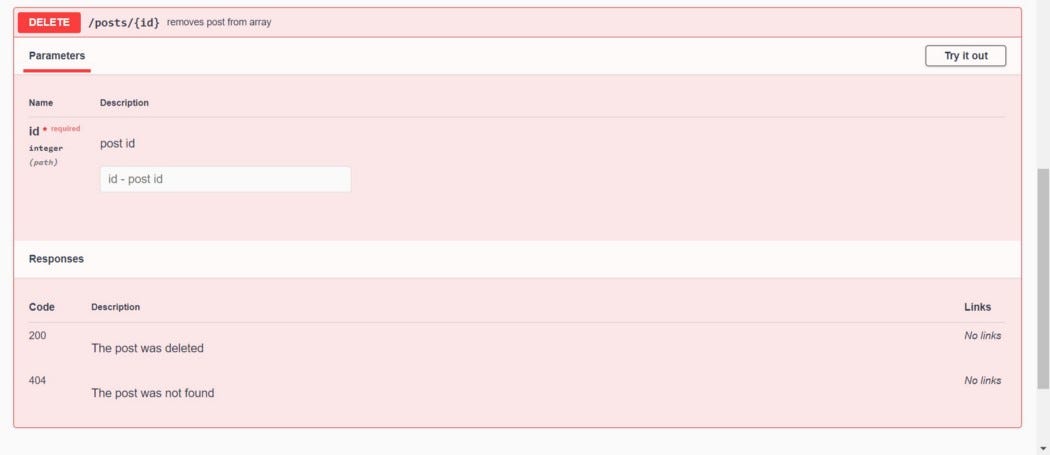
DELETE Method
It is usually sufficient to give only one id to the function to delete data. We do so too. For this, we add the parameter field and the responses field that will show us the responses, to the documentation:
The delete operation on the Swagger display will look like this:
Conclusion
In this article, we talked about how to document RESTful APIs in a web server created in Node.js with the OpenAPI approach. We talked about which setting-ups can be made to view this documentation on the Swagger UI. We created a model project together.
You can access this project from the following Github link.
Comments
Loading comments…