
AWS Lambda is an AWS serverless computing service that comes under the Compute category. Simply, you can run a code written in Java, Python, Node.js, etc, and run it in there. Regardless of the language, it is obvious that most of the time we will need to use some external libraries for our task. If we do the development locally, adding libraries is straightforward. For instance, if you are writing Python code you have pip install
So, We have two approaches basically.
- Do the development locally with your external libraries and upload it to the Lambda console as a zip file or container file (This is called a deployment package).
- Add external libraries as layers.
Using deployment packages is fine, but it has the downside of requiring you to reupload the code to Lambda for even minor changes.
What are the advantages of using layers then?
- Once you have created a layer, you can use it over multiple functions written in the same language.
- Can have multiple versions for a library.
- You can simply write the code in Lambda and do inline editing. This is so much easier than using a deployment package.
Let's go through step by step how we can add a layer to a Node.js Lambda function. Please note that adding layers is not limited to Node.js. The idea is the same even for other languages, only a few things would be changed.
The library we are going to use well-known uuid, which is widely used to create unique Ids.
Create the function
- Go to the Lambda console and create a function. You need to provide a name and specify the runtime.
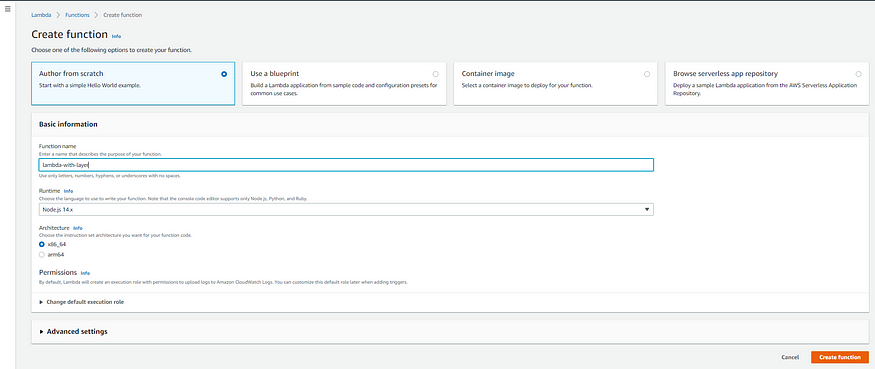
Create function
- Add the following code.
const { v4: uuidv4 } = require('uuid');

exports.handler = async (event) => {

// TODO implement

console.log('uuid: ', uuidv4());

};
- Click the Test button and it will ask you to create a Test event. Give an event name and create the event.
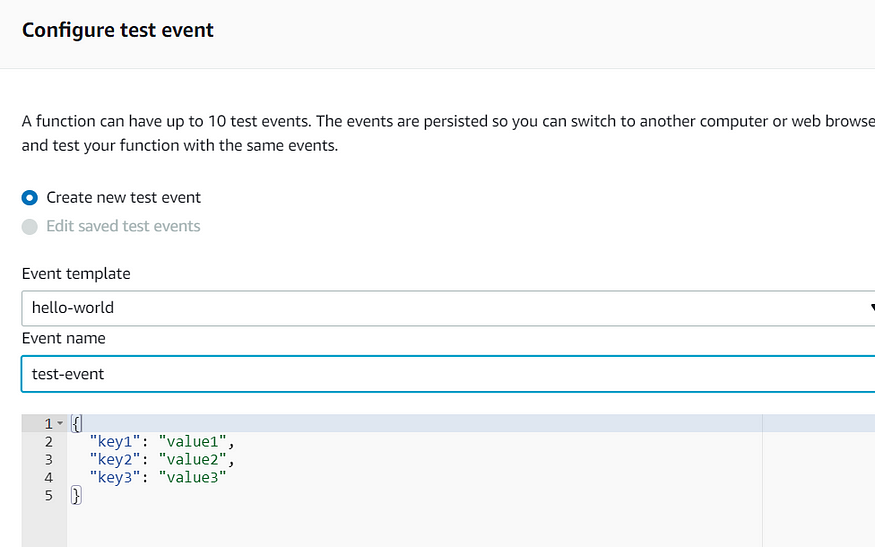
Create test event
- Now you can test the function. Click on the test button and you will see the following.
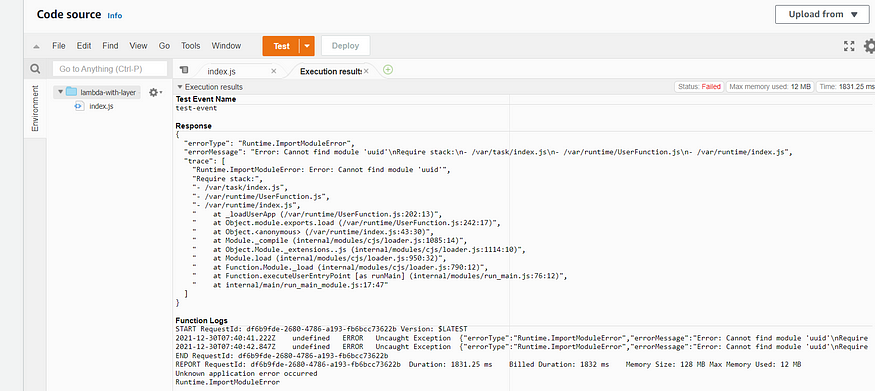
Test the function
Yes, we got the error “Cannot find module ‘uuid' ”. This is obvious because there is no such thing as uuid in AWS Lambda.
To resolve this we can add the uuid library as a Lambda layer.
Create Layer
- Create a folder as “nodejs” in your computer. Please note that nodejs is not a random name. This is the exact name that should be given to it.
- Open a command terminal inside the “nodejs” folder you created. Type following command.
npm init -y
- Install the package you need. In this case, it is uuid. We can install the library via the following command.
npm i uuid
Now we can see the package has been installed.

nodejs folder
- Make a zip file of nodejs folder.

nodejs zip folder
That's it. Now we can upload this to Lambda.
Add layer to Lambda
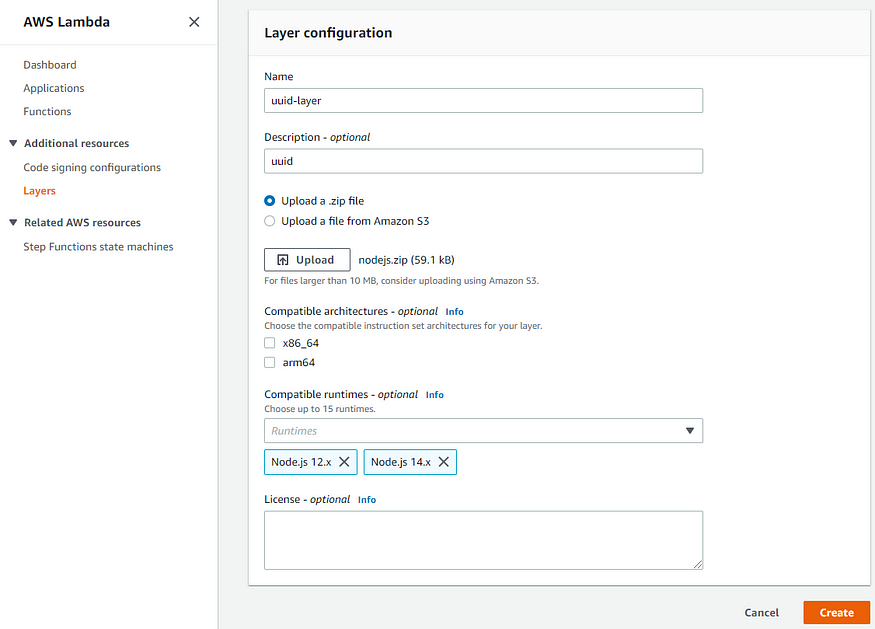
- Expand the left navigation panel of the Lambda console. Select Layers and click on Create Layer.
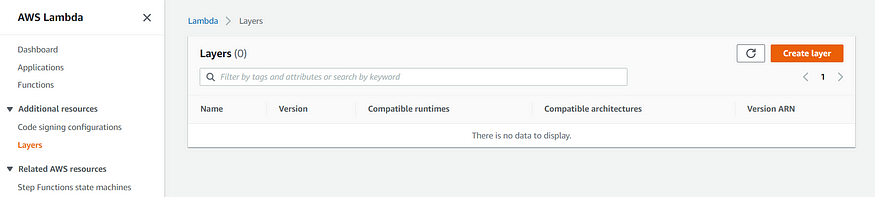
Create layer
- Provide name and runtime. You can provide multiple runtimes as well. Upload the zip file you created and click on Create button.
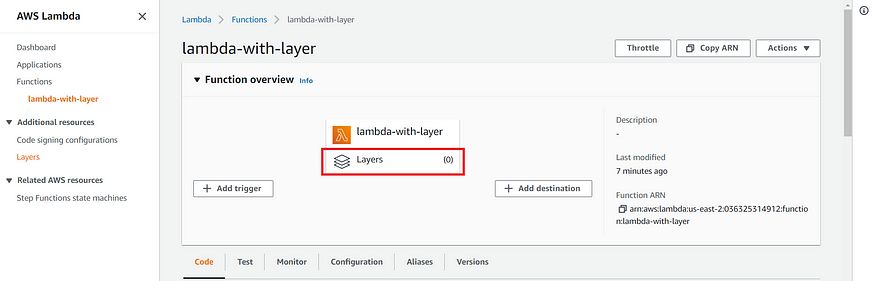
- After creating the layer, Go to the Lambda function and click on Layers.
- Select Custom layers. Then choose the layer we just added and the version. Click Add.
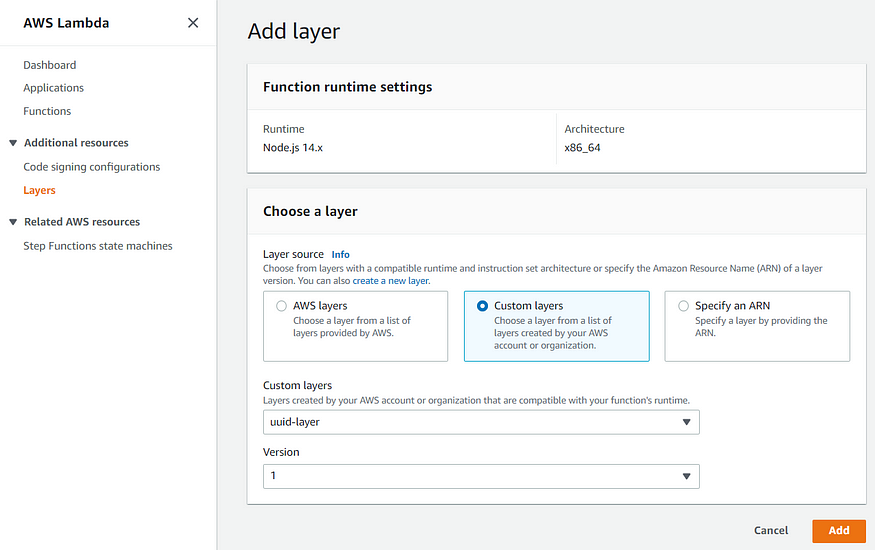
Add layer
That's it. You have successfully added the layer to Lambda. Now you can use this layer for another Lambda function as well, not only this one.
Let's see the output now. Click the Test button. Here we go!.

Execution result
We got the output!
Please note that you can add only up to 5 layers for a function and the unzipped package should not exceed 250 MB.
Hope you find this helpful.
Happy coding!
Comments
Loading comments…