
One of the easiest ways you can improve any data that you publish, is to utilise JavaScript to make it sortable. Whilst this can be done server-side using a dynamic architecture, it’s not necessarily the best choice there, let alone in a static environment where we have no other option.
Progressive enhancement
I’m going to present a technique with uses Unobtrusive JavaScript to enhance existing content, if possible. For any readers who do not have JavaScript available, they won’t miss out on the core content: whatever data it is that we’re presenting. Whilst they won’t be able to sort it — for a static site, this is the best we can offer — they will still be able to view the data.
Note that, in a dynamic environment, you could still layer this technique on top of a server-side sort fallback. The links that will be used to sort each column could send different values in URL parameters, which a backend script uses to generate the appropriately-sorted content. The JavaScript approach presented here could then be modified very slightly to, where JavaScript is available, replace those links and use the client-side version. The only significant challenge is ensuring the backend and frontend versions work in exactly the same way; easier if you use something like Node.js.
The markup
We’re looking to sort data, so this should be presented in the most appropriate form: a table. We’ll try to require as few additions as possible, to ensure maximum separation of content from functionality.
Here’s a basic bare-bones example which you can download from the accompanying GitHub repository:
<!doctype html>
<html lang="en">
<head>
    <meta charset="utf-8" />
    <title>Easy table sorting with JavaScript</title>
    <link rel="stylesheet" href="styles.css" />
</head>
<body>
    <table>
        <thead>
            <tr>
                <th>Game</th>
                <th>Price</th>
                <th>Release date</th>
                <th>Rating</th>
            </tr>
        </thead>
        <tbody>
            <tr>
                <td>Super Mario Odyssey</td>
                <td>49.99</td>
                <td>October 27, 2017</td>
                <td>97</td>
            </tr>
            *<!-- the actual examples includes more rows here -->*
       </tbody>
    </table>
    <script src="sort-table.js"></script>
</body>
</html>
Note that this example specifies thead and tbody elements which are optional in HTML5. Since these elements add structure, they also add potential for a more accurate —or simply more straightforward — implementation. As a rule of thumb, it’s usually a good idea to include elements, even if they’re optional, if they add valuable structure such as this.
Without any added extras (and a bare minimum of styling), the basic table looks like this:
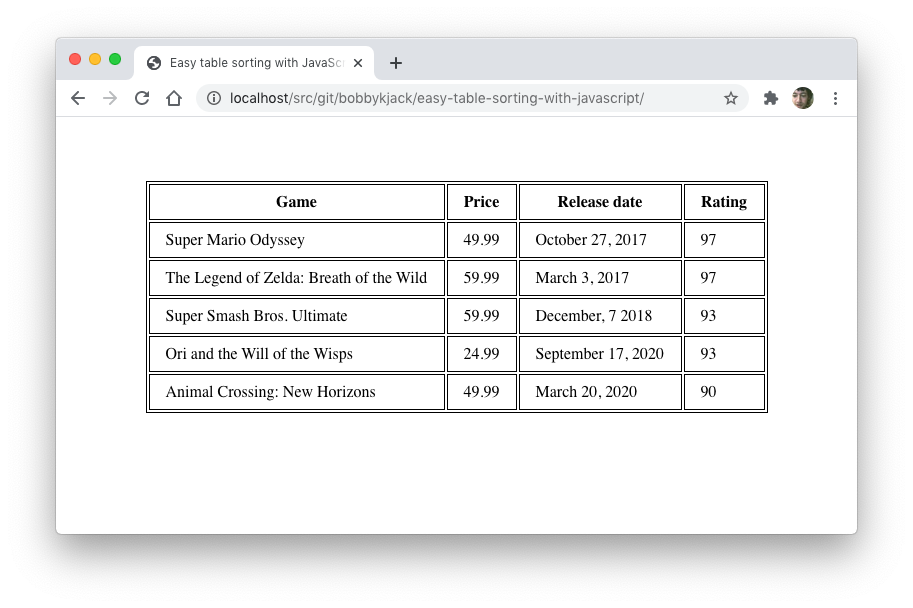 Initial data table before any alterations
Preparing the markup
It’s good practice to keep the markup as clean as possible, in order to maintain the strictest separation between content and behaviour. To that end, we could just leave it at that, but when it comes to sorting tables in our document (and across a whole site), it’s unlikely that we want every single one to be sortable. The cleanest way of communicating our intent is with a class named ‘sortable’. This allows multiple sortable tables on one page, and the class name is perfectly semantic, so the added ‘footprint’ on the document is minimal.
<table **class="sortable"**>
...
</table>
We’ll revisit this approach later when it comes to sorting different types of data. Now, I’ll go through the JavaScript, sort-table.js, in some detail. I recommend opening that link in a new window and viewing it alongside the rest of the article.
Setting up the event handlers
The standard way of sorting tables — that most likely to be expected by our visitors — is to click on the corresponding column header. To make it extra obvious, we’ll begin by injecting hyperlinks around each column header — clicking a header’s link will sort that column.
It’s important to ensure that our method works with multiple tables, and sorts them independently, as expected. Although this example only uses one table on a page, you can easily test it by creating a second. You can also take this opportunity to test a table without the sortable class on, to confirm that it remains unaltered.
Setting up the event handlers involves fetching the required tables from the document, injecting hyperlinks, and adding event listeners to sort the corresponding column.
Start by fetching the table elements using querySelectorAll():
var tables = document.querySelectorAll("table.sortable");
Then we loop through the set and ignore any without a thead element:
for (i = 0; i < tables.length; i++) {
    table = tables[i];

    if (thead = table.querySelector("thead")) {
Next, we wrap each column’s header text in a hyperlink and add an event listener to it:
headers = thead.querySelectorAll("th");

for (j = 0; j < headers.length; j++) {
    headers[j].innerHTML = "<a href='#'>" + headers[j].innerText
        + "</a>";
}

thead.addEventListener("click", sortTableFunction(table));
sortTableFunction is a function that we call which will, itself, produce a function. We pass it the value of the current table in our main loop; this approach helps to avoid a common error which would result in only the final table being sortable:
function sortTableFunction(table) {
    return function(ev) {
        if (ev.target.tagName.toLowerCase() == 'a') {
            sortRows(table, siblingIndex(ev.target.parentNode));
            ev.preventDefault();
        }
    };
}
Note that we check that it was actually a hyperlink that was clicked, rather than any of the whitespace surrounding it in the column header. You can vary this approach if you prefer alternative behaviour. When a link is clicked, the handler inspects its parentNode (the th element) so it can find out which column has been clicked via the siblingIndex function. I won’t present that function here; it simply returns 0 for the first column, 1 for the next, and so on.
At this point, we’ve now added links to column headers which will identify their index and call a yet-to-be-written function, sortRows, passing on the table and column index to be sorted.
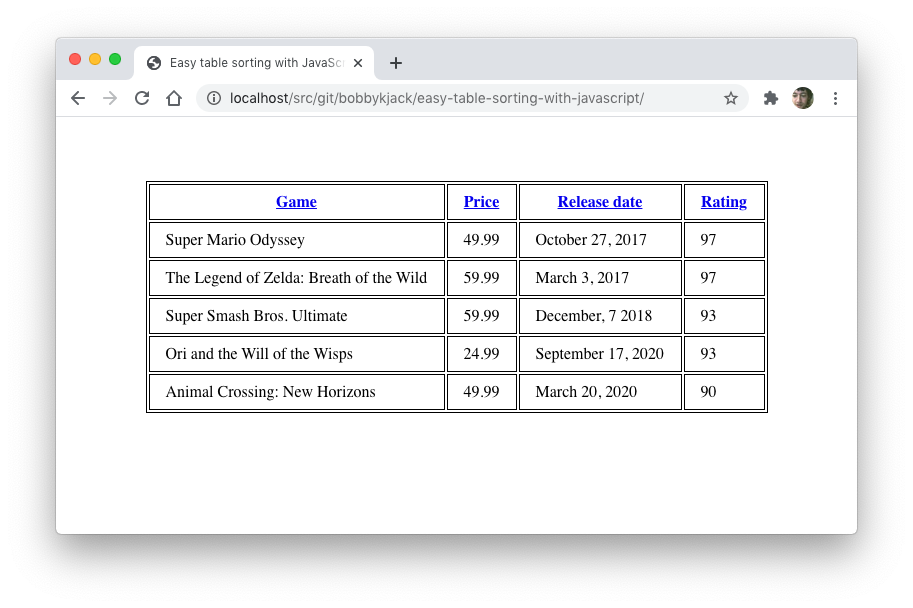 The same table with hyperlinks wrapped around column headers
Sorting the table
Here’s where all the real work takes place, in the sortRows function. We carry this out in three steps:
-
Get all of the values in the specific column and store them in an array.
-
Sort the array using an appropriate function.
-
Position the rows in the table, one-by-one, using the new order.
Step one: Get the values
The function begins by getting all rows from the table’s body, and setting up a selector to get the appropriate table cell (td) based on the columnIndex provided:
function sortRows(table, columnIndex) {
    var rows = table.querySelectorAll("tbody tr"),
        sel2 = "td:nth-child(" + (columnIndex + 1) + ")",
It then loops through the set of rows, fetching each td using that selector:
for (index = 0; index < rows.length; index++) {
    node = rows[index].querySelector(sel2);
Once we have the table cell, we can grab the value inside it:
val = node.innerText;
and store that value in a values array which will hold all the rows we wish to sort:
values.push({ value: val, row: rows[index] });
Note that we’re building up an array of objects, each object storing the actual value alongside a reference to the row — i.e. the tr Node itself. This will prove useful when it comes to reordering the rows in step 3; we’ll sort all the objects in the values array, and each object will have a ready-made reference to the row which can then be added, in order, to the final table.
Step two: Sort the array
Now that we have an array of objects in values, it’s time to sort them. By default, Array.sort() does a String comparison, which might be appropriate for our “Game” column, but isn’t really appropriate for any of the other columns, since they’re numbers.
Actually, it turns out that the default sort is case-sensitive, which is almost certainly not what we want even for the data that is straightforward text; a case-insensitive order is more appropriate.
The Array.sort() method can take an argument which is a user-defined comparison function in the form:
function(a, b) {
         if (a is before b)     return -1;
    else if (a is after b)      return 1;
    else if (b and a are equal) return 0
}
In fact, -1 can be any value less than 0, and 1 can be any number greater than 0. This is very useful because it turns out the default numerical sort function is as simple as:
function sortNumber(a, b) {
    return a - b;
}
We use that function in our code, but indirectly because, as explained in step one, the values we’re sorting are objects.
function sortNumberVal(a, b) {
    return sortNumber(a.value, b.value);
}
So, if we’re sorting a column of numbers, the call looks like so:
values.sort(sortNumberVal);
The full code also presents a sort function for Strings, sortTextVal, and one for dates, sortDateVal. Each of them does a small amount of work to first convert the value into an appropriate one for comparing, then make the actual comparison.
The remaining piece we haven’t covered here, which gets a bit fiddly, is the identification of the type. To an extent, we can ‘guess’ whether we’re looking at numbers or dates or some other type of value, by looking at the values we come across when first fetching them. This is vulnerable to problems though, so a more robust approach is preferred.
I hinted at the solution earlier, and it’s simply to indicate the type of data by including it in the original markup, e.g.
<thead>
    <tr>
        <th>Game</th>
        <th>Price</th>
        <th** class="date"**>Release date</th>
        <th>Rating</th>
    </tr>
</thead>
The sortRows function then uses the Element.classList method to check the type of the data in the column it’s asked to sort, e.g.
if (classList.contains("date")) {
Step three: position the rows
Once the values array has been sorted, all that remains is to order the rows according to their order in the objects in that array. A valuable property of the Node.appendChild() method is that it can move an existing Node without having to worry about its current position: just specify what needs to be moved (e.g. each row) and where to move it to (the end of the table’s body):
for (var idx = 0; idx < values.length; idx++) {
    table.querySelector("tbody").appendChild(values[idx].row);
}
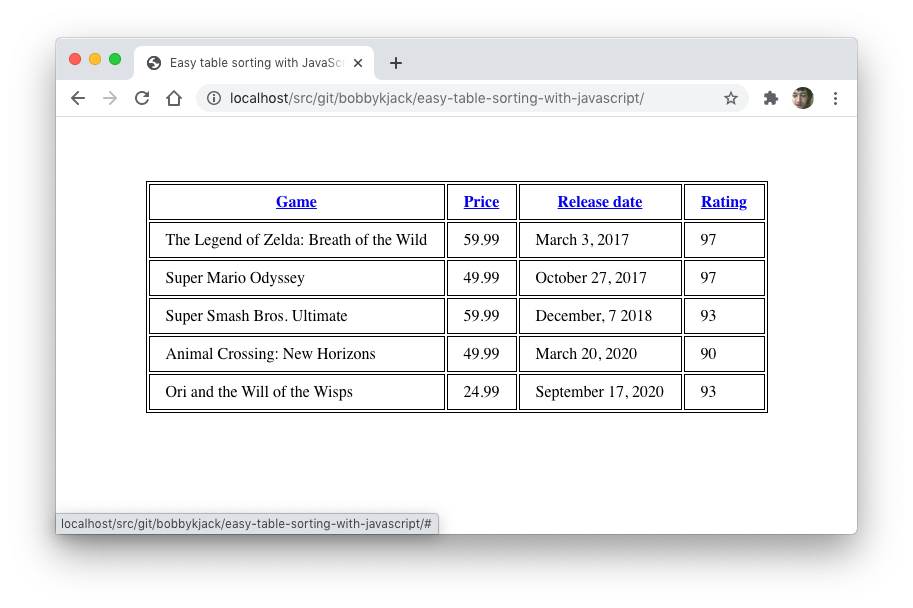 The table reordered, after the “Release date” column has been clicked
Summary
Although it might seem like quite a lot of work, just to sort some values in a table, we now have a solution that is fairly portable across any data that’s presented in a table, across an entire site. Just add the sortable class to any existing table, include the script, and you’re good to go.
A generic ‘Unobtrusive JavaScript’ approach should result in code that is highly portable and reusable.
You can view and interact with this example on my site, or explore the repository on GitHub further.
Further exercises
For a more complete solution, consider some of the following enhancements:
-
Handling more types: consider a unique class value for each type and a separate function which sorts values of that type
-
Indicating which column is sorted: add a class to a header when it’s clicked, style that class using CSS
-
Indicating which column is initially sorted: use the same class as the previous step, just add it to the markup
-
Catering for reverse sort order: when a column is sorted and it’s clicked a second time, add a ‘reverse’ class and use Array.reverse() after values have been sorted
Comments
Loading comments…