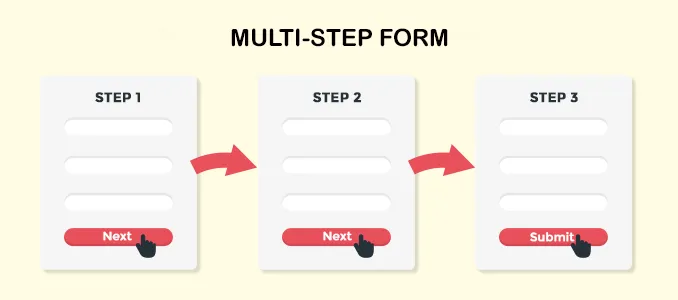
Online registration forms usually consist of long lists of fields for the user to enter. Dividing the long forms into smaller sections makes them more readable. This results in what is called a multi-step form. Such forms improve the user experience. Building multi-step forms have proven to be difficult for a lot of frontend developers.
In this article, I will show you step-by-step how to build such forms using Vue.js.
Step 1: Create a new Vue project called MultiStepForm. Read the Vue Project setup here.
vue create MultiStepForm
Step 2: In the components folder, create a Vue component and name it Multiform.vue. Divide it into three parts, template, scripts, and styles.
<template></template>

<script></script>

<style></style>
Step 3: Inside the template tags, create an
<template>

 <div>
  <article>
    <header></header>

    <section></section>
   </article>
 </div>

</template>
Step 4: Inside the header section add a
Then using the v-for, loop through the formGroup array. This formGroup will be defined later in the script section.
<header>

     <div
       :*class*="{'active':index === formPosition}"
       *v-for*="(step, index) in formGroup"
       :*key*="'step'+index"
     >
       {{ index + 1 }}
     </div>

</header>
Step 5: In the
<section :*class*="animation">
     <h2>{{ formGroup[formPosition].title }}</h2>
     <div>
     <div
       *v-for*="(field, index) in formGroup[formPosition].fields"
       :*key*="'field'+index"
     >

   <input *type*="text" *v-model*="field.value"  *required*>
      <label>{{ field.label }}</label>
     </div>
     </div>
   <div>

</div>
   </div>

</section>
Step 6: Below the input tag, add two buttons. These buttons will be conditionally displayed depending on formPosition. The v-if directive will be used to achieve this.
<section :*class*="animation">
     <h2>{{ formGroup[formPosition].title }}</h2>
     <div>
     <div
       *v-for*="(field, index) in formGroup[formPosition].fields"
       :*key*="'field'+index"
     >

<input *type*="text" *v-model*="field.value"  *required*>
      <label>{{ field.label }}</label>
     </div>
     </div>
   <div>

<button
     *v-if*="formPosition +1 < formGroup.length -1"      @*click*="nextStep">
     Next
   </button>

<button
     *v-if*="formPosition +1 === formGroup.length -1">
    Enter
   </button>

</div>
   </div>

</section>
The final template section will look like this below.
<template>
 <div>
  <article>
    <header>

     <div
       :*class*="{'active':index === formPosition}"
       *v-for*="(step, index) in formGroup"
       :*key*="'step'+index"
     >
       {{ index + 1 }}
     </div>

    </header>

<section :*class*="animation">
     <h2>{{ formGroup[formPosition].title }}</h2>
     <div>
     <div
       *v-for*="(field, index) in formGroup[formPosition].fields"
       :*key*="'field'+index"
     >

<input *type*="text" *v-model*="field.value"  *required*>
      <label>{{ field.label }}</label>
     </div>
     </div>
   <div>

<button
     *v-if*="formPosition +1 < formGroup.length -1"      @*click*="nextStep">
     Next
   </button>

<button
     *v-if*="formPosition +1 === formGroup.length -1">
    Enter
   </button>

</div>
   </div>

</section>
   </article>
   </div>

</template>
Step 7: In the <script> tag add two properties to the data object. The first one is formPosition which will be incremented each time the Next button is clicked.
The second one will be the animation which will store the CSS class name.
<script>
  export default {
  data: () => {
    return {
             formPosition: 0,
             animation: 'animate-in',


  }}}

</script>
Step 7: Next, add another property called formGroup which will hold the data to display on the form fields as it transitions.
<script>
  export default {
  data: () => {
    return {
             formPosition: 0,
             animation: 'animate-in',
             formGroup: [
               {title: "Personal Details",
                 fields: [
                   {label: "First Name", value: "" },
                   {label: "Second Name", value: ""},
                   {label: "Age", value: ""},]},
               {title: "Address",
                 fields: [
                   {label: "City", value: ""},
                   {label: "Zip Code", value: ""},
                   {label: "County", value: ""},
                   {label: "State", value: ""},]},
               {title: "Academic Details",
                 fields: [
                   {label: "Academic qualification", value: ""},
                   {label: "College Attended", value: ""},
                   {label: "Year of completion", value: ""},]},
                ]}},

methods: {
     nextStep(){
      *this*.animation = 'animate-out';
      setTimeout(() => {
      *this*.animation = 'animate-in';
      *this*.formPosition += 1;
     }, 600);
     },}

</script>
Step 8: Next, add a method that that will change the CSS class name to display the next form group.
methods: {
     nextStep(){
      *this*.animation = 'animate-out';
      setTimeout(() => {
      *this*.animation = 'animate-in';
      *this*.formPosition += 1;
     }, 600);
     },}}
Next, add the CSS styles.
<style>

*.animation-in* {
   transform-origin: left;
   animation: in .6s ease-in-out;
}
*.animation-out* {
   transform-origin: bottom left;
   animation: out .6s ease-in-out;
}

</style>
The final Multiform.vue component must look like this below.
<template>
 <div>
  <article>
    <header>

     <div
       :*class*="{'active':index === formPosition}"
       *v-for*="(step, index) in formGroup"
       :*key*="'step'+index"
     >
       {{ index + 1 }}
     </div>

    </header>

    <section :*class*="animation">
     <h2>{{ formGroup[formPosition].title }}</h2>
     <div>
     <div
       *v-for*="(field, index) in formGroup[formPosition].fields"
       :*key*="'field'+index"
     >


      <input *type*="text" *v-model*="field.value"  *required*>
      <label>{{ field.label }}</label>
     </div>
     </div>
   <div>

   <button
     *v-if*="formPosition +1 < formGroup.length -1"      @*click*="nextStep">
     Next
   </button>

   <button
     *v-if*="formPosition +1 === formGroup.length -1">
    Enter
   </button>


   </div>
   </div>

   </section>
   </article>
   </div>

</template>

<script>
  export default {
  data: () => {
    return {
             formPosition: 0,
             animation: 'animate-in',
             formGroup: [
               {title: "Personal Details",
                 fields: [
                   {label: "First Name", value: "" },
                   {label: "Second Name", value: ""},
                   {label: "Age", value: ""},]},
               {title: "Address",
                 fields: [
                   {label: "City", value: ""},
                   {label: "Zip Code", value: ""},
                   {label: "County", value: ""},
                   {label: "State", value: ""},]},
               {title: "Academic Details",
                 fields: [
                   {label: "Academic qualification", value: ""},
                   {label: "College Attended", value: ""},
                   {label: "Year of completion", value: ""},]},
                ]}},

  methods: {
     nextStep(){
      *this*.animation = 'animate-out';
      setTimeout(() => {
      *this*.animation = 'animate-in';
      *this*.formPosition += 1;
     }, 600);
     },}}

</script>

<style>

*.animation-in* {
   transform-origin: left;
   animation: in .6s ease-in-out;
}
*.animation-out* {
   transform-origin: bottom left;
   animation: out .6s ease-in-out;
}

</style>
Step 10: Lastly import the MultiForm.vue component into the App.vue.
<template>
  <div>
   <MultiForm/>
  </div>
</template>

<script>

import MultiForm from './components/MultiForm.vue'

export default {
   name: 'App',
   components: {
     MultiForm
 }
}

<script/>

<style></style>
Run the app
And there we have it. I hope you have found this useful. I will be back with more interesting articles. Thank you for reading.