In this article, I will be walking us through the process of creating a simple form using Streamlit. We will be working with widgets like buttons, sliders picker, text input, text area. Before we get started I recommend you to visit my GitHub page to get the commands used in this article. So, let’s get started.
Watch the video below:
Streamlit is an open-source python framework for building web apps for Machine Learning and Data Science projects. We can instantly develop web apps and deploy them easily using Streamlit. Streamlit allows you to write an app the same way you write a python code. Streamlit makes it seamless to work on the interactive loop of coding and viewing results in the web app.

Installing Streamlit
The first step is to install Streamlit via our terminal; you can go to the command prompt from windows, if you’re using a Windows PC for example, then you do pip install streamlit.

After installation, you want to open up your preferred text editor and then you import the streamlit module using: import streamlit as st
Code Explained:
In the next step, we will be creating a title heading for our form and a subheading:

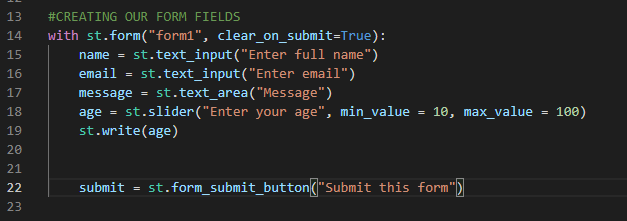
Now we want to create our form fields:
Line 14 creates a function signature of st.form(key, clear_on_submit=False) Here, the key is the “form1” passed as an argument. “clear_on_submit” If True, all widgets inside the form will be reset to their default values after the user presses the Submit button. Defaults to False.
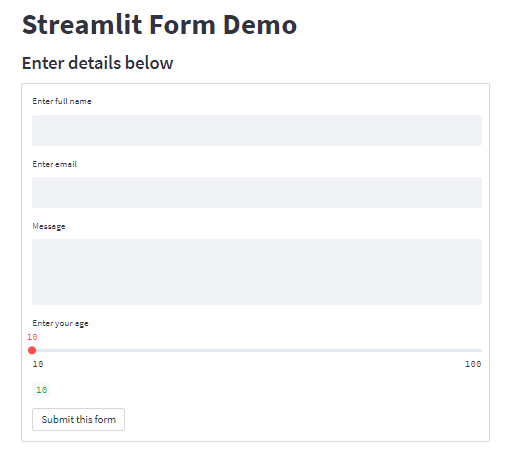
Line 15, 16 & 17 creates an input field for the form. Line 18 creates a slider and sets the slider value automatically. you can therefore pass in two arguments to set the min and max values for your parameter, this can be viewed by entering the code st.write(age) on line 19.

Finally, you can run your code from your terminal using:

streamlit run “nameofpythonfile.py” then press the Enter button. You can now view your Streamlit app in your browser via your Local URL or Network URL automatically.

You can check out the documentation of this form by entering: st.help(st.form)
Visit my GitHub page to get this code.