In this tutorial, we will pick up where we left off with OpenAI API — and create our very own AI copyright tool that we can use to create unique blog articles with the use of GPT-3 Artificial Intelligence (AI) API.
In this tutorial we will cover the following:
-
Using the Online Playground tool to call the API
-
Creating the code in Python
-
Create a Flask application for the blog writer
Using the online Playground to generate blog topic ideas
This online blog writing tool is going to generate an AI blog in three different steps.
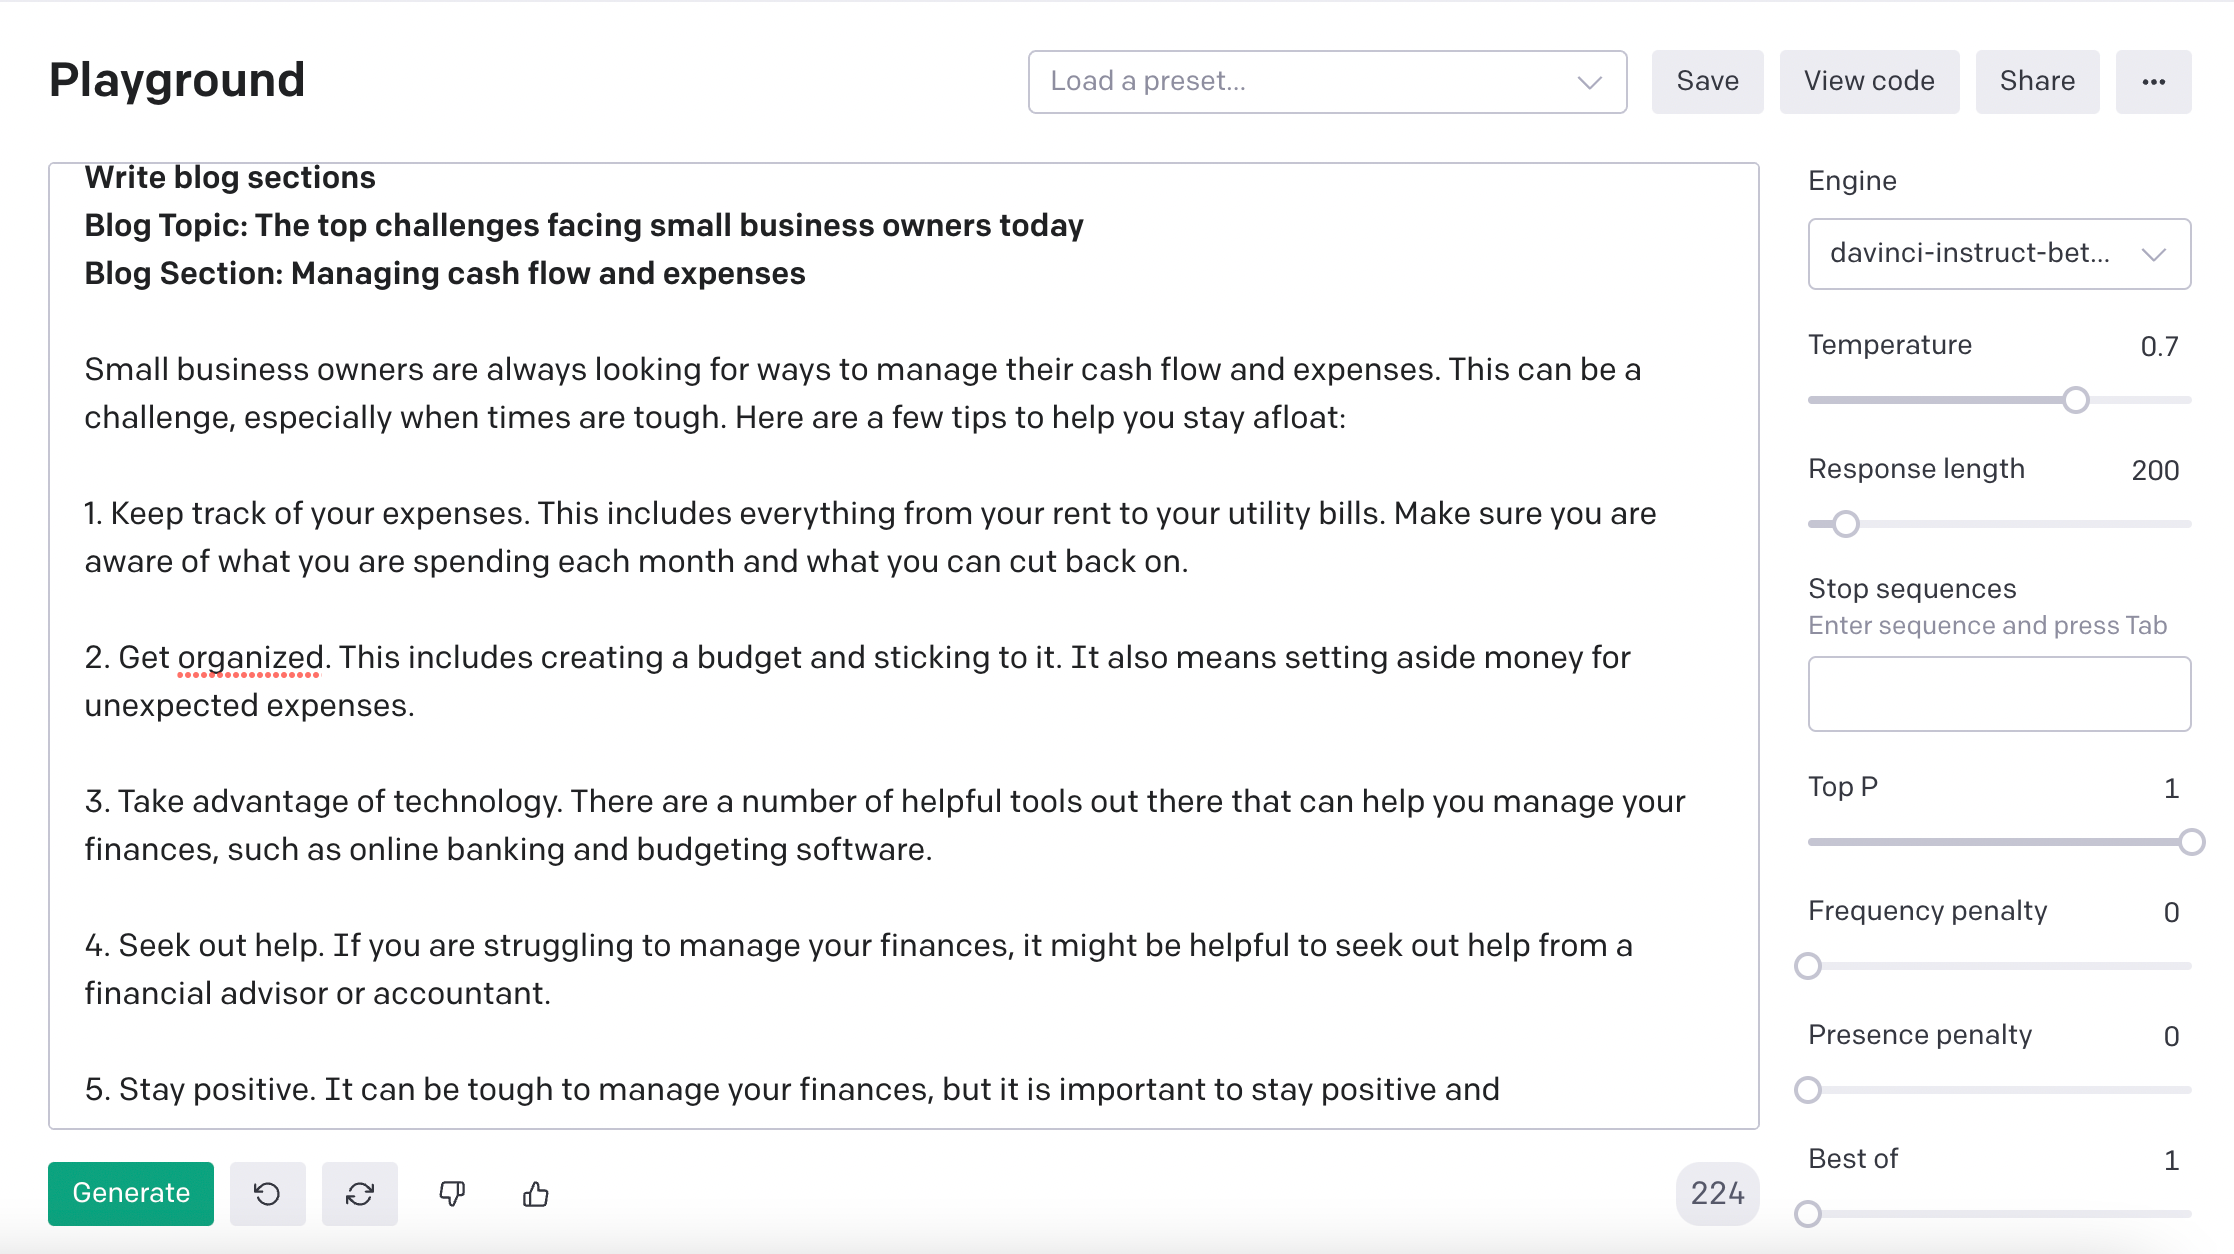
For the playground, we are going to use: davinci-instruct-beta-v3 — AI model to generate our content. So far it works best when it comes to generating unique, blog content for our use case.
Other parameters:
-
Temperature=0.7
-
Response length=between 100 and 200 characters
AI Prompt — the prompt that you use is the most important part of using the OpenAI API. The prompt tells the AI engine what it should return, it's a hint of what is required. If you would like to generate blog topics, then you would say so in the prompt, e.g. “Generate blog topics for xxxxxxxx”
Let us get down to it with some examples:
Step 1 — Generate blog topic ideas from a concept. The GPT-3 tool can help you generate completely random, human-readable blog topic ideas using Artificial Intelligence (AI)

Step 2 — Select one blog topic and generate blog section topics that will break down the blog topic into sections that can be expanded later.
Step 3 — Expand on the blog sections, enter a section topic and write a paragraph or two of blog content.
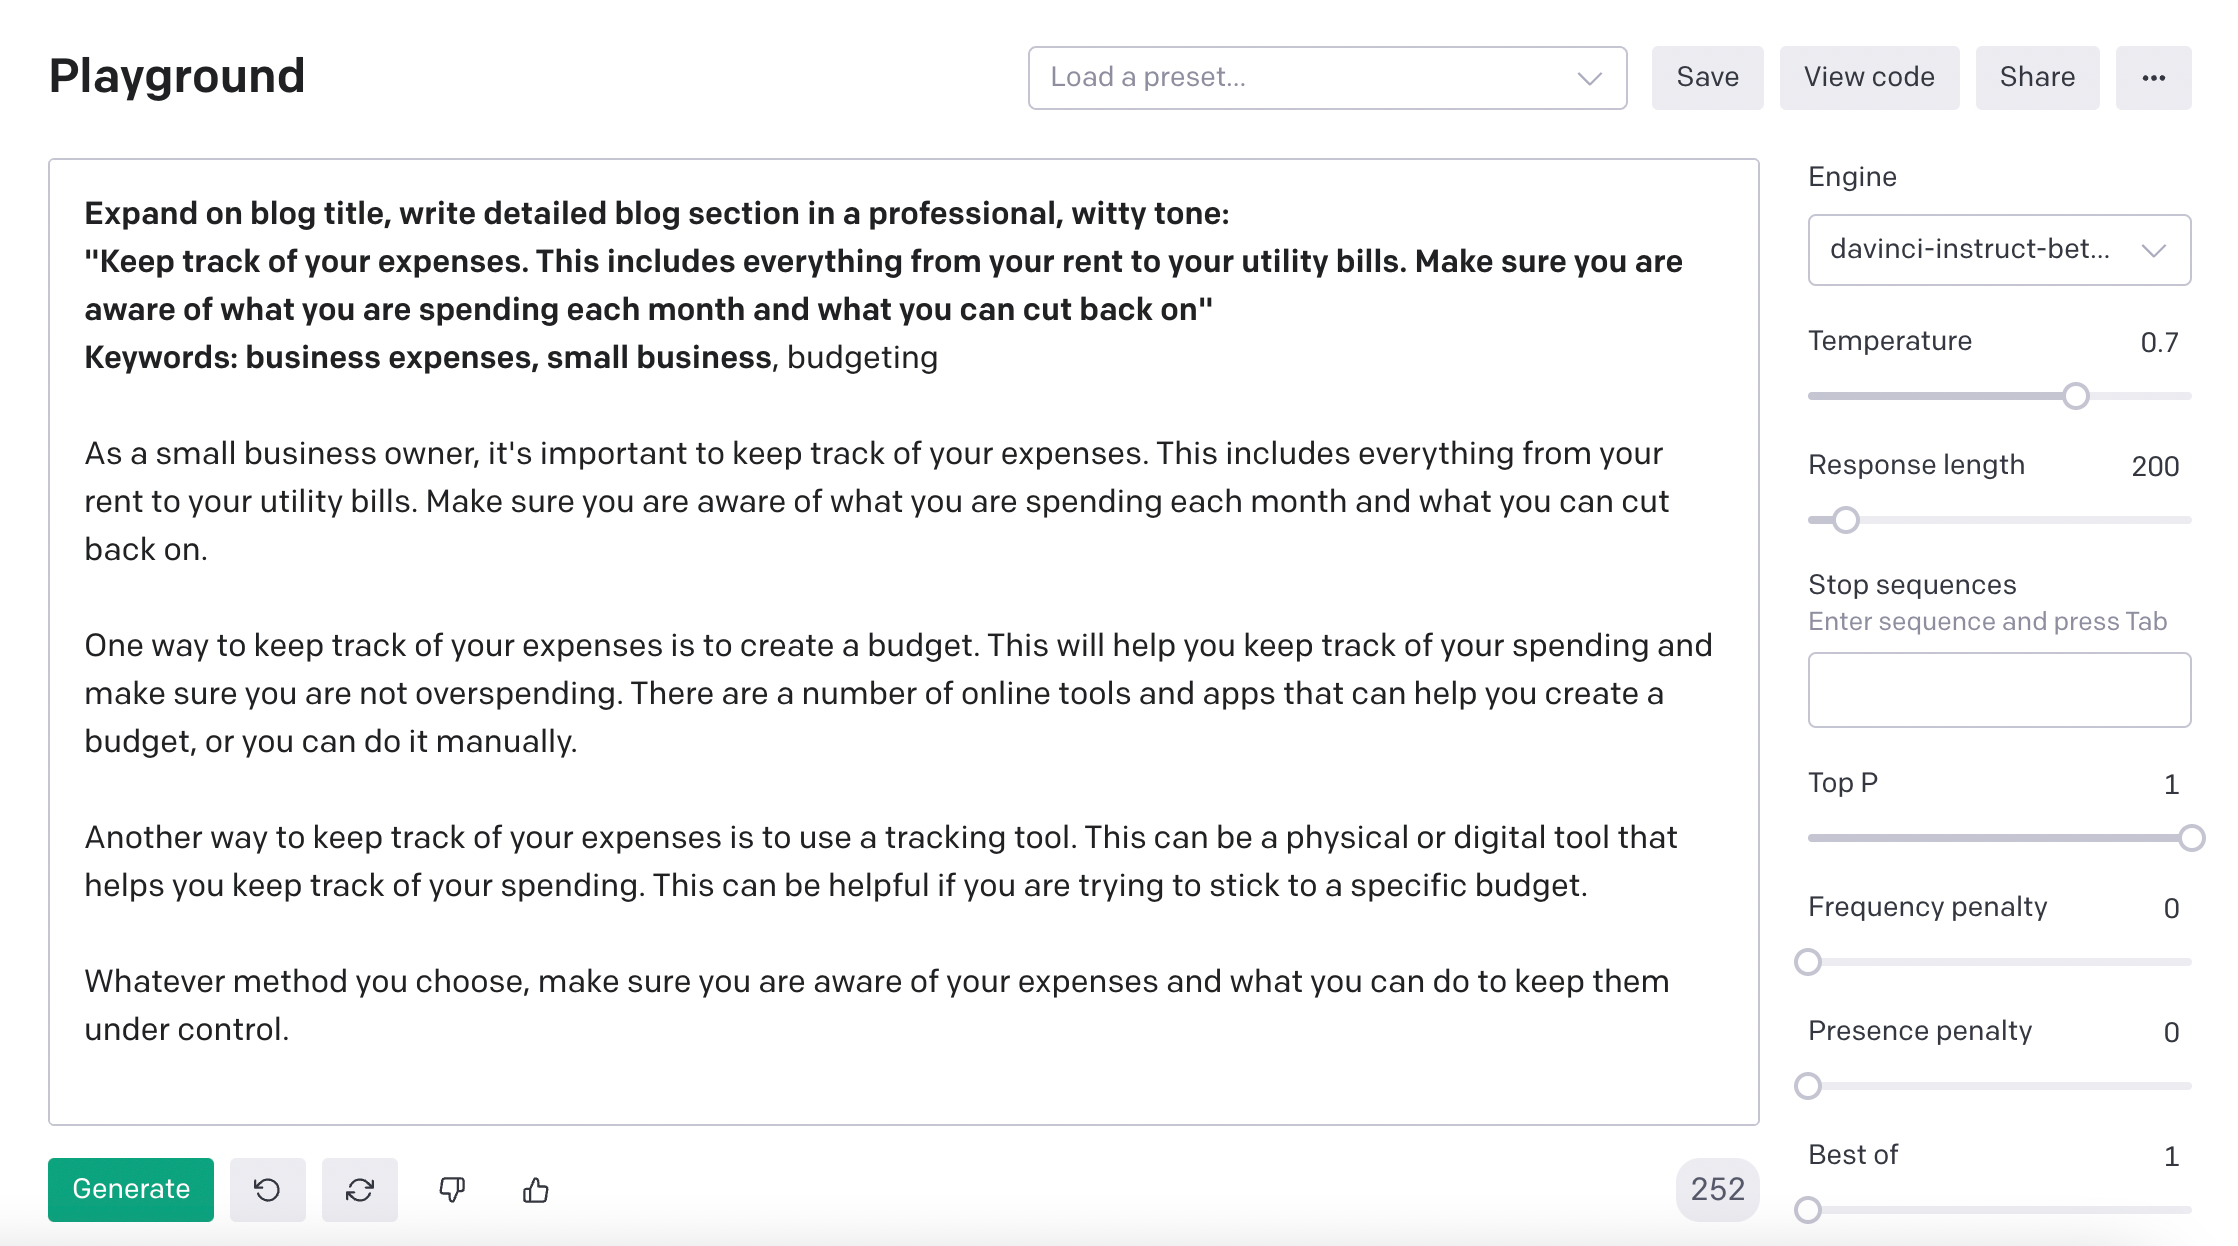
When you combine these three steps above, you have a full AI-generated blog.
Making use of the Prompt
The prompt is what tells the API, what to return — you can enter the use-case, keywords, titles, tone of language, and even the first paragraph of a long story. The AI will think about what should come next, and automatically produce that content for you — until you run out of characters that you have provided the AI.
Creating the Python code
You can immediately copy and paste the code from the playground into your Python file.
The source code is available on our GitHub page here: GitHub - skolo-online/ai-blog-writer-openai: Create an AI blog writing toll with Open AI API *Create an AI blog writing tool with Open AI API. In this video, I'll show you how to create a simple tool for writing…*github.com
The blog.py file will look like this:
import os
import openai
import config


openai.api_key = config.OPENAI_API_KEY


def generateBlogTopics(prompt1):
    response = openai.Completion.create(
      engine="davinci-instruct-beta-v3",
      prompt="Generate blog topics on: {}. \n \n 1.  ".format(prompt1),
      temperature=0.7,
      max_tokens=100,
      top_p=1,
      frequency_penalty=0,
      presence_penalty=0
    )

    return response['choices'][0]['text']

def generateBlogSections(prompt1):
    response = openai.Completion.create(
      engine="davinci-instruct-beta-v3",
      prompt="Expand the blog title in to high level blog sections: {} \n\n- Introduction: ".format(prompt1),
      temperature=0.6,
      max_tokens=100,
      top_p=1,
      frequency_penalty=0,
      presence_penalty=0
    )

    return response['choices'][0]['text']


def blogSectionExpander(prompt1):
    response = openai.Completion.create(
      engine="davinci-instruct-beta-v3",
      prompt="Expand the blog section in to a detailed professional , witty and clever explanation.\n\n {}".format(prompt1),
      temperature=0.7,
      max_tokens=200,
      top_p=1,
      frequency_penalty=0,
      presence_penalty=0
    )

    return response['choices'][0]['text']
Create a Flask Application for the AI Blog Writing Tool with OpenAI API, GPT-3
If you are familiar with Python flask — generate a basic app boilerplate. If you are not sure how just get the code provided in the GitHub repository above.
The contents of the app.py file
from flask import Flask, render_template, request
import config
import blog


def page_not_found(e):
  return render_template('404.html'), 404


app = Flask(__name__)
app.config.from_object(config.config['development'])

app.register_error_handler(404, page_not_found)


@app.route('/', methods=["GET", "POST"])
def index():

    if request.method == 'POST':
        if 'form1' in request.form:
            prompt = request.form['blogTopic']
            blogT = blog.generateBlogTopics(prompt)
            blogTopicIdeas = blogT.replace('\n', '<br>')

        if 'form2' in request.form:
            prompt = request.form['blogSection']
            blogT = blog.generateBlogSections(prompt)
            blogSectionIdeas = blogT.replace('\n', '<br>')

        if 'form3' in request.form:
            prompt = request.form['blogExpander']
            blogT = blog.blogSectionExpander(prompt)
            blogExpanded = blogT.replace('\n', '<br>')


    return render_template('index.html', **locals())


if __name__ == '__main__':
    app.run(host='0.0.0.0', port='8888', debug=True)
The contents of the index.html file.
<!DOCTYPE html>
<html lang="en" dir="ltr">
  <head>
    <meta charset="utf-8" />
    <meta http-equiv="x-ua-compatible" content="ie=edge" />
    <meta name="description" content="" />
    <meta name="viewport" content="width=device-width, initial-scale=1" />

    <title>Skolo</title>
    <!-- Bootstrap CSS -->
    <link
      href="https://cdn.jsdelivr.net/npm/bootstrap@5.1.3/dist/css/bootstrap.min.css"
      rel="stylesheet"
      integrity="sha384-1BmE4kWBq78iYhFldvKuhfTAU6auU8tT94WrHftjDbrCEXSU1oBoqyl2QvZ6jIW3"
      crossorigin="anonymous"
    />
    <link
      rel="shortcut icon"
      type="image/x-icon"
      href="{{ url_for('static', filename='images/favicon.png') }}"
    />
  </head>
  <body>
    <div class="container">
      <h1 class="mt-5">Skolo Online Blog Writing Tool</h1>

      <p>
        The Skolo blog writing tool will allow you to enter a blog topic and
        keywords - and get in return a full blog that you can use anywhere. The
        tool intiially provides a list of topic ideas to choose from, once you
        select a topic, you can go ahead and generate a full content AI blog.
      </p>

      <div class="row">
        <div class="col-lg-6">
          <form class="" action="/" method="post">
            <div class="mb-3">
              <label for="blogTopic" class="form-label"
                >What topic do you want to get blog ideas on?</label
              >
              <input
                type="text"
                class="form-control"
                id="blogTopic"
                name="blogTopic"
                placeholder="Enter a blog topic"
              />
            </div>
            <input type="hidden" name="form1" value="form1" />

            <button type="submit" id="blogTopicButton" class="btn btn-primary">
              Generate Blog Ideas
            </button>
          </form>
        </div>

        <div class="col-lg-6">1. {{blogTopicIdeas|safe}}</div>
      </div>

      <br />
      <hr />
      <br />

      <div class="row">
        <div class="col-lg-6">
          <form class="" action="/" method="post">
            <div class="mb-3">
              <label for="blogSection" class="form-label"
                >Enter the Blog Topic Below that you have selected to write
                about</label
              >
              <input
                type="text"
                class="form-control"
                id="blogSection"
                name="blogSection"
                placeholder="Enter the blog title to generate blog sections on"
              />
            </div>
            <input type="hidden" name="form2" value="form2" />

            <button type="submit" class="btn btn-primary">
              Generate Blog Sections
            </button>
          </form>
        </div>

        <div class="col-lg-6">{{blogSectionIdeas|safe}}</div>
      </div>

      <br />
      <hr />
      <br />

      <div class="row">
        <div class="col-lg-6">
          <form class="" action="/" method="post">
            <div class="mb-3">
              <label for="blogExpander" class="form-label"
                >Enter the Blog section title you want to expand</label
              >
              <input
                type="text"
                class="form-control"
                id="blogExpander"
                name="blogExpander"
                placeholder="Enter the blog section title"
              />
            </div>
            <input type="hidden" name="form3" value="form3" />

            <button type="submit" class="btn btn-primary">
              Expand on the title
            </button>
          </form>
        </div>

        <div class="col-lg-6">{{blogExpanded|safe}}</div>
      </div>
    </div>

    <!-- Option 1: Bootstrap Bundle with Popper -->
    <script
      src="https://cdn.jsdelivr.net/npm/bootstrap@5.1.3/dist/js/bootstrap.bundle.min.js"
      integrity="sha384-ka7Sk0Gln4gmtz2MlQnikT1wXgYsOg+OMhuP+IlRH9sENBO0LRn5q+8nbTov4+1p"
      crossorigin="anonymous"
    ></script>
  </body>
</html>
Comments
Loading comments…