In this blog post, we will deploy a React App to AWS S3 and Cloudfront. The React app is created using the create-react-app boilerplate and uses a dynamic routing with react-router-dom package.
In the last years S3 policy has changed a little bit, AWS introduced a block all public config as default so I will show how you can keep your S3 Private and serve the React App using Cloudfront so you will have both HTTPS by default and you will be using edge location of Cloudfront to speed up the website hosting.
If you prefer watching a video tutorial, you can find it here:
Create React App
Firstly, let’s create the app using npx create-react-app my-app. This command will bootstrap a new React App with a solid structure so we can start playing with it. After the creation, we need to add the basic routing on the main file. We will use the react-router-dom package and copy the basic example from their website.
The final App.js will look like this:
import logo from './logo.svg';
import './App.css';
import {
  BrowserRouter as Router,
  Switch,
  Route,
  Link
} from "react-router-dom";

function Home() {
  return <h2>Home</h2>;
}

function About() {
  return <h2>About</h2>;
}

function Users() {
  return <h2>Users</h2>;
}

function Dashboard() {
  return <h2>This is the Dashboard</h2>;
}


function App() {
  return (
    <div className="App">
      <Router>
      <div>
        <nav>
          <ul>
            <li>
              <Link to="/">Home</Link>
            </li>
            <li>
              <Link to="/about">About</Link>
            </li>
            <li>
              <Link to="/users">Users</Link>
            </li>
            <li>
              <Link to="/dashboard">Dashboard</Link>
            </li>
          </ul>
        </nav>

        {/* A <Switch> looks through its children <Route>s and
            renders the first one that matches the current URL. */}
        <Switch>
          <Route path="/about">
            <About />
          </Route>
          <Route path="/users">
            <Users />
          </Route>
          <Route path="/dashboard">
            <Dashboard />
          </Route>
          <Route path="/">
            <Home />
          </Route>

        </Switch>
      </div>
    </Router>
    </div>
  );
}

export default App;
Now, if we run npm run start , the App will show a simple navigation menu where we can navigate through the different pages that we have just created. Our App is ready to be deployed.
Create S3 Bucket
Amazon’s S3 buckets are a popular option for storing static assets. One of the most common use cases of S3 is storing images for display on a web or mobile app.
-
Log into your AWS Account
-
Navigate to the S3 service and click
Create Bucket. Make up a name for your new bucket, I will usemy-example-app-deployment. -
In the
Set Permissionsstep, leave all the boxes checked. Your S3 bucket will remain private and the website will be served using Cloudfront.
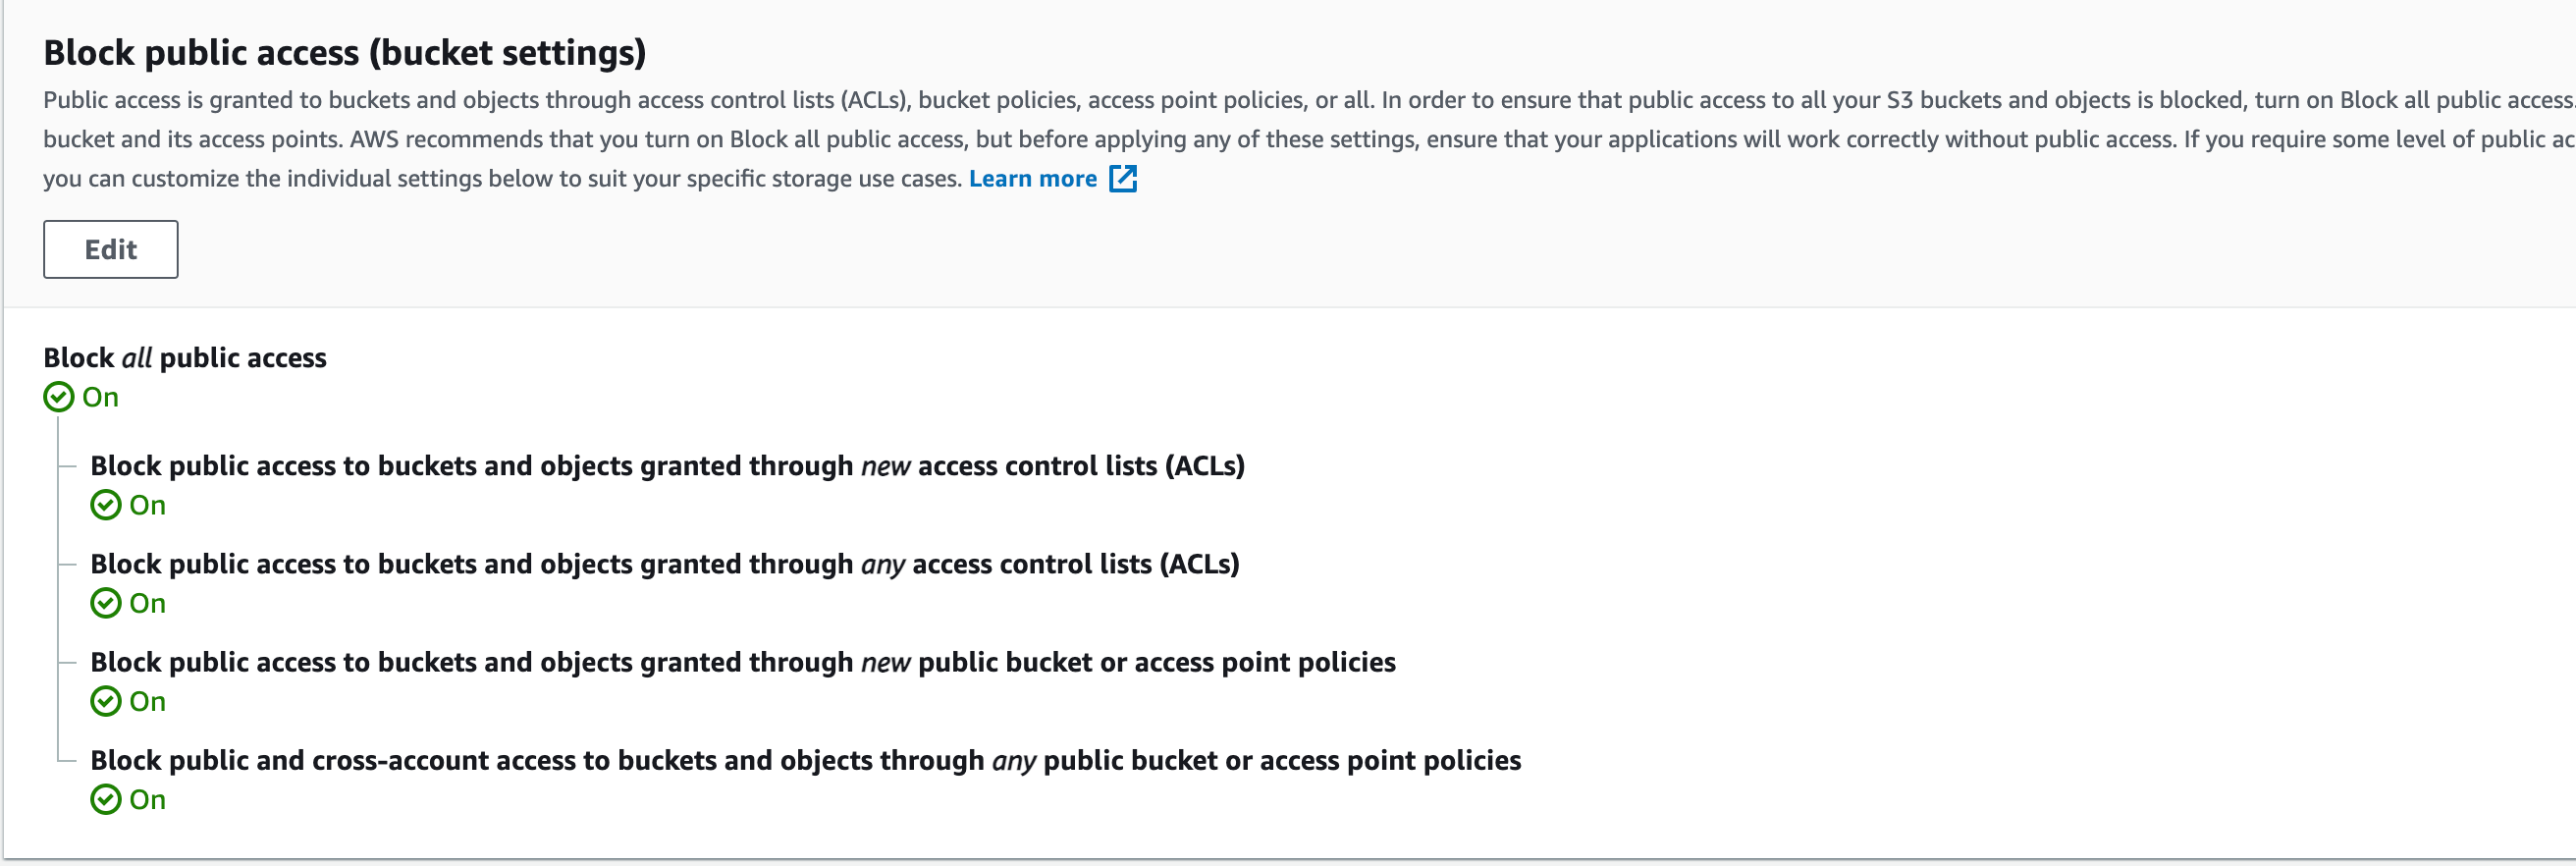
- You don’t need to enable the “Static Website hosting”, indeed the S3 bucket will be used only to host the files and not the website itself.

- Click Create Bucket.
Create AWS CloudFront Distribution
The next step is to create the AWS Cloudfront distribution. CloudFront is the Content Delivery Network (CDN) service offered by AWS. CDNs optimize for speed by pushing your content out to edge locations, making it highly available around the globe.
-
Go to the
CloudFrontservice in the AWS console, clickCreate Distributionand choose Web Distribution. -
Select your Origin Settings. The
Origin Domain Namechoices pre-populate with S3 buckets. Selecting yours will also populate theOrigin ID.
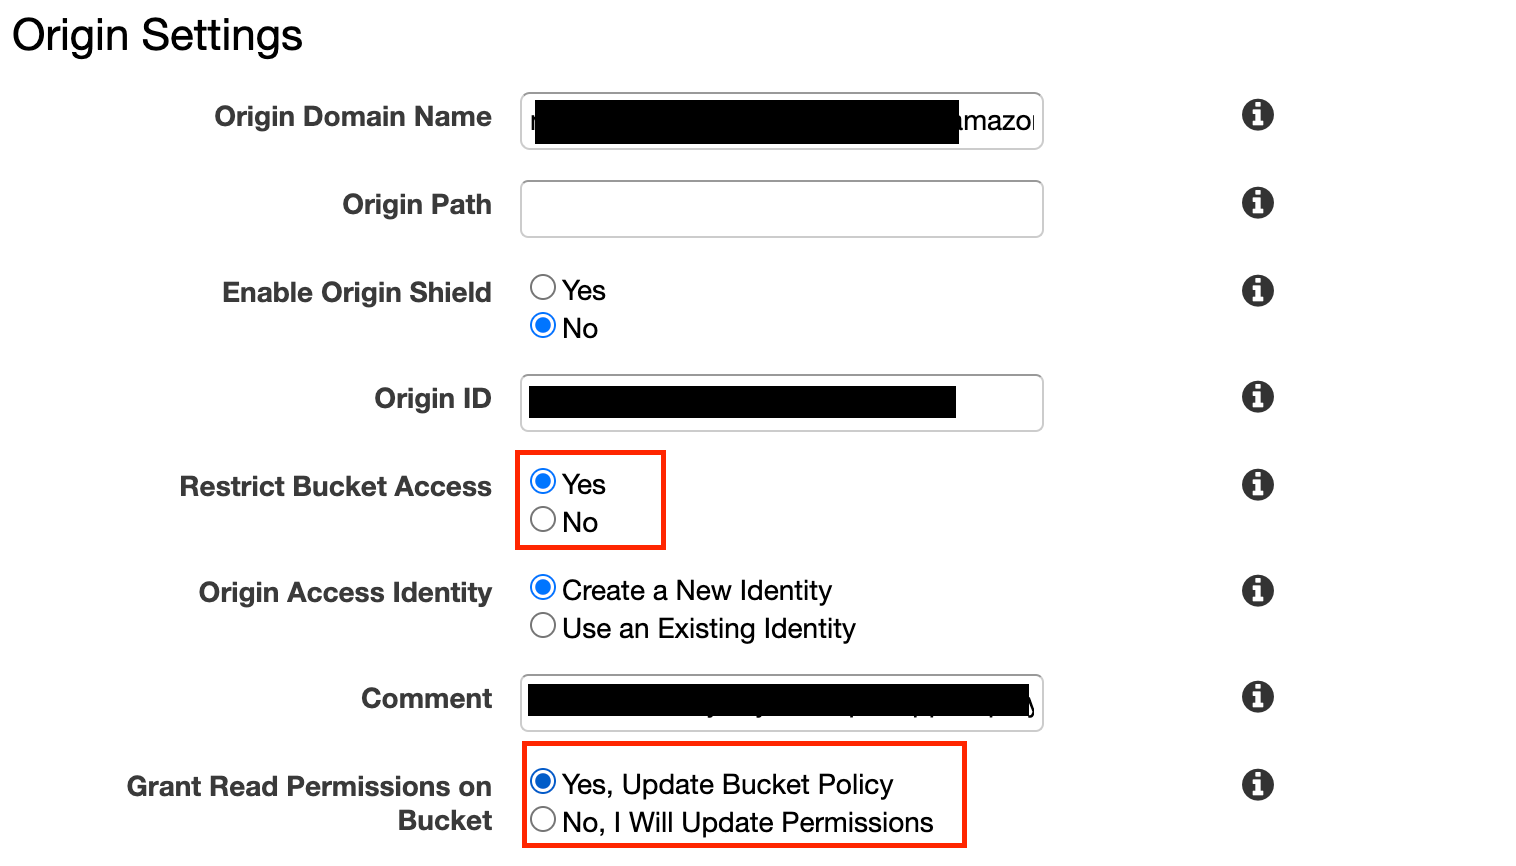
-
Note that we are restricting bucket access as we want our S3 Bucket to be private. To allow CloudFront access to the bucket, we create a new identity and tell CloudFront to update the Bucket Policy.
-
Select
Create Distribution. -
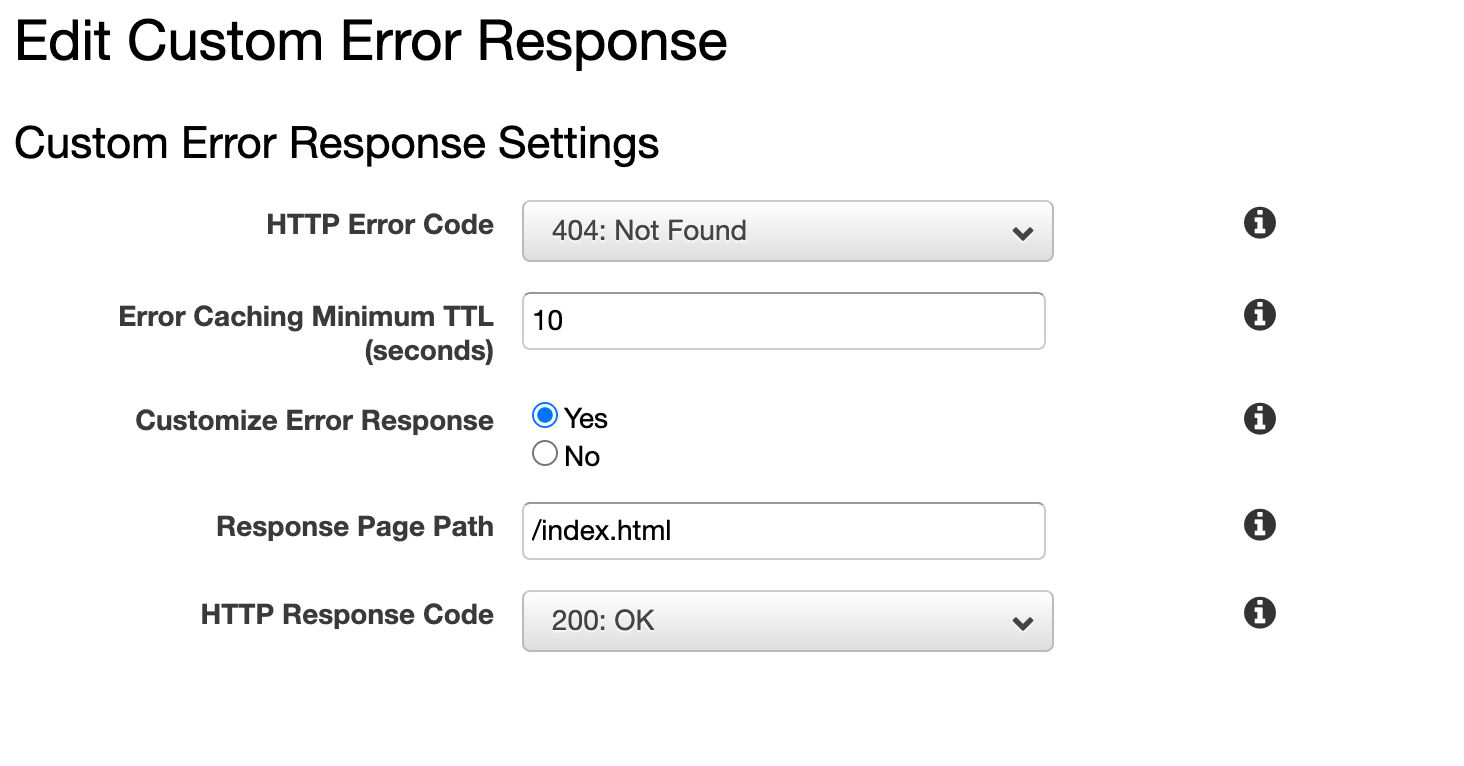
The next step is to select the created Distribution then click on the
Error Pagestab. SelectCreate Custom Error Response. -
Select Yes for a custom error response, set
/index.htmlfor the response page path and200: OKfor the response code. When done, clickCreate. We will do this process for errors 403 and 404.
Great! Now we have to wait a few minutes for the Distribution to be up and running.
Bonus: 307 Redirect CloudFront Error
Since our application is accessed by CloudFront distribution and our S3 Bucket is private, you could experience an annoying Access Denied error. This is due to the internal DNS propagation of the S3 bucket name:

You can find a full explanation in this AWS Forum Thread.
Use AWS CLI to update S3 and CloudFront
You can automate the deployment process with the AWS Command Line Interface. Ideally, you add an npm script to run build the application and push it to your S3 bucket. Briefly:
-
Install the AWS CLI.
-
Configure the CLI with
aws configure. For example:AWS Access Key ID [None]: AWS Secret Access Key [None]: Default region name [None]: eu-west-1 Default output format [None]: json
The AWS CLI has a command called sync to sync the content of a local folder to the S3 Bucket. Running npm run build will create a build folder that the script will upload to the S3 bucket. For example:
"client-s3-deploy":"aws s3 sync build/ s3://{your-s3-bucket}"
Since our CloudFront distribution caches the content of the S3 Bucket and doesn’t know if the content has been updated, the application needs to tell CloudFront Distribution to invalidate the cache. We can do that from the AWS CLI, adding the following script:
"client-cloudfron-invalidation":"aws cloudfront create-invalidation --distribution-id YOUR_DISTRIBUTION_ID --paths '/*'"
This script tells CloudFront to invalidate the cache for every item (note the --path '/*') .
Conclusion
In this blog, we have seen how we can deploy a React App using S3 and CloudFront maintaining the S3 Bucket private. Using Cloudfront is also possible to add a CNAME so your users will navigate to your app using a custom domain name.
Comments
Loading comments…