Use useEffect to fetch data in a functional component and use setInterval to refresh that data as desired.

What We Will Learn
Although React’s useEffect hook allows you to do many things, In this tutorial we will walk through how to use the useEffect hook **specifically to fetch data from an API, **and **refresh **that data periodically.
You can use whatever API you prefer but we will be using the fake API https://jsonplaceholder.typicode.com/ to fetch posts.
https://jsonplaceholder.typicode.com/posts
UseEffect
By using this Hook, you tell React that your component needs to do something after render. React will remember the function you passed (we’ll refer to it as our “effect”), and call it later after performing the DOM updates.
Something important to notice in the statement above is that the useEffect hook** runs after the DOM updates**. Therefore it will not block the render process.
Something else important, especially for fetching data from an API is,
By default, it runs both after the first render and after every update.
This means that if we are not careful, after we get data and set State, causing a DOM update, it will fetch the data again and again and again…
We will cover how to avoid this infinite loop of fetching but also how to have it fetch periodically so that our data “refreshes” if new data is added.
Let’s Get Started
I will be using Visual Studio Code. You can certainly use whatever code editor you desire.
Initial Setup
-
Create a directory in which to place your application.
-
Start VS Code and open the folder you just created.
-
Open a Terminal window and enter this code to bootstrap our React app.
npx create-react-app fetch-with-useeffect
Next we need to change in to this directory and run npm start to start the development server to verify it is running our React app. By default this will be on localhost port 3000.
-
After your application has been bootstrapped type the following in the Terminal.
cd fetch-with-useeffect npm start
You should see something similar to the image below.
 Basic React Application
We will be using Axios to fetch our data. If you prefer you can use fetch or whatever you desire.
-
Use CTRL +C to stop the development server and close the browser tab.
-
Type the following in the Terminal window to install Axios.
npm install axios
-
Open App.js and replace the default code with the code below. Notice the import of the useEffect hook, along with useState and the import of axios.
import React,{useEffect,useState} from 'react' import axios from 'axios' import './App.css'
const App=()=> {
return (
{" "}
{" "}
{" "}
{" "}
); }useEffect
export default App;
-
Save and restart the development server with,
npm start
You should just see only the word “useEffect” in the browser.
Working With UseEffect
Now we are ready to use useEffect!
The useEffect hook has this basic syntax.
useEffect(()=>{

// Effect goes here
})
The useEffect hook needs to be placed in the body of the functional component in which it is used.
We will fetch our posts in a javascript function named getPosts. This function will be called from the useEffect hook, which will reside in the body of the functional App component.
The result of getPosts, the posts themselves, will be shown in the console initially but eventually stored in State using the useState hook.
Let’s write the function that will get the posts, getPosts, and call that function from the useEffect hook.
-
Modify your App.js like this. Observe the function getPosts and the call to the function in useEffect.
import React, { useEffect, useState } from "react"; import axios from "axios"; import "./App.css";
const App=()=> {
const getPosts = async () => { try {
const userPosts = await axios.get("https://jsonplaceholder.typicode.com/posts")
console.log(userPosts.data);} catch (err) { console.error(err.message); } };
useEffect(()=>{
getPosts()**})
return (
); }useEffect
export default App;
-
Save and open your dev tools to the console. You should see a list of posts.
 Posts obtained from https://jsonplaceholder.typicode.com/posts
Notice that each post has an id and a title.
We want to store these posts in State, in an array called posts, and display the posts on the screen.
We will be adding a useState hook, initialized to an empty array.
const [posts, setPosts]=useState([])
The array **posts **will store the array of posts returned from the GET call and **setPosts **is the setter method to set the value of posts.
We will then map over the posts displaying the post title on the screen and use the post id as the key.
**Important: **As previously mentioned, useEffect is run after a DOM update. If we then change State in getPosts, which causes a DOM update, posts are fetched again. When this happens, State is set again, ad infinitum. This was not a problem when we used console.log() as State was not changed.
The way to ensure useEffect is run only once is to use an empty dependency array.
We will not focus on all the uses of the dependency array in this article except to note an empty one keeps useEffect from running after every render. More on the dependency array can be found here.
The new syntax for useEffect is below. Notice the empty array. No dependencies so it runs once.
useEffect(() =>{

// Effect goes here

}, **[])**
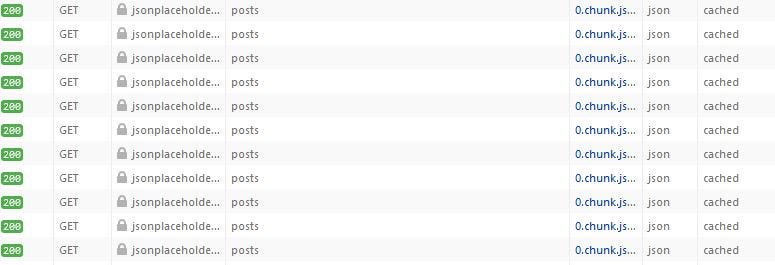
Here is the result, from the network section of your dev tools if an empty dependency array **is not used. **It is not apparent from the image that the GET’s are being performed continuously.
 Infinite loop of GET requests when not using an empty dependency array.
Displaying The Posts
In the code to follow, we add useState, pass this to our getPosts function so it can set the State of posts to the userPosts.data.
Note that you could include the getPosts function in the functional App component body instead. This would keep you from having to pass setPosts to the function.
In the return statement of App.js, we map over the posts array.
-
Make these changes to App.js, noting the items in bold.
import React, { useEffect, useState } from "react"; import axios from "axios"; import "./App.css";
const App=()=> { ** const [posts, setPosts]=useState([])**
const getPosts = async () => { try {
const userPosts = await axios.get("https://jsonplaceholder.typicode.com/posts")
**setPosts(userPosts.data); // set State**} catch (err) { console.error(err.message); } };
useEffect(()=>{
getPosts()},[]) // includes empty dependency array
return (
); }useEffect
-
**{" "}
{posts.map((post) => (
- {post.title} ))} **
export default App;
-
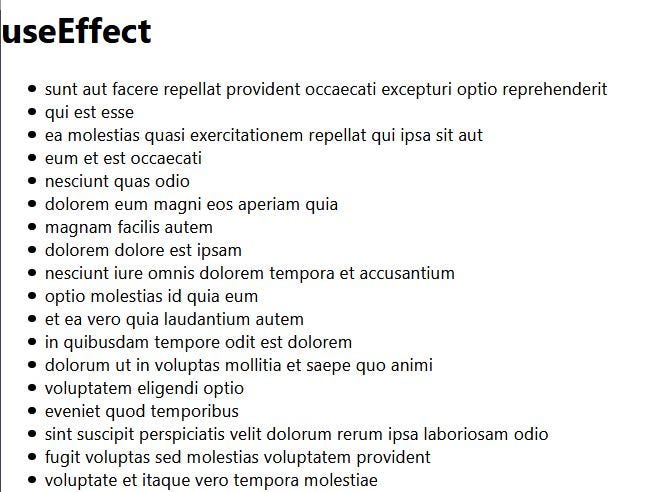
Save and observe your application in the browser. It should look at follows,
 Posts returned from our App component
Refreshing The Posts
Although our list of posts will not change as none are being added, in a real application, where other users may be adding posts, you may want to refresh the list posts on a periodic basis of your choosing.
We will use **setInterval **to update our list of posts every 10 seconds. Since no actual new posts will be displayed (typicode is a fake API), we will have to use our dev tools network section to observe the GET call every 10 seconds.
We will also be adding a clearInterval. This would be important in a larger application so that the interval is cleared when the user navigates to another page.
To accomplish the refresh, modify the useEffect as follows,
useEffect(()=>{

   ** getPosts()**

    const interval=setInterval(()=>{
     ** getPosts()**
     },10000)


    ** return()=>clearInterval(interval)**

},[])
We initially get the posts and then every 10 seconds call getPosts again.
Using your developer tools, examine network, and you will see a GET every 10 seconds.
 Initial GET and one every 10 seconds
Conclusion
In summary we have seen one use of useEffect, fetching data. We also learned that without the empty dependency array, we would be invoking the GET call continuously; obviously causing an immense amount of network traffic.
However, we may want to refresh the data periodically and we used setInterval to accomplish this.
As always, I encourage to not only learn more about useEffect but experiment with this application and expand on it.
Thank you for reading and coding along!
Read all you want and help me continue to write by joining Medium Join Medium with my referral link — gravity well (Rob Tomlin) *As a Medium member, a portion of your membership fee goes to writers you read, and you get full access to every story…*bobtomlin-70659.medium.com
You may also enjoy: How to Use Props in your First React Application *Build a Product Displayer, Not a simple Hello World!*medium.com How to Use React-Router to create an SPA Using client-side routing to create a single page applicationmedium.com How to Manage State in React with the useState Hook Managing state with the useState hook on functional componentsmedium.com Two Ways of Managing State in a Functional React Form *In a registration form, using useState hooks for each input versus using a user object and a single useState hook.*medium.com What is Next.js and Server-Side Rendering *Next.js is a React framework created by Vercel. Unlike React which uses client-side rendering, Next.js uses server-side…*javascript.plainenglish.io