
I wanted to write this article since I found a lot of tutorials online about deploying Flask applications to run with Apache and noticed that a lot of them include bad security practices.
In particular, a lot of tutorials created symbolic links between the site directories and your home directory, which there is really no reason to do.
Deploying with Apache can be quite fiddly, so I think there’s often a tendency to take shortcuts since it’s frustrating. But needless to say, this is a bad idea! It’s actually pretty easy to specify permissions on a Linux server— even if you’re not familiar with the syntax of the required commands.
So that’s what I hope to address in this article — how to get a Flask application up and running on Apache in a secure way that nails some cybersecurity basics around account privileges.
Overview
This is what our to-do list looks like. It’s a little long but unfortunately, that’s just the way this cookie crumbles. However, it’s a very robust set up so once you’ve got it all up and running you won’t have to do most of this again and should find it fairly straightforward to debug.
-
Install Apache.
-
Get your code onto the server.
-
Create a python virtual environment for your application and check that you can run your application.
-
Configure your Web Server Gateway Interface (WSGI) file. This is how your Flask application will talk to Apache.
-
Set up the Apache configuration for your site.
-
Carefully define the read/write/execute permissions for different parts of your web application and make use of the Apache user group.
-
Force HTTPS connections after setting up SSL configuration.
-
In the inevitable event that this goes wrong at some stage of the process, debug it without going insane.
Apache Installation
Hit sudo apt-get install apache2 and then sudo apt-get install libapache2-mod-wsgi-py3.
Navigate to the url for your site. You should be able to see this page if Apache has installed correctly.
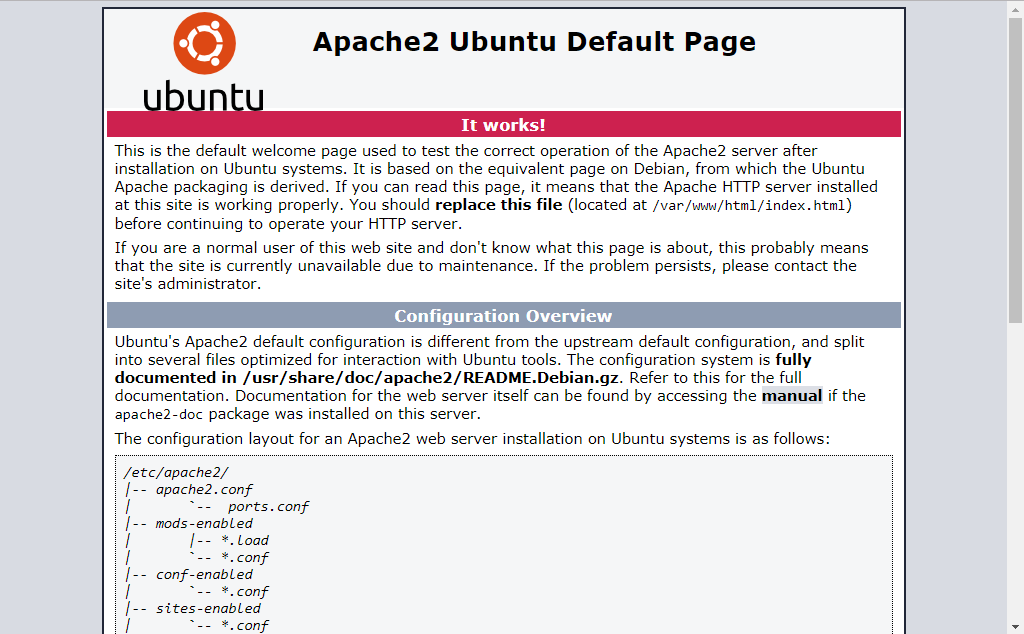
Default loading page for Apache
So far, so simple.
Get your Code
The next step is to get your code off a GitHub repository and onto the server. To do that, navigate to the directories typically used for Apache configuration.
Hit cd /var/www/html and then sudo git clone <your repository url> .
If all goes well, your code should now be on the server. You might want to hit git branch to check the branch is correct at this point.
Create a Python Virtual Environment
It's good practice to use a specific virtual environment for your application - it will help manage project dependencies in a more explicit manner and makes the setup more extensible. For instance, if you want to add another website then you can just create another virtual environment contained to that site.
There are a lot of different ways to do this which all have their merits. I won't go into that here, but you should probably consider which versions of python are available in your server environment. For instance, if python 3.6 is the latest version available then you should probably consider using pyenv to make sure your local development environment also uses 3.6.
The main thing you want to ensure here is that your development environment uses the same python version as the server, otherwise you are going to get some very not fun errors when you deploy.
So with that in mind, here's a super simple way to create an environment from the system python on the server. First, switch to the directory that contains your site cd /var/www/html/your_site_name. Then hit python3 -m venv your_site_environment.
Ideally, your project code will contain a requirements.txt file that contains all your project dependencies. If it doesn't, then you can create this quite easily by writing pip freeze >requirements.txt in your local development environment and adding that to your project repository.
You can then activate your python environment by hitting source/your_site_environment/bin/activate. Check this has worked by running which python --- this should point to the python executable in the virtual environment you just created. If it just doesn't seem to work, remember you can always run python with the absolute path to the executable (i.e. /var/www/html/your_site_name/your_site_environment/bin/python3).
Anyhow, the next step is to install the dependencies with pip install -r requirements.txt and then try to run your app. How to do this will depend upon the precise configuration of your app, but it will probably be something like python app.py or python run.py for Flask application. The point being here, that you want to see this spins up a development server without any error messages - that way you know that your python environment contains everything it needs to run the app and you didn't forget to commit any key files to the GitHub repository.
Configure your WSGI File
Now, head to your website's directory on the server with cd /var/www/html/your_site_name and hit touch your_site.wsgi. There are a few things to get right here - have a look at the screenshot of an example file below first:

Sample wsgi file
First, you need to configure the logging so that it writes to the file and you can see the output. Then you need to specify the paths for your python executable and the web app directory before importing your Flask app instance.
Apache Configuration
Now you need to create a configuration file so that Apache can load your site. This is also a bit fiddly :-( . The easiest way to do this is copy the default configuration file that ships with Apache and then just adjust it for your site.
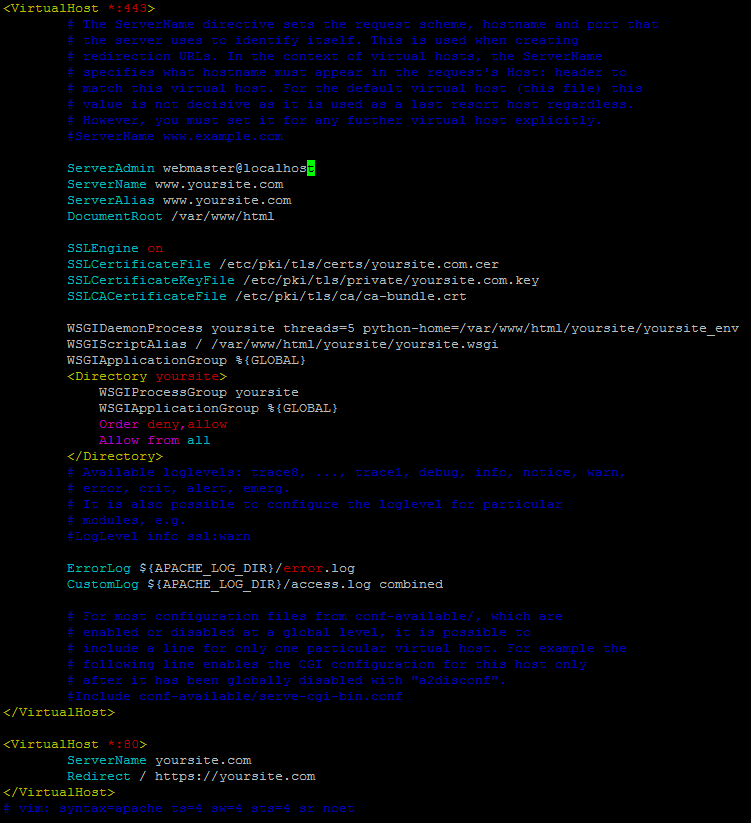
So, to do that... First hit cd /etc/apache2/sites-available and then copy the default config file sudo cp 000-default.conf yoursite.conf. Once that's done it's time to make some tweaks.
There are quite a few things to add to this file and it’s worth checking the screenshot below to see what it should look like. Note that screenshot has port 443 included and a redirect in the second set of <Virutal Host> </Virtual Host> tags which you can ignore for now as we’ll set this up later.
Anyway, these are the changes you need to make to this file:
- ServerName yoursitename.com
- ServerAlias yoursitename.com
- WSGIDaemonProcess yoursite threads=5 python-home=/var/www/html/yoursite/yoursite_env
- WSGIScriptAlias / /var/www/html/yoursite/yoursite.wsgi
- WSGIApplicationGroup %{GLOBAL}
- < Directory yoursite
- WSGIProcessGroup yoursite
- WSGIApplicationGroup %{GLOBAL}
- Order deny,allow
- Allow from all
- </Directory>
And here’s what the finished file should look like. You can ignore the SSL lines for now — I won’t cover that in this write-up since it’s very specific to the particular environment you’re working in.
Once that's done, Apache has a handy tool you can use to test for any errors in the syntax of the configuration file --- sudo apache2ctl configtest.
We're pretty close to the site working now and if you have a more straightforward web app it might work already. The next step is to enable this site with sudo a2ensite yoursite.conf and then disable the default site with a2dissite 000-default.conf.
Now you just need to create a log file and set permissions for it otherwise Apache will error on startup since we specified this in the WSGI file. To do that: cd /var/www/html/yoursite and then hit sudo touch yoursite.log. Once that file's created, you then need to set permissions so that Apache can work with it using sudo chgrp www-data yoursite.log and then sudo chmod 464 yoursite.log.
Aaaaand now you can restart Apache with the command sudo systemctl restart apache2 and pray that everything works.
Warning: Unless you're a dev-ops wizard, it is extremely likely that your site won't work at this point. If that's the case, check out the debugging tips at the end of your article and look at the Apache logs in /var/log/apache2/error.log.
Disclaimer aside, head to the URL for the website (the same one you used earlier to check if Apache had installed correctly) and load the page. If it loads, your site is up and running!
Set Permissions
By now you should probably have a break.
After your break…
…time to have a careful think about what different parts of your web application need to do. Do they need to read, write, or execute files? Maybe the web application showed a 500 error when you checked the page in the previous stage above and you saw some permission errors in the logs — that could be a good place to start.
The point of this part is to get a clear oversight of what parts of your web application need to do what so we can assign the permissions accordingly and manage the risk as best we can.
If your web application is in a production environment, it will probably also get pentested and restricting permissions in this manner is going to really help because it will severely restrict a hacker’s ability to escalate their privileges and move to another part of your server environment.
So, now that you know which bits need to do what, this is how I would recommend approach settings permissions for your web application:
-
Assign everything in your web application to the Apache user group. This lets you contain permissions into a specific group relevant to the web application, which will make it much harder to escalate privileges into other areas of the server (such as your home directory or system files) where the Apache user group is absent. To do this, you can use the command
sudo chgrp www-data -r /var/www/html/your_site_name. The groupwww-datarefers to Apache. -
Now that's down, use
sudo chmod xxx -R directorywherex x xis a three number combination such as 464. This recursively set permissions for each directory. Apache will always be the middle number since you've set the group to apache for the whole website. In brief, 4 means Apache can only read the file, 6 means read and write, 7 means execute.
If you’re confused about the syntax of those two commands, there are some very good article on how to use them here and here.
Force HTTPS
The last thing to do is force HTTPS connections to your site so that no data is transferred over plain text, meaning it can’t be read by just anyone.
For this bit to work, you need to have set up SSL certificates for your site — I’m not covering that here since it varies so much platform to platform! But if you have done that, here’s how to force traffic to your site to redirect from HTTP to HTTPS within Apache:
Firstly, hit sudo a2enmod ssl to get ssl running. Next, you need to edit the website config file — so yoursite.conf, the file created earlier — so that it includes lines pertaining to your SSL certificates. You also need to edit the top so that it responds to port 443 rather than 80 and then add in the redirect syntax at the bottom. The best way to do see what that looks like is to scroll back up to the screenshot of the site configuration file earlier and look right at the bottom where it says <Virtual Host :80>.
And that’s it —time to hit sudo systemctl restart apache2 and then try to navigate to your site using http://yoursite.com. If you’ve set things up correctly, you should land on the HTTPS version of the page.
Comments
Loading comments…