The Flood Fill algorithm is used to replace values within a given boundary. This algorithm can be programmed in a variety of ways, but the usual method uses recursion to compare old and new values.
While Flood Fill can be written in any programming language, the following example uses Python for simplicity's sake.
If you'd like to jump straight to the code, the example is available on my GitHub.
The Flood Fill Algorithm Explained
Before we get started programming the flood fill, let's take a moment to briefly describe how it works.
If you've ever used a painting or drawing program before, chances are it had a paint bucket tool or something equivalent. This tool lets the user fill an area with a given color. Typically, users can draw an enclosed boundary and fill in that shape with a given color.
The following example, created in GIMP, shows what I mean.
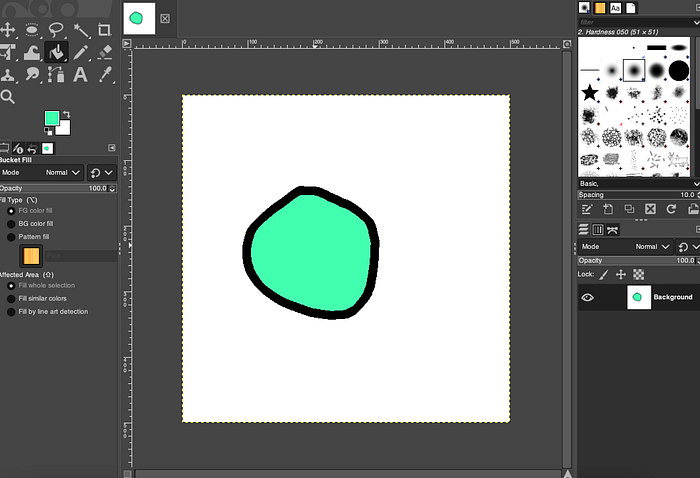
Use the paint bucket tool to fill in an area with color.
The familiar paint bucket tool is an implementation of the flood fill algorithm. This algorithm begins with a starting point provided by the user's mouse click. From there, the algorithm searches each neighboring pixel, changing its color, until it runs into the boundary.
The familiar paint bucket tool is an implementation of the flood fill algorithm. This algorithm begins with a starting point provided by the user's mouse click. From there, the algorithm searches each neighboring pixel, changing its color, until it runs into the boundary.
Breaking Down the Problem
In the paint bucket example, only the pixels that are within the boundary are painted. Those outside the circle are left untouched.
The two-step process can be summarized as follows:
- Choosing a starting point
- Check each neighbor until we run into a boundary
Getting 2D
We'll start the exercise by creating a two-dimensional array. This 2D array could represent many things, including the pixels in an image, or the cells in a simulation. We'll just use simple digits for now.
We'll use the number 0 to represent empty space, and the number 1 to represent a filled space.
# we'll need a 2D array to practice onfield = [
    [0,0,0,0,0,0,0],
    [0,1,0,0,0,0,0],
    [0,1,1,0,0,0,0],
    [0,0,0,0,0,1,0],
    [0,0,0,0,1,1,0],
]
Next, we'll need a way to view the array. We'll write a function that traverses the array and displays the contents in the console.
def print_field():
    # this function will print the contents of the array
    for y in range(len(field)):
        for x in range(len(field[0])):
	        # value by column and row
            print(field[y][x], end=' ')
            if x == len(field[0])-1:
                # print a new line at the end of each row
                print('\n')
Running the program will show us the field in the console.
Output
0 0 0 0 0 0 0
0 1 0 0 0 0 0
0 1 1 0 0 0 0
0 0 0 0 0 1 0
0 0 0 0 1 1 0
Flooding the Field
Our implementation of flood fill will use a recursive algorithm. Beginning with a starting point, we will check each neighboring point until we run into a border, either the boundary of the field or a value that doesn't match the old value.
If the current location in the field does match the old value, we'll replace it with the new one. Afterward, we'll run the function on each of the four possible neighbors of the current position.
def flood_fill(x ,y, old, new):
    # we need the x and y of the start position, the old value,
    # and the new value
    # the flood fill has 4 parts
    # firstly, make sure the x and y are inbounds
    if x < 0 or x >= len(field[0]) or y < 0 or y >= len(field):
        return
    # secondly, check if the current position equals the old value
    if field[y][x] != old:
        return

    # thirdly, set the current position to the new value
    field[y][x] = new
    # fourthly, attempt to fill the neighboring positions
    flood_fill(x+1, y, old, new)
    flood_fill(x-1, y, old, new)
    flood_fill(x, y+1, old, new)
    flood_fill(x, y-1, old, new)
With the function finished, we can run our code and see if it works. We'll run print_field() twice, once before the flood fill and again after. This way we can see it in action.
We'll use point (0,0) as the starting point. The old value will be the number 0. We'll use the number 3 for the new value.
if __name__ == "__main__":
    # print field before the flood fill
    print_field()
    flood_fill(0, 0, 0, 3)
    print("Doing flood fill with '3'")

    # print the field after the flood fill
    print_field()
Run the program from the console…
python3 flood_fill.py
Output
0 0 0 0 0 0 0
0 1 0 0 0 0 0
0 1 1 0 0 0 0
0 0 0 0 0 1 0
0 0 0 0 1 1 0
Doing flood fill with '3'
3 3 3 3 3 3 3
3 1 3 3 3 3 3
3 1 1 3 3 3 3
3 3 3 3 3 1 3
3 3 3 3 1 1 3
It works! All the 0's were replaced by 3's. Now just imagine if these were colors instead of numbers. This is how you make a paint bucket tool.
Conclusion
I hope you enjoyed this brief tutorial. The flood fill algorithm has all kinds of uses, and the skills used to create it are invaluable.
If you'd like to learn more about Python and computer programming, please check out some of my other articles:
Comments
Loading comments…