API Gateway provides one amazing facility that is, you can integrate the AWS lambda function with API Gateway as a proxy service. Now you might be having a question about what is lambda proxy integration, so the answer is given below.
When a client submits an API request, API Gateway passes to the integrated Lambda function the raw request as-is, except that the order of the request parameters is not preserved. This request data includes the request headers, query string parameters, URL path variables, payload, and API configuration data. The configuration data can include the current deployment stage name, stage variables, user identity, or authorization context (if any). The back-end Lambda function parses the incoming request data to determine the response that it returns. For API Gateway to pass the Lambda output as the API response to the client, the Lambda function must return the result in the below format:
{
    "isBase64Encoded": true|false,
    "statusCode": httpStatusCode,
    "headers": { "headerName": "headerValue", ... },
    "multiValueHeaders": { "headerName": ["headerValue", ..], .. },
    "body": ".."
}
Now you might be aware of the proxy integration so, let’s implement the given scenario.
Simple Architecture

Step — 1
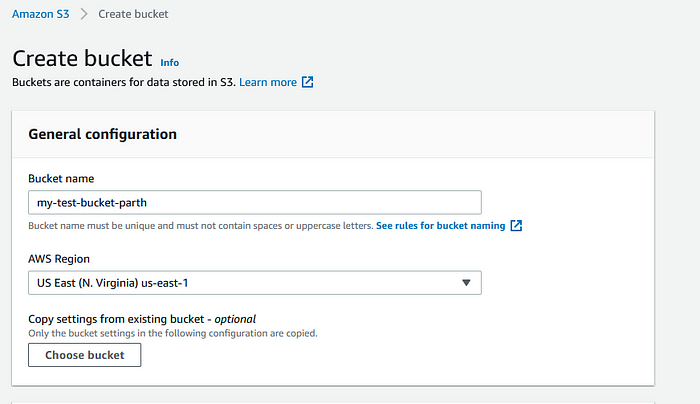
Login into AWS Management Console and go to the S3 console. Overthere click on Create Bucket button and create an S3 bucket with default settings.
Step — 2
Once you have created the S3 bucket then go to the AWS Lambda console. Over there click on Create Function button and create a new function. Select python3.8 or the latest version of python as a function runtime.

Give function and create lambda function with default permission and default settings.
Once you have created Lambda functions then copy the below code and paste it into the code of lambda function and save the changes.
Once your Lambda function has been done with the above code then go to the Configurations tab of that lambda function. In the Configurations tab click on the Permission tab.
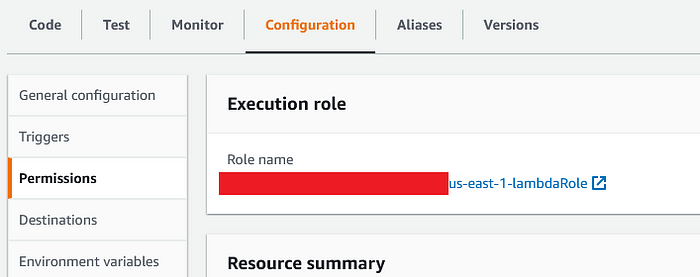
In that tab click on the IAM Role name and that will redirect you to IAM Console, in the IAM console attach a policy to that role, with the name AmazonS3FullAccess , or you can give Inline Policy to that role, which is given below:
{
    "Action": [
        "s3:*"
    ],
    "Resource": [
        "s3-bucket-arn",
        "s3-bucket-arn/*"
    ],
    "Effect": "Allow"
}
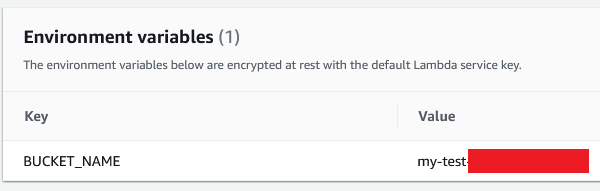
In the Configuration tab click on Environment Variable and set one environment variable with name and value BUCKET_NAME : s3 bucket name .
Step — 3
Now, go to the API Gateway console. Over there create a new API and select REST API out of the given options and click on the Build button. On the next screen enter the API name according to your requirements.

Now, API has been created so, now click on the Action button and create the resource in the root / resource with name upload or whatever you want.
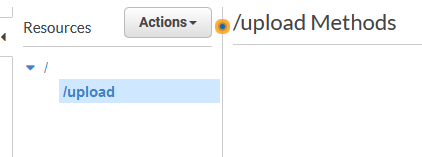
In Upload resource create a new POST method, to do that first click on the upload resource and then click on that action button.

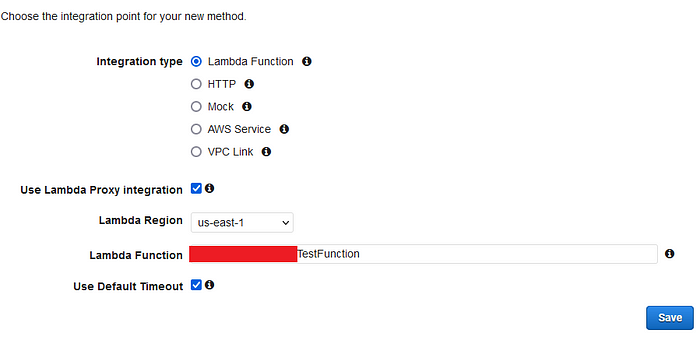
In that POST method choose Lambda function as an integration type. Select your Lambda function’s region and your lambda function which was created in the above step. We want to integrate our Lambda function as a proxy service, to do that check Use Lambda Proxy Integration checkbox. and click on Save.
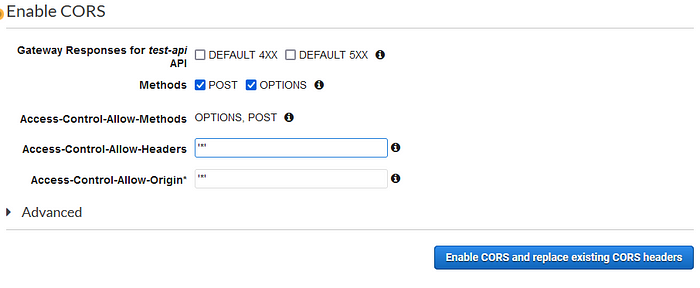
Now, we need to Enable CORS, so to do this again click on upload the resource and then click on the Action button and Enable CORS. In CORS settings the value of Access-Control-Allow-Headers is '*' and Access-Control-Allow-Origin is '*' , and leave other settings as it is. Click on Enable CORS and replace existing CORS headers.
Now, go to the settings of that API on which you are working. In settings enable Binary Media Types. Set the value of that field like this */* , and Save the changes.

Now, we have done the configuration, so it’s time to deploy our API, to do that go to the resources from the sidebar and click on the Action button and Deploy API, if you don’t have any previously made stage then create a new stage according to your requirement and deploy your API.
Infrastructure as Code(IaC)
AWS Serverless Application Model
GitHub - ParthTrambadiya/file-upload-sam
Clone the above repository and follow the steps are given in the README.md file to deploy and remove the application on AWS Cloud.
Serverless Framework
GitHub - ParthTrambadiya/file-upload-sf
Clone the above repository and follow the steps are given in the README.md file to deploy and remove the application on AWS Cloud.
Testing
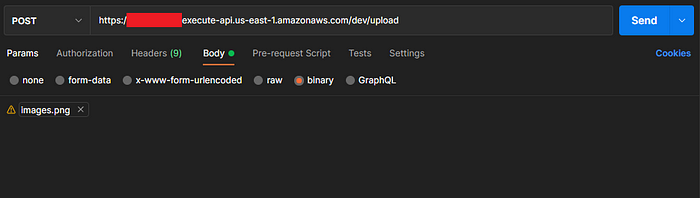
To test our API or to interact with API we need the endpoint of API, so go to the stages section from the sidebar and get the endpoint of API
API Endpoint looks like,
https://api-id.execute-api.us-east-1.amazonaws.com/api-stage
I am going to use POSTMAN to test API, you can use any other tool or you can also call the endpoint from your project’s front-end.
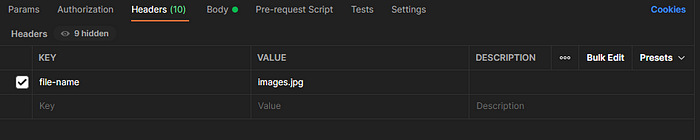
In postman, your request would be like API endpoint followed by resource name, in this case, resource name /upload , and method type is POST. In the body part of the request go to a binary section and select any binary file and pass the name of that file in header with file-name field (for front-end you need to pass file-name in header of API endpoint request) and fire a query.
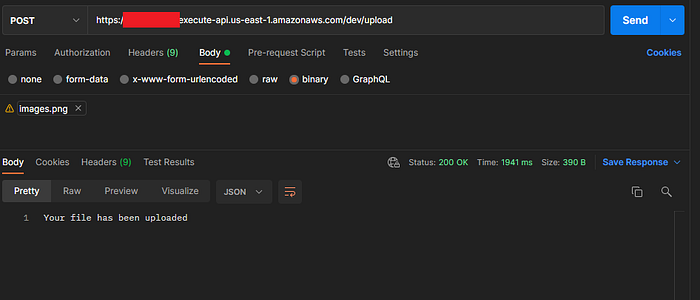
That’s it, you have configured successfully if you will get 200 Status code and you can go to S3 console and check file will be successfully uploaded. For any query contact me on LinkedIn or on My Portfolio.
LinkedIn: https://www.linkedin.com/in/parth-trambadiya/
Portfolio: https://parthtrambadiya.me
Comments
Loading comments…