In order to set up the Kubernetes environment, we need to install the following in our cloud Instance:
1. Docker: docker-ce:18.06 or above
2. Kubectl
3. Minikube
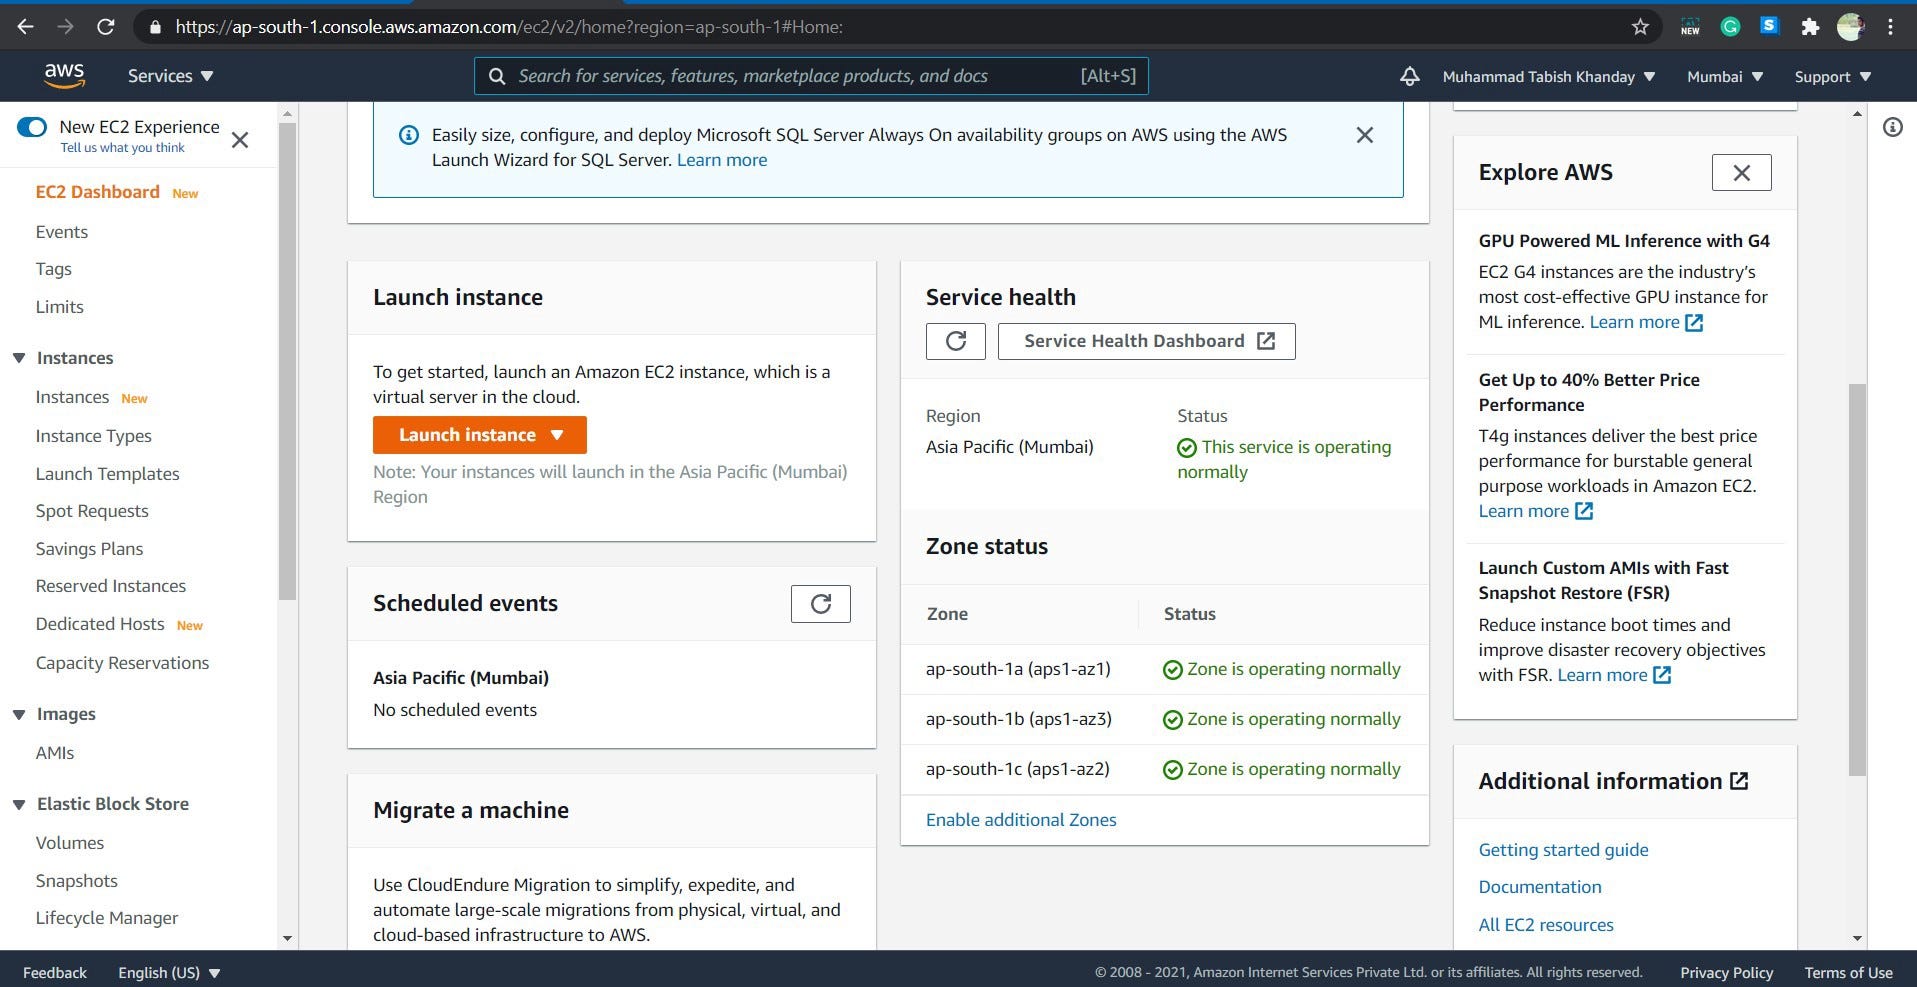
Step 1: Launch an AWS EC2 Instance
Go to AWS Management Console →Services →EC2
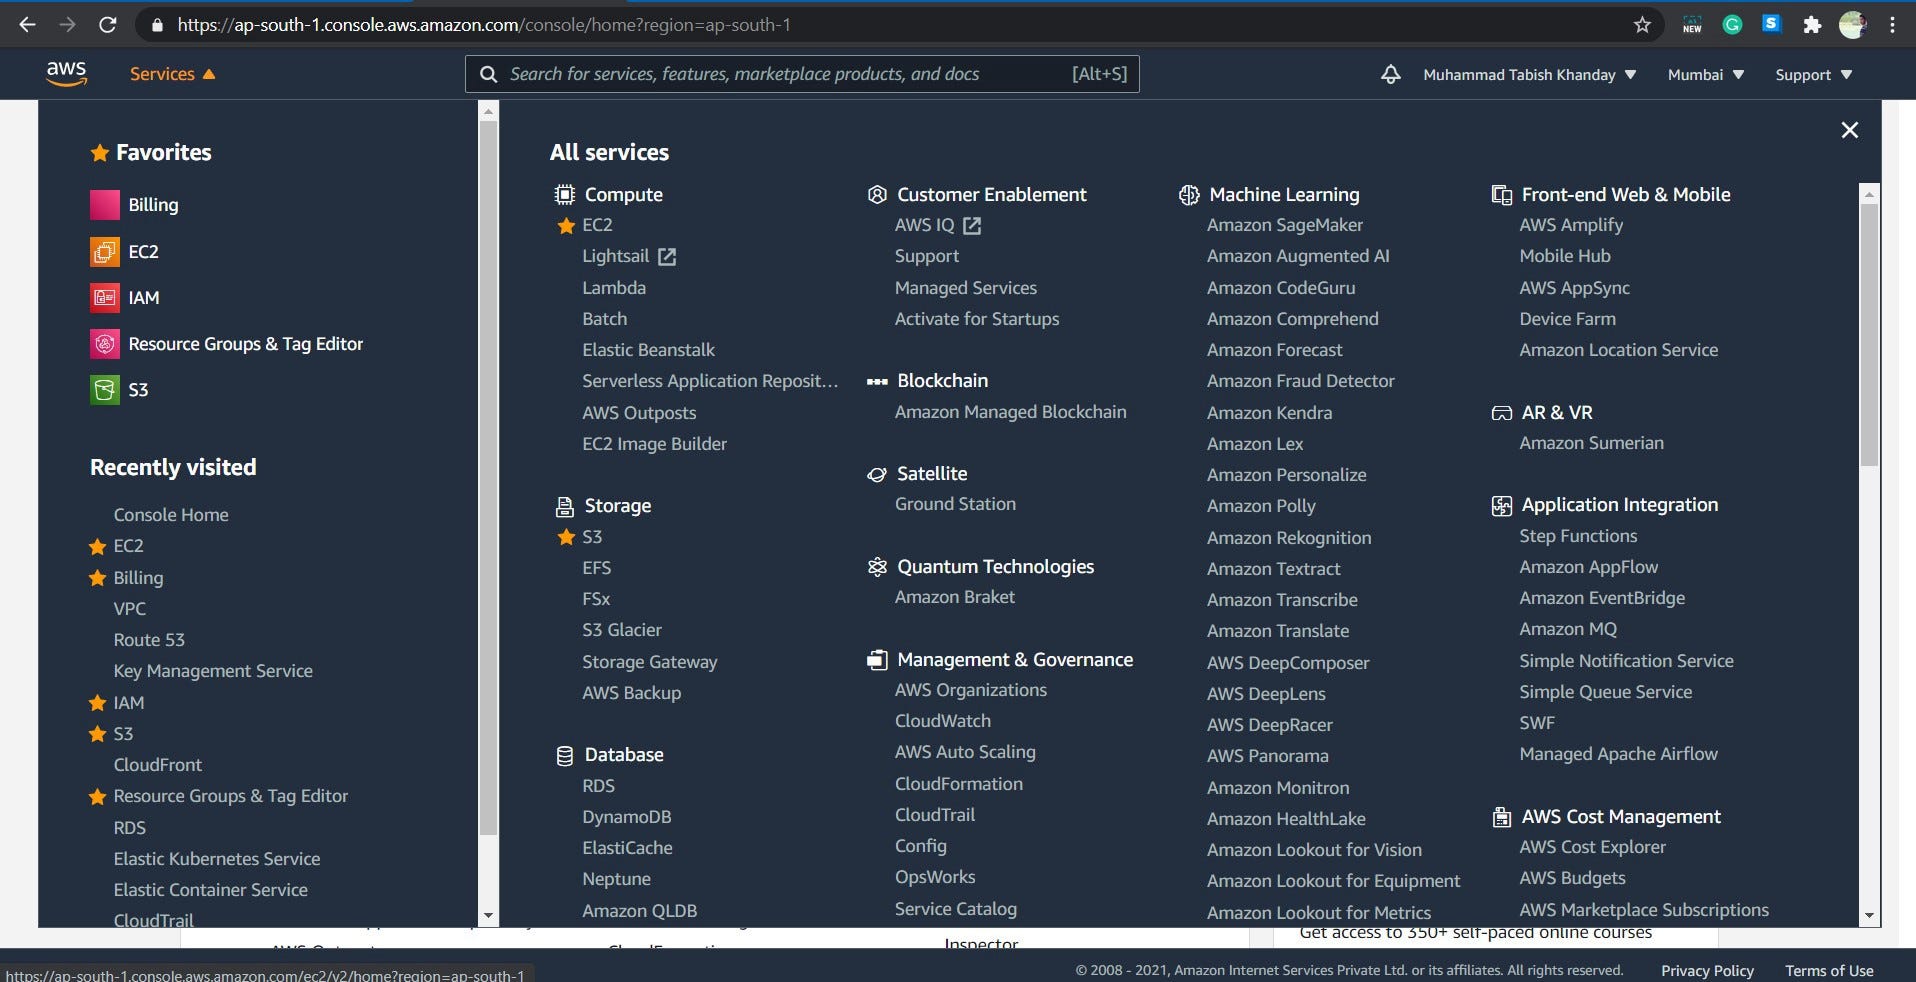
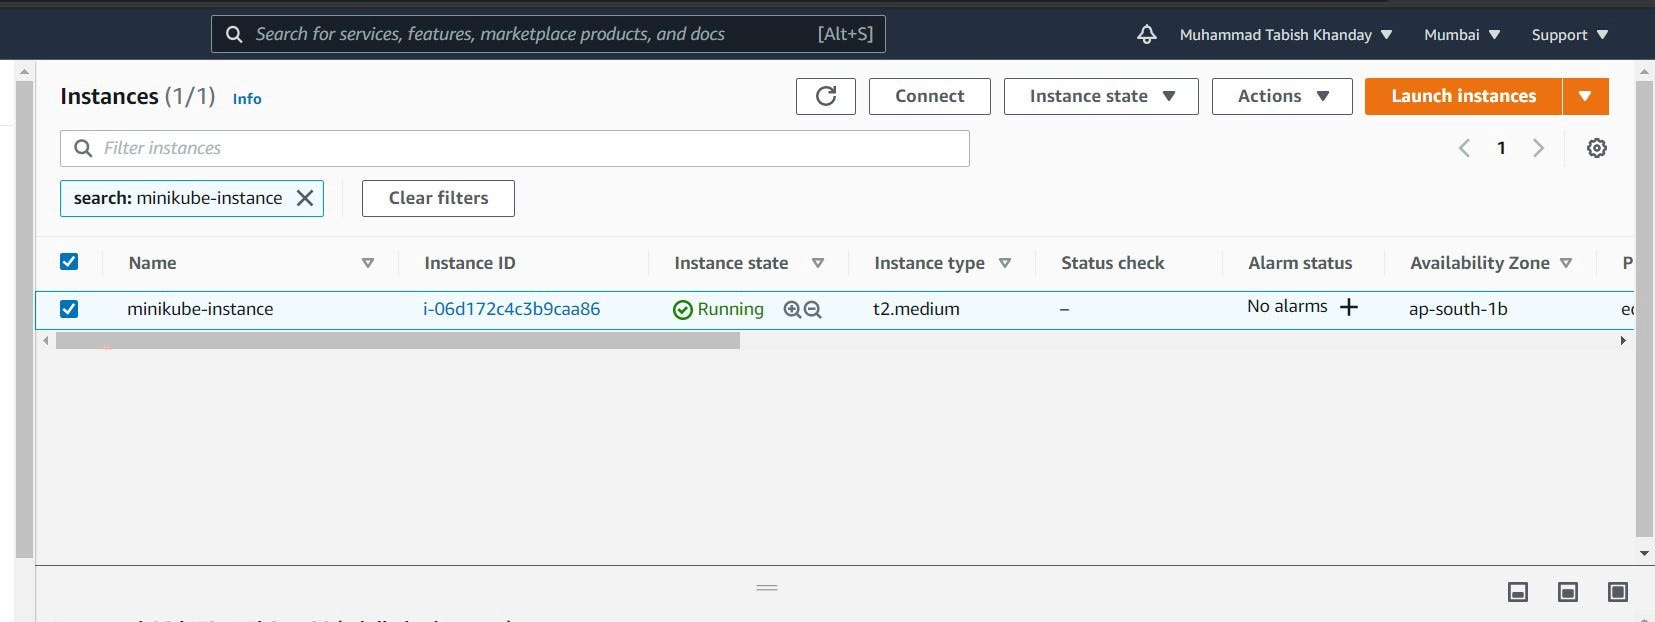
Now Launch Instance
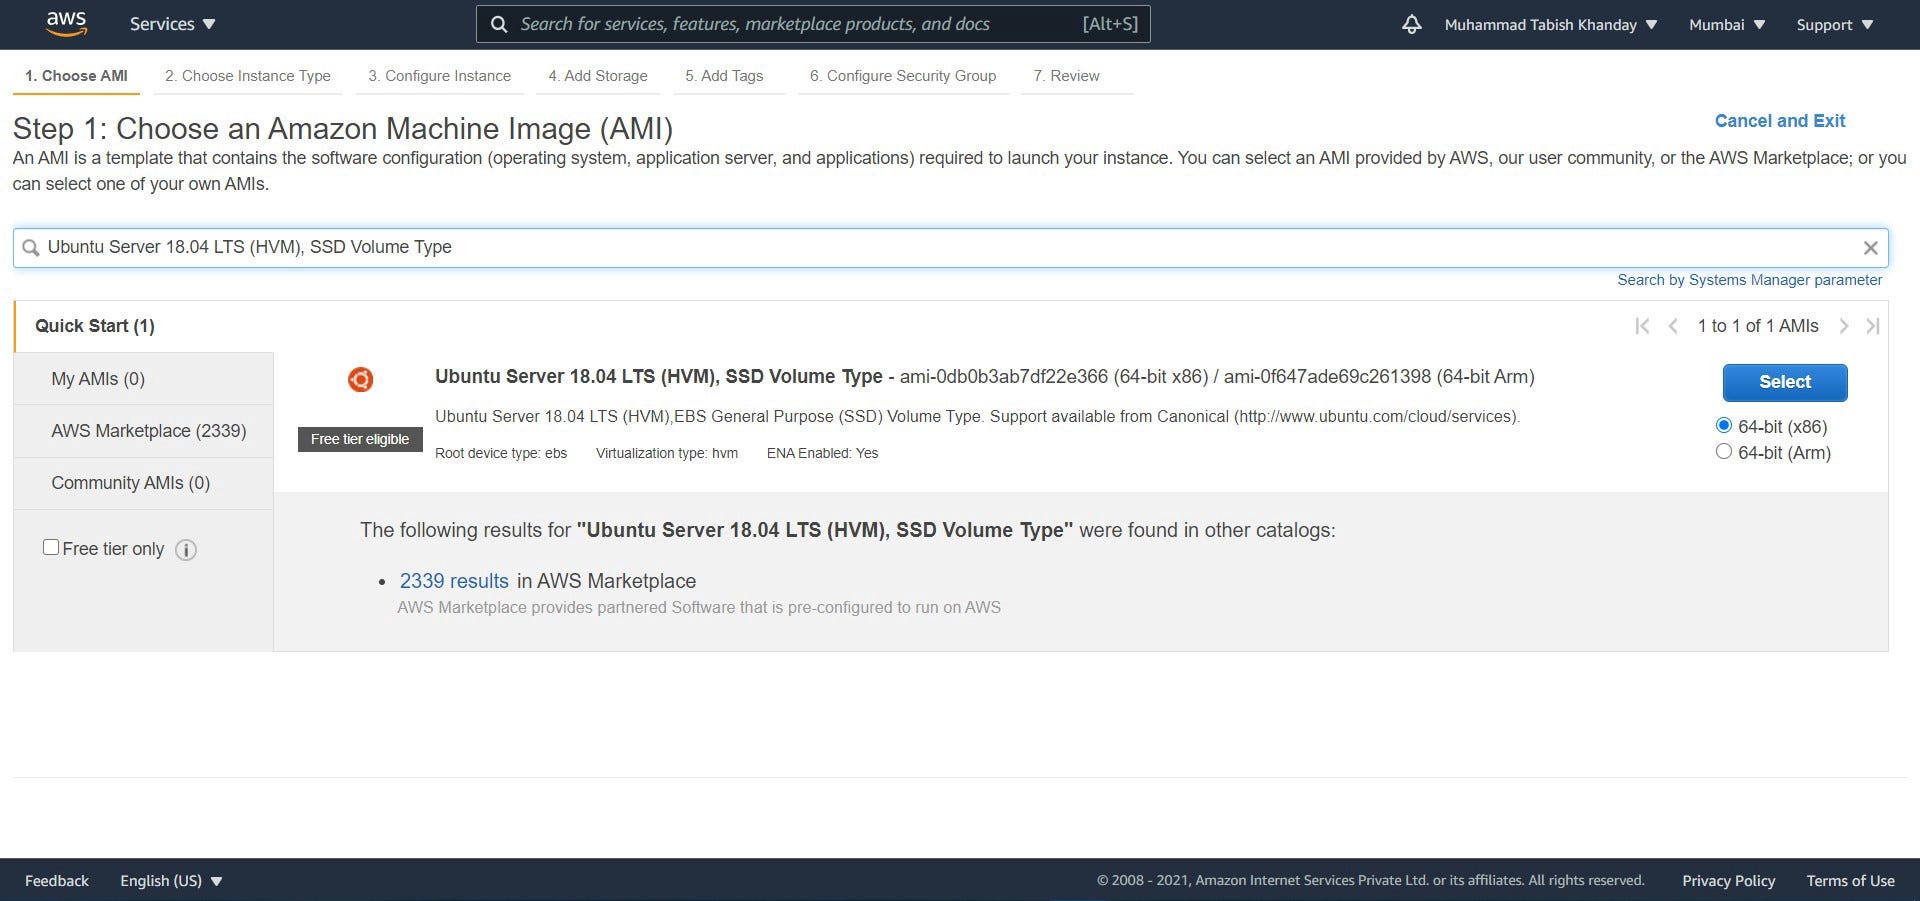
Use the following configurations for the Instance:
- Amazon Machine Image: Ubuntu Server 18.04 LTS (HVM), SSD Volume Type
- Instance Type: t2.medium
Change Instance Type from t2.micro (1 vCPU) to t2.medium (2 vCPU). Minikube requires a minimum of 2 vCPUs. There will be an error when running with t2.micro:
Requested cpu count 1 is less than the minimum allowed of 2.
t2.medium is no longer in the Free Tier, make sure to stop or terminate the instance after you are done testing to avoid a huge AWS bill.

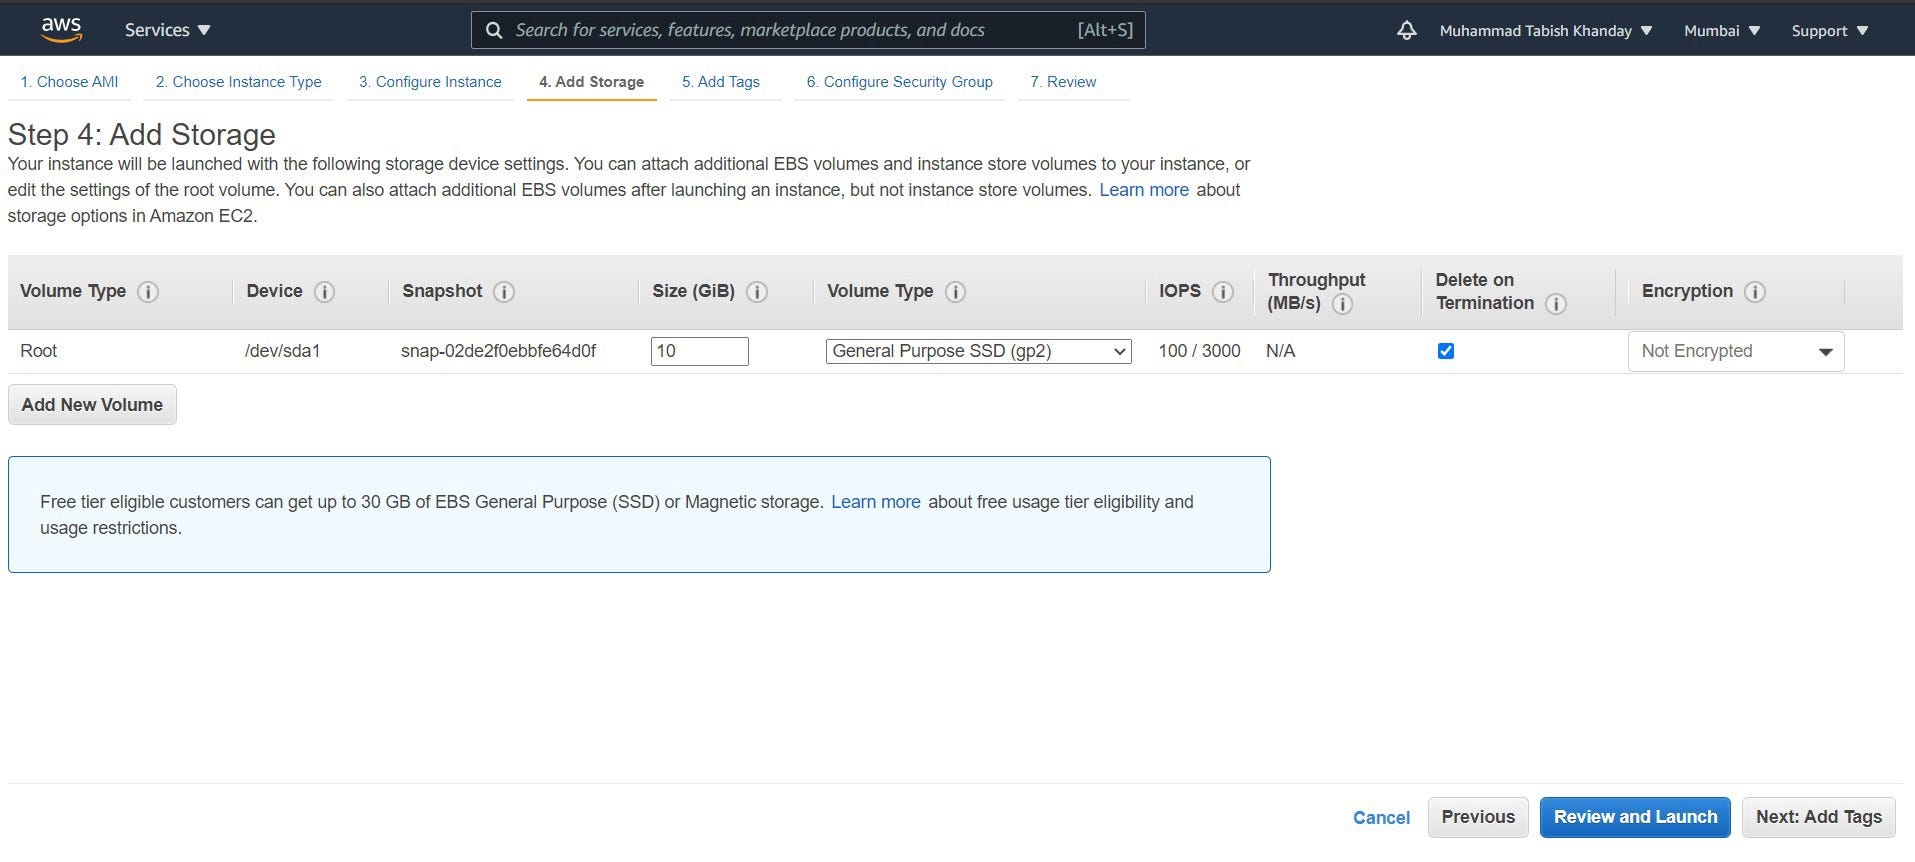
- Add Storage: 10GiB
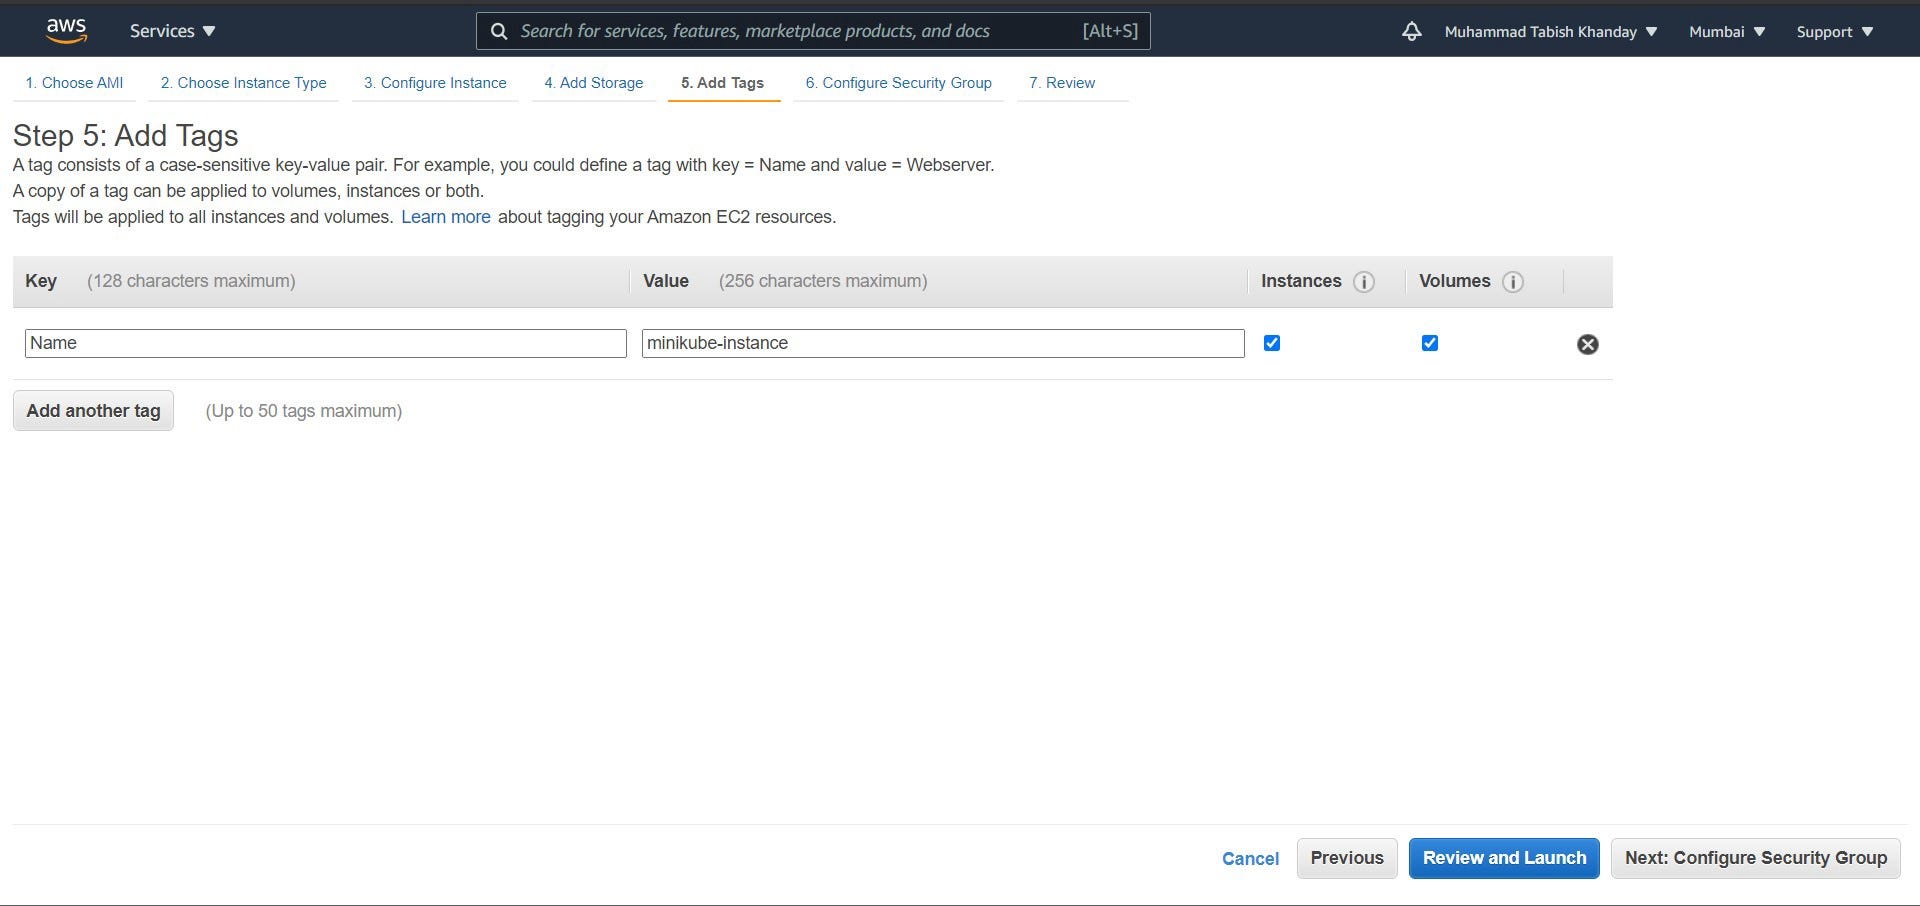
- Add Tags
– Key: Name
– Value: minikube-instance
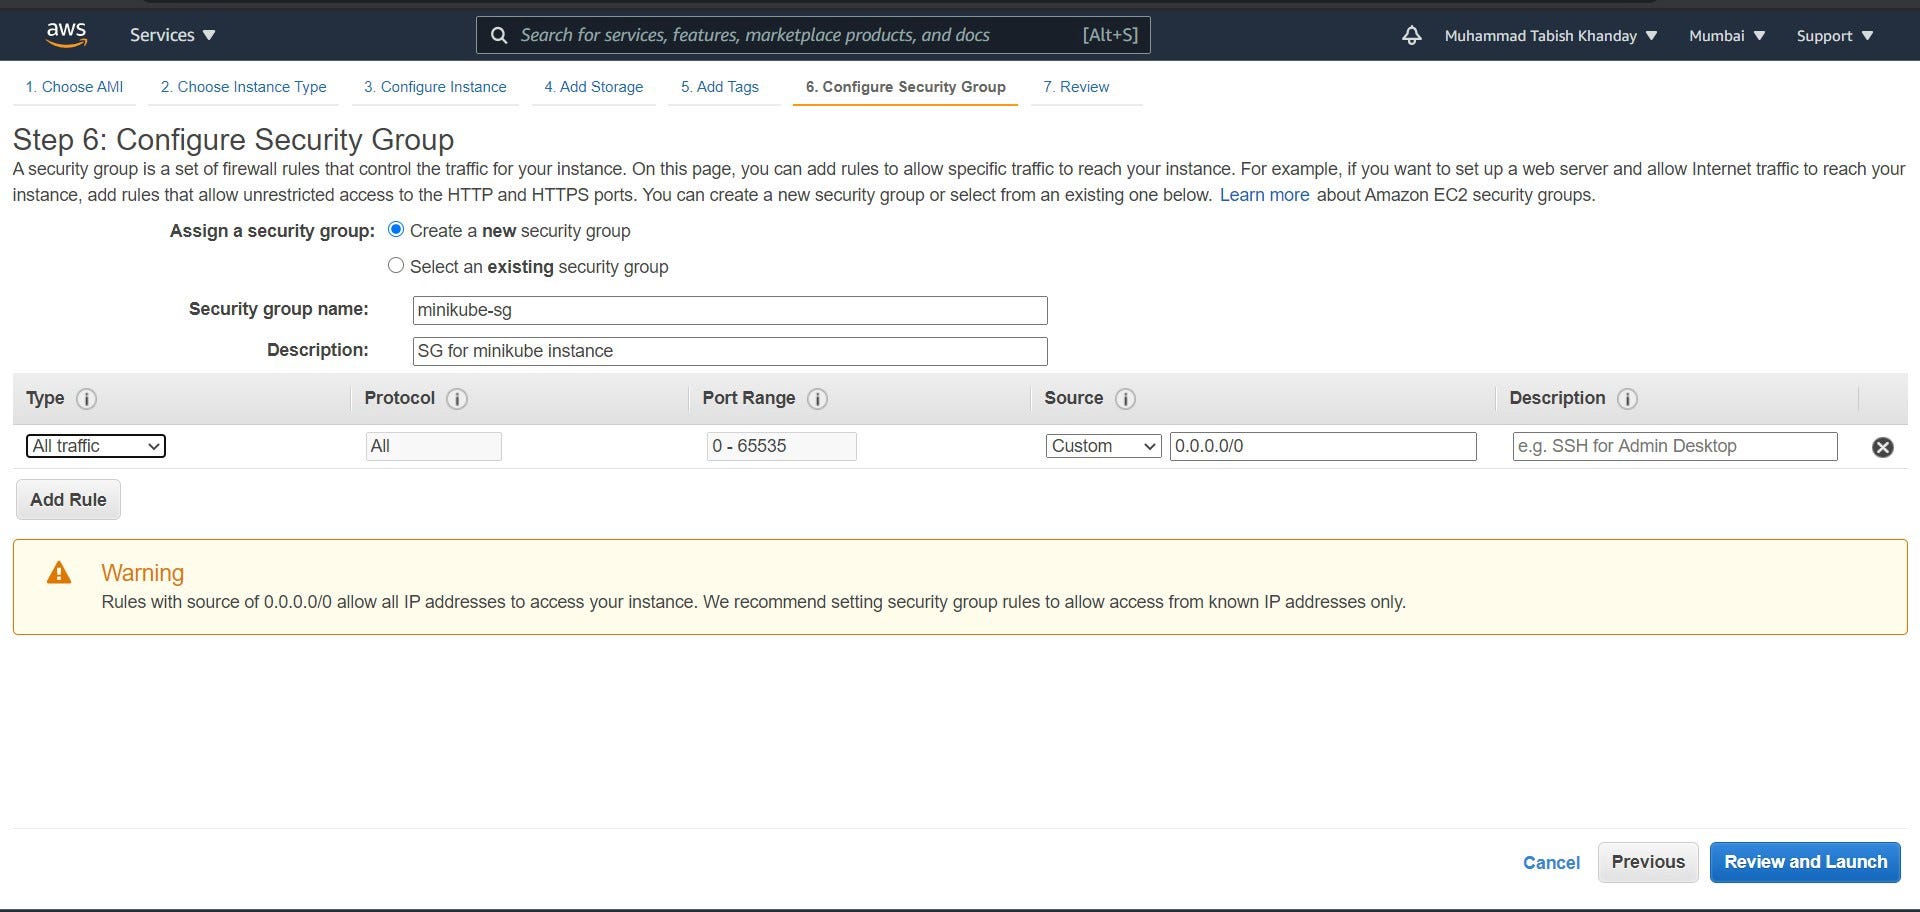
5. Security Group
Name: minikube-sg
– All traffic, 0.0.0.0/0
(For testing servers, allow all traffic. Not recommended for Production Servers)
- Review and Launch → Launch →
Now either choose an already created Key Pair or create a new one.
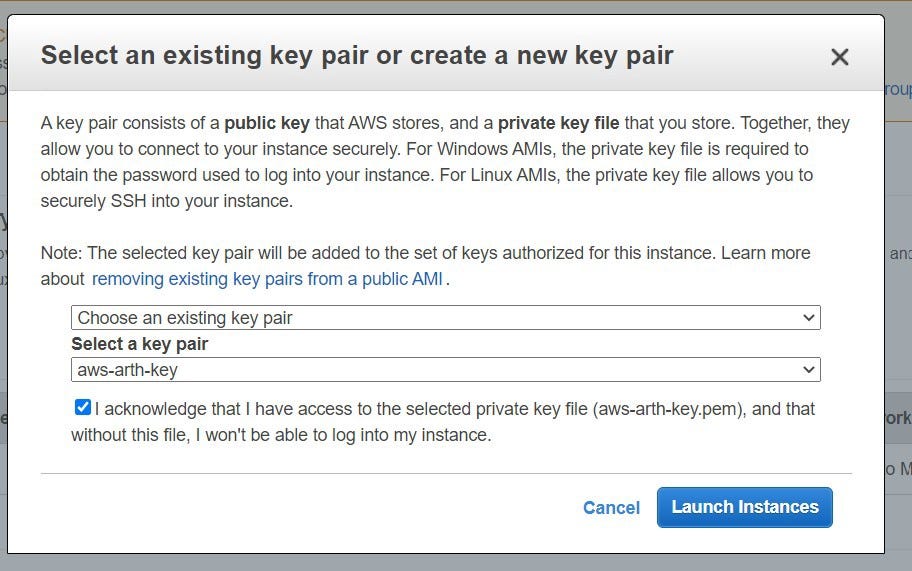
Select Launch Instances
Step 2: SSH into your created EC2 Instance using your keypair from your local Terminal.
$ ssh -i [keypair] ubuntu@[Instance Public IP]
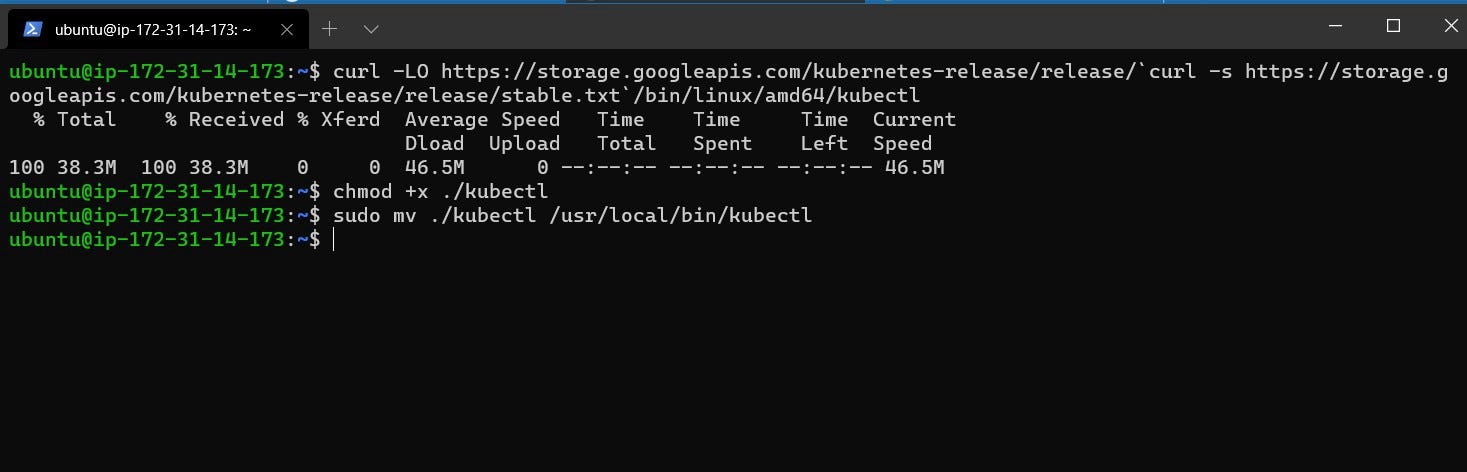
Step 3: Install kubectl
$ curl -LO https://storage.googleapis.com/kubernetes-release/release/`curl -s https://storage.googleapis.com/kubernetes-release/release/stable.txt`/bin/linux/amd64/kubectl$ chmod +x ./kubectl$ sudo mv ./kubectl /usr/local/bin/kubectl
Step 4: Install Docker
sudo apt-get update && \
    sudo apt-get install docker.io -y
Minikube requires a Container Engine. Here we are using Docker.

Step 5: Install Minikube
curl -Lo minikube https://storage.googleapis.com/minikube/releases/latest/minikube-linux-amd64 && chmod +x minikube && sudo mv minikube /usr/local/bin/

Step 6: Check Minikube Version
$ minikube version

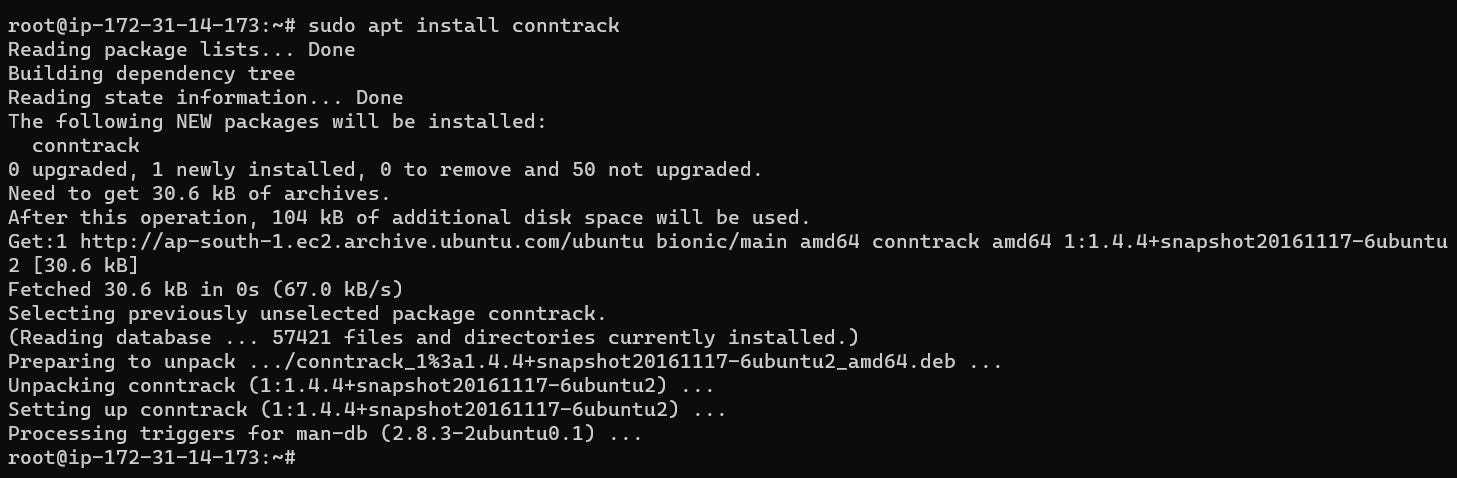
Kubernetes v1.20.0 requires conntrack to be installed in root’s path. So let’s install conntrack
$ sudo apt install conntrack
We have now successfully installed Minikube!
Let’s test it!
Step 7: Running Minikube on EC2 Ubuntu
Become a root user.
sudo -i
If you are not comfortable running commands as root, you must always add sudo before the commands minikube and kubectl.
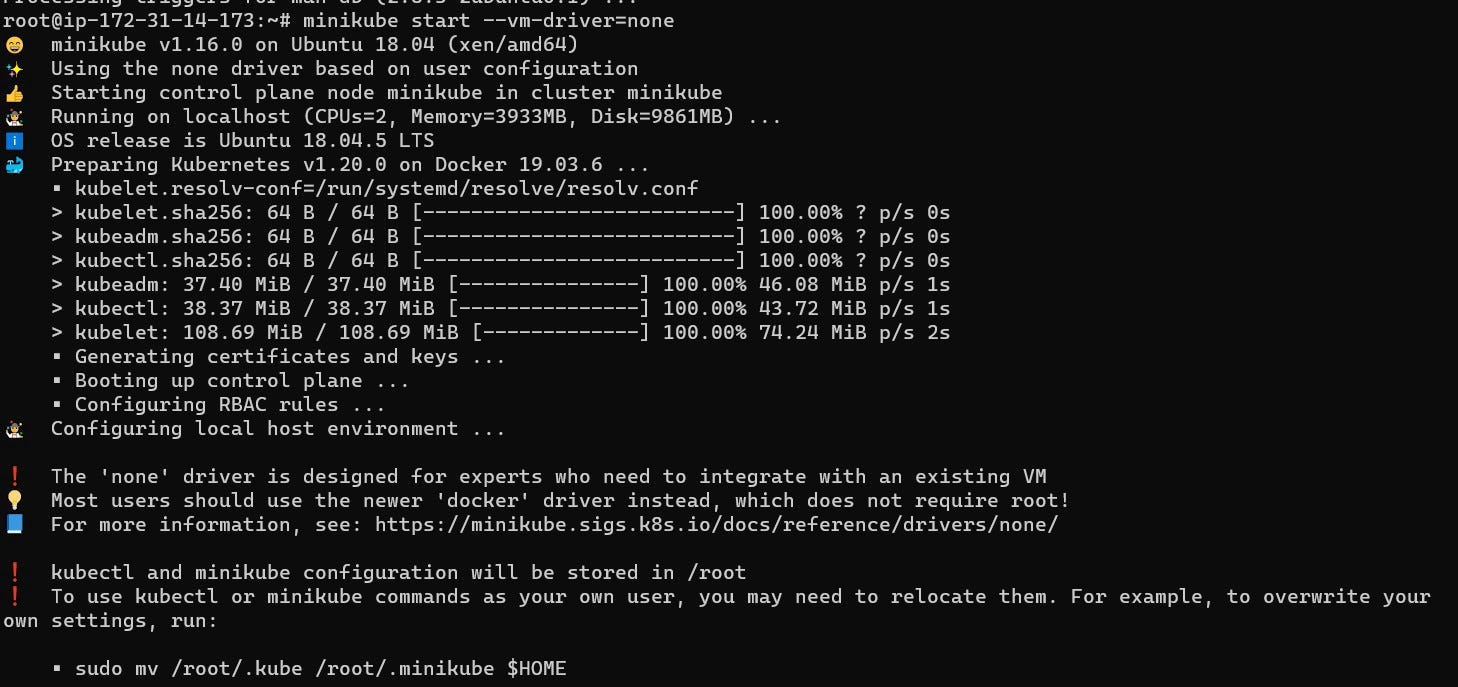
Now Start the minikube
$ minikube start --vm-driver=none
$ minikube status
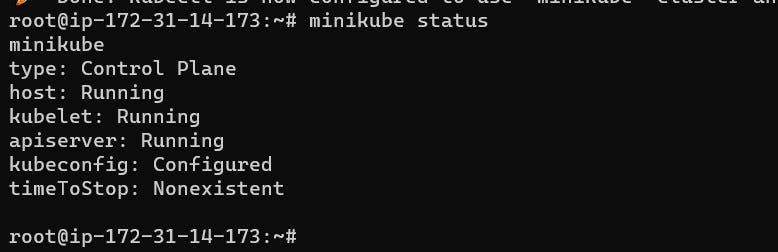
Note: In the Install Minikube documentation from Kubernetes.io it says that you need to enable virtualization by accessing the computer’s BIOS. For EC2 Instances we do not have access to the BIOS since AWS EC2 instance is a Virtual Machine. Thus we are using the --vm-driver=none tag. No need to install a Hypervisor (VirtualBox or KVM)
Let us run our first container
$ kubectl run hello-minikube --image=gcr.io/google_containers/echoserver:1.4 --port=8080

Expose the container port so that we can access it and Find where port 8080 in the container exposed in the EC2 Instance port.
$ kubectl expose pod hello-minikube --type=NodePort
$ kubectl get svc
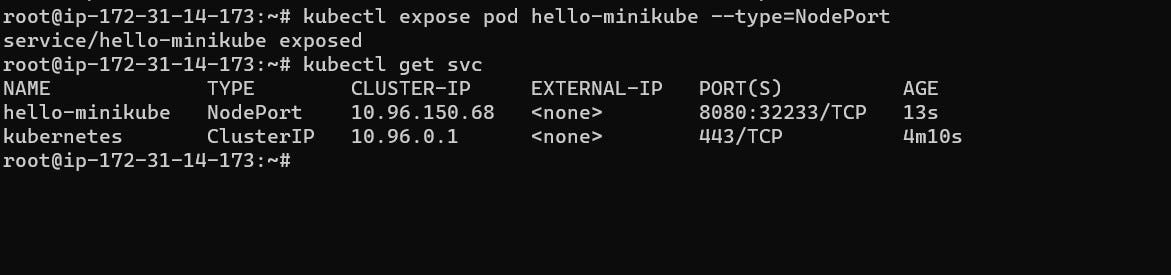
Note: Port 32233 is the EC2 Instance Port where the Port 8080 of the container is exposed.
The EC2 Instance Port changes each time you expose a port, you may have been given a different value than what I have.
kubectl get svc the command shows the list of services and their exposed ports.
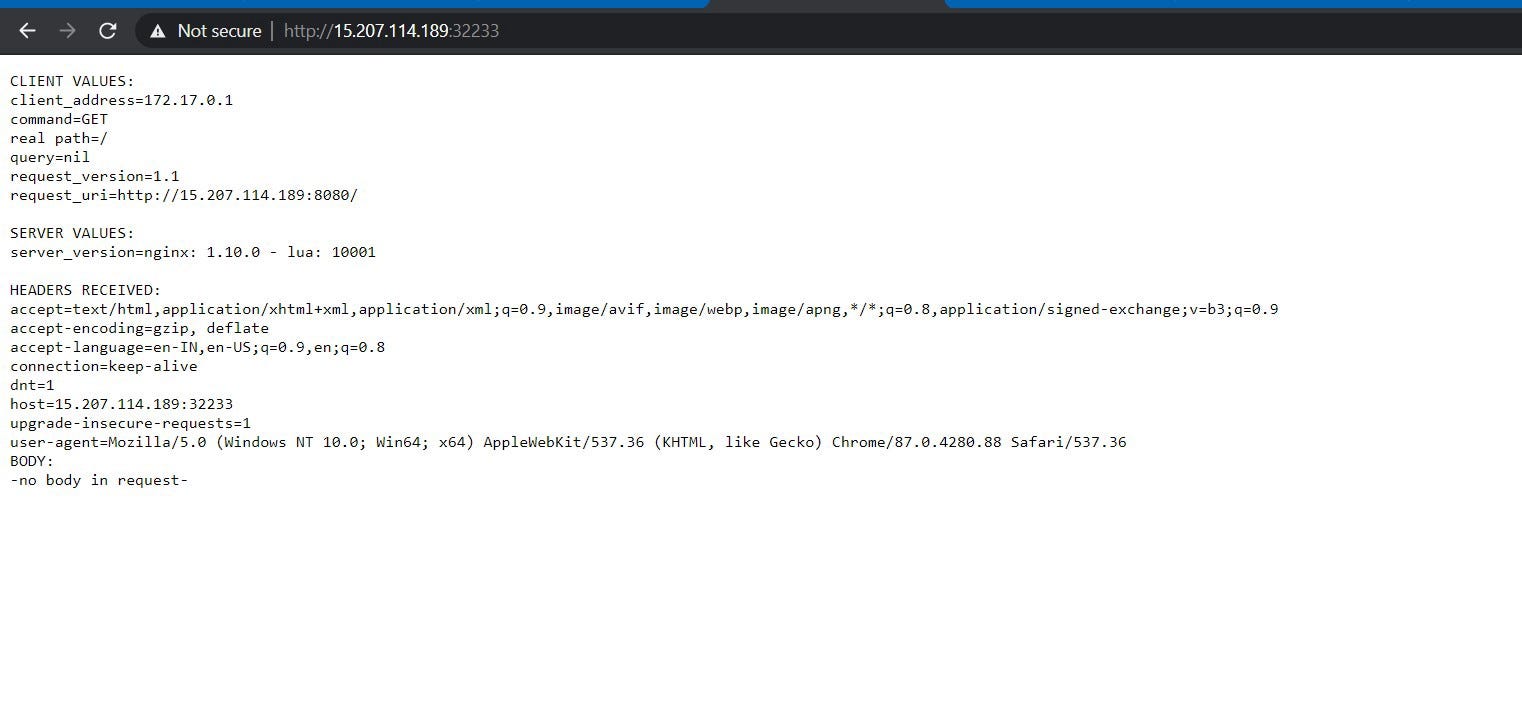
Let us check by accessing this via a web browser on our local computer.
Access our container via the EC2 Instance Port on a web browser.
The address is: [Public IP]:32233
Step 8: Minikube Dashboard
In order to access the Minikube Dashboard. I’ll create an SSH Tunnel to access the dashboard locally.
$ minikube dashboard --url

Open another local terminal and create an SSH Tunnel
$ ssh -i [private key.pem] -L [local port]:localhost:[remote port of minikube dashboard] ubuntu@[public ip]
$ ssh -i .\aws-arth-key.pem -L 8081:localhost:46233 ubuntu@15.207.16.144
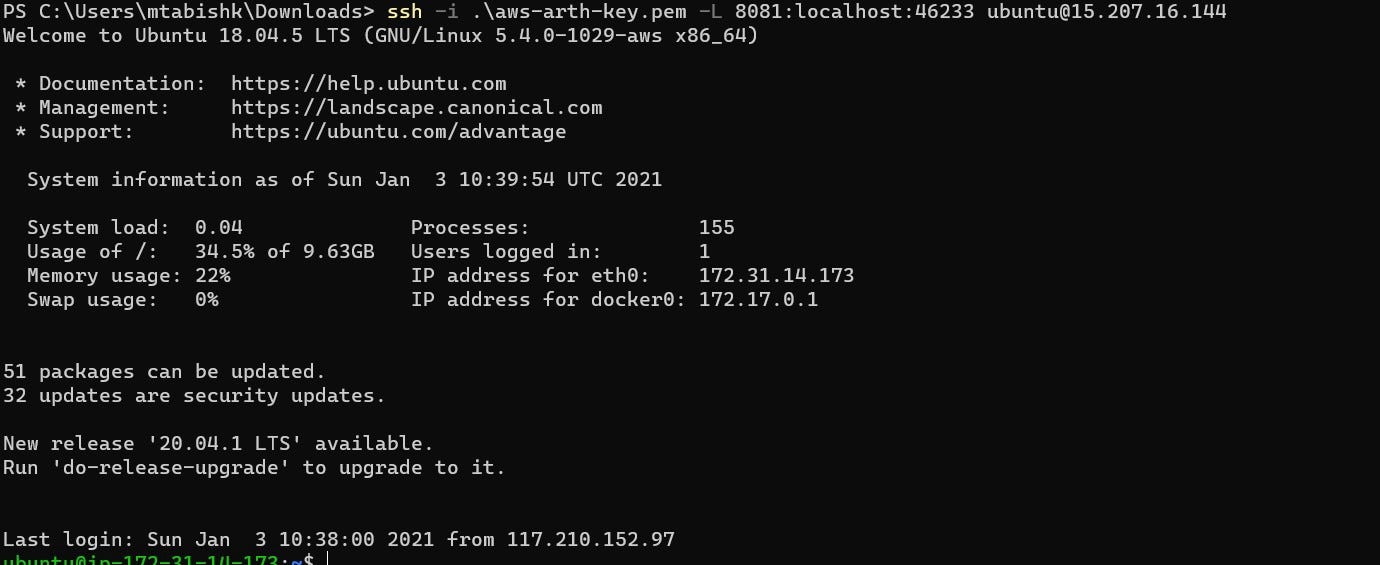
Now open your browser and open this url
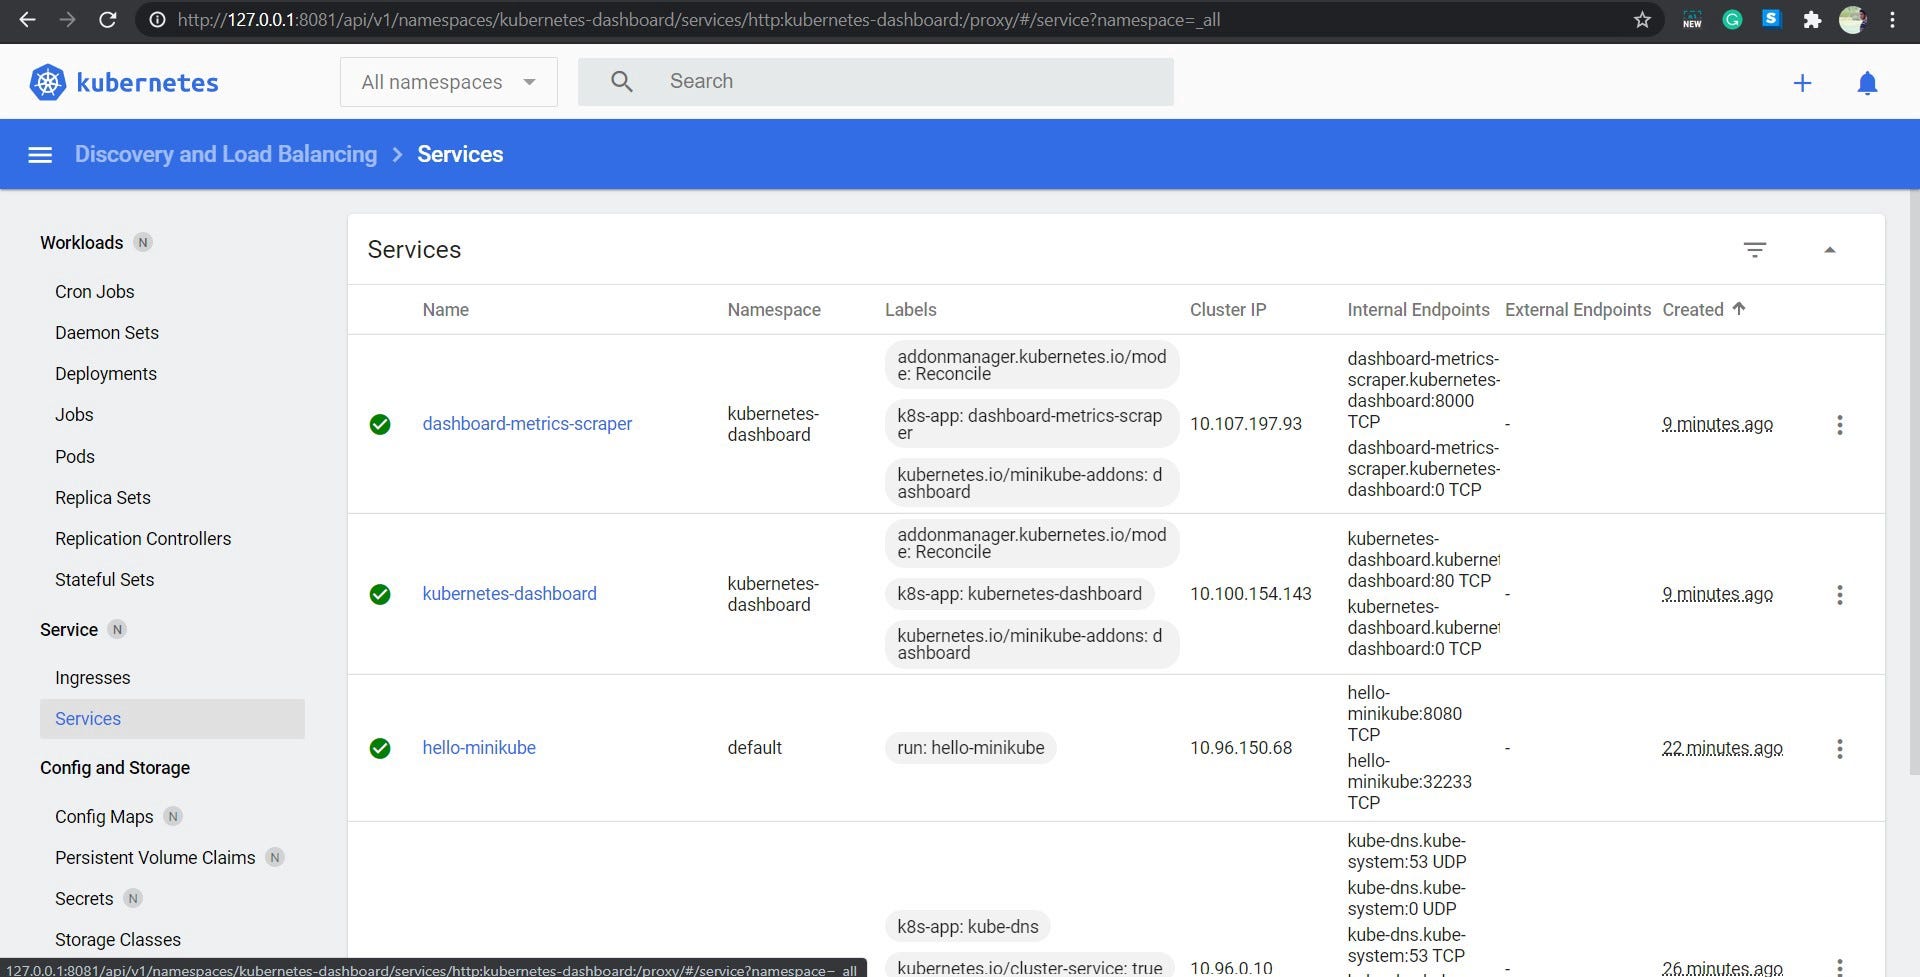
Finally, we have successfully run the Kubernetes on AWS Cloud.🥳
That’s all for today! I’ll be back with some new articles very soon, thanks! 🤗
Muhammad Tabish Khanday
LinkedIn: https://www.linkedin.com/in/mtabishk/
Comments
Loading comments…