 Photo by Solen Feyissa on Unsplash
As a developer, you will surely develop that contact form with the send button on your side projects, or academic projects, or your own portfolio.
Today I am gonna show you how to do that step by step only using JavaScript by calling EmailJS, so from now on you won't need to worry about the behind code of that contact form.
EmailJS is a JavaScript library that can let you trigger an email without the need for server-side technology, which makes it perfect for static websites.
You'll only need to connect EmailJS to one of the supported email services like Gmail, Outlook, Yahoo… and create an email template.
We'll start the steps now, and for each step, there's a screenshot below each descriptive line to make it easier for you.
Step 1. Creating your EmailJS account
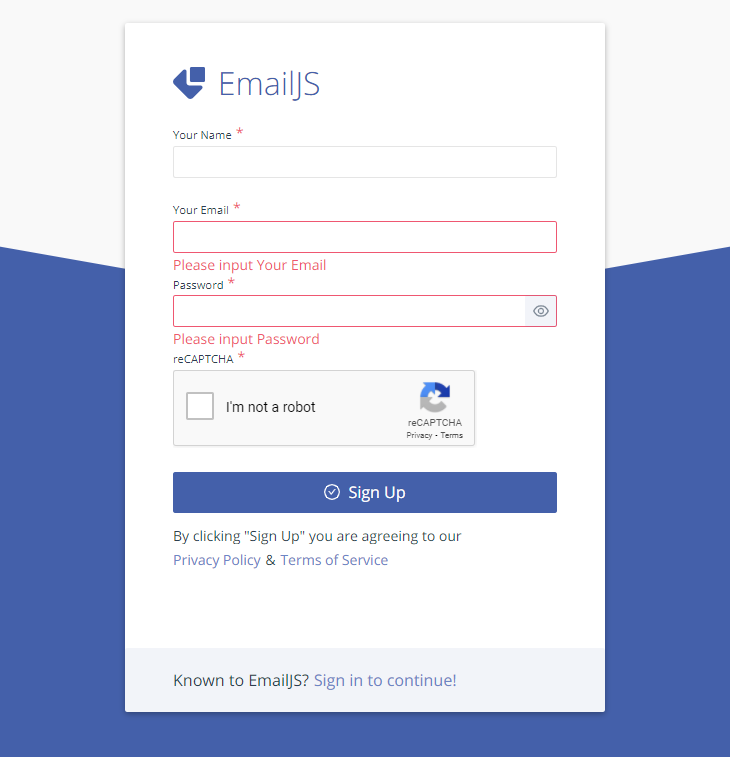
Navigate to the EmailJS website, click on that button in the top-right corner to sign up for free it will take you to a registration form.

Once you get this registration form, make sure to fill in your name, email, password and check the captcha “I'm not a robot”
Congratulations on creating your first account mate, now let's jump to the second step.
Step 2. Adding email service
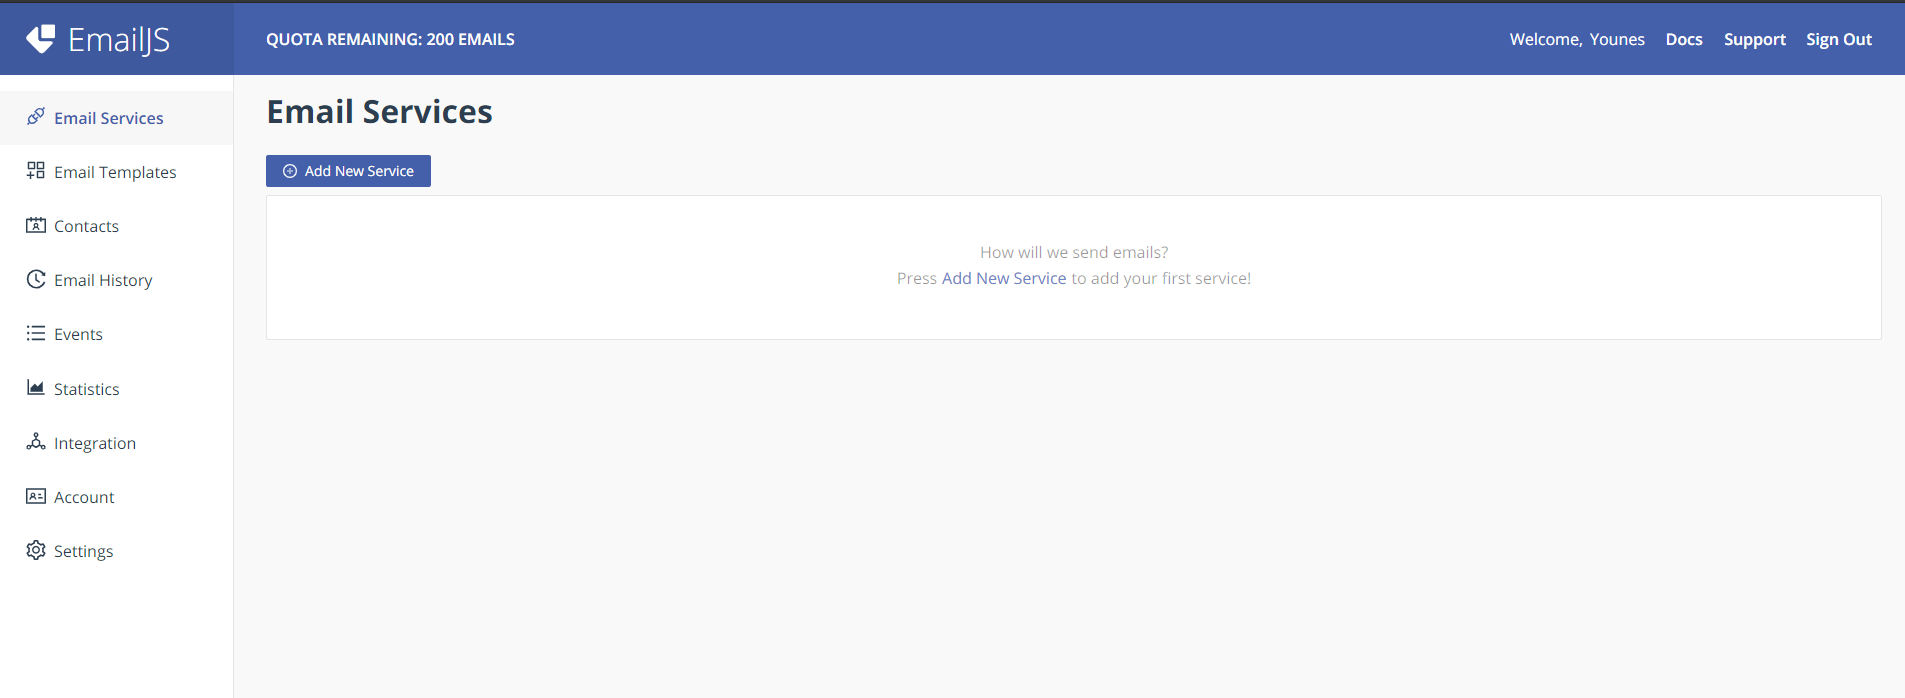
Once your account is created successfully, you'll be redirected to your account dashboard. Now you need to create your email service, click on that button “Add New Service”.
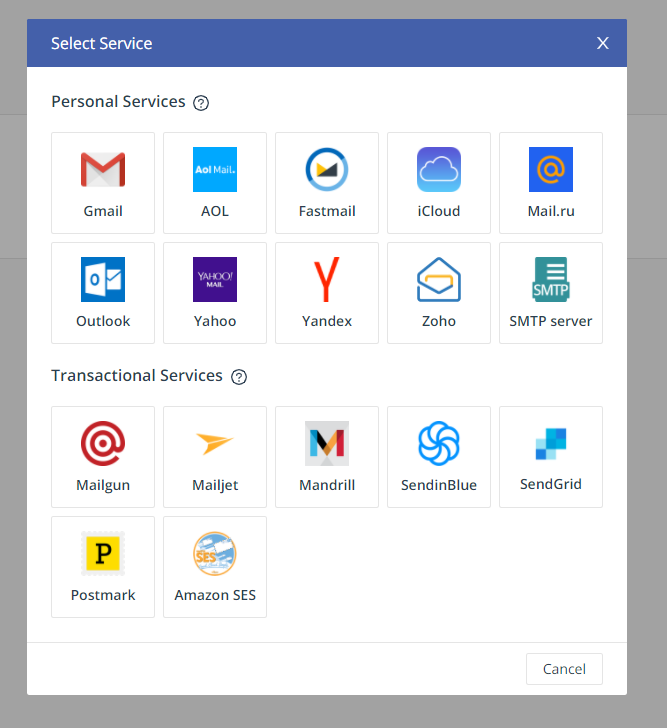
You'll get a popup on which email service you want, in this tutorial we'll choose “Gmail” based on the fact that is the most used but keep in mind that the process doesn't differ for the other services.
Now you'll get a popup to configure your Gmail receiver address.
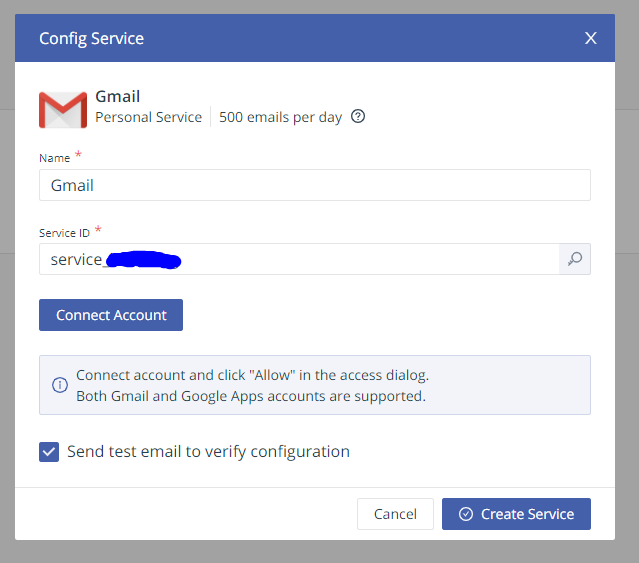
Don't touch that service Id, we'll keep it aside for now until we reach the JavaScript code.
Click on Connect Account, make sure to fill in the credentials of your Gmail on which you'd like to start receiving emails from that contact form.
After connecting your Gmail account successfully, click on create Service.
Your email service is all set now, next step is creating and customizing the email template on which you will receive your contact form inputs.
Step 3. Creating & customizing the email template.
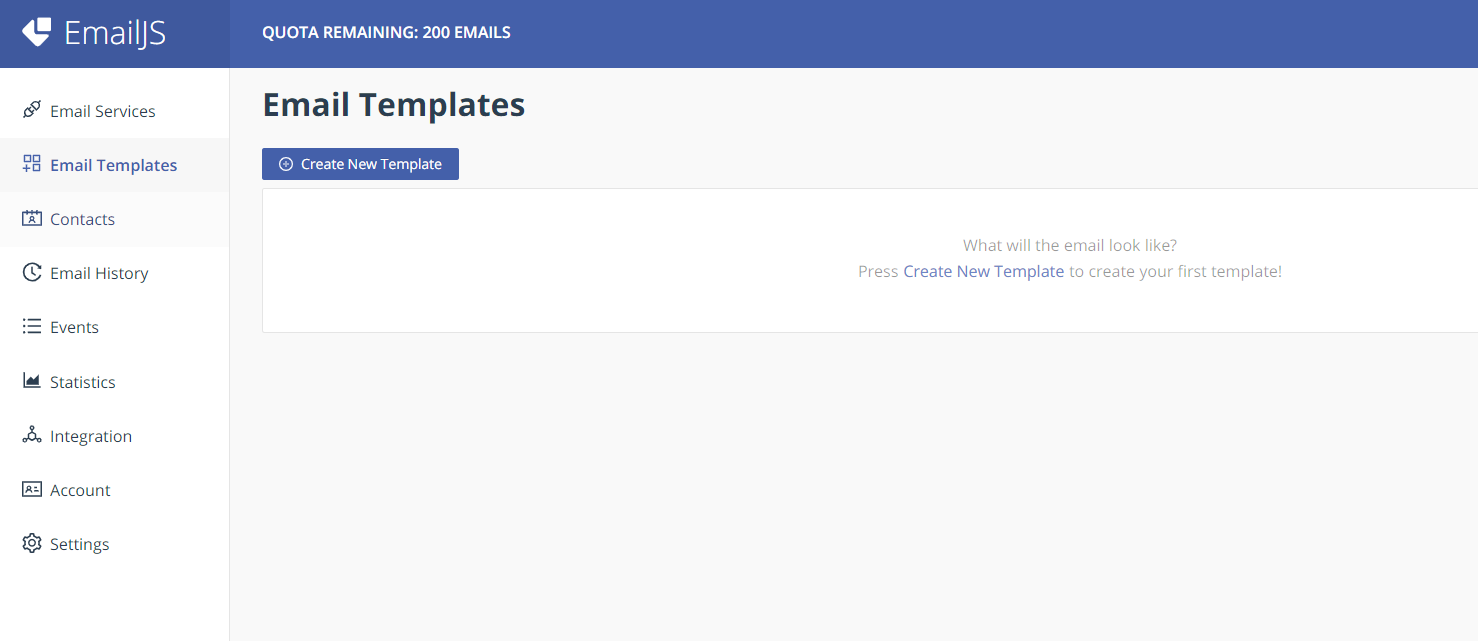
On the dashboard of your EmailJS account, there's a sidebar on your left click on “Email Templates” and then click again on “Create New Template”
After Clicking on it, you'll get the default template by EmailJS, you can modify it as you want.
Those variables on the template represent the inputs from your contact form, and on the right side specify the receiver email, and specify if you want to add another email in the CC section otherwise keep it blank.
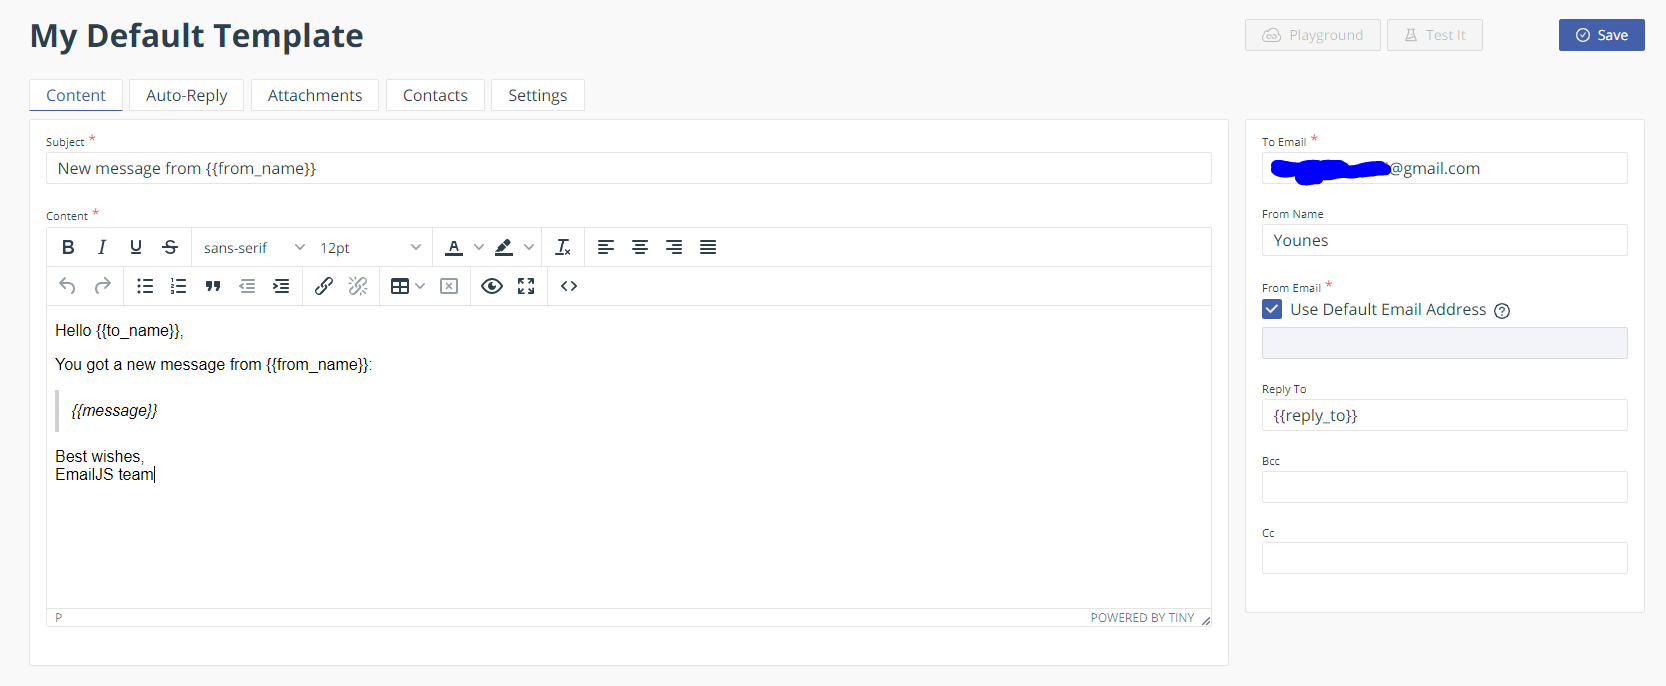
If you modify those variables names, make sure to consider them in the next step on which we will do the JavaScript code.
The template variables:
-
{{from_name}}: name of the person sending the email through the contact form.
-
{{to_name}}: name of the receiver, must be your name if you are the owner of the recipient Gmail account.
-
{{message}}: the message of the sender, the content of that textarea tag in your HTML code.
-
{{reply_to}}: this variable is used in case if you want to add a second receiver of that email.
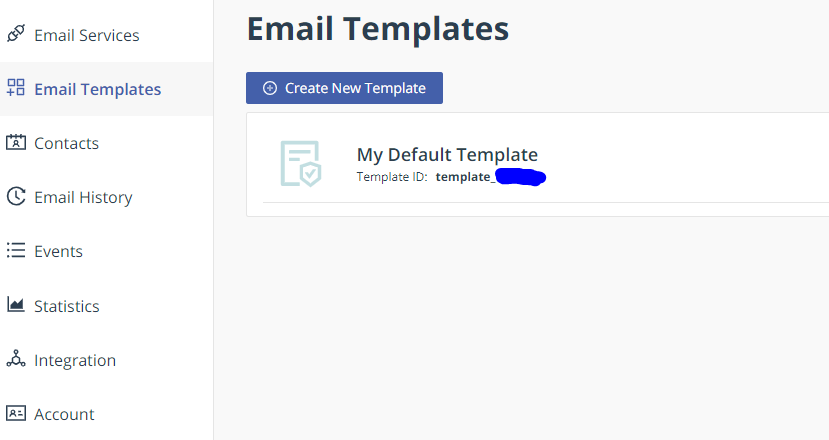
After finishing the template modification, click on the save button and copy that template_id because we will need it in the JavaScript call.
Step 4. Your HTML & JavaScript code
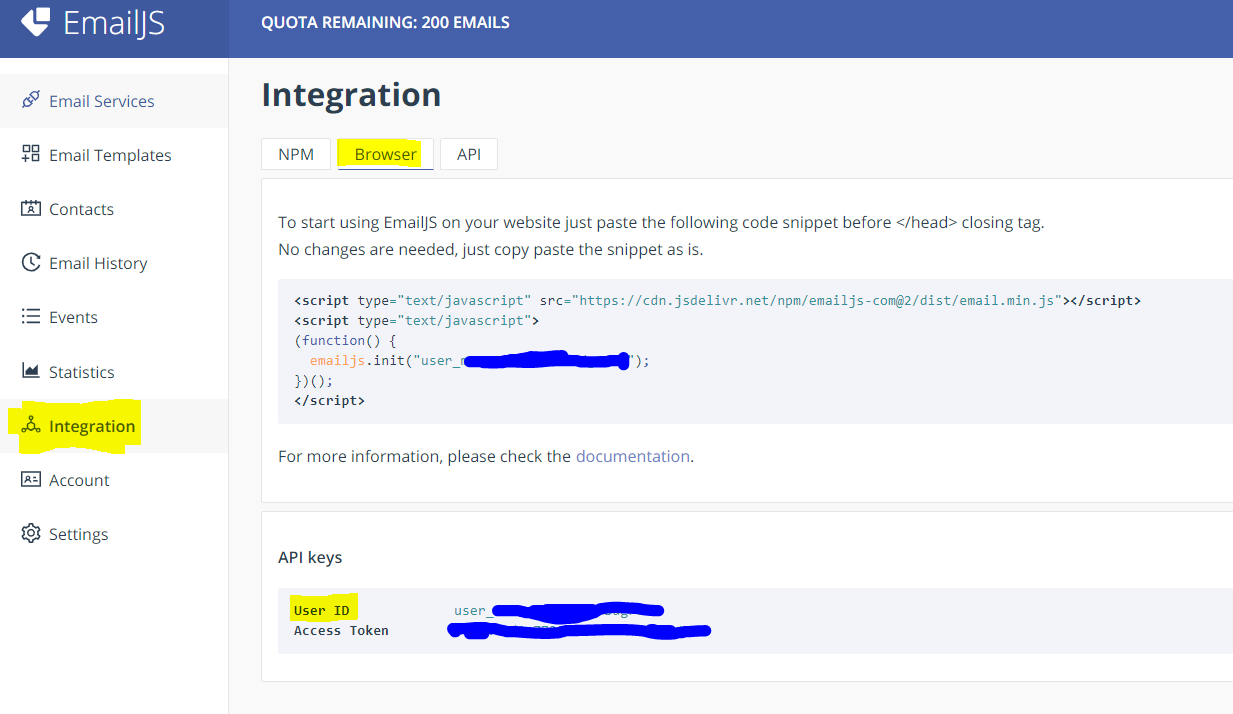
In your project, you should first start by loading the EmailJS SDK and initializing your user_id, you can find it by this link or following the screenshot below.
On the left sidebar click on the Integration, Browser tab. copy and paste that HTML code with the two script tags and paste it before the end of your body tag.
The first script tag is responsible for loading the EmailJS SDK, and the second one is for initializing the EmailJS library with your user_id.
Now let's take a look at our HTML code :
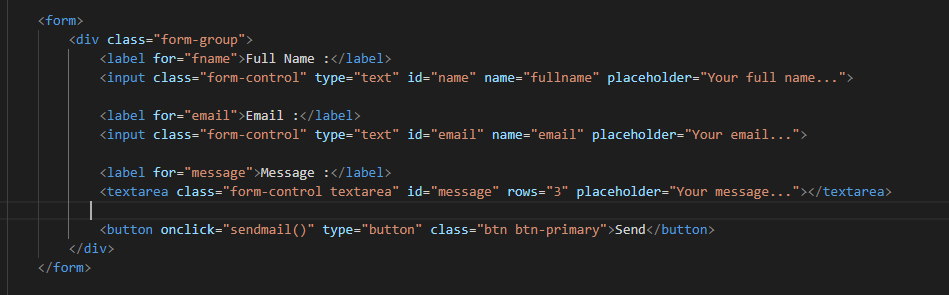
In my HTML code, I'm using bootstrap classes, you can ignore the attribute class if you are not familiar with bootstrap.
You can have a customized contact form as you want, but make sure to have the attribute id for each input and area.
In our example, we have 2 inputs and one textarea.
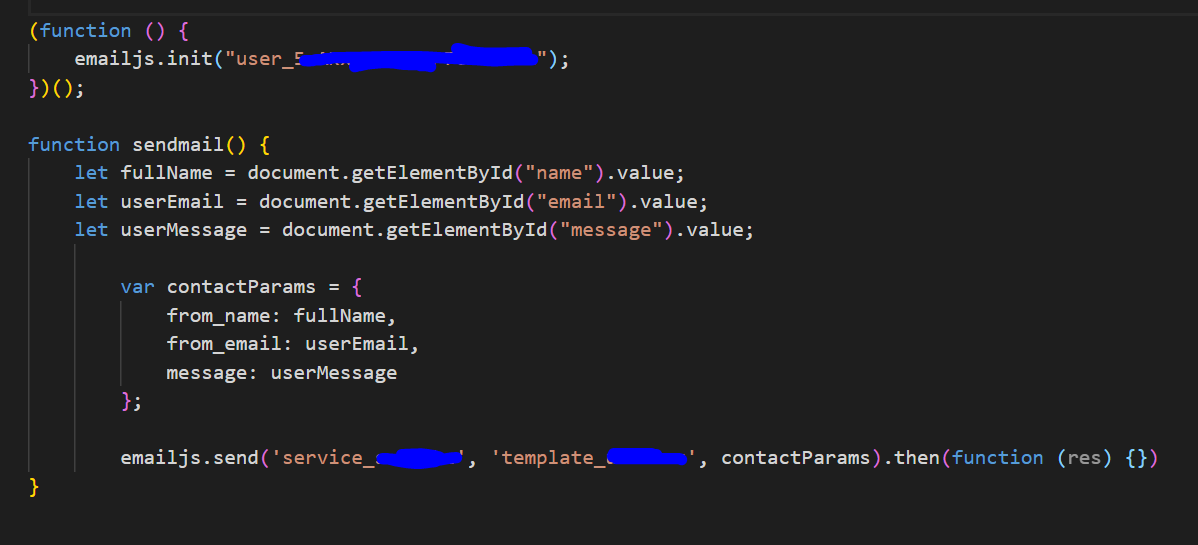
Now let's get into the JavaScript code (Screenshot below):
Make sure to add the JavaScript code after the initialization of emailJS with your User_ID, otherwise, you'll get an exception that emailJS is undefined.
The first function is the one that we pasted at the beginning of this step to initialize emailJS with your user_ID.
The second function call Sendmail will be called by our send button, we start getting the inputs values using the id of the inputs specified in the HTML code.
We store those inputs into a variable called contactParams before triggering the send email event. The fields inside contactParams should have the same name of attributes in your customized template.
To trigger the email send action, you need to specify your Service_ID (Creating email service step) and template_ID (Creating template step).
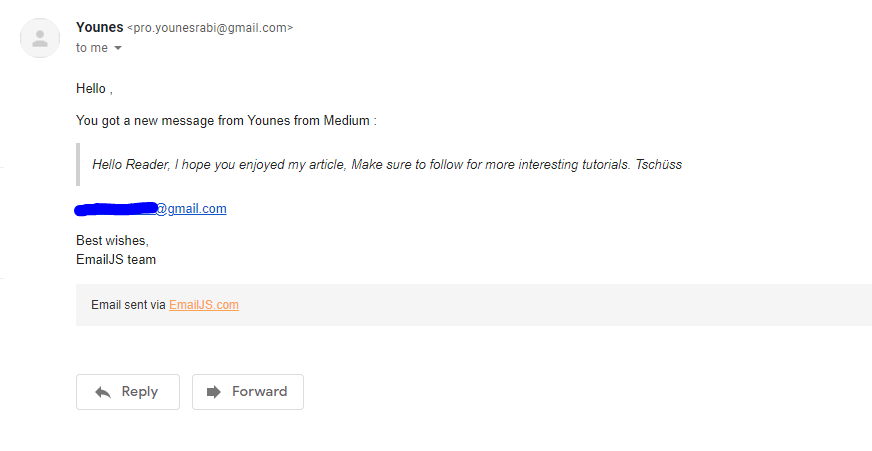
Try your contact form now and see how the emails come smoothly to your Gmail account.
The result:
Conclusion
That's it, you've completed the tutorial!
You can find the source code here, don't forget to put your user_ID, service_ID, and template_Id in the javascript file(main.js).
Comments
Loading comments…